Sildur's Shaders 1.19.4 → 1.18.2
Bring new level of graphics to Minecraft Java Edition with stunning visual effects.
| Developer | 👤SildurFX |
|---|---|
| Style | 🌅Realistic |
| Support GPUs | |
| Loaders | |
| Performance Impact | Low |
| Settings | 103 |
| Features | Photorealistic Skyboxes+41 |
| Created | Nov 4, 2021 |
| Updated | Dec 29, 2022 |
| Stats |
|
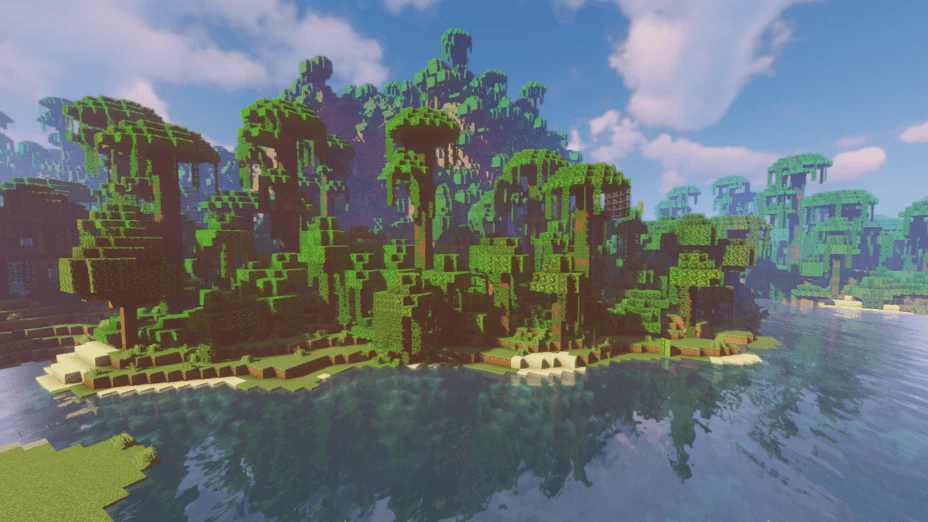
Sildur’s Shaders is a shaders pack that focuses on options. Many shaders packs out there have some heavy limitations, such as only working for Microsoft operating systems or only functioning on higher-end computers. This shaders pack functions on most operating systems, and it comes equipped with many various editions that are sure to cater to whatever kind of operating system, Minecraft build, or processing specs the player may have. There are a few types of shaders, each with subtypes within them. For example, there is a set called Vibrant shaders which add a graphical overhaul to the game’s aesthetic. The Vibrant shaders have Lite, Medium, High, High-MotionBlur, and Extreme versions. And those options are only considering the Vibrant shaders. There are also Basic shaders as well as Light shaders. If you are someone who has been interested in the idea of shaders but have felt limited due to your operating system or processing capabilities, Slidur’s Shaders are a great way to get your feet wet.
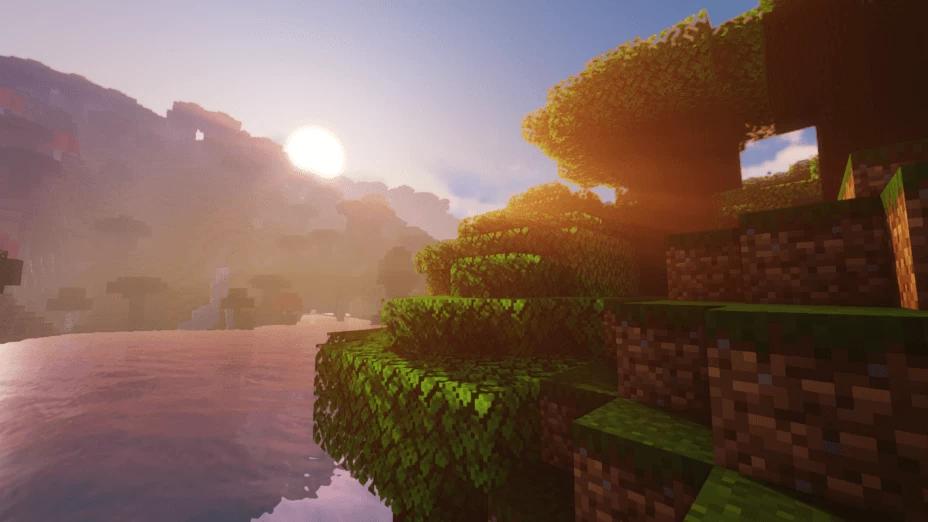
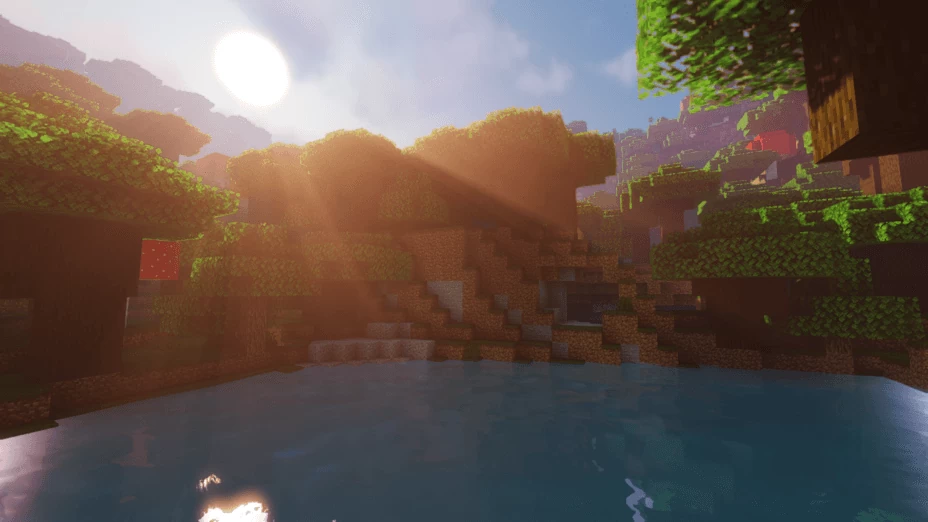
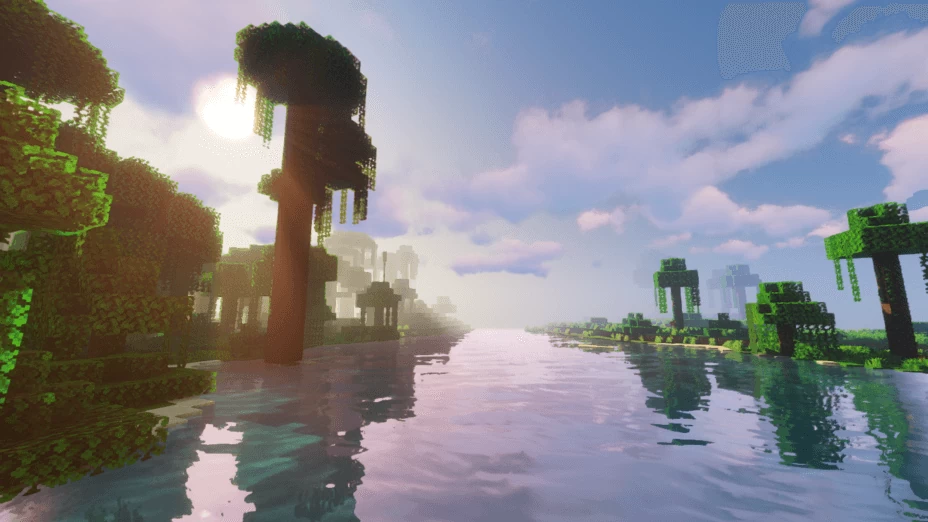
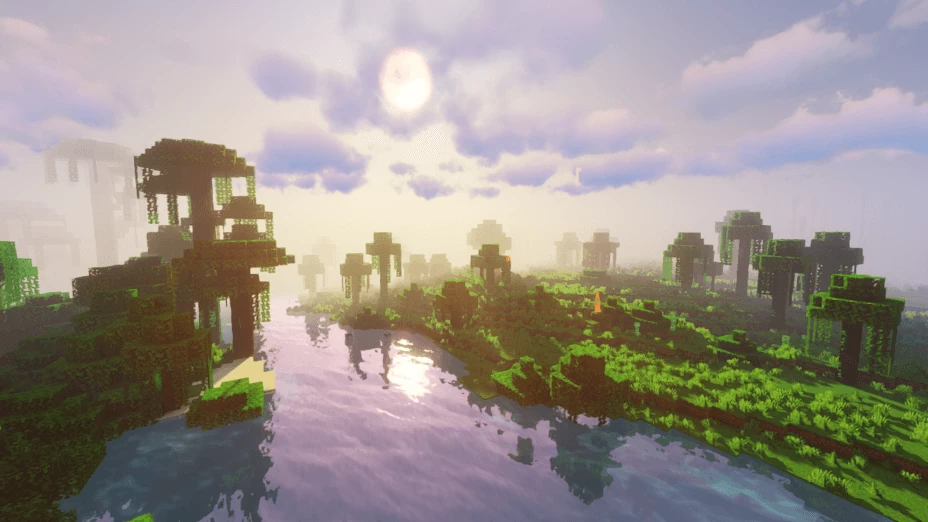
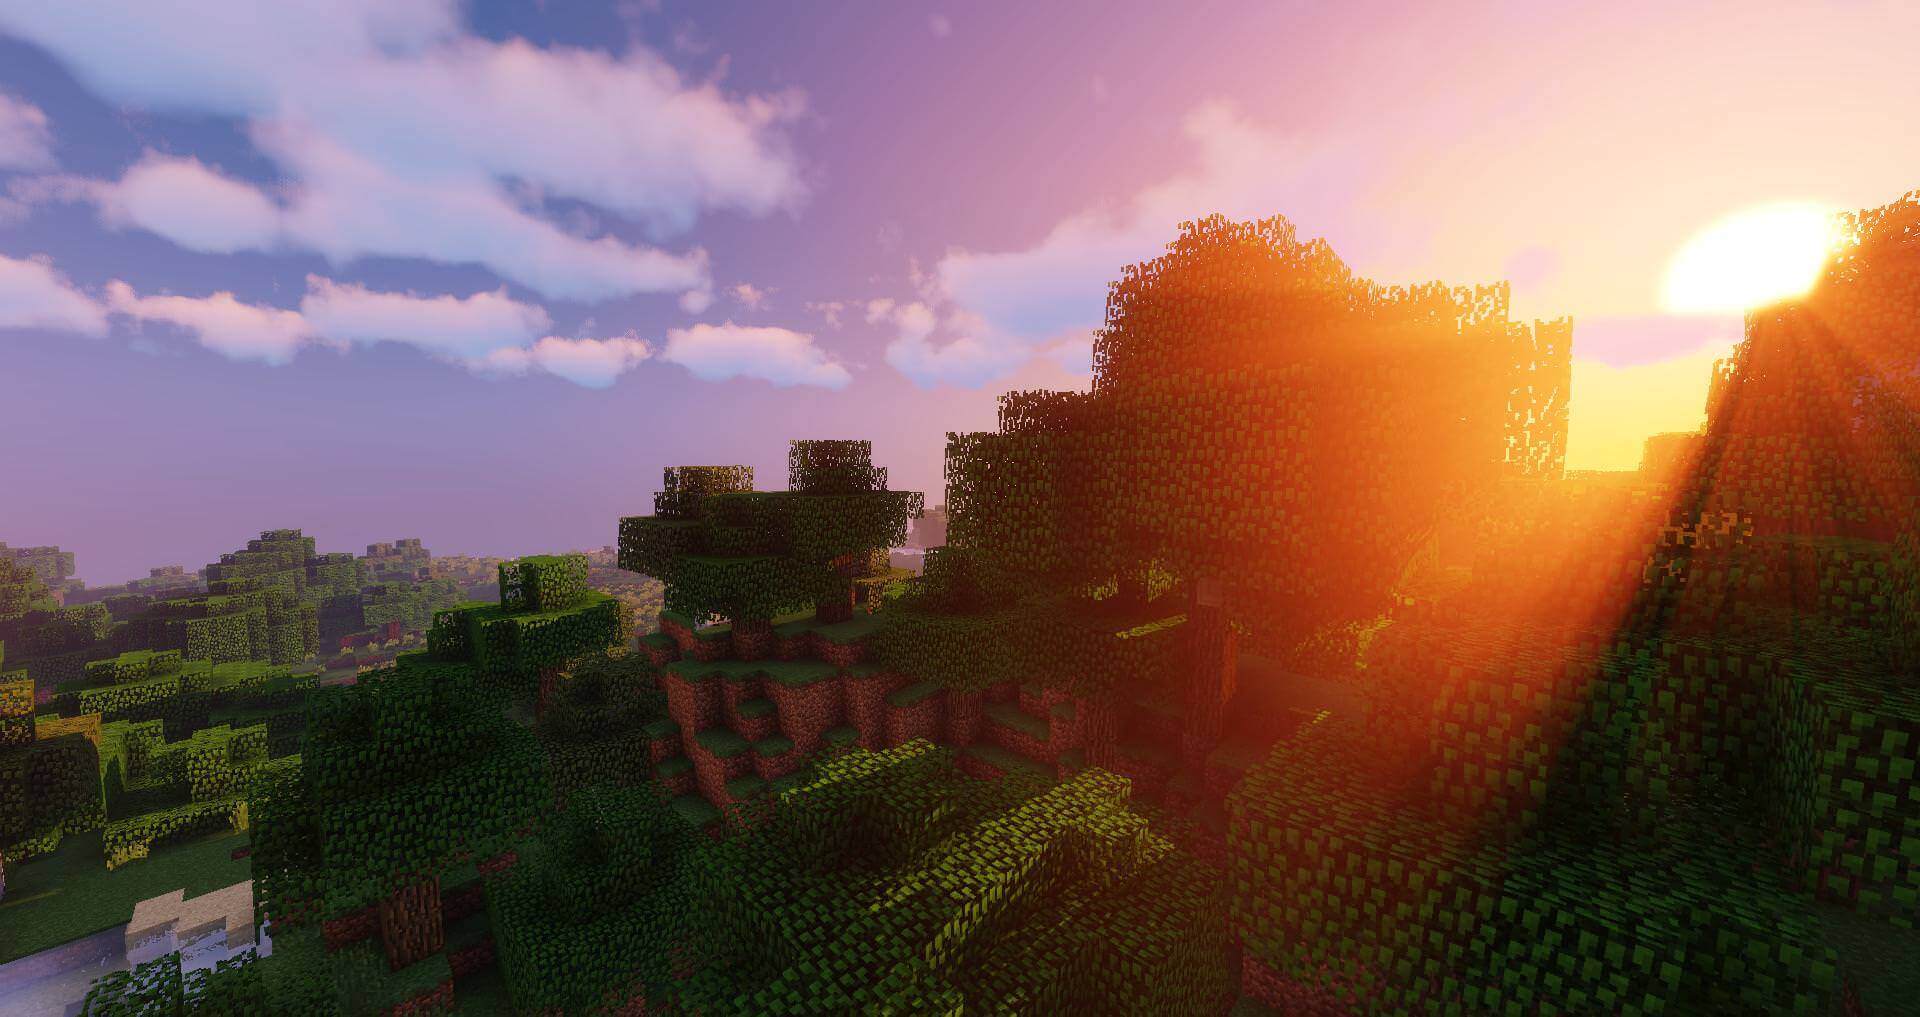
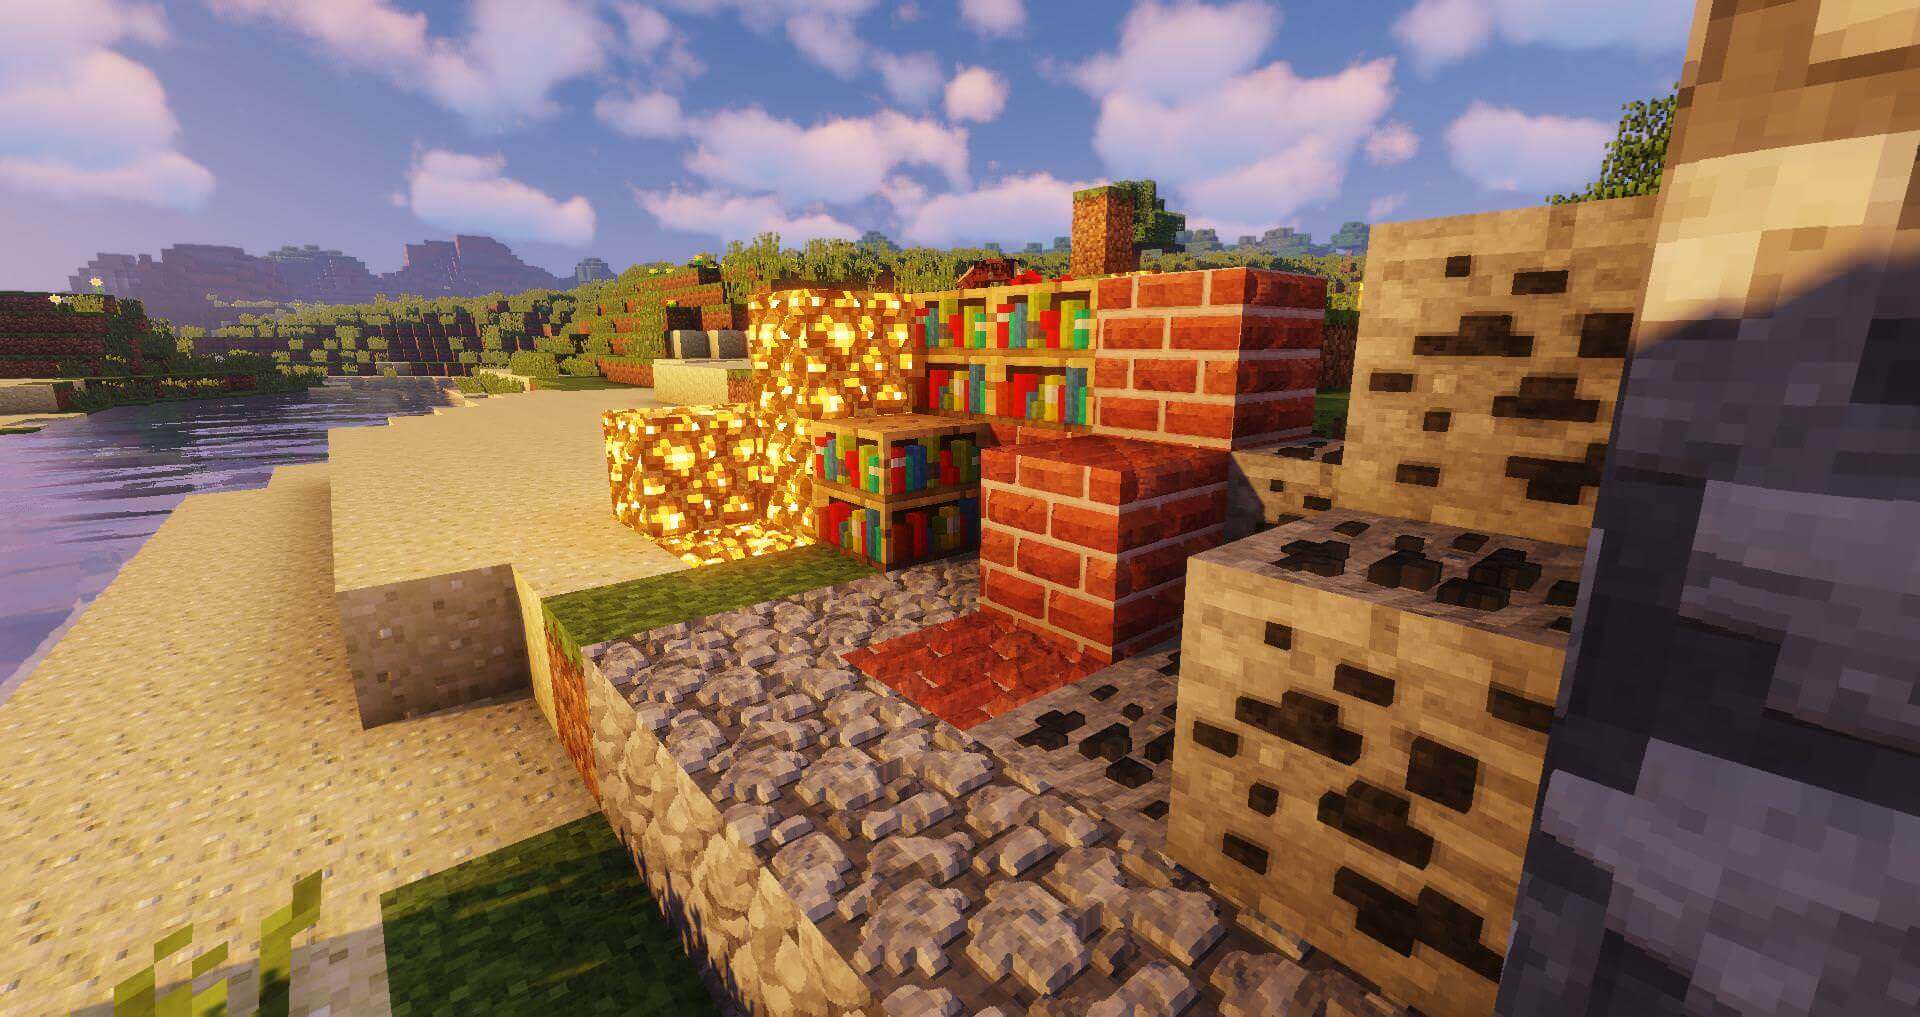
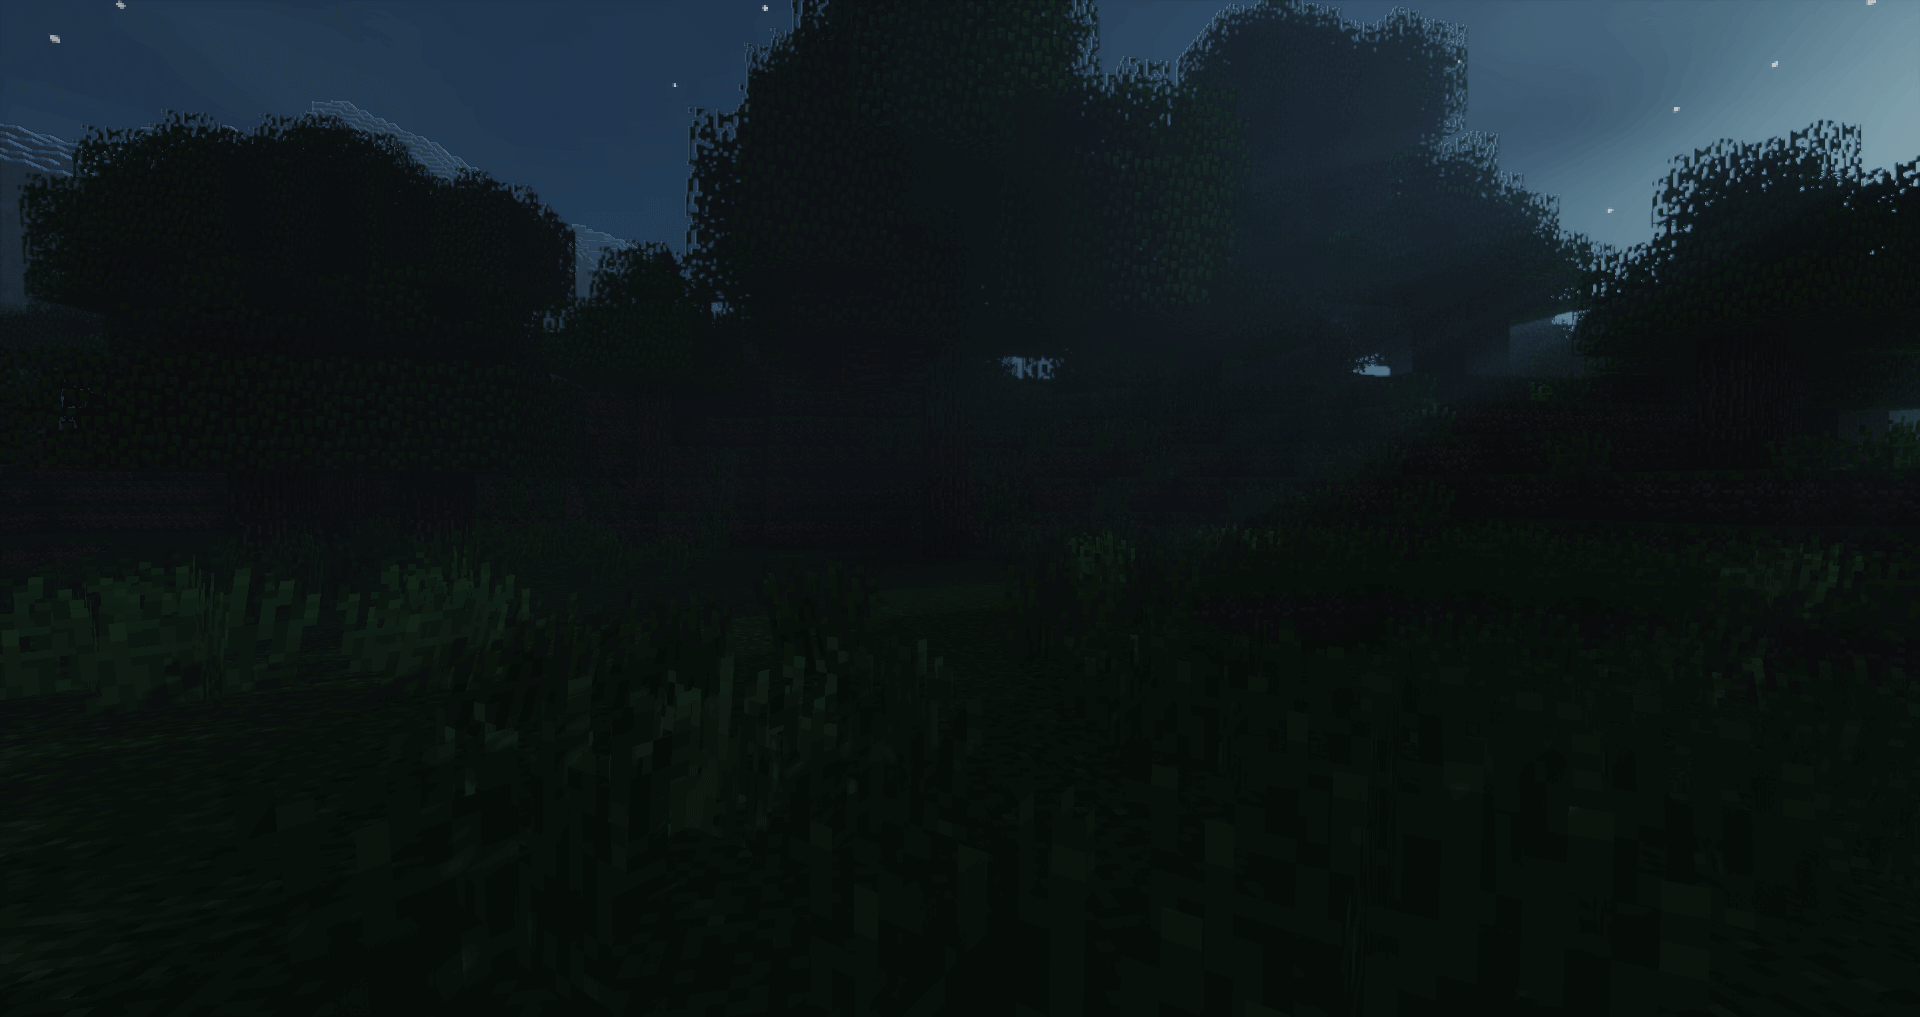
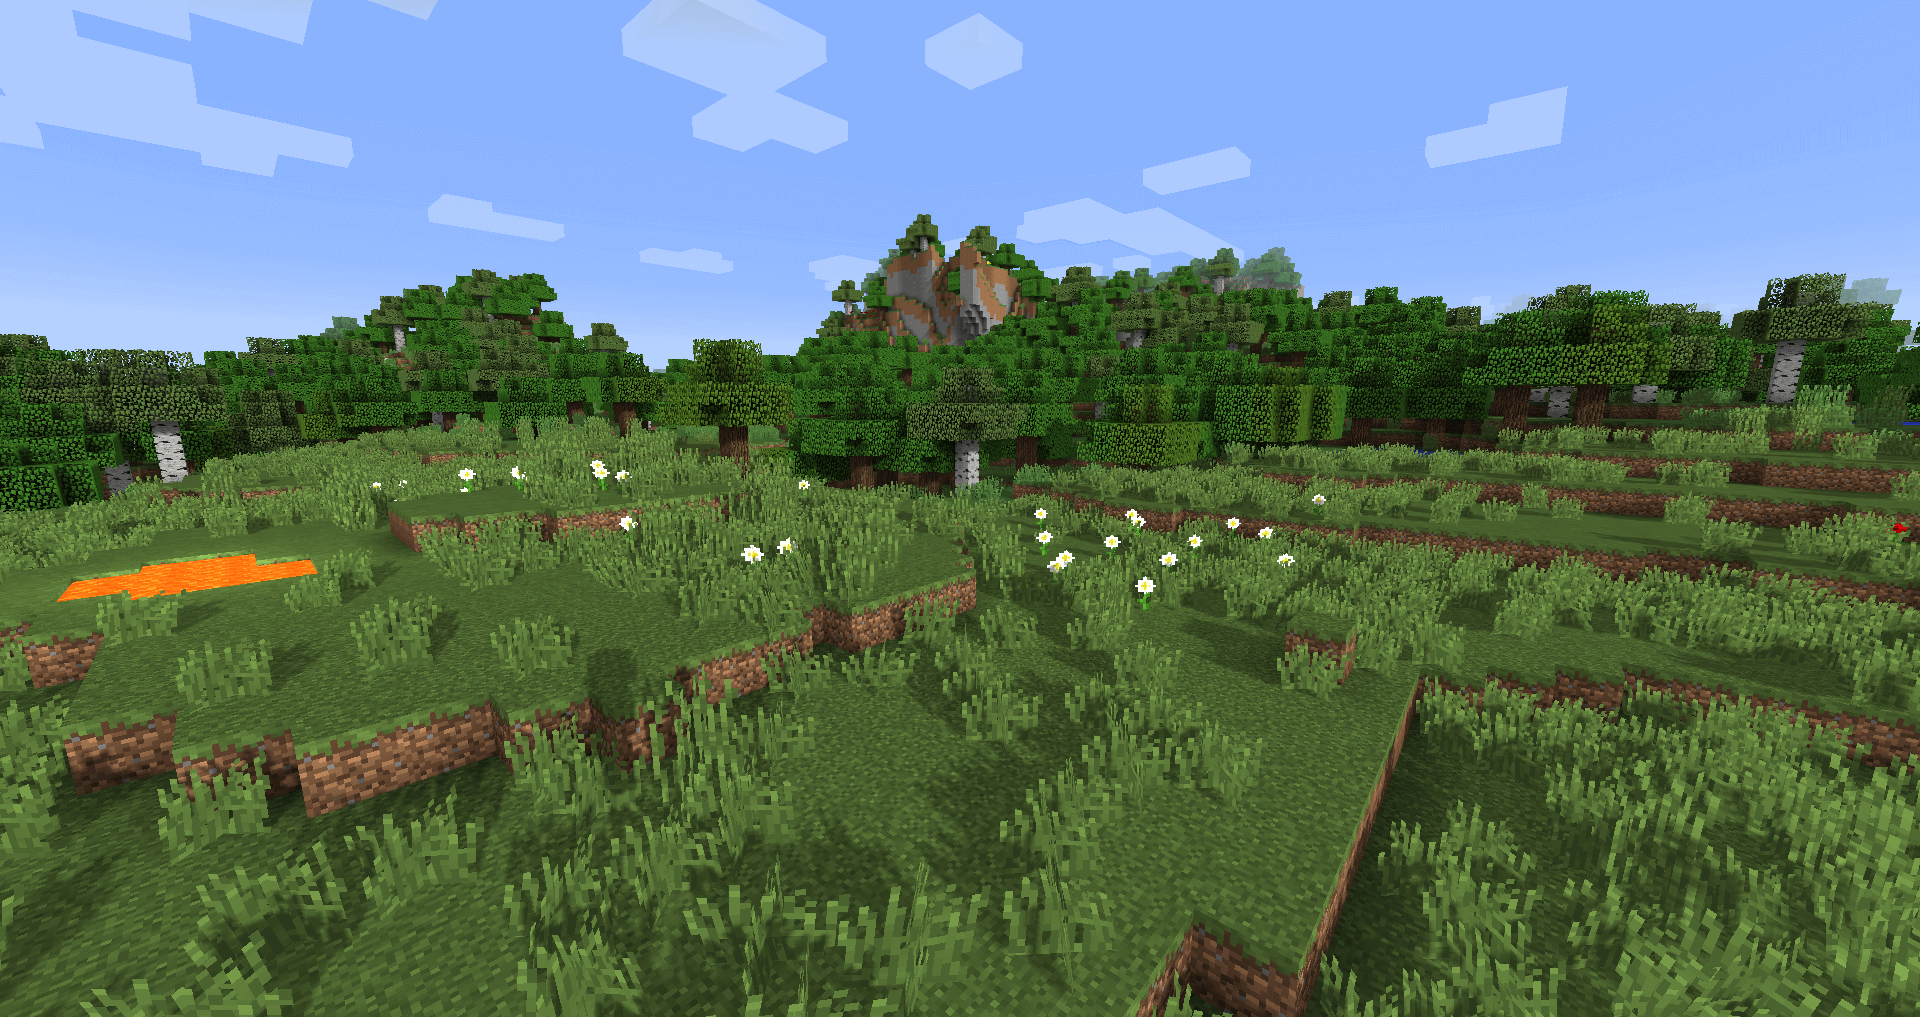
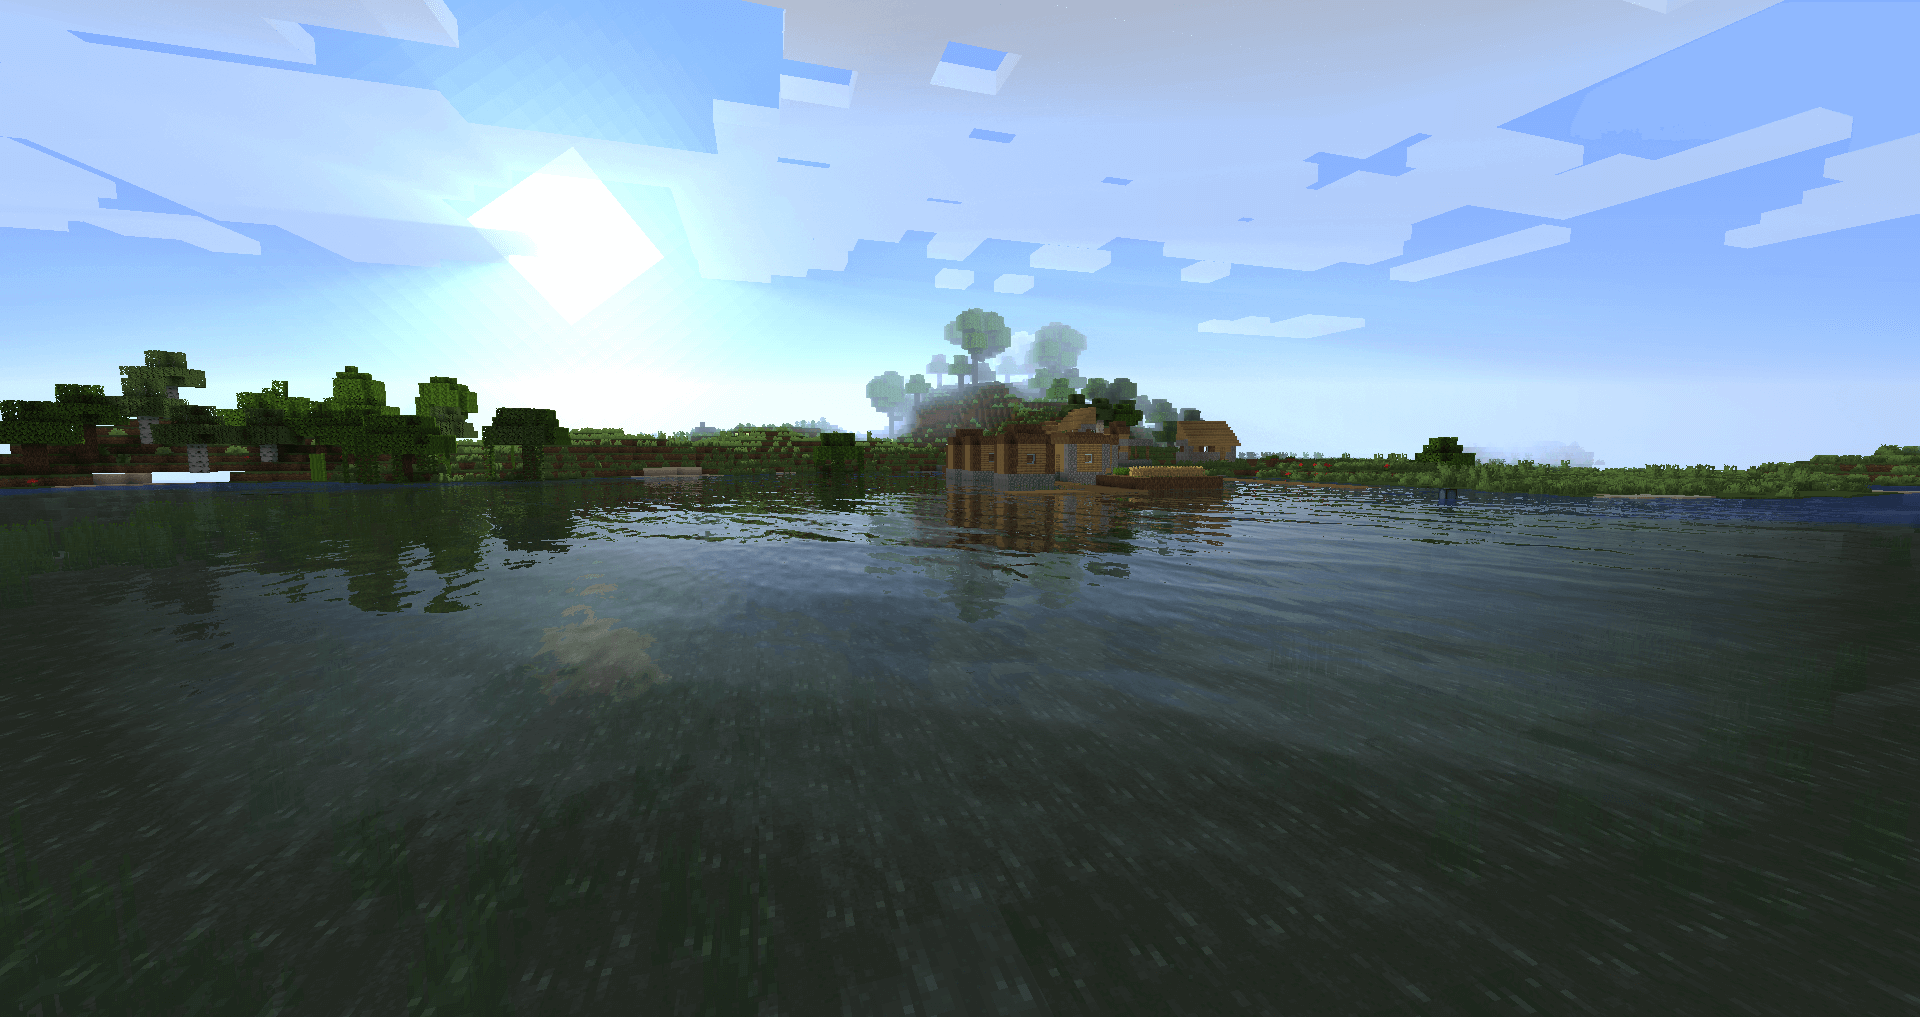
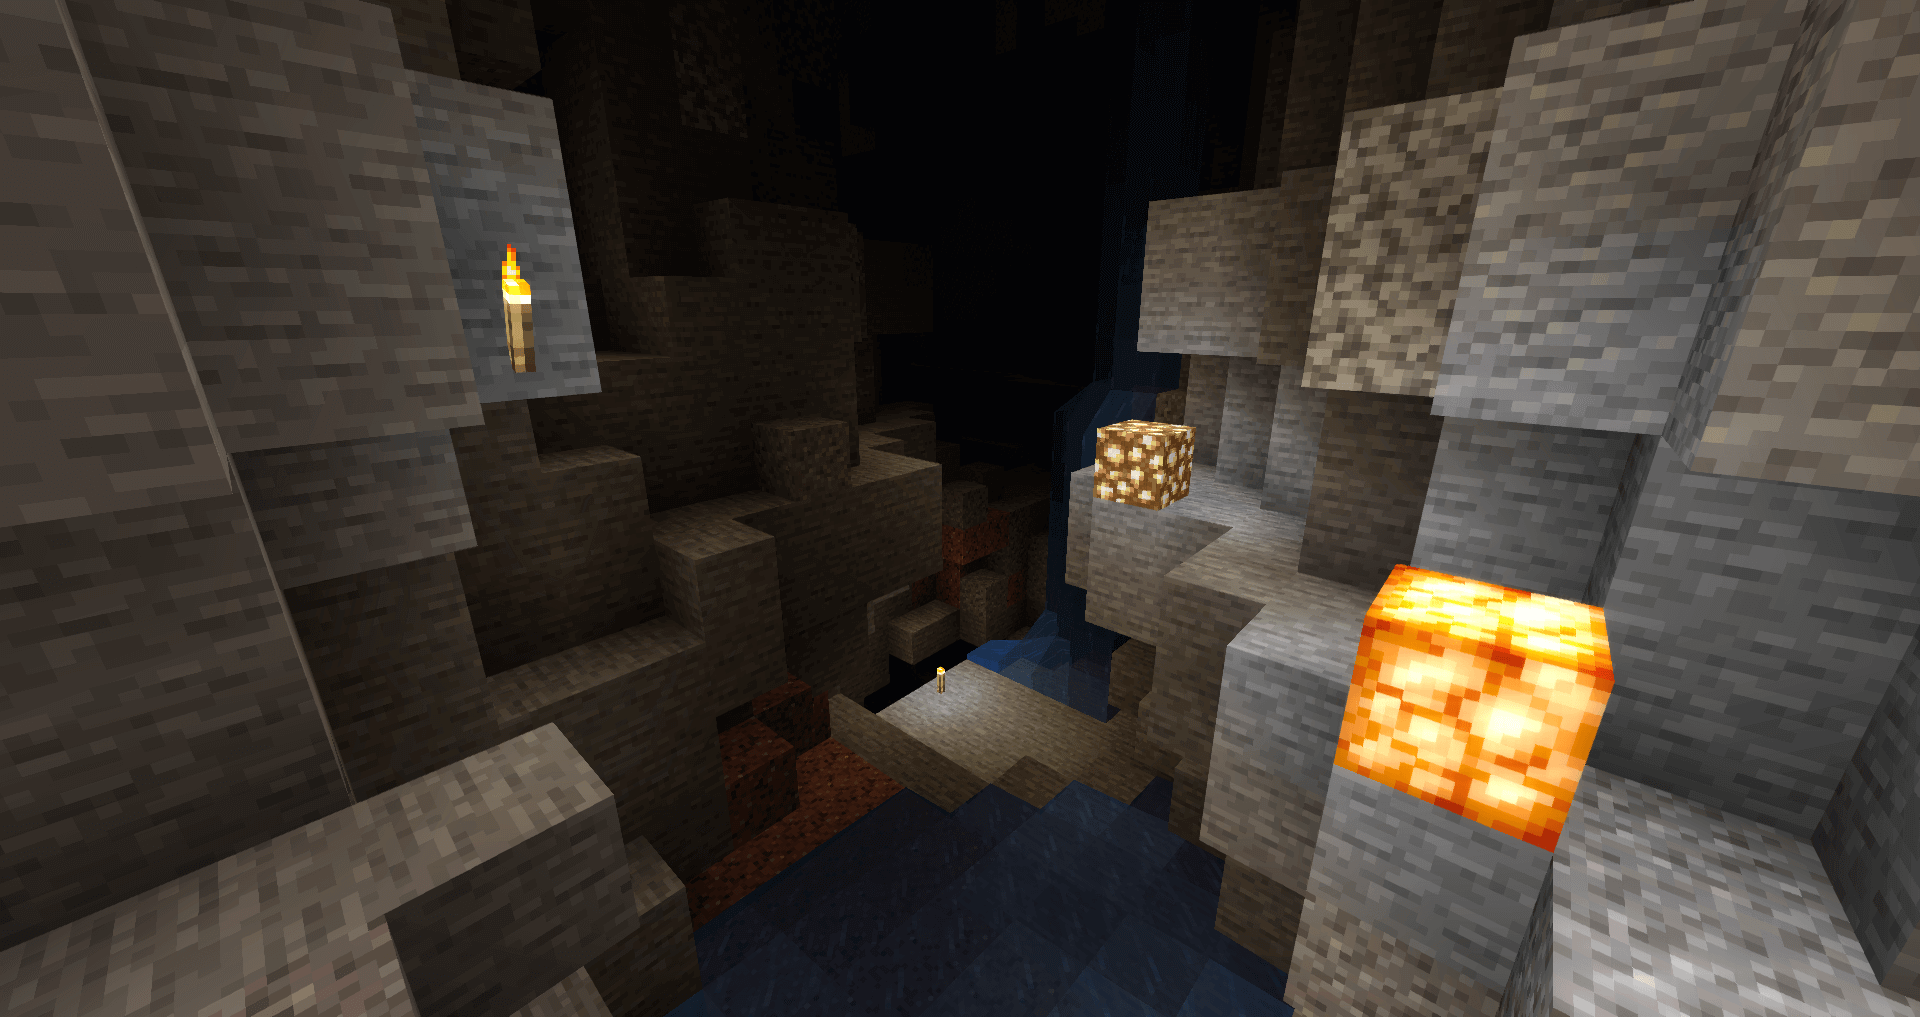
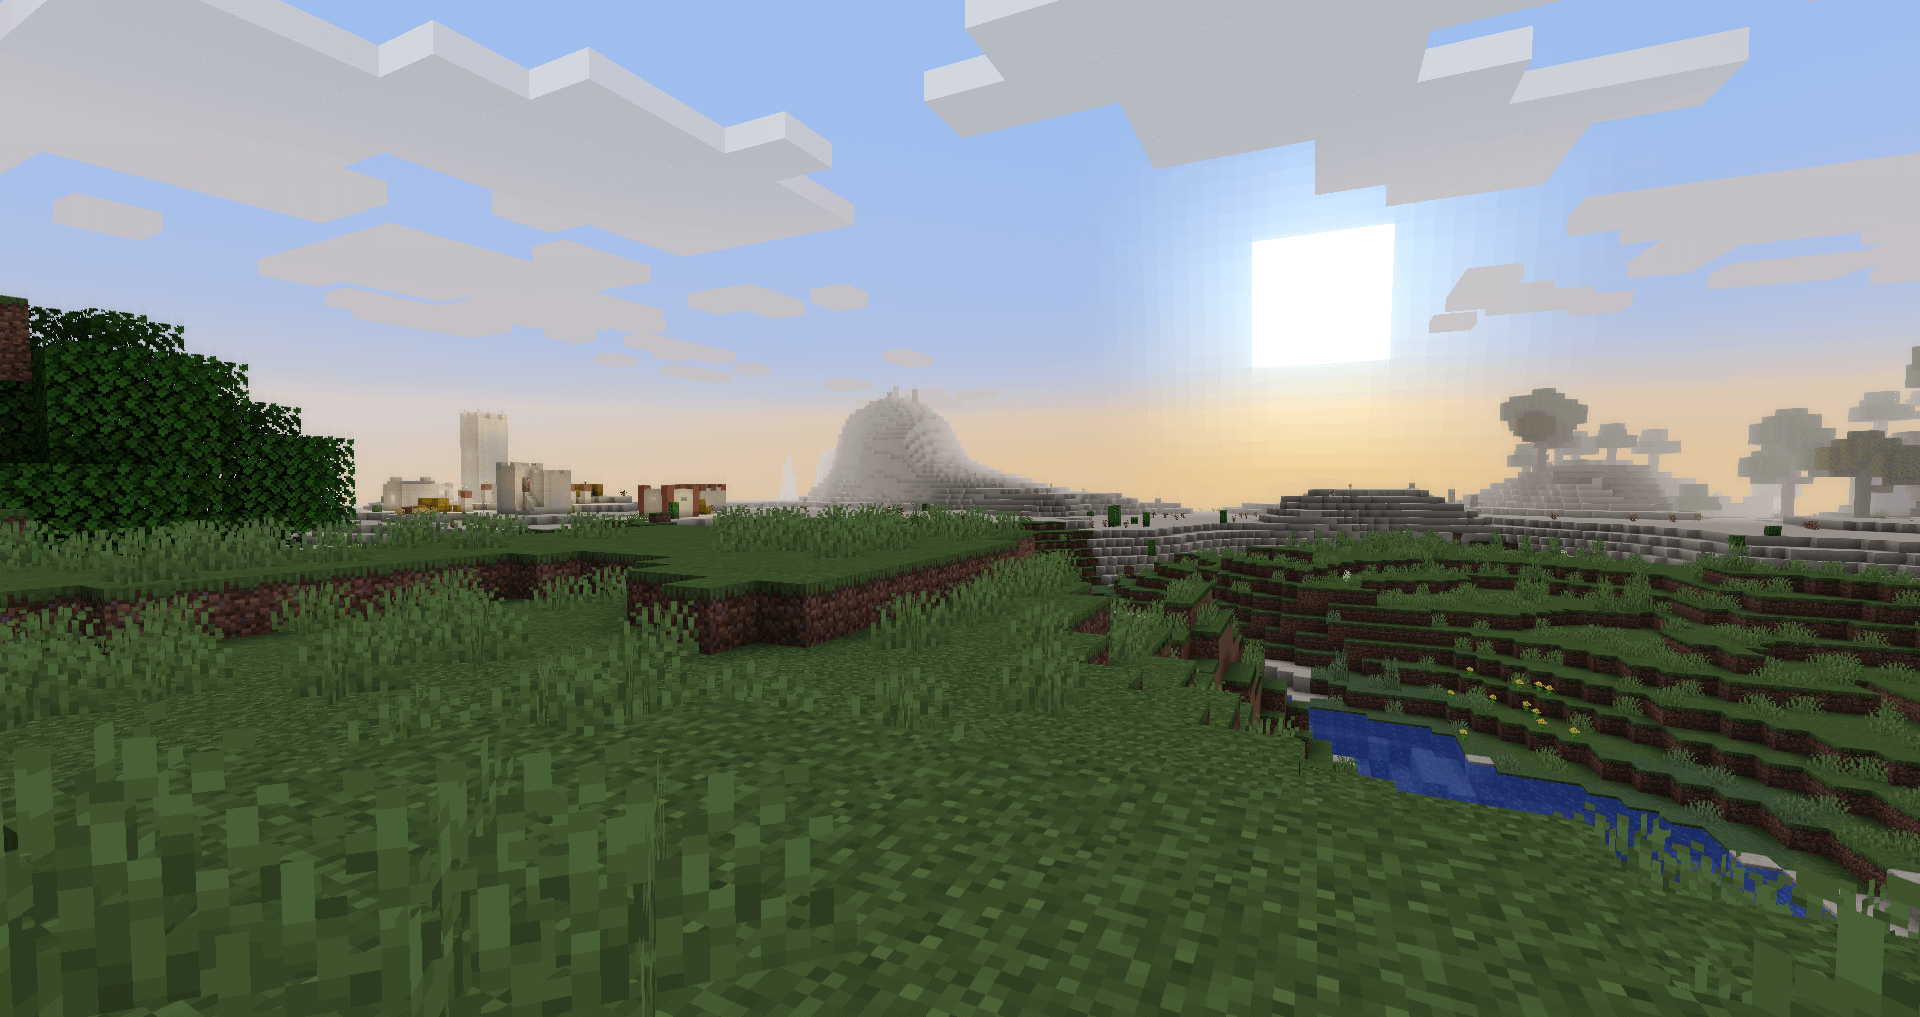
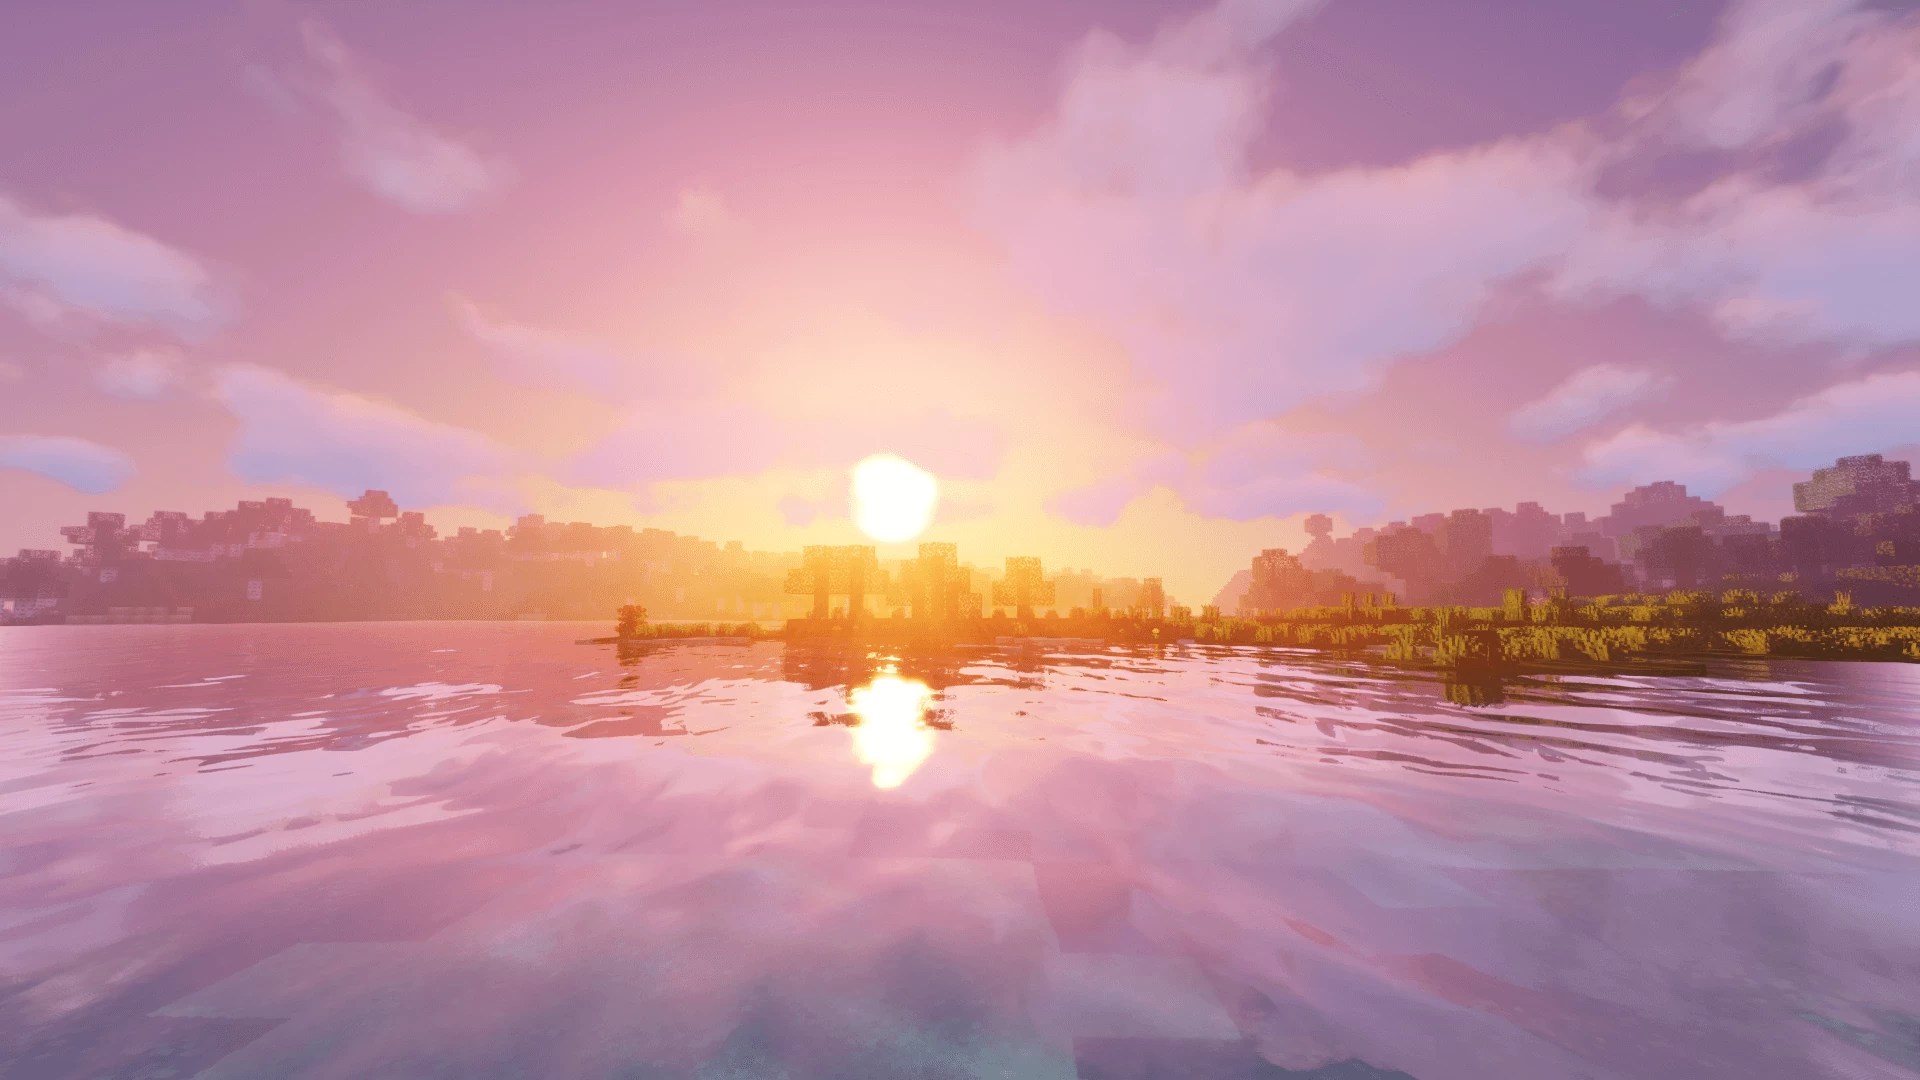
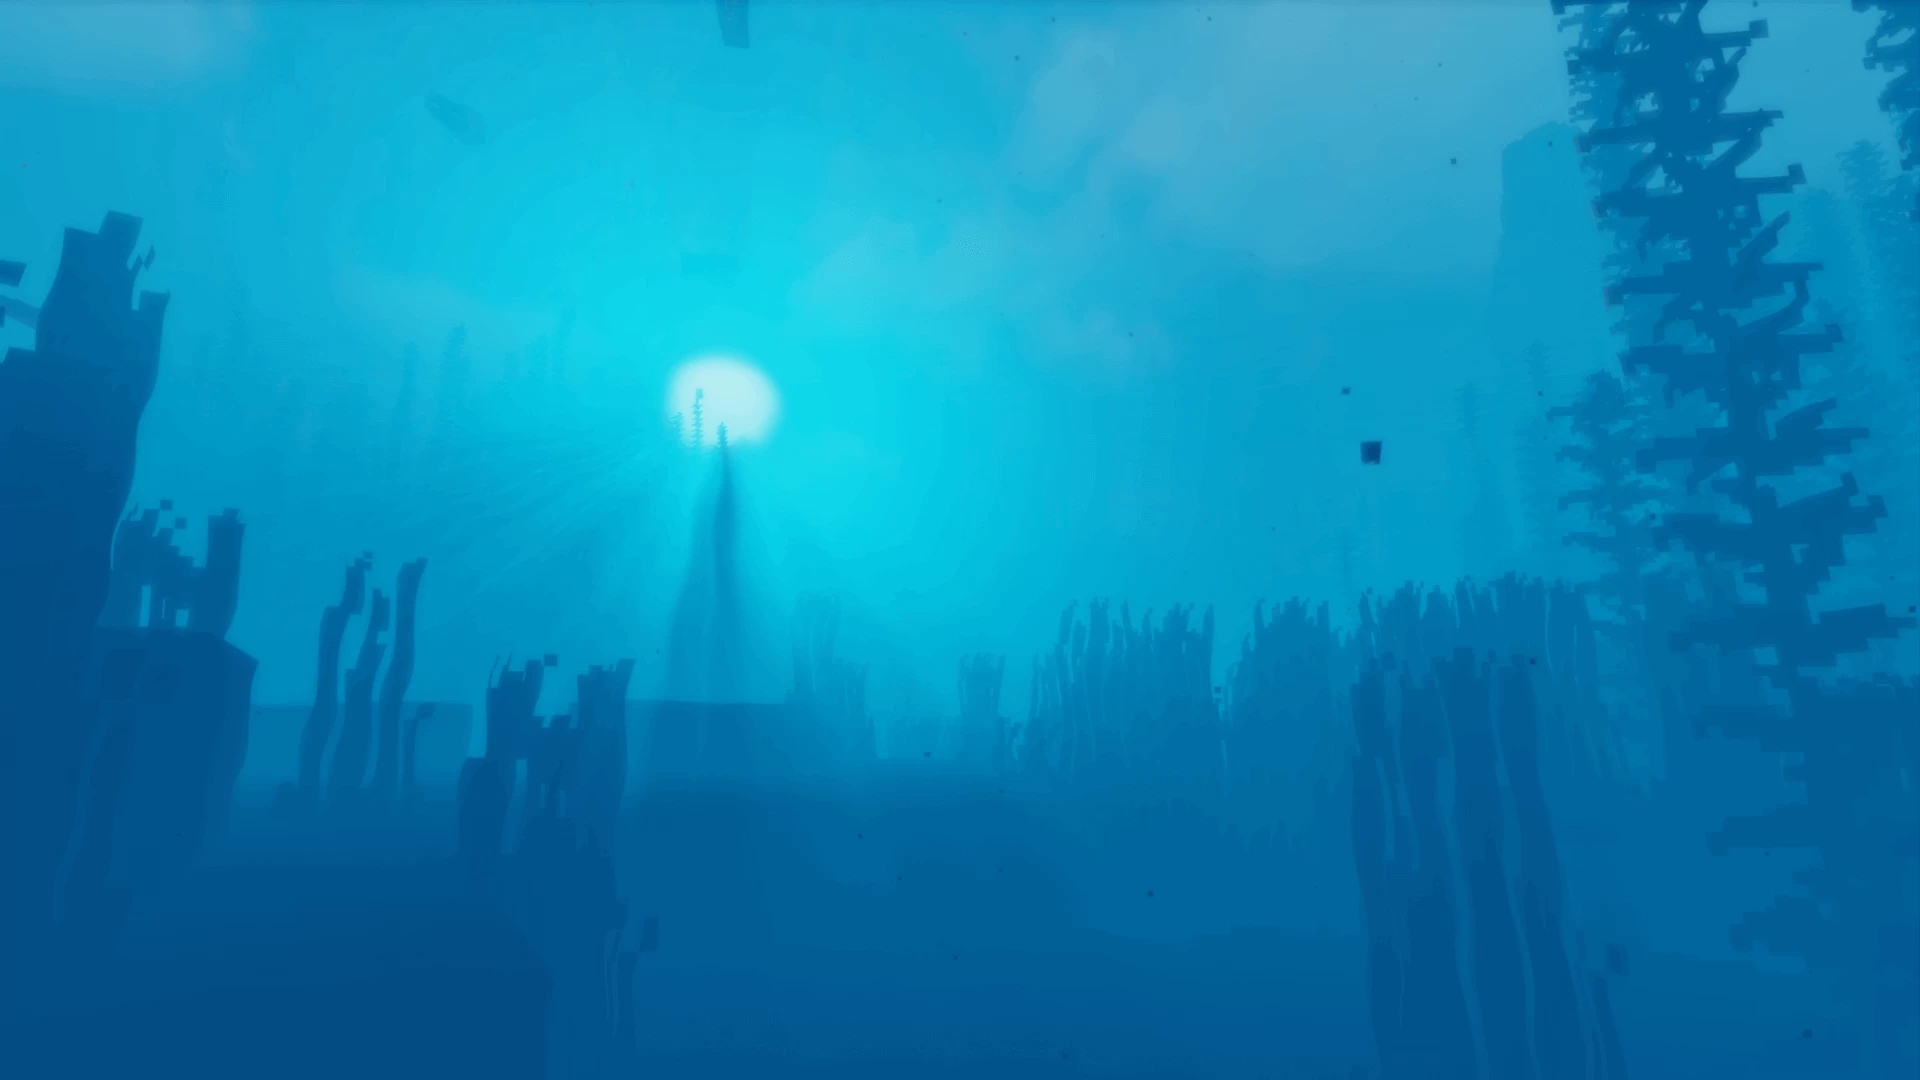
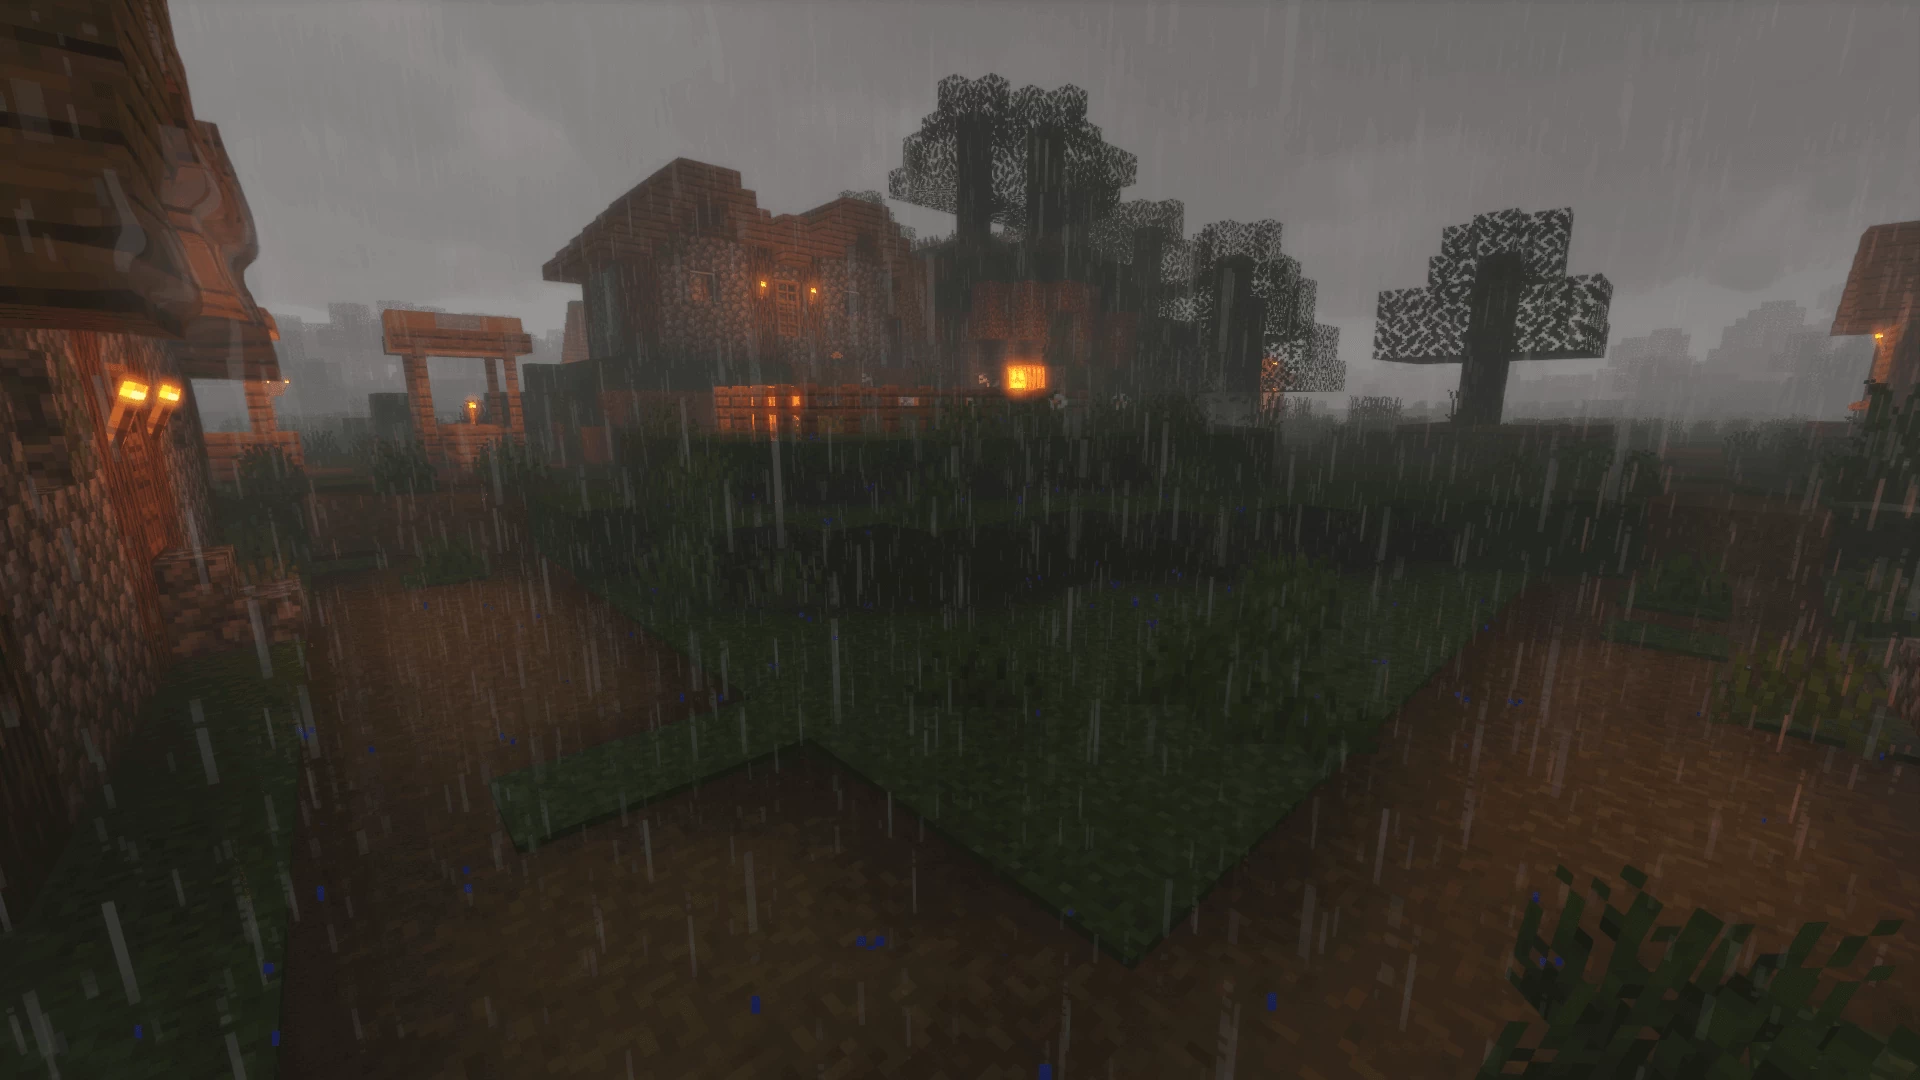
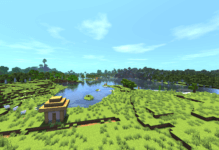
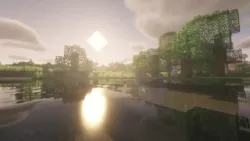
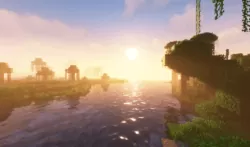
Moving on to the actual shaders themselves, this shaders pack adds tons of graphic changes to the game, ranging from simple features to more elaborate ones. For starters, this pack adds dynamic lighting and shadows. Light seems to be a binary function in vanilla Minecraft: either it’s there or not. Sure, brightness and color are something that continues to improve in the game, but none of them seem to really explore the capabilities that lighting can have in Minecraft. This mod truly dives into the different effects that something as simple as light can have, morphing a bland torchlight to a cozy luminescence. Sunlight is another aspect that this mod gives justice to. At high noon, the sun is bright and invigorating. A subtle touch of lends flare also seems to be added, giving the game more of a cinematic feel. At the end of the day, the sunset looks more like an actual sunset, rather than the sky simply turning orange. The surrounding clouds have the same colors to them, and there is a clear transition from the blue of the sky to the orange of the sunset.
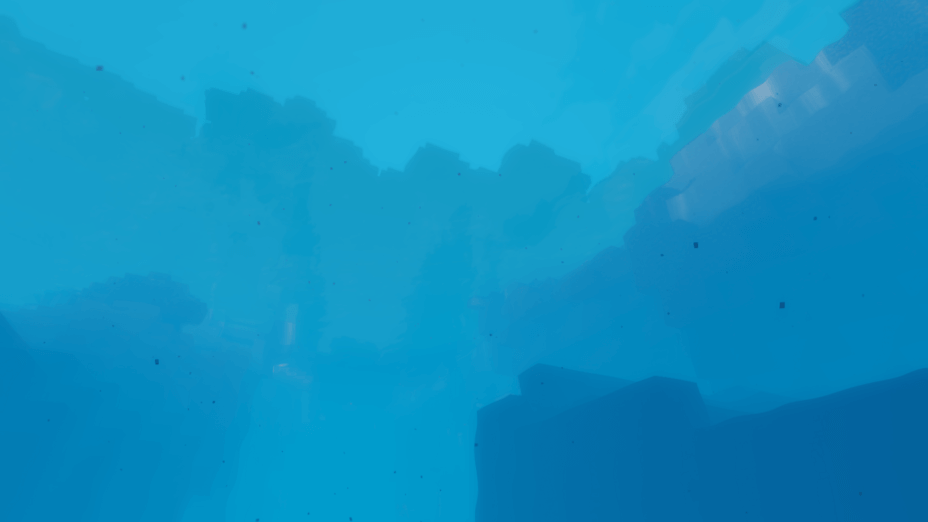
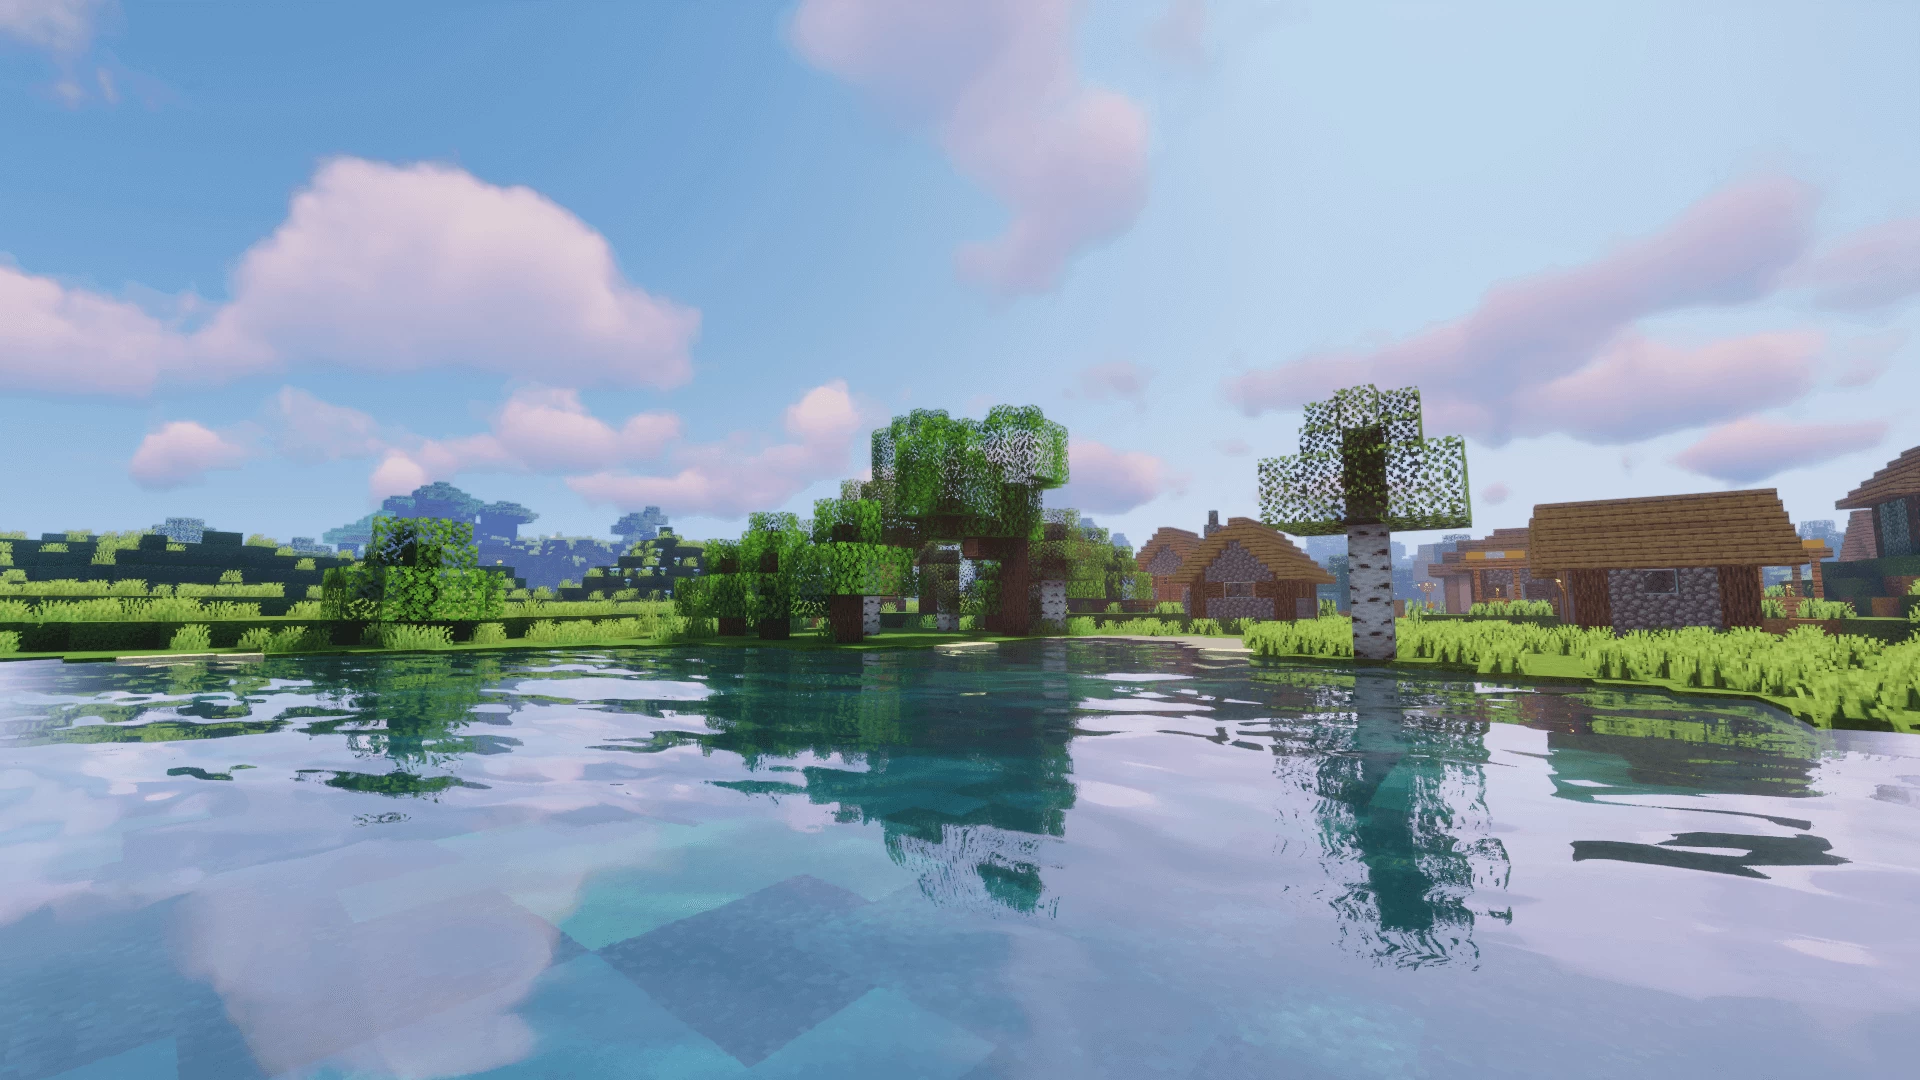
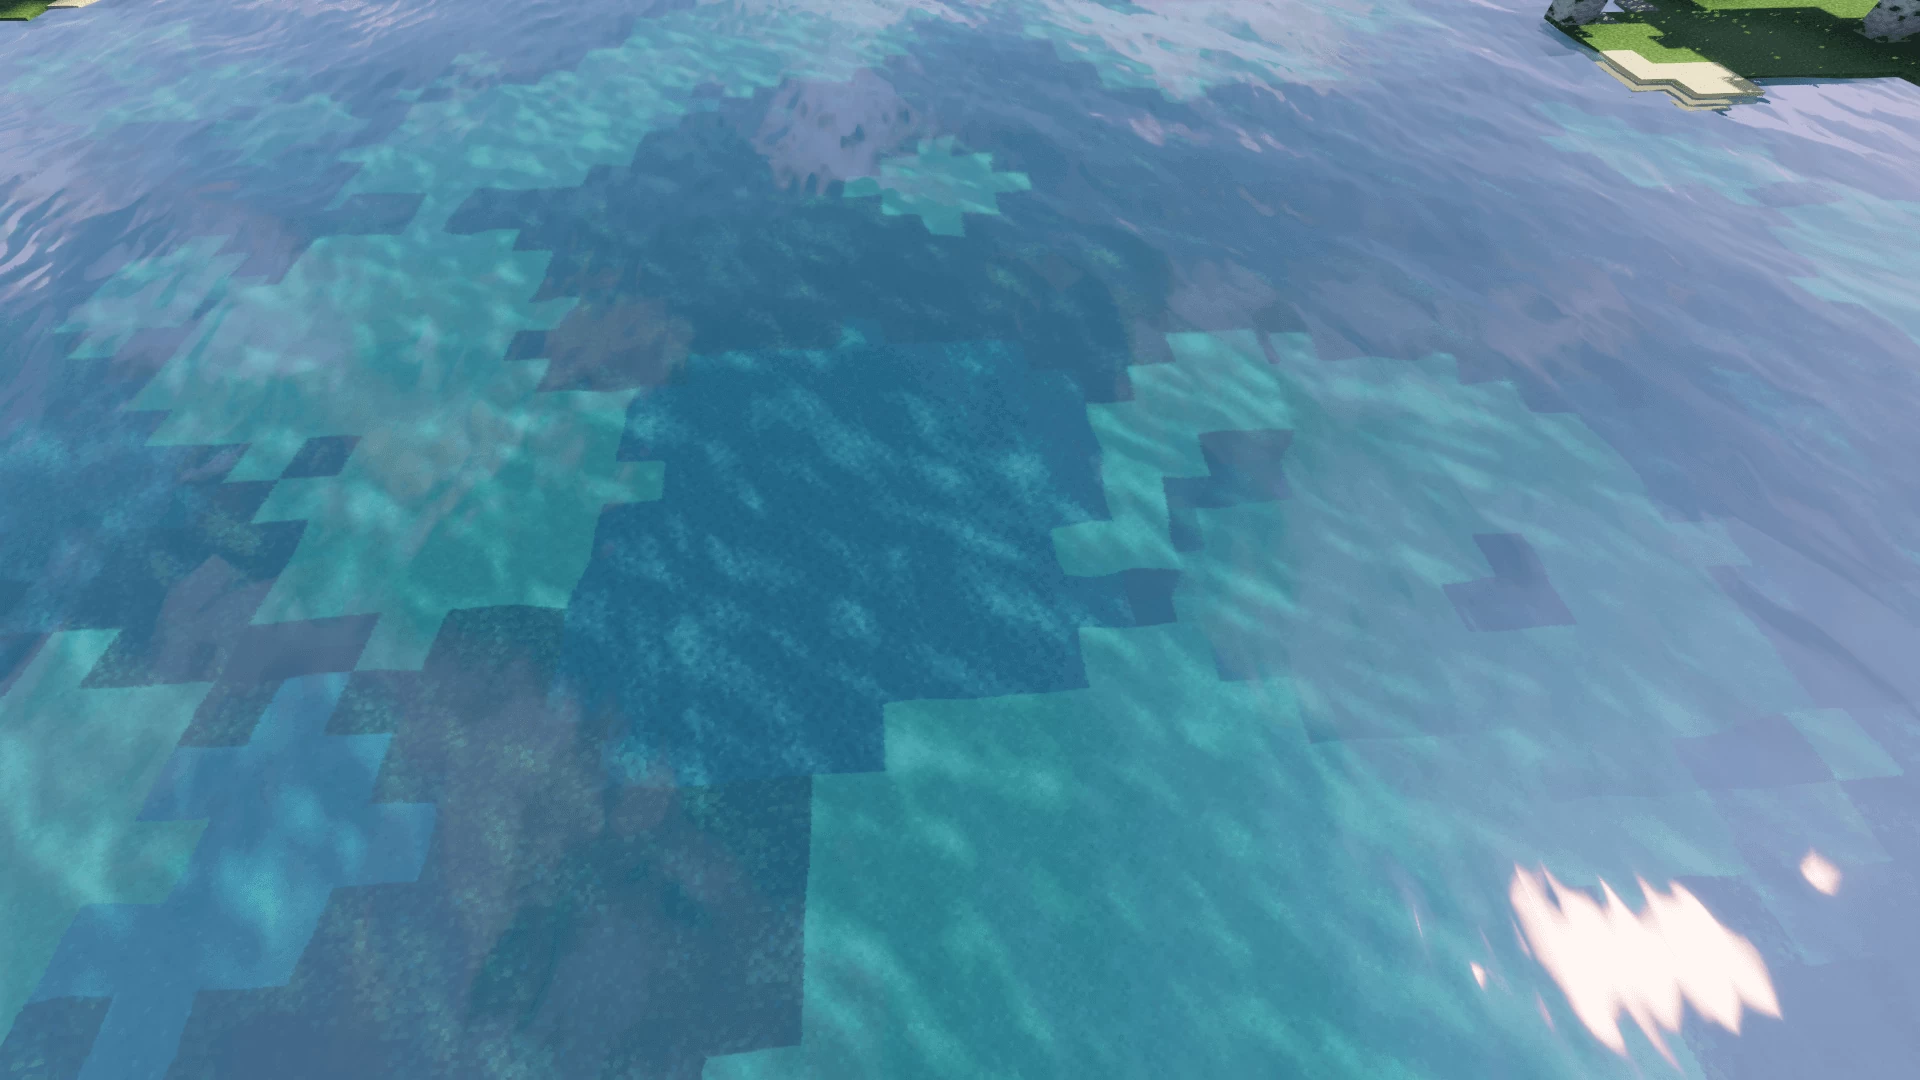
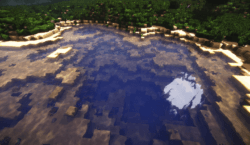
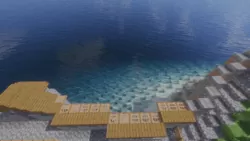
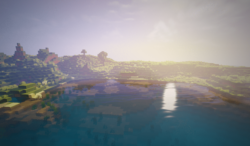
Water is another aspect this shaders pack plays with. These shaders transition the traditional look of water to a more mysterious and beautiful one, much like actual bodies of water have. A simple pond in the game may look like a crystal-watering hole, and a large ocean may feel like an unknown abyss of wonder and terror. The last major update to vanilla added tons of features to the underwater aspect of Minecraft, and this shaders pack complements those additions quite nicely.
Lastly, certain effects can be disabled or enabled. While these shaders add incredible detail to the natural effects of the game, it is sometimes best for the framerate to disable certain effects. Because Slidurs’ Shaders integrate the many different builds of software and hardware that players have, this feature compliments the great level of accessibility this shaders pack has to offer.
- 1.19.4
- 1.19.3
- 1.19.2
- 1.19.1
- 1.19
- 1.18.2
- 1.18.1
- 1.18
- 1.17.1
- 1.17
- 1.16.5
- 1.16.4
- 1.16.3
- 1.16.2
- 1.16.1
- 1.16
- 1.15.2
- 1.15.1
- 1.15
- 1.14.4
- 1.14.3
- 1.14.2
- 1.14.1
- 1.14
- 1.13.2
- 1.13.1
- 1.13
- 1.12.2
- 1.12.1
- 1.12
- 1.11.2
- 1.11.1
- 1.11
- 1.10.2
- 1.10.1
- 1.10
- 1.9.4
- 1.9.3
- 1.9.2
- 1.9.1
- 1.9
- 1.8.9
- 1.8.8
- 1.8.7
- 1.8.6
- 1.8.5
- 1.8.4
- 1.8.3
- 1.8.2
- 1.8.1
- 1.8
- 1.7.10
- 1.7.9
- 1.7.8
- 1.7.7
- 1.7.6
- 1.7.5
- 1.7.4
- 1.7.2
- 1.7
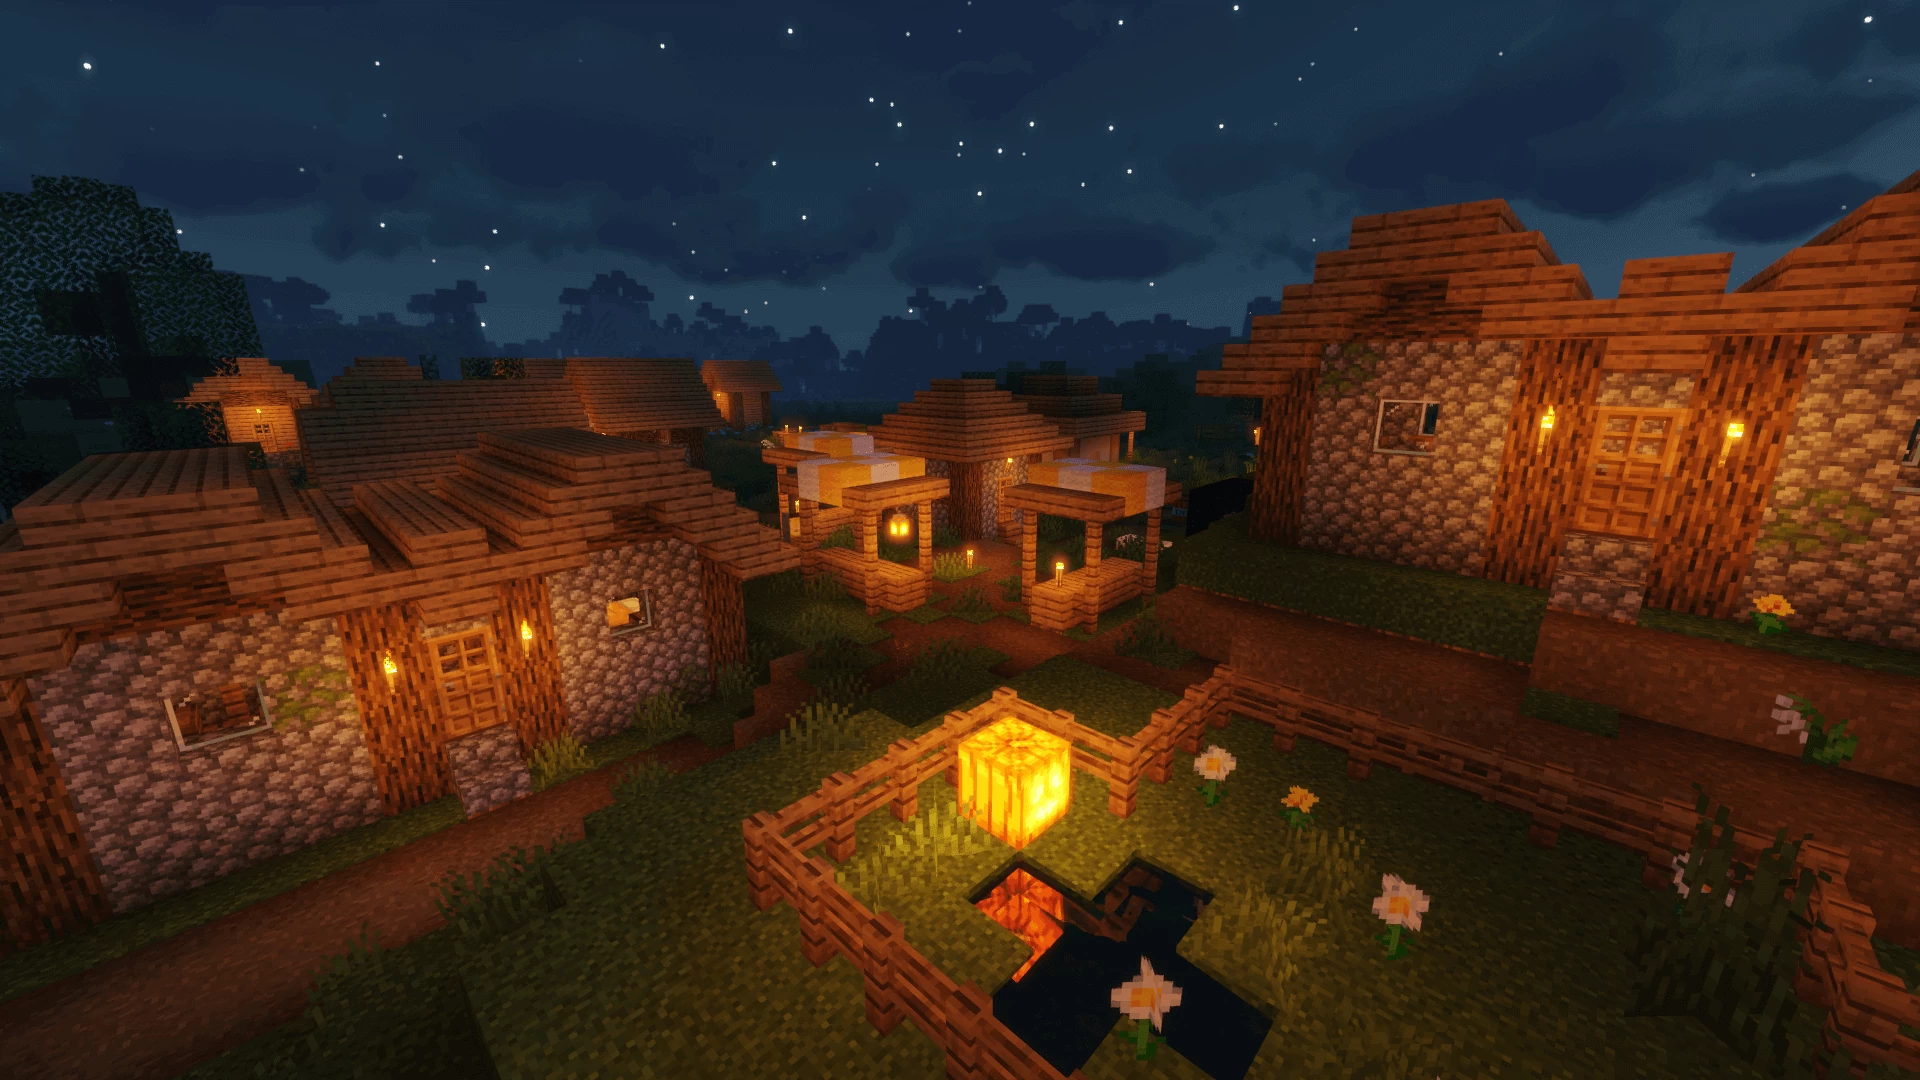
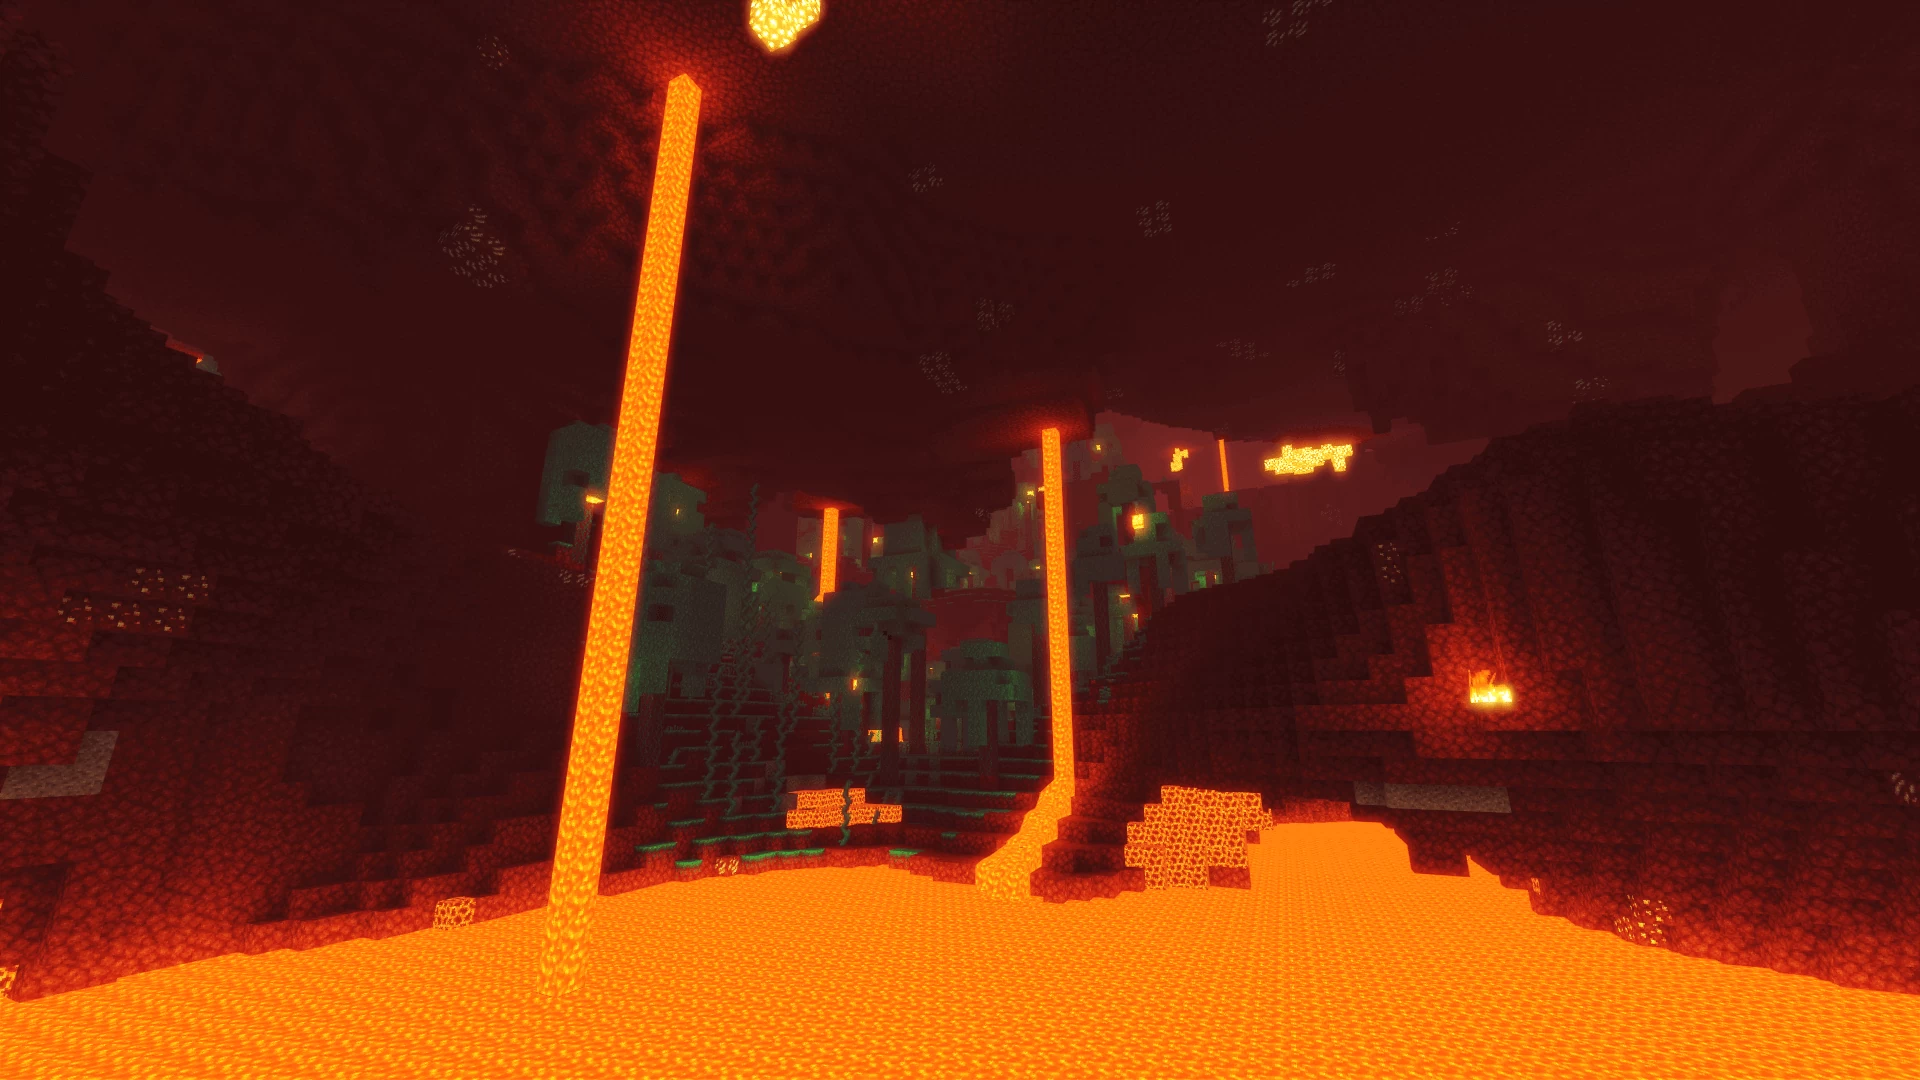
Sildur’s Vibrant — Screnshoots


Sildur’s Enhanced Default — Screnshoots


Sildur’s Fabulous — Screnshoots
Features
Over 41 new features are available in Sildur's Shaders to enhance your gaming experience.
📊 Performance Impacts
Decrease in performance can vary from device to device, driver version, and many other factors, you should test yourself on your machine for the best result.
- None
- No performance decreases
- Small
- ~5%
- Medium
- ~10%
- High
- ~25%
- Extreme
- +50%
-
- Ambient OcclusionMedium
- Simulating how light interacts with objects and surfaces.
-
- Atmospheric SkySmall
- Simulates realistic atmospheric scattering.
-
- BloomSmall
- Enhance the game's lighting and create a more realistic and immersive visual experience
-
- BlurSmall
- Simulate how fast-moving objects appear to blur in a photograph or video.
-
- CausticHigh
- Simulating the way light is refracted and reflected by the water's surface
-
- Cel ShadingSmall
- Technique used to give the game a more stylized, cartoon-like appearance.
-
- CinematicExtreme
- Create more cinematic and visually-stunning scenes in the game.
-
- CustomizationNone
- Customize various aspects of the game's visual effects.
-
- Depth of FieldMedium
- Making objects closer to the camera appear sharp and in focus, while objects farther away appear out of focus and blurry.
-
- Dirty LensSmall
- Simulates the effect of a dirty or scratched camera lens.
-
- HDRMedium
- Enhance the lighting and color in the game.
-
- Lens FlareSmall
- Simulating the way light scatters and reflects inside a camera lens.
-
- LightMedium
- Enhance the game's overall visual quality.
-
- Motion BlurHigh
- Simulates the way that fast-moving objects appear to blur in the real world.
-
- Moving CloudsMedium
- Simulates the movement of clouds across the sky and can be used to create the appearance of a dynamic and ever-changing sky
-
- Normal MapSmall
- Add depth and detail to surfaces without increasing the number of polygons.
-
- Parallax WaterMedium
- Enhances the realism of water by simulating the parallax effect.
-
- PBRHigh
- Enhances the realism of textures and materials by simulating the way light interacts with surfaces in a more physically accurate way.
-
- Photorealistic SkyboxesMedium
- Replacing the in-game sky with high-resolution, realistic images of the sky.
-
- Ray-Traced ReflectionsExtreme
- Simulating how light behaves in the real world.
-
- Realistic NightskyMedium
- More realistic and immersive night sky.
-
- Realistic RainMedium
- More natural and immersive rain experience.
-
- Realistic SkyMedium
- More realistic and immersive sky experience.
-
- Realistic WaterHigh
- More realistic and immersive water experience.
-
- ShadowsSmall
- Simulate how light is blocked and scattered by objects in the environment.
-
- Sun RaysMedium
- Simulate the appearance of sunlight streaming through trees leaves, objects, clouds, or other atmospheric conditions.
-
- SunriseSmall
- More realistic and immersive sunrise experience.
-
- SunsetSmall
- More realistic and immersive sunset experience.
-
- TAAMedium
- Smooth out jagged edges and reduce the "stair-stepping" effect that can occur when rendering graphics.
-
- Tone MappingSmall
- Adjusting the brightness, contrast, and saturation levels.
-
- VibrantSmall
- More saturated colors and realistic lighting.
-
- Volumetric CloudsHigh
- Simulate the way that clouds appear to have volume and depth in the real world rather than just flat textures.
-
- Volumetric FogHigh
- Create the appearance of fog that is lit from within, casting shadows and creating a sense of depth.
-
- Volumetric LightHigh
- Simulating the scattering of light in the atmosphere and in the environment.
-
- Volumetric NetherHigh
-
- Volumetric The EndHigh
-
- Water ReflectionsMedium
- Simulating reflections on the surface of the water.
-
- Water WavesMedium
- Movement of waves on the surface of the water.
-
- Waving GrassSmall
- Simulating the way it moves and sways in the wind.
-
- Waving PlantsSmall
- Simulating the way they move and sway in the wind.
-
- Waving TreesSmall
- Adds movement to the leaves and branches of trees, making them look more alive and realistic.
Sildur's Shaders allow you to change more than 103 settings to suit your needs.
| Settings | Description | Options |
|---|---|---|
| Damage flash | Makes mobs and the player flash red when hurt. |
|
| Whiteworld | Makes the ground white, mostly used for debugging. This option was added because it was requested alot. I suppose it looks kinda neat for screenshots. |
|
| Antialiasing Toggle antialiasing (TAA) and adaptive sharpening. | ||
| TAA |
| |
| sharpening |
| |
| Bloom Change things related to Bloom. | ||
| Bloom | Adds a glowing effect to emissive blocks. Is also used for sun/moon glow. Medium performance impact. |
|
| Bloom strength | Adjust the strength of bloom. Higher values make the image more soft and more blurry. |
|
| Colors Change various color options, like gamma or watercolors. | ||
| Brightness |
| |
| Contrast |
| |
| Water Colors | ||
| Water texture | Toggle the default water texture / texture from your resourcepack. |
|
| Watertexture blend factor | Adjust the texture strength. |
|
| water color red |
| |
| water color green |
| |
| water color blue |
| |
| water alpha |
| |
| Lighting colors | ||
| Handheld Lighting | Toggle handheld lighting. |
|
| Eye light adaption | Adjust the eye light adapation amount, doing so will increase or decrease lighting strength in general. Adjust bloom accordingly. |
|
| Light brightness | This should be tweaked once you've adjusted the lighting colors. |
|
| red amount |
| |
| green amount |
| |
| blue amount |
| |
| Depth of field Change things related to Depth of Field. | ||
| Depth of Field | Simulates eye focusing on objects. Low performance impact |
|
| Blur amount | Adjust the amount of blur used for depth of field. |
|
| Smooth Transition | Toggle a smooth transition between clear and blurry while focusing on something. |
|
| Distance Blur | Requires Depth of Field to be enabled. Replaces eye focusing effect with distance being blurred instead. |
|
| Blur view distance | Adjust the view distance of blur. |
|
| Fog options Contains all fog related options. | ||
| Fog | Toggle fog. |
|
| Overworld fog density. | Adjust overworld fog density |
|
| Morning Fog | Increases fog density during sunrise. |
|
| Underwater Fog | Toggle fog underwater. |
|
| Underwater fog density | Adjust underwater fog density. |
|
| Underwater color tint | Toggle the blue color tint for ground underwater. |
|
| Motionblur Change things related to Motionblur. | ||
| Motionblur | Blurres your view/camera during movemenent. Doesn't work with Depth of Field. |
|
| Blur strength | Adjust the blur strength of Motionblur. |
|
| Normal map Enable bump or parallax support if the resourcepack supports it. | ||
| RP Support | Enable bump or parallax mapping support for resourcepacks, the resourcepack must support it. |
|
| RP Resolution | Increasing the resolution past the rp resolution makes it smoother. |
|
| POM Depth | Adjust the depth of parallax mapping, to high values might look weird. |
|
| POM Render Distance | Adjust the distance at which parallax mapping renders. |
|
| Water parallax mapping | Enable or disable parallax mapping for water. Low performance impact |
|
| Water height | Adjust the water height / parallax strength. |
|
| Reflections Toggle various reflections and adjust their quality. | ||
| Water reflections | Toggle water reflections. |
|
| Refraction |
| |
| Caustics |
| |
| Caustics strength |
| |
| Ice and Glass reflections | Toggle ice and stained glass reflections. |
|
| Wave size |
| |
| Metallic Reflections | Toggle reflections for metallic blocks like iron. Metallic blocks are defined in block.properties. |
|
| Reflections strength | Adjust reflection strength for metallic and polished reflections. If the reflections become to dark, increase sky reflection. |
|
| Polished Reflections | Toggle reflections for polished blocks like polished granite. Polished blocks are defined in block.properties. |
|
| Sky reflection | Adjust the amount of sky reflections on metallic and polished blocks. Higher values make it look more wet. |
|
| Rain reflections | Toggle rain reflections / wetness while raining. |
|
| Rain noise | Adjust the amount of noise for rain reflections, higher values mean less noise. |
|
| Biomes check | Checks if the biome that you're in actually supports rainy weather for reflections. Disable to have rain reflections / wetness in every biome. Updating optifine might resolve issues with missing reflections with this on. |
|
| Cloud reflections | Toggle cloud reflections. Medium performance impact. |
|
| Cloud Reflections Quality | Adjust reflections quality of volumetric clouds. |
|
| Sky & Lighting Contains sky related options, like godrays, lens flares and clouds. | ||
| Lens Flares | Simulates camera lens effects. Bloom must be enabled for lens flares. Low performance impact. |
|
| Lens Flares strength | Adjust the strength of lens flares. |
|
| Rain Drops | Enables rain drops on screen during raining. Low performance impact. |
|
| Godrays | Makes the sun casts rays. Low performance impact. |
|
| Godrays density | Changes the amount of sunrays. |
|
| Volumetric Lighting | Enable volumetric lightning, disables godrays since it's comes with it's own ones. |
|
| Volumetric lighting amount |
| |
| Clouds | Toggle clouds. Volumetric clouds run a bit faster than 2D clouds. |
|
| Cloud Quality | Adjust quality of volumetric clouds. |
|
| Sky blur | Apply a blur filter to the sky to make volumetric clouds smoother. On AMD cards this filter is also applied to distant land due to driver issues. Doesn't work with DoF or Motionbur. |
|
| Cloud height | Adjust the clouds height. |
|
| Default Skybox | Toggle support for the default skybox, including custom skies from resourcepacks. If no resourcepack is present this will only enable the default sun and moon texture. This option also auto disables the custom shader sun and moon. |
|
| Skybox blend factor | Tweak the color amount of the custom shader sky mixing with the default skybox texture. |
|
| Shader Stars | Toggle stars. |
|
| Sun/Moon angle | Adjust sun and moon angle. |
|
| Moonlight | Adjust brightness during night time. |
|
| Alternative Weather angle | Toggle alternative weather angle. |
|
| Shadows Change shadow related settings like resolution and view distance. | ||
| Shadows |
| |
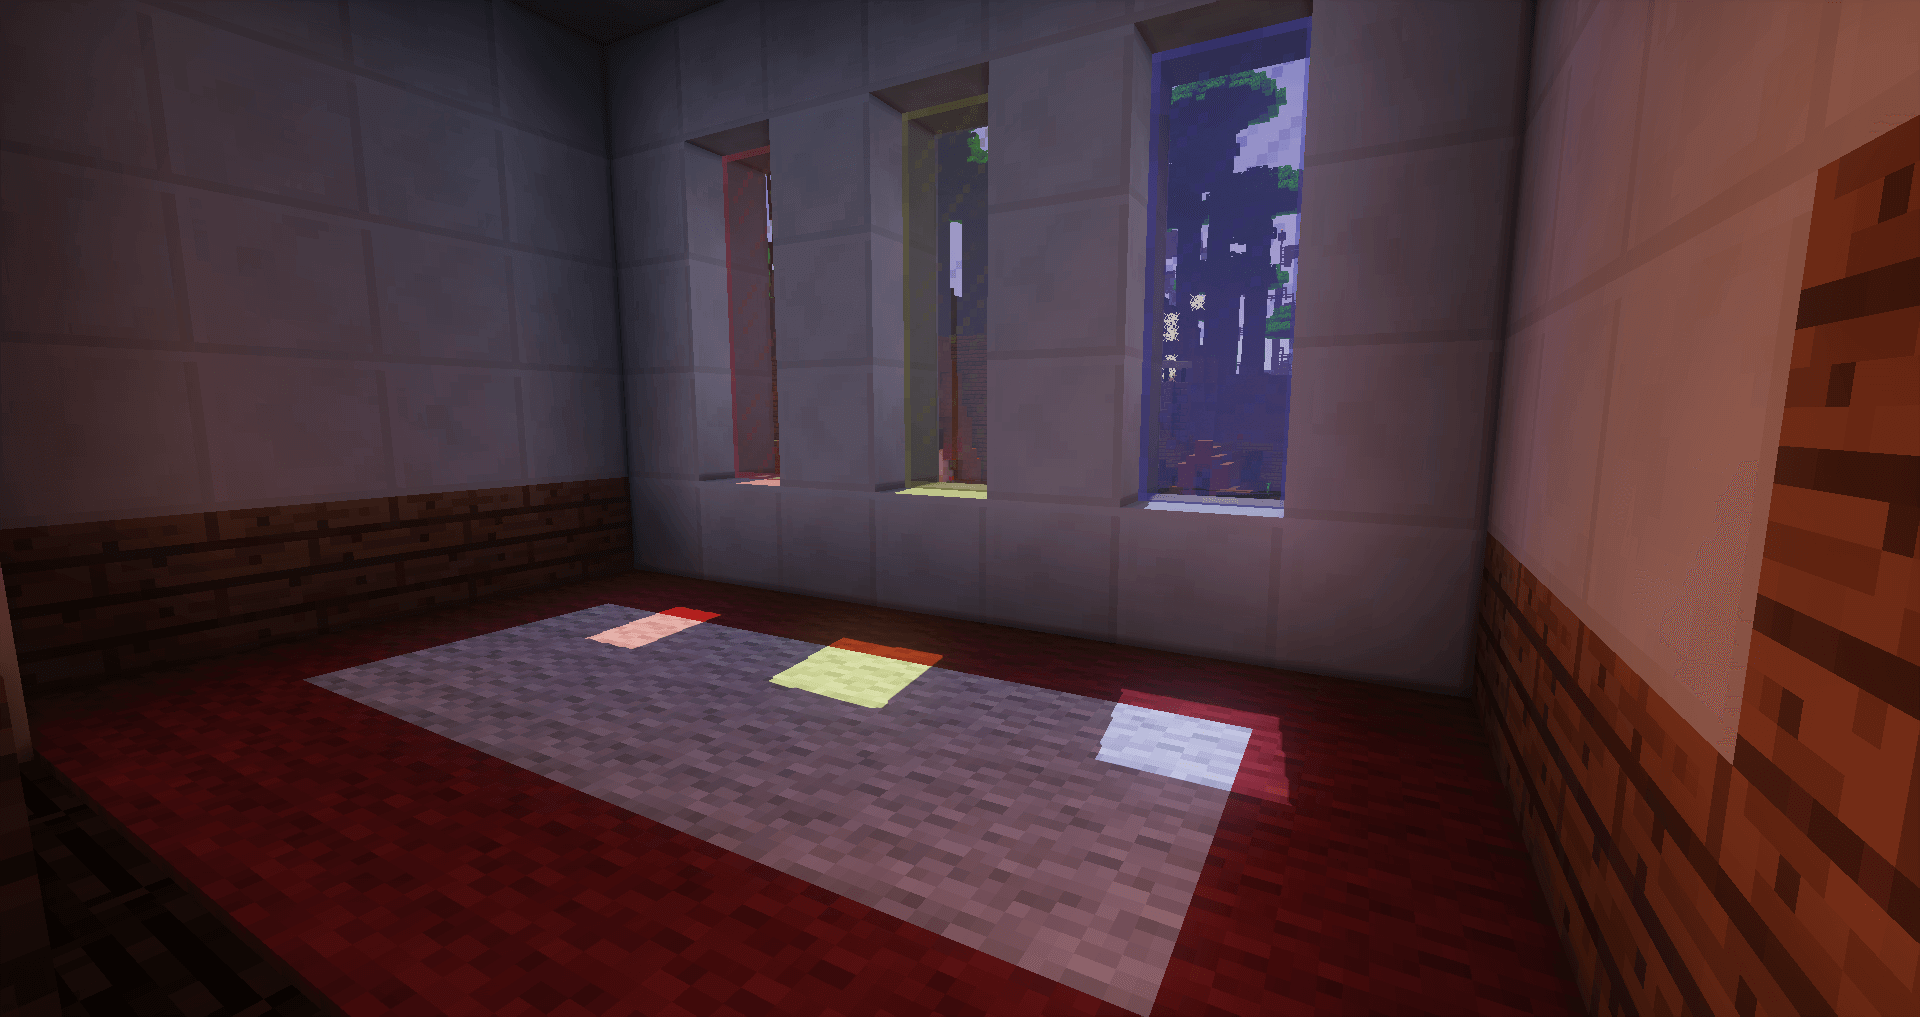
| Colored Shadows | Toggle colored shadows. Tints shadows color if passing through stained glass. Can cause some visual glitches. |
|
| Variable Penumbra Shadows | Shadow filtering. The farther shadows are away from their source the more soft they become. Doesn't work on AMD or Intel gpus. |
|
| Grass Shadows | Toggle grass shadows, also disables shadows for tallgrass and flowers. |
|
| Shadows Resolution | Change the shadows resolution. Reduce the shadow render distance at low resolutions to improve quality and reduce flickering. |
|
| Raytraced Shadows | Improves closeup and faraway shadows. Also allows shadows to be cast outside of the shadowmap, outside of your shadows render distance. Requires shadows to be enabled. Has some issues since it's raytraced in screenspace. |
|
| Shadows Render Distance | Change the render distance of shadows. This stretches the shadowmap, so make sure to increase the shadows resolution on high values. |
|
| Shadowfilter Quality | Adjust the quality of the shadowfilter. Increase this if you run into issues with penumbra shadows on. |
|
| Near Shadowplane Quality | This is the near plane of the shadowmap. Lower values improve shadow quality, reduce performance and shadow rendering distance by squeezing the shadowmap together. You want to increase this if you increase far plane shadow quality, otherwise leave it alone. |
|
| Far Shadowplane Quality | This is the far plane of the shadowmap. Higher values reduce closeup quality, improve performance and shadow rendering distance by stretching the shadowmap. If black dots appear increase near shadowplane quality. |
|
| Shading Adjust various shading effects like ambient occlusion or celshading | ||
| Ambient Occlusion | Makes lighting more realistic (SSDO). Medium performance impact. |
|
| AO amount | Adjust the amount/strength of ambient occlusion. |
|
| Celshading | Applies black lines on everything making it look cartoony, similar to borderlands. Very low perfomance impact. |
|
| Celshading outline thickness | Adjust the outline thickness of celshading |
|
| Celshading search radius | Adjust the search radius for celshading. Lower values mean less search radius, which might misses some inline borders, creating more of an outline shader. Which can look cool aswell. |
|
| Waving Objects Contains grass, wheat, leaves etc. | ||
| Animation speed | Adjust the speed of all animations except water. |
|
| Waving Grass | Does not include tallgrass due some issues with it. |
|
| Waving_Tallgrass |
| |
| Waving Entities | Includes: Saplings, small flowers, wheat, carrots, potatoes and beetroot. |
|
| Waving Leaves |
| |
| Waving Vines |
| |
| Waving Fire |
| |
| Waving Lanterns |
| |
| Waving Lava |
| |
| Waving Lilypad |
| |
| Waving Water |
| |
| Waves amplitude | Adjust the water waves amplitude (height) |
|
| Emissive Light Change the lighting color of blocks that emit light, like torches. | ||
| Minimum Light |
| |
| red |
| |
| green |
| |
| blue |
| |
| Debug | ||
| Showbuffer |
|
Comparison
Our comparison tool makes it easy to compare Sildur's Shaders with Minecraft vanilla and other shader packs.


How To Install Sildur's Shaders
- Support Forge / Vanilla
- Extra features
- Good performance
- Support Fabric / Quilt
- Better performance, depend on your hardware
- No modding required
- Very limited shader features
Optifine Installation Guide
Note
Your device must have Java installed to run the Forge and Optifine installers.
Quick Java Installation Guide
Download Java
Download the Java installer from the official website here.

Open Installer
Once you have downloaded the file, run it and click the Install button.


How to install Sildur's Shaders with Optifine?
Download Optifine
Get the latest version of Optifine for your Minecraft version.
Download OptifineInstall Optifine
Run the Optifine installer and follow the on-screen instructions to complete the installation.
Download Sildur's Shaders
Go to the download section and get shaders zip file. Unzip the file if necessary, as some shader developers may bundle multiple shader versions in one zip file.
Launch Minecraft
Start the Minecraft launcher and make sure you have the Optifine profile selected.
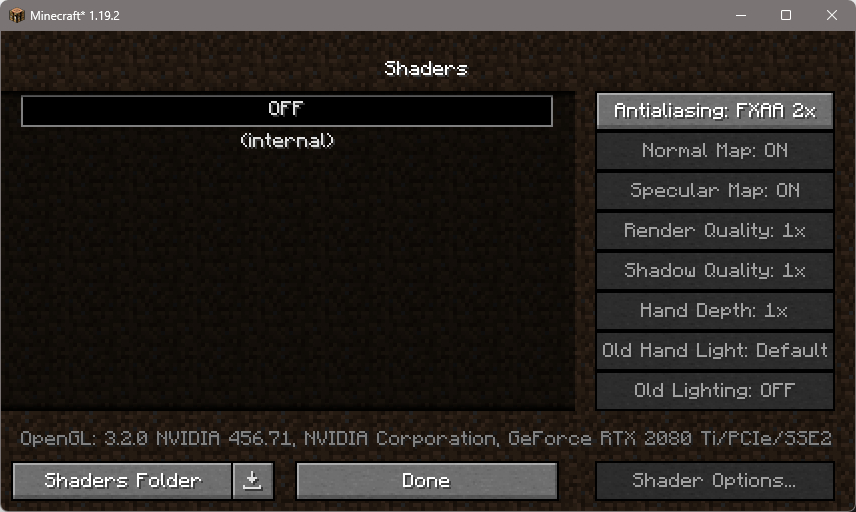
In-game Shaders menu
Go to Options > Video Settings > Shaders to access the shaders menu.
Open shaderpacks folder
Click on the "Shaders Folder" button to open the folder where shaders are stored, so you can add or remove shaders as desired.
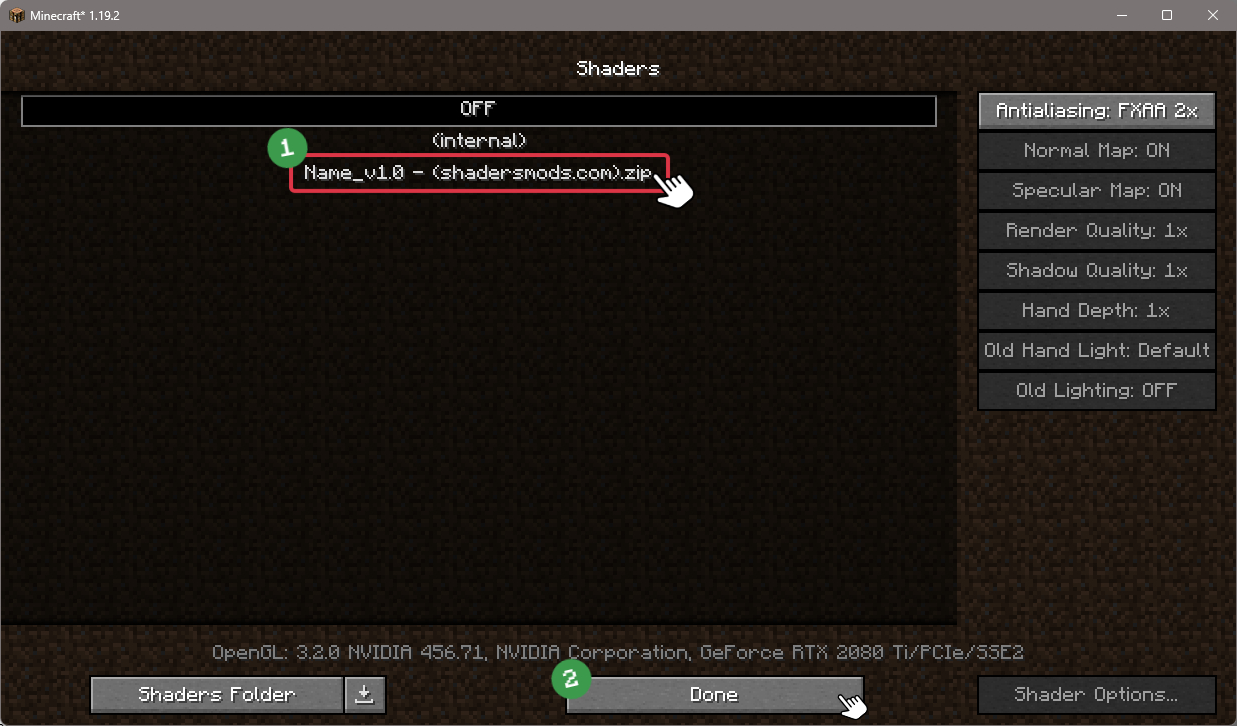
Install Sildur's Shaders
Copy or move the downloaded Sildur's shaders zip file into the shaderpacks folder.
Select Sildur's Shaders
Choose Sildur's shader pack from the list of available shaders in the options menu.


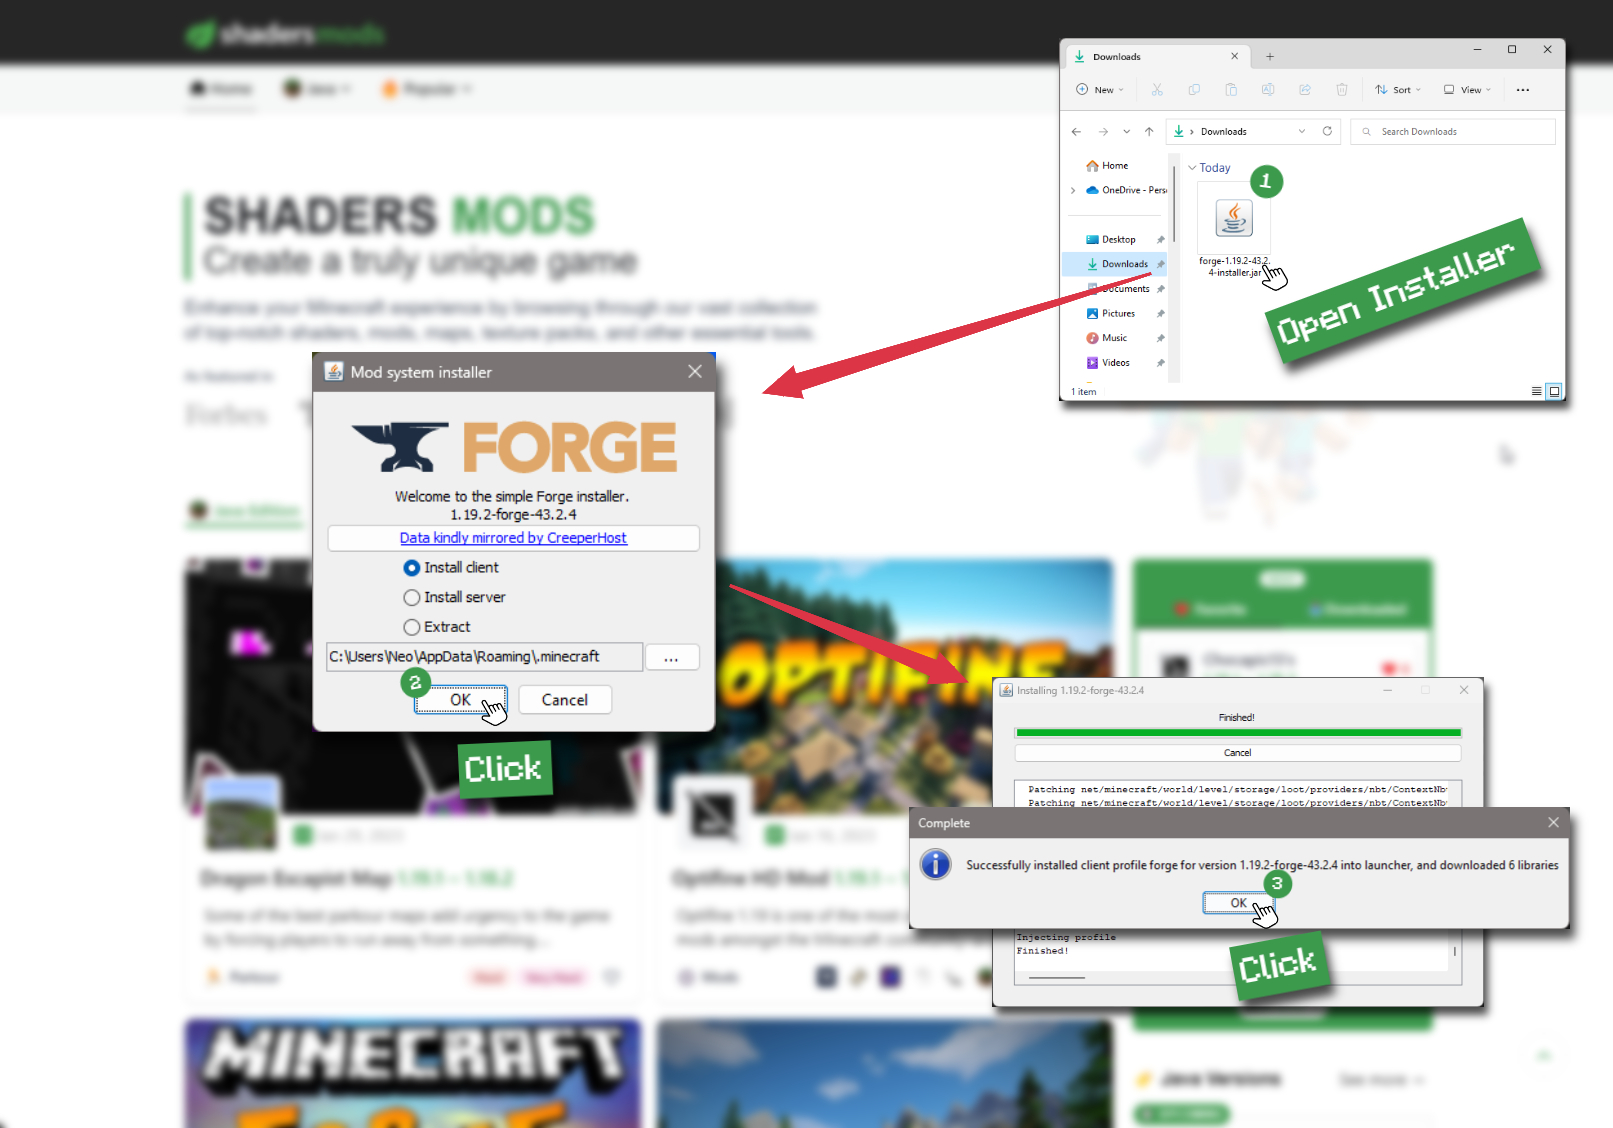
How to install Sildur's Shaders with Forge and Optifine?
Quick Installation Guide
Install Forge
Obtain the latest version of Forge that is compatible with your Minecraft version.
Download Minecraft ForgeLaunch Minecraft
Start the Minecraft launcher and select the version of Minecraft you want to install Forge on. Run the game once by clicking on the "Play" button to create necessary files for Forge.
Install Forge Client
Double-click on the Forge installer jar file and choose "Install Client" in the window that appears.
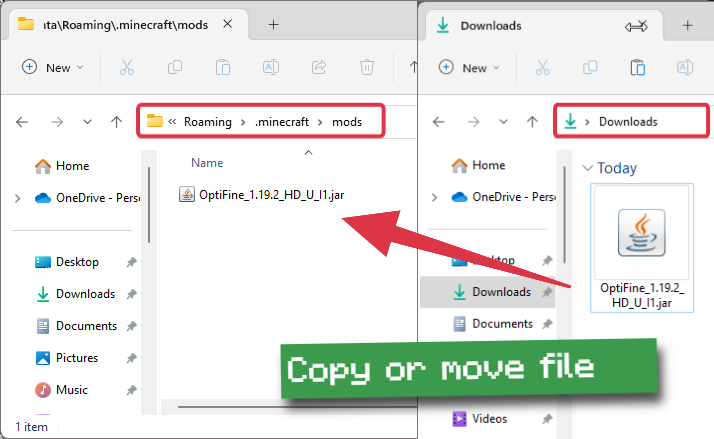
Install Optifine
Download the Optifine jar file after Forge is installed. Move the Optifine jar file to the mods folder in the .minecraft directory.
Download Optifine
Launch Forge Profile
Launch Minecraft using the "Forge" profile, Optifine will be automatically loaded along with Forge.
Install Chocapic13's Shaders
Now the installation is the same as from the above Optifine instructions, just follow the steps starting from step 5.


Iris Installation Guide
Note
Your device must have Java installed to run the Iris installer.
Quick Java Installation Guide
Download Java
Download the Java installer from the official website here.
Open Installer
Once you have downloaded the file, run it and click the Install button.
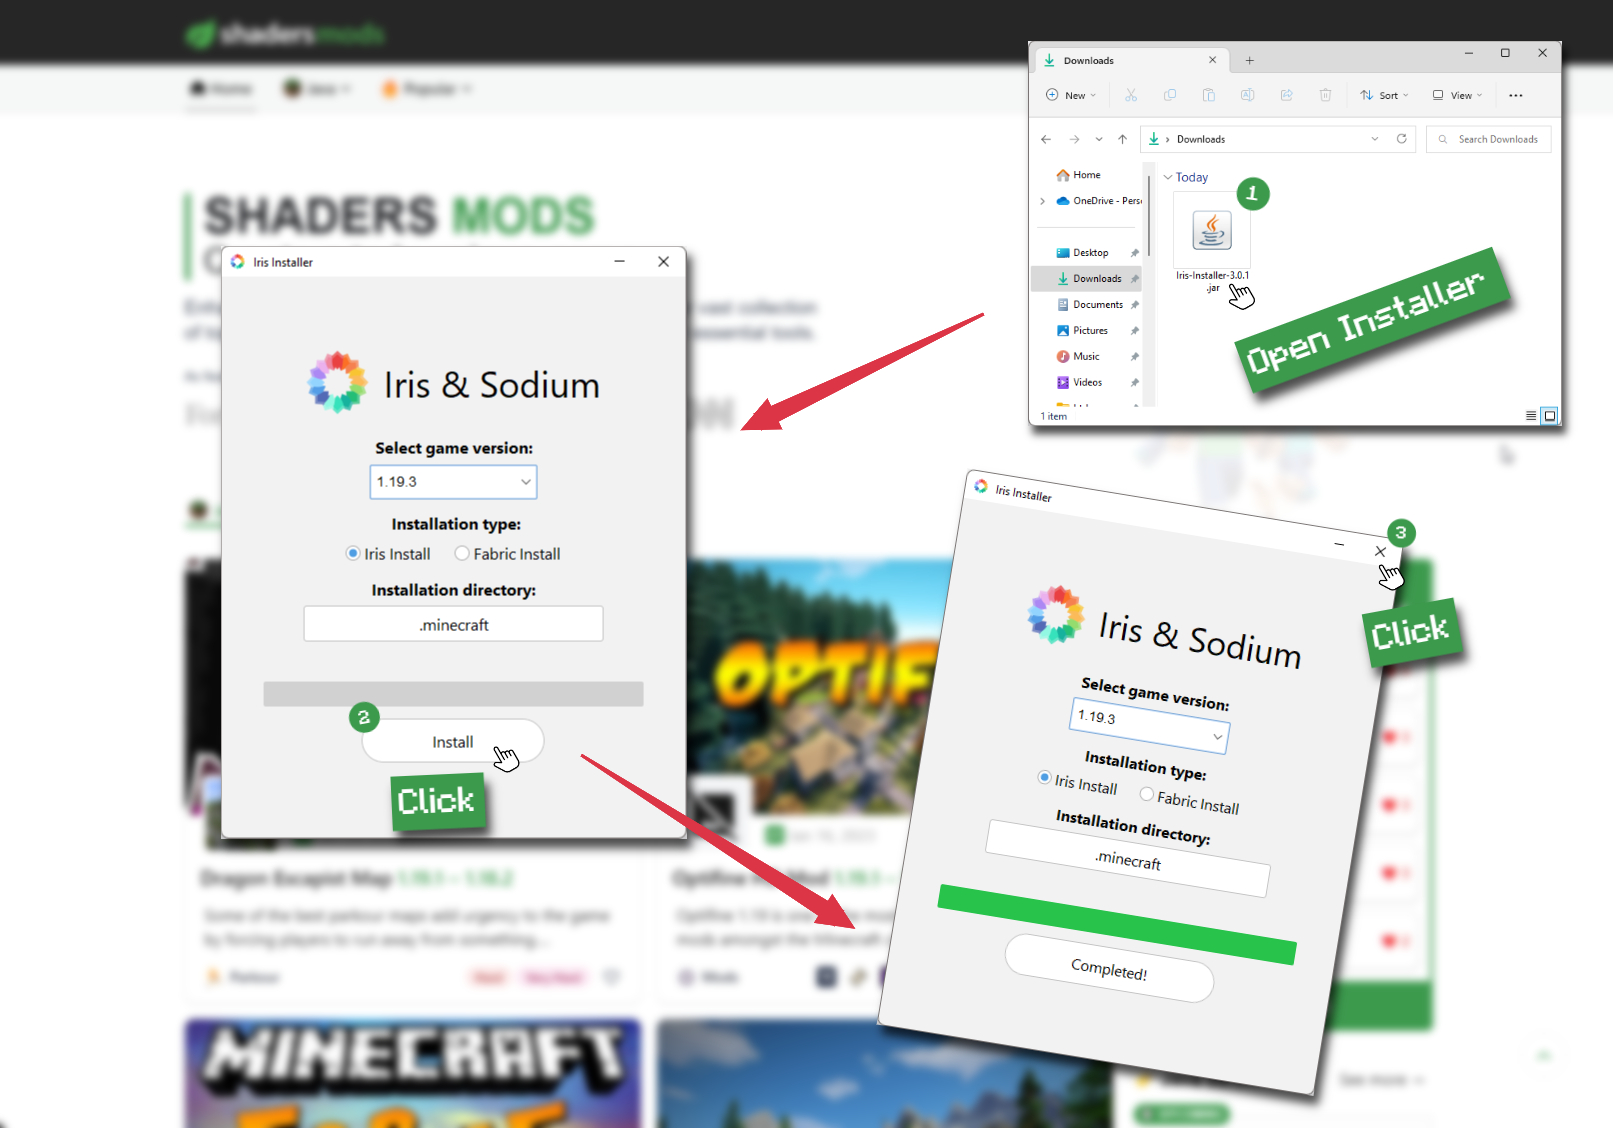
How to install Sildur's Shaders with Iris?
Download Iris Shaders
Find the latest version of the Iris Shaders installer and download it.
Download Iris InstallerInstall Iris Shaders
Open the downloaded jar file, and choose the preferred game version and installation type.
⯈ Iris Install:
If you don't plan on using any other mods with Iris, choose this option.⯈ Fabric Install:
Choose this option if you want to use Iris with Fabric and other mods. The Iris jar files will be copied to the mods folder within the .minecraft directory.
Start Installation
After selecting the game version and installation type, click the "Install" button to start the installation process.
Launch Minecraft
Start the Minecraft launcher and make sure you have the Iris profile selected.
Note
Select the Fabric profile if you opt for the Fabric installation type.
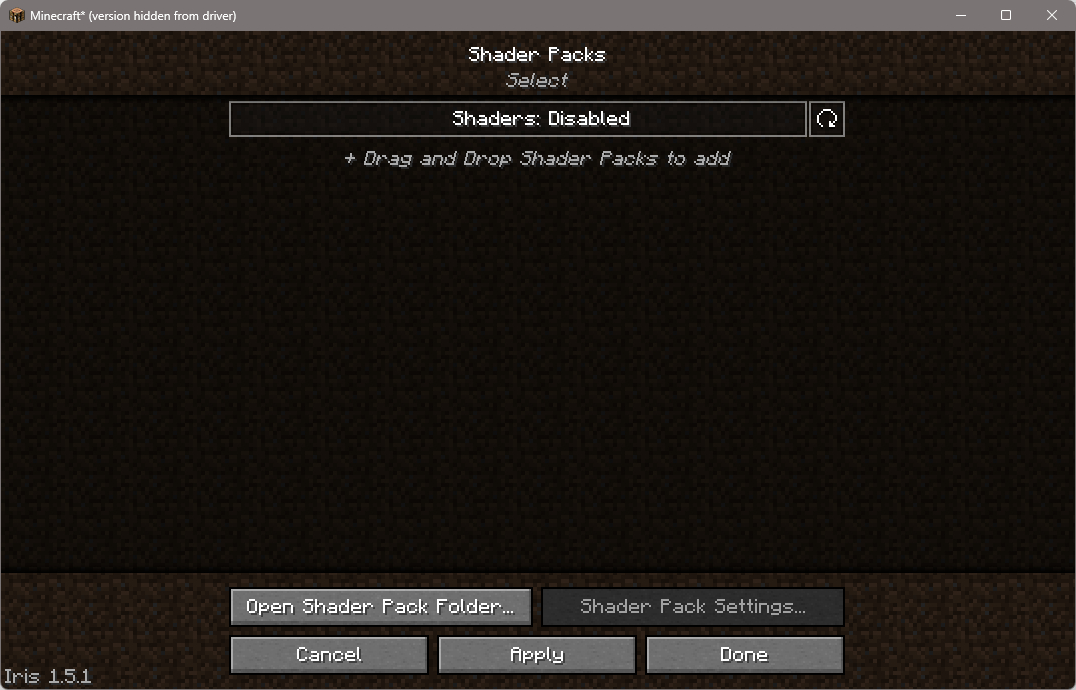
In-game Shader Menu
Open the Minecraft game and go to Options > Video Settings > Shader Packs to access the shaders menu.
Tip
To simplify the process, simply drag and drop the shader ZIP file directly into the Minecraft window, bypassing the next two steps.
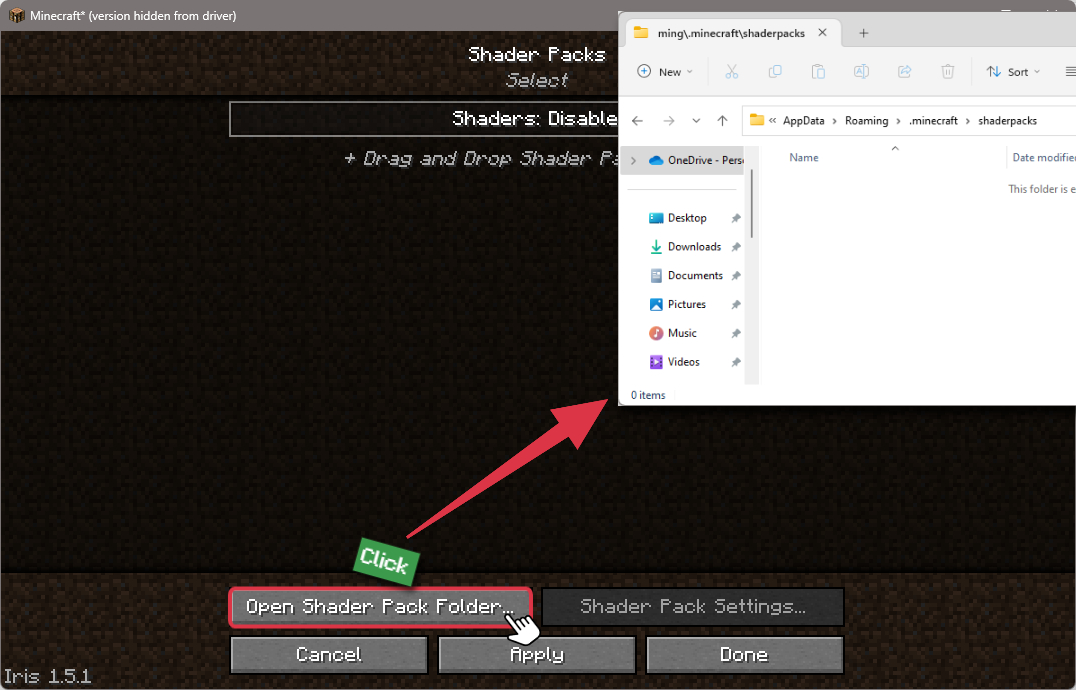
Open shaderpacks folder
Click on the "Open Shader Pack Folder" button to access the folder where shaders are stored.
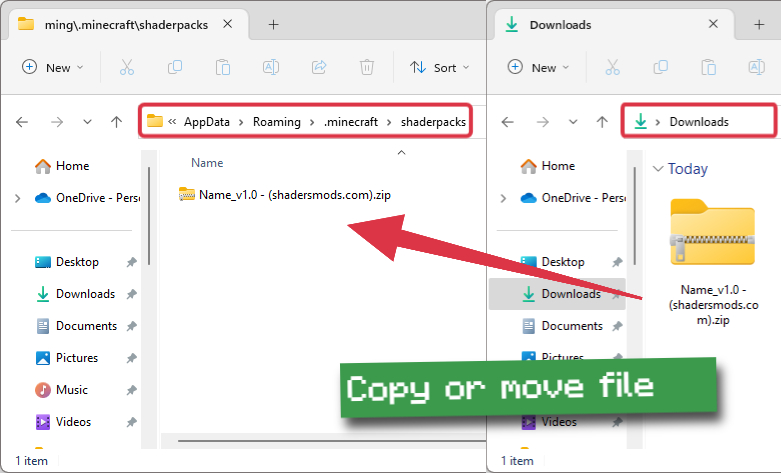
Install Sildur's Shaders
Copy or move the shaders zip file into the shaderpacks folder.
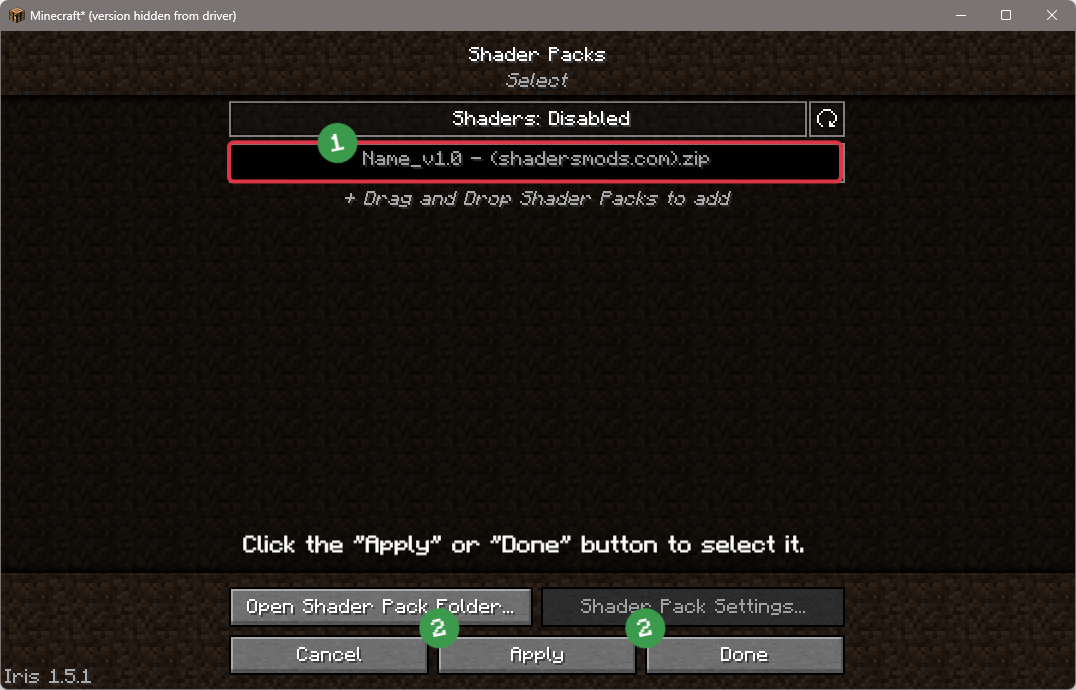
Select Sildur's Shaders
Choose installed shader pack from the list of available shaders in the options menu and click the "Apply" or "Done" button to select it.
Tip
When the shader pack is selected, its name will be changed to yellow.

Vanilla Installation Guide
Important
Sildur’s Vibrant Shaders
- Vibrant shaders feature everything, from a depth of field to volumetric lighting.
Sildur’s Enhanced Default
- Full support for default Minecraft, meaning things like night vision work fine!
- Shadows, colored shadows, underwater shadows, reflections, cel-shading, color boost, cross-process(color filer), motion blur, depth of field, and distance blur.
Sildur’s Fabulous Shaders
- This is a shader pack using the inbuild Mojang shader functions. It requires the fabulous shader option to be turned on.
Features
- Antialiasing
- Bloom
- Cel shading
- Depth of Field
- Tone mapping
- Bumpy and Blobs
Sildur’s Basic Shaders
- Cross processing.
- Motion Blur.
- Depth of Field.
- World Curvature (outdated).
- Crazy Acid shaders (outdated).
📥 Sildur's Shaders — Download
Something You Should Know
- Our links are only from the official developer, so you can be sure they are secure.
- No modifications or edits are made to the files.
Sildur's Vibrant Shaders:
Sildur's Enhanced Default:
Sildur's Basic Shaders:
Sildur's Fabulous Shaders:
🔄 Update Logs
Latest
Vibrant Shaders v1.50
- Supports MC 1.19.3
- Added an ingame option to adjust the volumetric lighting strength/amount.
- Rewrote Bloom and TAA rendering pipeline, improving performance and fixing various issues.
- Fixed sharpness issues with bloom.
- Improved TAA, sharper image, less flickering, and ghosting.
- Weather rendering is a bit glitchy right now and requires a rendering pipeline rewrite, maybe in the next update.
Enhanced Default v1.15:
- Supports MC 1.19.3
- Improved TAA, significantly reduced flickering, and reduced ghosting.
Basic Shaders v2.1:
- Supports MC 1.19.3
- Improved TAA, significantly reduced flickering, and reduced ghosting.
- Code and buffer optimizations, improving performance!
Fabulous Shaders v1.0:
- Initial release features Antialiasing (FXAA), Bloom, depth of field, cel shading, and tone-mapping (colors).
- It also supports Bumpy and Blobs from the old secret shader settings.
Comments (225)
but the shaders actually look nice
is this work for tlaucher?
doesn’t work on nether, like blinding
enhanced default links give this errors:
The resource you are looking for might have been removed, had its name changed, or is temporarily unavailable.
Great sharder no lags. Best fps man.
This shader when i put on my shaders it look exactly the same as vanilla mc.
even when i used lite. Anyone can help pls!!!
EXTREMALY NICE SHADERS PROB THE BEST EVER! O_O
nice
I think it’s the best
Its real