

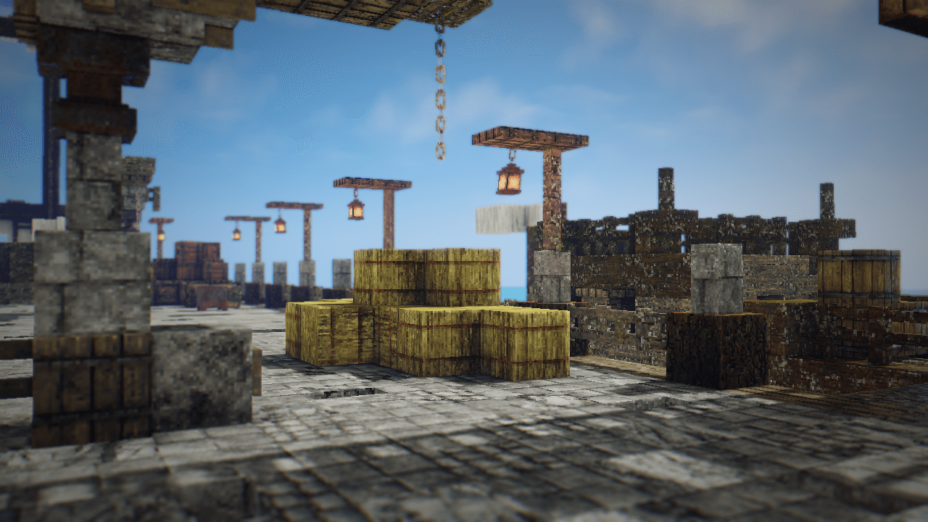
RedHat Shaders 1.19.4 → 1.18.2
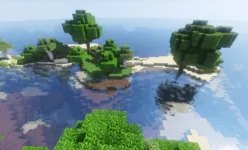
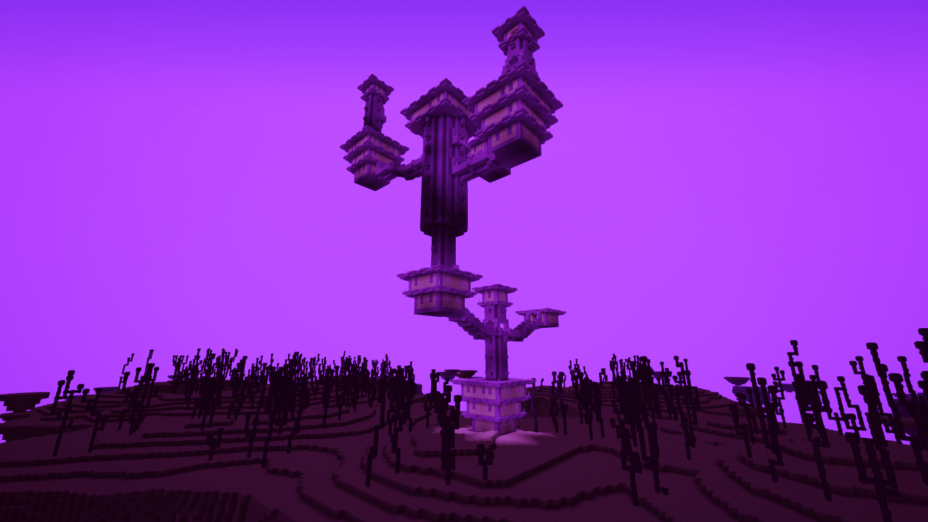
RedHat is a popular Minecraft shaderpack with vibrant colors, lighting effects, and many customization options.
| Developer | 👤mlgimposter |
|---|---|
| Style | 🔅Semi-Realistic |
| Support GPUs | |
| Loaders | |
| Performance Impact | Medium |
| Settings | 131 |
| Presets | 🛠️ Very low+4 |
| Features | Cinematic+37 |
| Created | Feb 22, 2021 |
| Updated | Apr 5, 2022 |
| Stats |
|
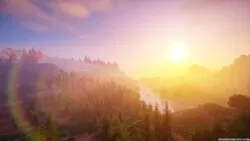
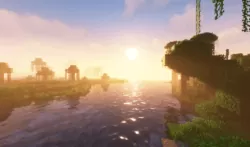
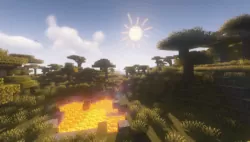
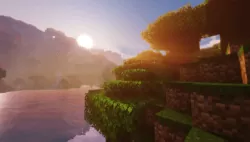
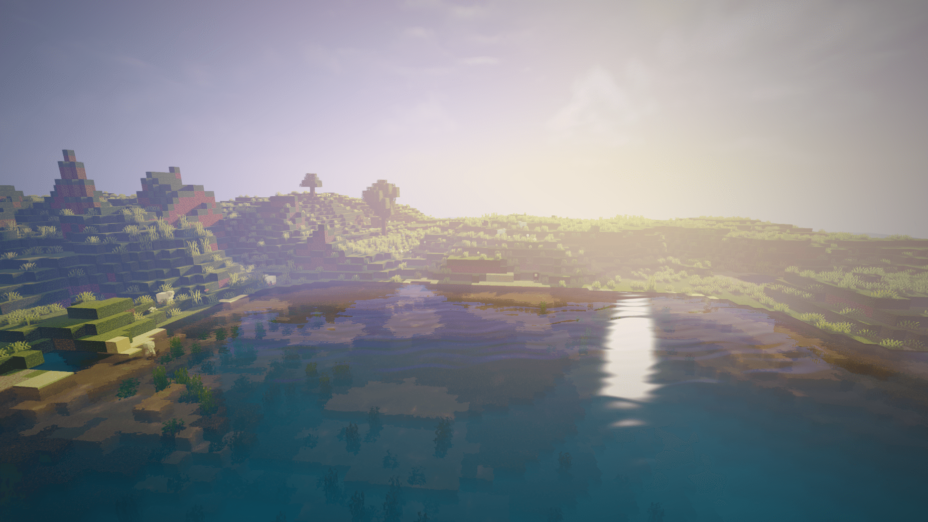
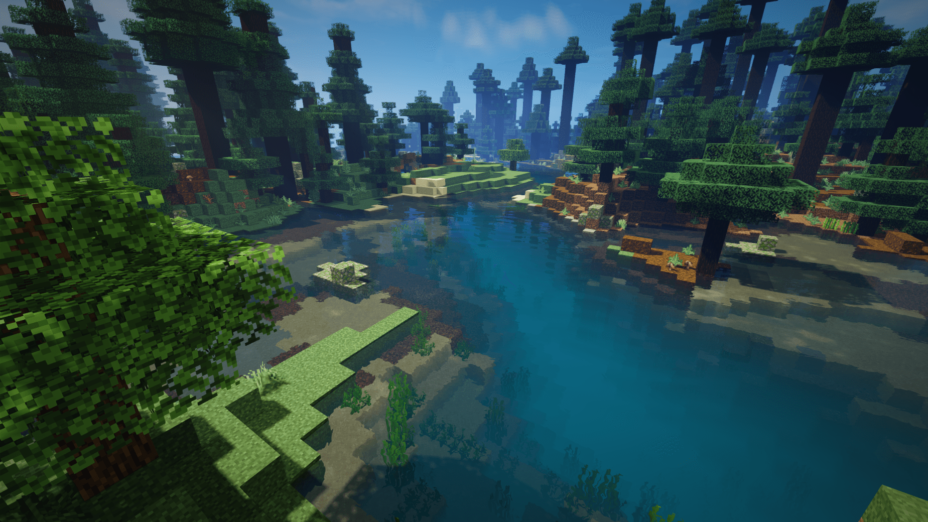
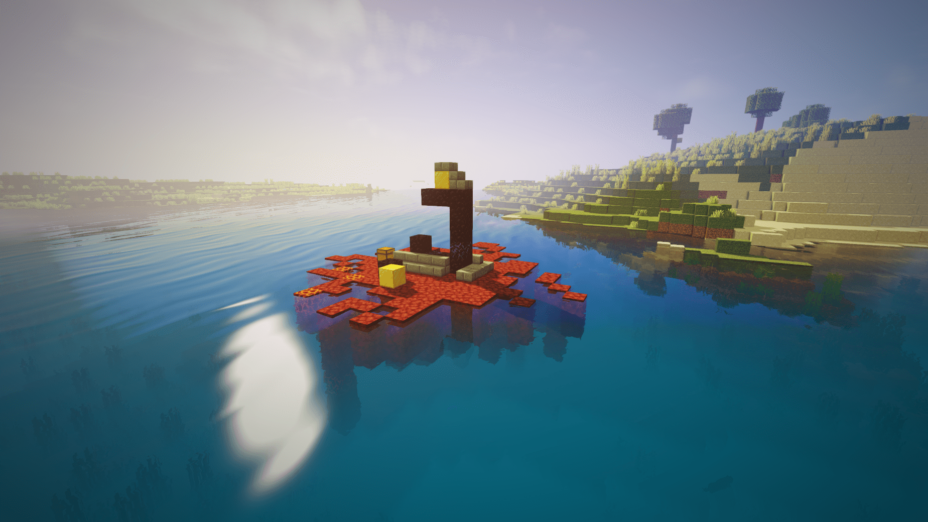
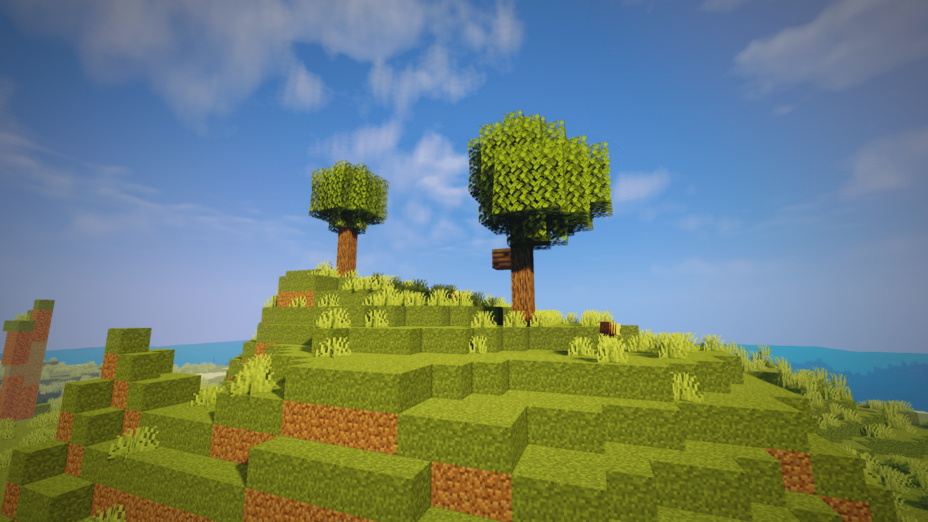
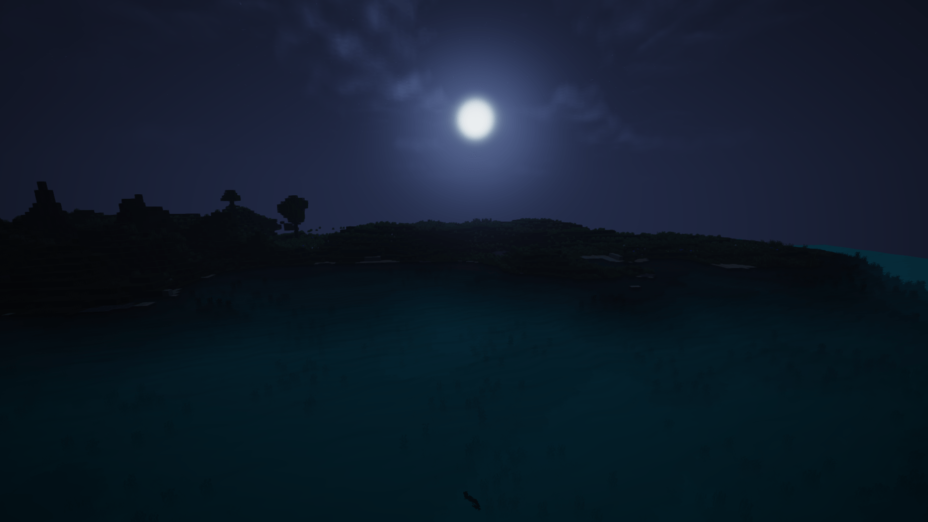
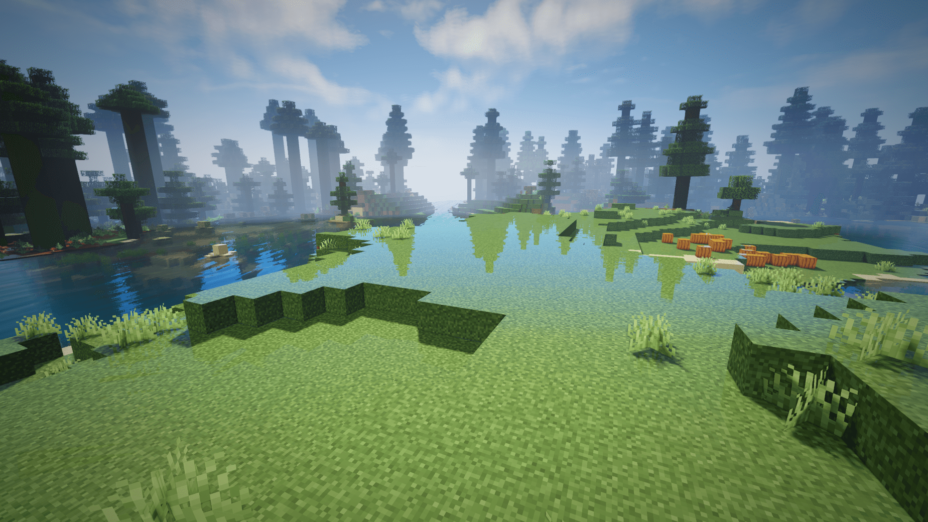
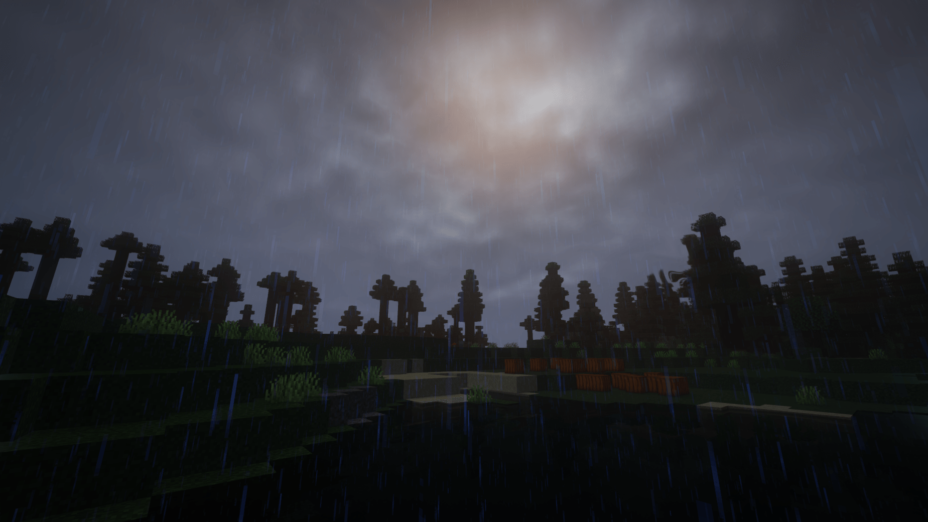
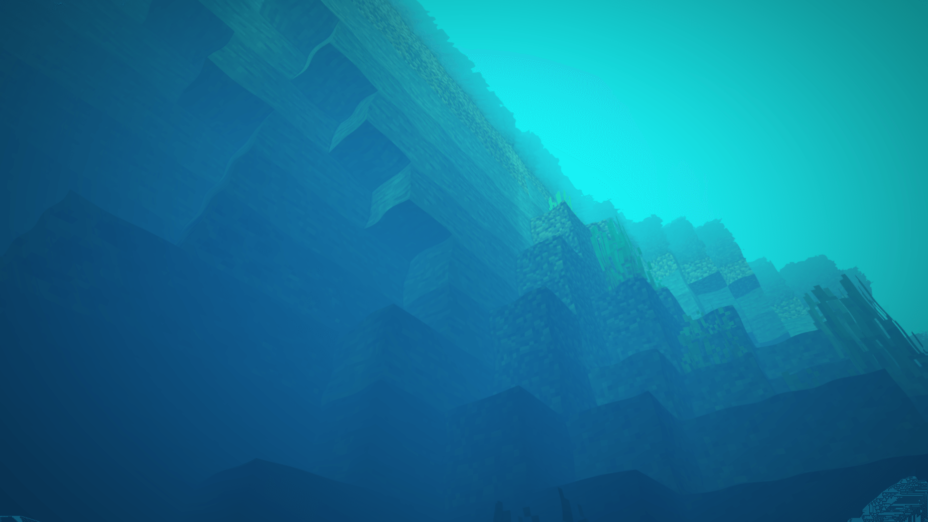
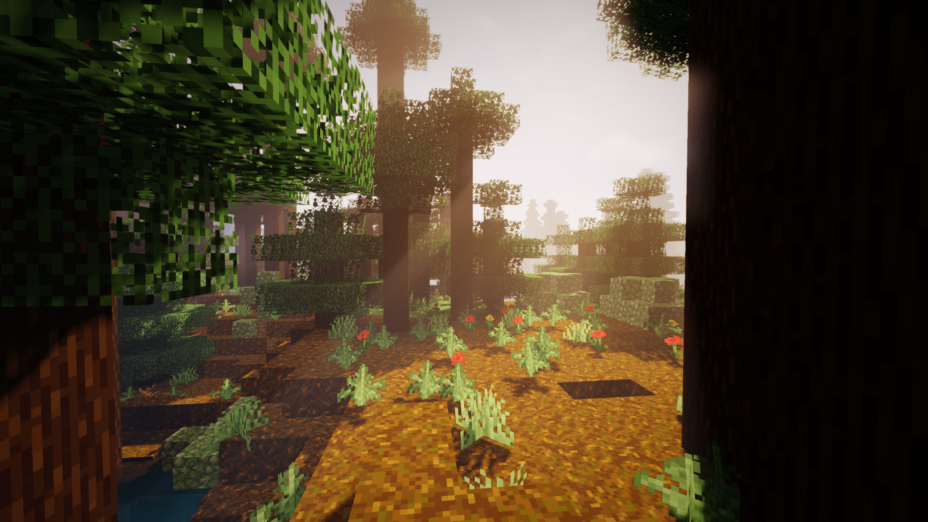
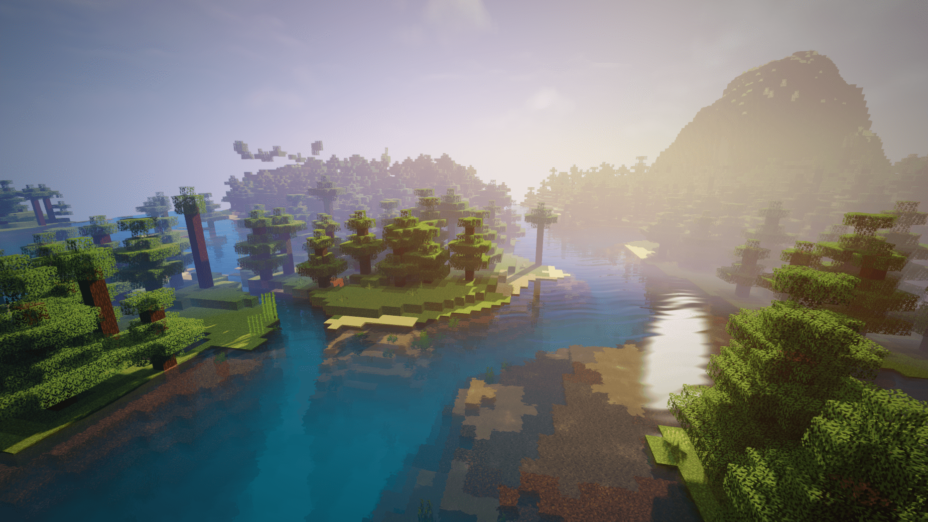
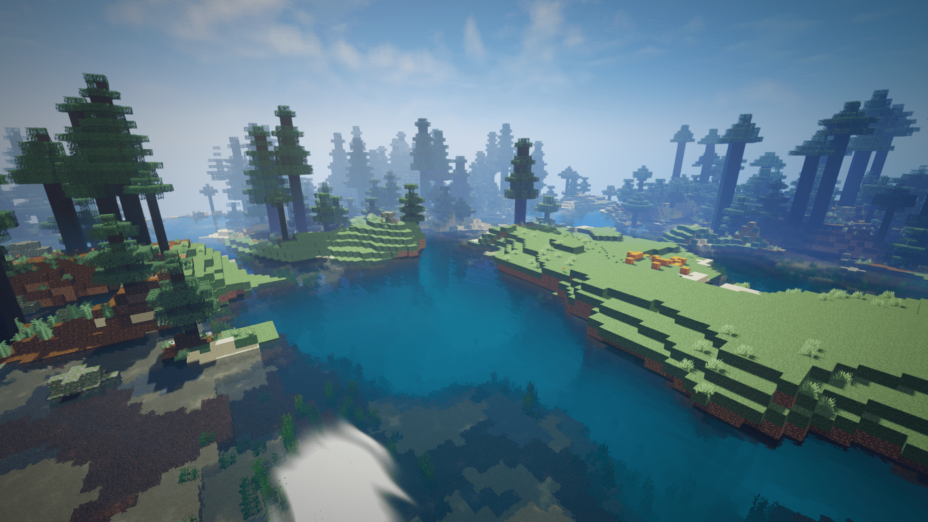
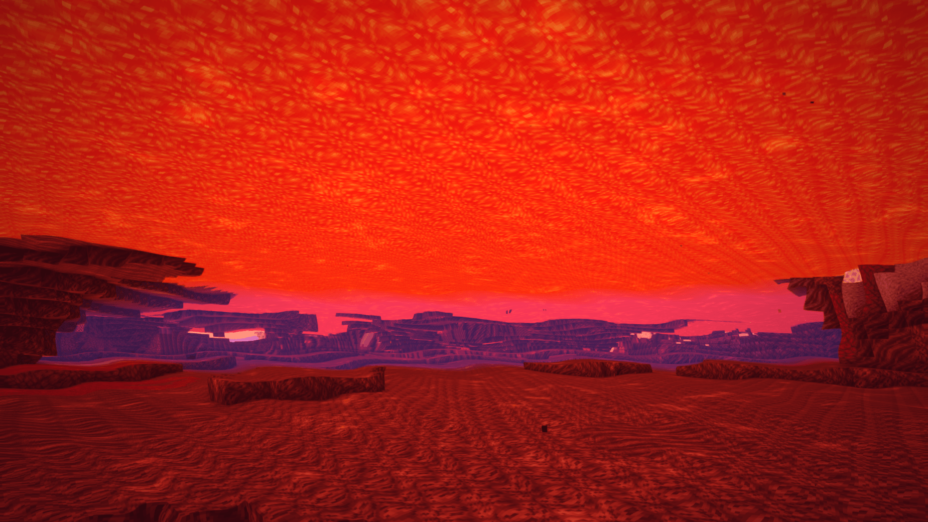
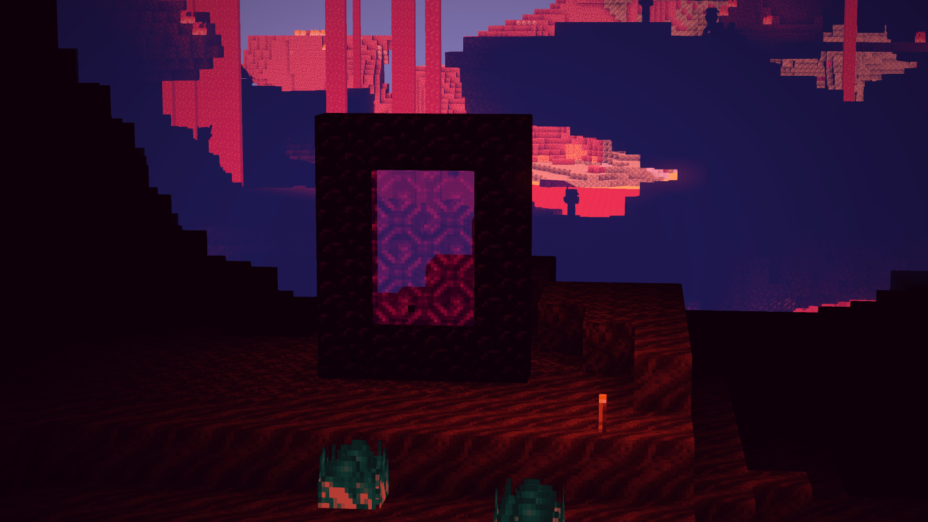
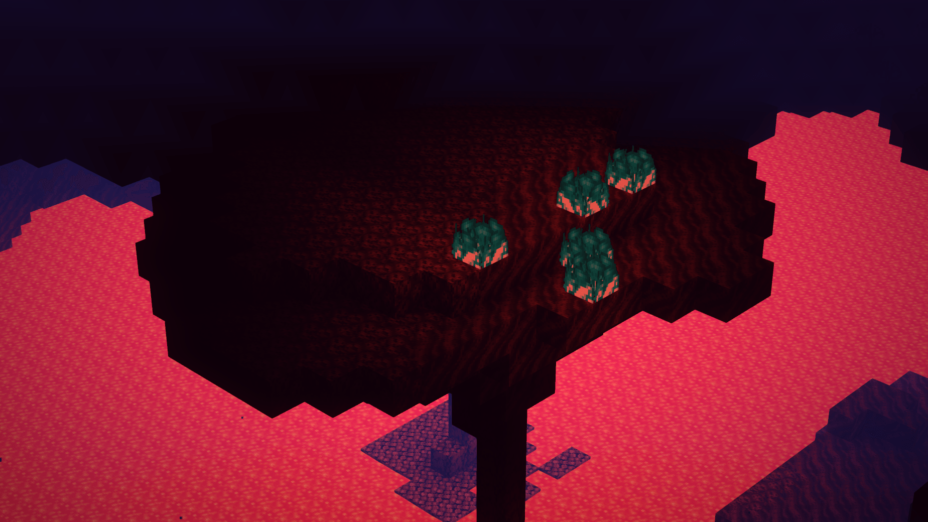
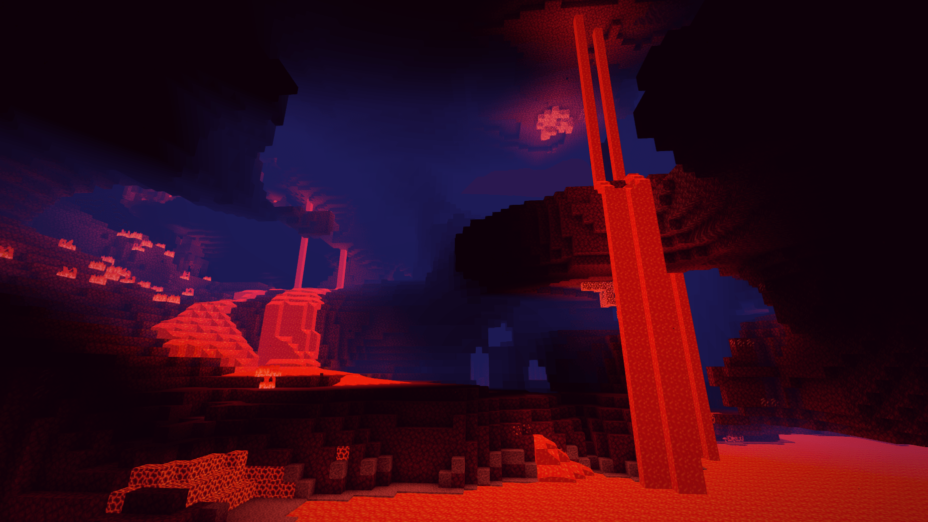
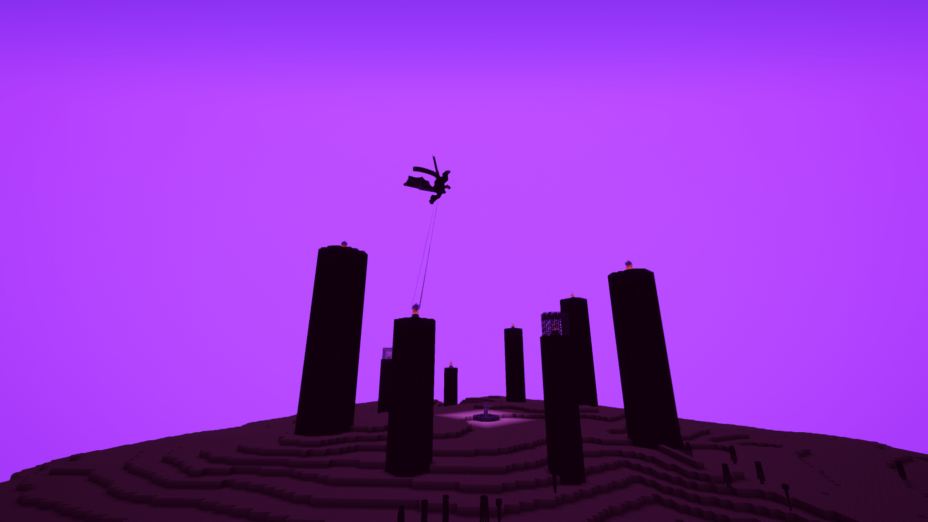
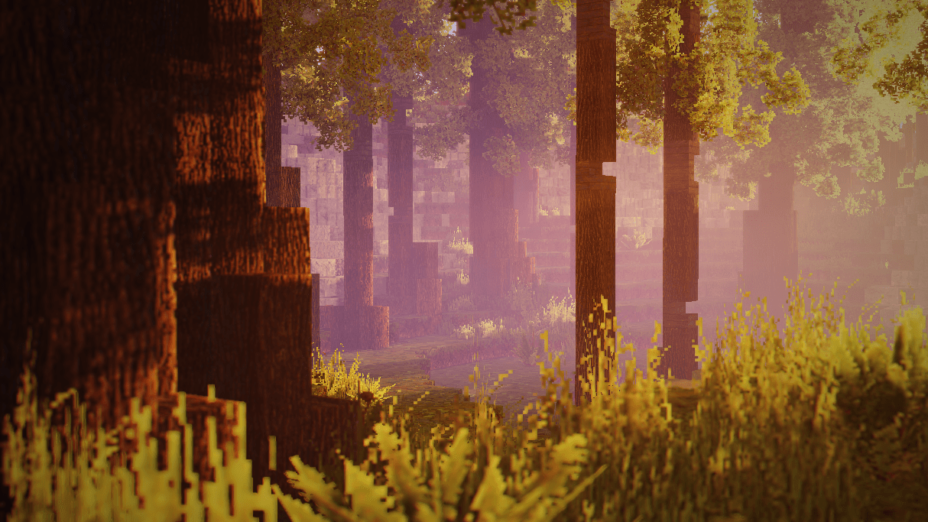
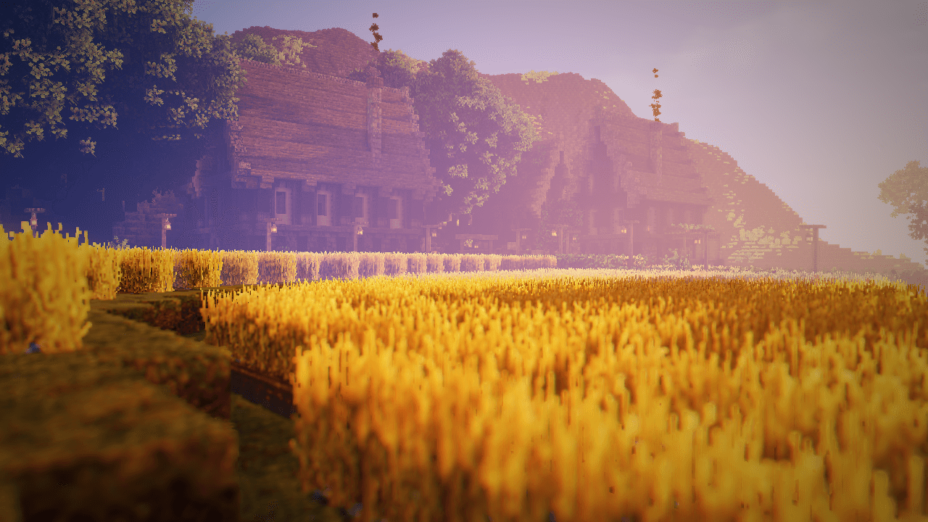
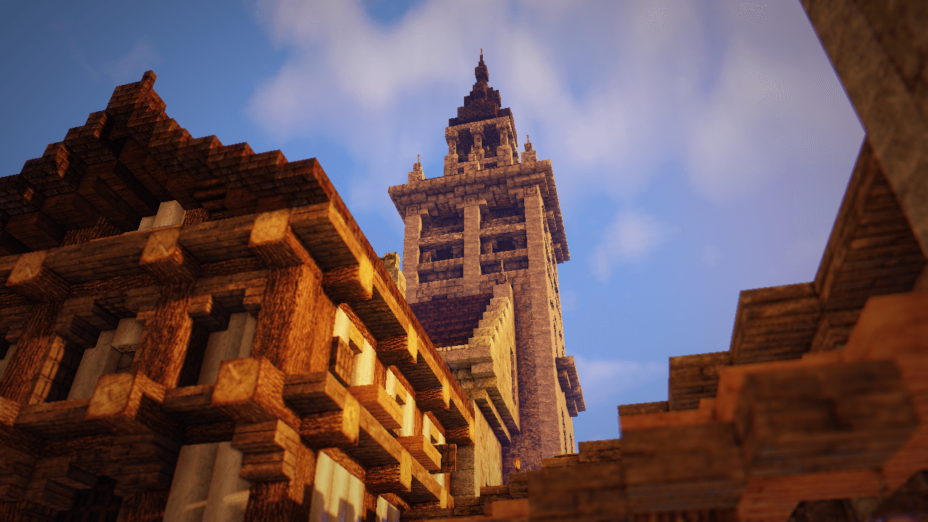
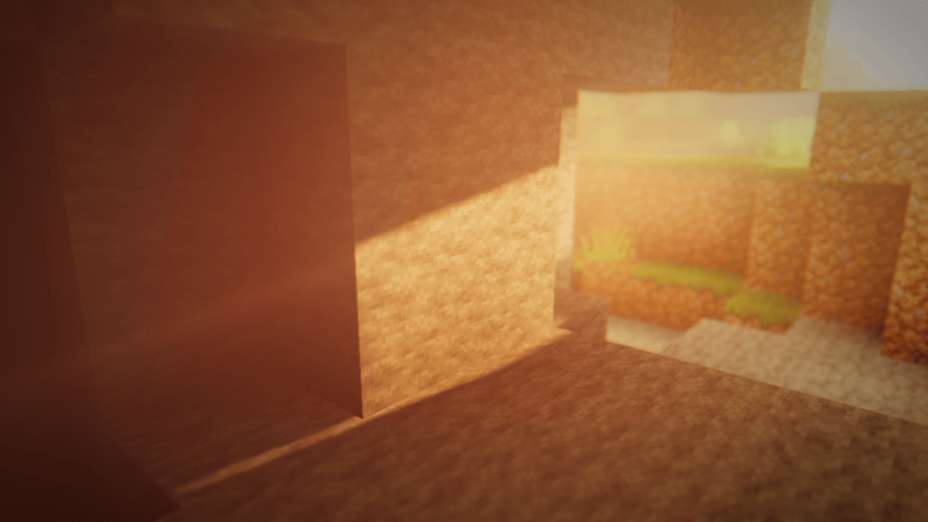
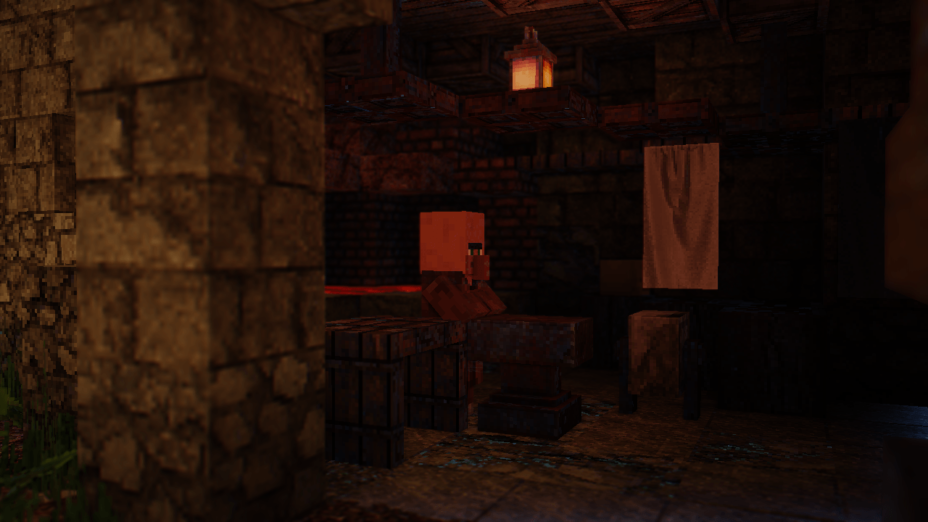
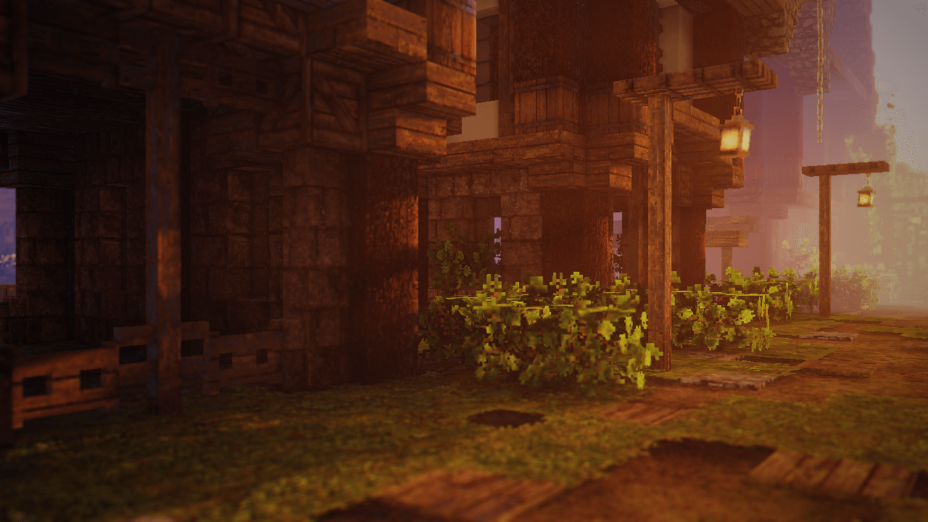
For seriously enhanced lava graphics, the right shader pack is crucial. RedHat Shaders allows the bloom from lava to really illuminate surrounding areas. These dynamic lighting effects allow for light flickering along walls, with torches working similarly. The sense of realism can be seen in caves and out in the open world as well, thanks to improved sunrises and sunsets, along with reflections. Enhanced bloom, desaturation in low-light environments, and a sky full of stars all allow for smoother and warmer lighting, both in the evening and the morning. None of these are standard in Minecraft, and performance will probably take a hit, but Redhat Shaders are easy to customize too.
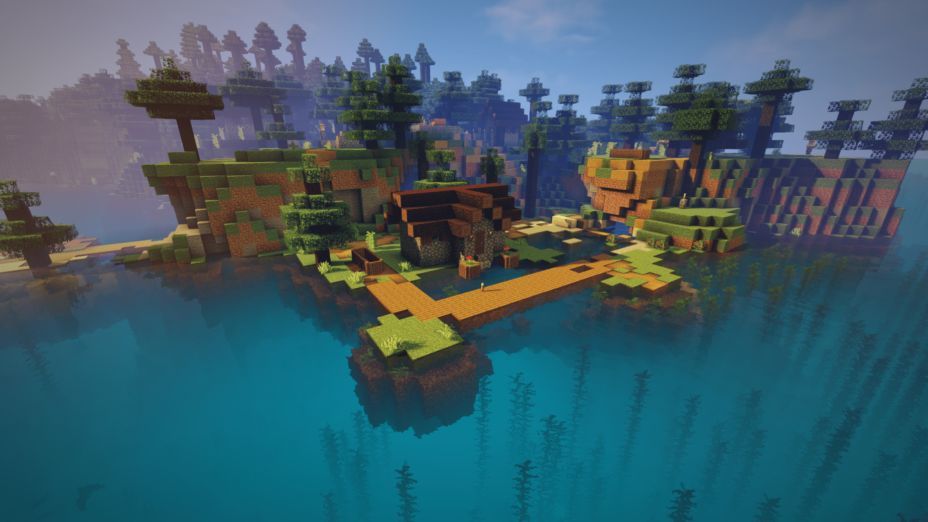
That means you can turn specific Redhat Shaders features on and off easily through a menu without any technical knowledge necessary. Just make sure you’re using an appropriate version of Minecraft, either 1.19 or older. You will also need either Optifine or Iris, as these loaders are necessary to use the Redhat shader pack. The lighting effects are superior to standard Minecraft, with realistic shadows that move along with the position of the sun in the sky, The sun and moon are rounded, too, looking more like their real-world counterparts. They allow for more a more natural appearance and really complement the updated fog effects. Overall, the improvements make a huge difference in the visual quality of the game.
- 1.19.4
- 1.19.3
- 1.19.2
- 1.19.1
- 1.19
- 1.18.2
- 1.18.1
- 1.18
- 1.17.1
- 1.17
- 1.16.5
- 1.16.4
- 1.16.3
- 1.16.2
- 1.16.1
- 1.16
- 1.15.2
- 1.15.1
- 1.15
- 1.14.4
- 1.14.3
- 1.14.2
- 1.14.1
- 1.14
- 1.13.2
- 1.13.1
- 1.13
- 1.12.2
- 1.12.1
- 1.12
- 1.11.2
- 1.11.1
- 1.11
- 1.10.2
- 1.10.1
- 1.10
- 1.9.4
- 1.9.3
- 1.9.2
- 1.9.1
- 1.9
- 1.8.9
- 1.8.8
- 1.8.7
- 1.8.6
- 1.8.5
- 1.8.4
- 1.8.3
- 1.8.2
- 1.8.1
- 1.8
- 1.7.10
- 1.7.9
- 1.7.8
- 1.7.7
- 1.7.6
- 1.7.5
- 1.7.4
- 1.7.2
- 1.7
Features
Over 37 new features are available in RedHat Shaders to enhance your gaming experience.
📊 Performance Impacts
Decrease in performance can vary from device to device, driver version, and many other factors, you should test yourself on your machine for the best result.
-
- None
- No performance decreases
-
- Small
- ~5%
-
- Medium
- ~10%
-
- High
- ~25%
-
- Extreme
- +50%
-
- Ambient OcclusionMedium
- Simulating how light interacts with objects and surfaces.
-
- Atmospheric SkySmall
- Simulates realistic atmospheric scattering.
-
- BloomSmall
- Enhance the game's lighting and create a more realistic and immersive visual experience
-
- BlurSmall
- Simulate how fast-moving objects appear to blur in a photograph or video.
-
- BrightNone
- Adjust the overall brightness of the game's graphics
-
- CausticHigh
- Simulating the way light is refracted and reflected by the water's surface
-
- CinematicExtreme
- Create more cinematic and visually-stunning scenes in the game.
-
- CustomizationNone
- Customize various aspects of the game's visual effects.
-
- Depth of FieldMedium
- Making objects closer to the camera appear sharp and in focus, while objects farther away appear out of focus and blurry.
-
- LightMedium
- Enhance the game's overall visual quality.
-
- Motion BlurHigh
- Simulates the way that fast-moving objects appear to blur in the real world.
-
- Moving CloudsMedium
- Simulates the movement of clouds across the sky and can be used to create the appearance of a dynamic and ever-changing sky
-
- Parallax WaterMedium
- Enhances the realism of water by simulating the parallax effect.
-
- Photorealistic SkyboxesMedium
- Replacing the in-game sky with high-resolution, realistic images of the sky.
-
- POMHigh
- Realism of textures by simulating the way light interacts with surfaces.
-
- Rain ReflectionsMedium
- Reflections during rainy weather by simulating the way light reflects off of wet surfaces.
-
- Realistic NightskyMedium
- More realistic and immersive night sky.
-
- Realistic RainMedium
- More natural and immersive rain experience.
-
- Realistic SkyMedium
- More realistic and immersive sky experience.
-
- Realistic WaterHigh
- More realistic and immersive water experience.
-
- ShadowsSmall
- Simulate how light is blocked and scattered by objects in the environment.
-
- Sun RaysMedium
- Simulate the appearance of sunlight streaming through trees leaves, objects, clouds, or other atmospheric conditions.
-
- SunriseSmall
- More realistic and immersive sunrise experience.
-
- SunsetSmall
- More realistic and immersive sunset experience.
-
- TAAMedium
- Smooth out jagged edges and reduce the "stair-stepping" effect that can occur when rendering graphics.
-
- Tone MappingSmall
- Adjusting the brightness, contrast, and saturation levels.
-
- VignetteNone
- Darkening effect around the edges of the screen
-
- Volumetric CloudsHigh
- Simulate the way that clouds appear to have volume and depth in the real world rather than just flat textures.
-
- Volumetric FogHigh
- Create the appearance of fog that is lit from within, casting shadows and creating a sense of depth.
-
- Volumetric LightHigh
- Simulating the scattering of light in the atmosphere and in the environment.
-
- Water ReflectionsMedium
- Simulating reflections on the surface of the water.
-
- Water WavesMedium
- Movement of waves on the surface of the water.
-
- Waving GrassSmall
- Simulating the way it moves and sways in the wind.
-
- Waving LavaSmall
-
- Waving PlantsSmall
- Simulating the way they move and sway in the wind.
-
- Waving TreesSmall
- Adds movement to the leaves and branches of trees, making them look more alive and realistic.
-
- Wet EffectSmall
There are 5 profiles pre-built into RedHat Shaders to adjust the level of intensity of these effects.
| Profiles |
Very Low |
Low |
Medium |
High |
Very High |
|---|---|---|---|---|---|
Cinematic Bars | |||||
Bloom | |||||
Upper Clouds | |||||
Chromatic Aberration | |||||
Lower Clouds | |||||
Dirty Lens | |||||
Depth Of Field | |||||
Round Moon | |||||
Round Sun | |||||
Auto Exposure | |||||
Fake Auto Exposure | |||||
Grain | |||||
Fog | |||||
Crepuscular Rays | |||||
Lens Effects | |||||
Parallax Occlusion Mapping | |||||
Rain Drops | |||||
Shadow Acne Fix | |||||
Filtering | |||||
Shadows Resolution | |||||
Screen Space AO | |||||
SSS Amount | |||||
Stars | |||||
Vignette | |||||
Blur Amount | |||||
VL Multiplier | |||||
Quality | |||||
Volumetric Lighting | |||||
Water Caustics | |||||
Water Reflections | |||||
Waving Water |
RedHat Shaders allow you to change more than 131 settings to suit your needs.
| Settings |
Description |
Options |
|---|---|---|
| RedHat | Made by mlgimposter, credits to Chocapic13, Septonious, CrankerMan, Capt Tatsu, Robobo1221 and CYBOXGaming |
|
| Post-Processing Toggle effects such as Lens Flares | ||
| Bloom | ||
| Bloom | Adds a blur effect on light sources such as torches. [x] Low/Moderate performance impact. |
|
| Bloom Strength | Adjust the strength of bloom. |
|
| Cinematic Effects | ||
| Grain | ||
| Grain | Adds a grain effect on the visual when you're in dark places. [+] Doesn't affect performance. |
|
| Grain Check | Adjust the darkness the effect needs to activate. |
|
| Grain Density | Adjust the strength of the effect |
|
| Cinematic Bars | ||
| Cinematic Bars | Adds 2 black bars to simulate movies. [+] Doesn't affect performance. |
|
| Ratio | Adjust the ratio/thickness of the black lines. |
|
| Opacity | Adjust the opacity of the black lines. |
|
| Posterize | ||
| Posterize | Adds color banding. |
|
| Colors Amount | Adjust the amount of colors with posterization. |
|
| Depth of Field DOF Options | ||
| Depth Of Field | Simulates eye focusing. [+] Very useful for screenshots. [x] Moderate performance impact. |
|
| Distant Blur | Makes everything far blurry. [!] Requires depth of field. |
|
| Hexagonal Bokeh | Uses an hexagonal bokeh for depth of field, instead of the circular one. |
|
| Lens Size | Adjust the lens size of the camera when using Depth of Field. |
|
| Chromatic Aberration | ||
| Chromatic Aberration | Adds a fringe to the corners of the visual. [!] Requires Depth of Field. |
|
| Strength | Adjust the strength of the fringe. |
|
| Fringe Color | Customize the color of the fringe. |
|
| Vignette Toggle vignette and change strength | ||
| Vignette | Makes the borders of the visual darker. [x] Low/Moderate performance impact. |
|
| Vignette Strength |
| |
| Lens Effects Options Toggle many sun effect | ||
| Lens Effects | Simulates camera effects such as lens flares. [+] Little performance impact. |
|
| Lens Flares | Makes Lens Flares show up when looking at the sun. [x] Low/Moderate performance impact. [!] Requires lens effects. |
|
| Dirty Lens | Adds dirtiness on the visual, simulating dirty camera and glasses. [!] Requires lens effects. |
|
| Anamorphic Lens | Simulates eye lens. [!] Requires lens effects. [+] Little performance impact. |
|
| Glowing Sun | Makes sun brighter to simulate dirty glasses. [+] Little performance impact and looks awesome with volumetric light. [!] Requires lens effects. |
|
| Glowing Sun Strength | Adjust the strength of glowing sun. |
|
| Colors Colors settings | ||
| Color Preset |
| |
| Lighting Color | ||
| Sunrise Red Amount |
| |
| Sunrise Green Amount |
| |
| Sunrise Blue Amount |
| |
| Noon Red Amount |
| |
| Noon Green Amount |
| |
| Noon Blue Amount |
| |
| Sunset Red Amount |
| |
| Sunset Green Amount |
| |
| Sunset Blue Amount |
| |
| Midnight Red Amount |
| |
| Midnight Green Amount |
| |
| Midnight Blue Amount |
| |
| Tonemap & Color Effects | ||
| Tonemap Operator | Change how the colors of the shaderpack are seen. [+] Little performance impact. |
|
| Auto Exposure | ||
| Fake Auto Exposure | Simulates dynamic exposure. [+] Doesn't affect performance. [!] Only visible when looking at the sun, and requires lens effects. |
|
| Strength | Adjust the brightness of Fake Auto Exposure. |
|
| Auto Exposure | Makes bright places slightly brighter while you're in dark places. [+] Doesn't affect performance. |
|
| Strength | Adjust the brightness of Auto Exposure. |
|
| HDR | ||
| HDR | A fake version of the original HDR, which lets you use colors over the 255 values of RGB. |
|
| HDR Multiplier | HDR Multiplier. |
|
| Minimum Range |
| |
| Maximum Range |
| |
| Night Desaturation | ||
| Night Desaturation |
| |
| Desaturation Strength |
| |
| Saturation |
| |
| Water Colors | ||
| Underwater Operator |
| |
| Red |
| |
| Green |
| |
| Blue |
| |
| Opacity |
| |
| Torch Color | ||
| Red Amount |
| |
| Green Amount |
| |
| Blue Amount |
| |
| Fog Color | ||
| Red Amount |
| |
| Green Amount |
| |
| Blue Amount |
| |
| Sky Color | ||
| Red Amount |
| |
| Green Amount |
| |
| Blue Amount |
| |
| Dynamic Sky Color | Changes the sky color depending on what time it is. [+] No performance impact. |
|
| RGB Mode | ||
| RGB Mode |
| |
| Red Amount |
| |
| Green Amount |
| |
| Blue Amount |
| |
| Atmospherics | ||
| Clouds Options | ||
| Lower Clouds | Generates clouds using noise in the sky. [x] Medium performance impact. |
|
| Upper Clouds | Generates clouds using noise in the sky. [x] Medium performance impact. |
|
| Clouds Speed | Adjust the speed of the clouds. |
|
| Light Shafts | ||
| Volumetric Light (3D) | ||
| Volumetric Lighting | Adds 3D light shafts. [+] Look way better than Crepuscular Rays. [x] Has a heavy performance impact. |
|
| Quality | Quality of the light shafts. [+] High quality can replace high amounts of blur and look very nice. [x] Too high values are very performance heavy. |
|
| VL Multiplier | Simple VL Multiplier |
|
| Blur Amount | Blur amount applied on the light shafts. [+] Fixes dithering when quality is set to low values. [x] Could have a few artifacts. |
|
| Crepuscular Rays (2D) | ||
| Crepuscular Rays | Adds 2D light shafts. [+] Less performance heavy than Volumetric Light. [x] Has a small impact on performance, and looks worse than VL |
|
| Shafts Amount | Adjust the amount of crepuscular rays. |
|
| Fog | ||
| Fog | Adds fog. [x] Low/Medium performance impact. [!] Could cause issues with specular reflections. |
|
| Fog Density | Adjust the density of the fog. |
|
| Round Moon | Makes the moon round. [+] Barely affects performance. |
|
| Round Sun | Makes the sun round. [+] Barely affects performance. |
|
| Stars | Generates stars with fBm. [x] Low performance impact. |
|
| Lighting Lighting options | ||
| Shadows Shadows settings | ||
| Filtering | [+] Filters shadows and makes them smoother. [x] High performance hit |
|
| Shadows Resolution | Adjusts the resolution of shadows. [x] High values reduce shadow distance and have impact on performance. |
|
| Shadow Distance | Adjusts the distance shadows are shown. [x] High values reduce shadow quality and have impact on performance. |
|
| Shadow Darkness | Adjusts the darkness of shadows. |
|
| Shadow Fixes | ||
| Shadow Acne Fix | [+] Fixes shadow acne. [x] Reduces shadow quality and may slightly affect performance. |
|
| Cave Leak Fix | Fixes random lightning inside caves or large structures. |
|
| Water Leak Fix | Fixes random lightning inside large oceans while being underwater. |
|
| Emissive | ||
| Torch Intensity |
| |
| Torch Atten | How much torch light will be attenued |
|
| Torch Mult | Torch lightmap attenuation function, where x is torch light from minecraft lightmap : ((x*mult)^atten)*intensity |
|
| Jitter Speed |
| |
| Water Caustics | ||
| Water Caustics |
| |
| Caustics Strength |
| |
| Caustics Size |
| |
| Caustics Speed |
| |
| Caustics Style |
| |
| Light Shafts | ||
| Volumetric Light (3D) | ||
| Volumetric Lighting | Adds 3D light shafts. [+] Look way better than Crepuscular Rays. [x] Has a heavy performance impact. |
|
| Quality | Quality of the light shafts. [+] High quality can replace high amounts of blur and look very nice. [x] Too high values are very performance heavy. |
|
| VL Multiplier | Simple VL Multiplier |
|
| Blur Amount | Blur amount applied on the light shafts. [+] Fixes dithering when quality is set to low values. [x] Could have a few artifacts. |
|
| Crepuscular Rays (2D) | ||
| Crepuscular Rays | Adds 2D light shafts. [+] Less performance heavy than Volumetric Light. [x] Has a small impact on performance, and looks worse than VL |
|
| Shafts Amount | Adjust the amount of crepuscular rays. |
|
| Sunlight Amount | Adjust the amount of sunlight. |
|
| Moonlight Amount | Adjust the amount of moonlight. |
|
| Screen Space Ambient Occlusion | ||
| Screen Space AO | Makes corners of blocks, mostly of dark areas, darker. [x] Moderate impact on performance. [!] If SSAO is set to off, the shaderpack will automatically use Minecraft's AO. |
|
| SSAO Quality | Modify the quality of the shader's AO. [x] High values will cause big impacts on performance. |
|
| Material & World | ||
| Parallax Occlusion Mapping | ||
| Parallax Occlusion Mapping | Requires a resource pack that supports POM |
|
| POM Resolution | Set this to the resolution of the resource-pack |
|
| Reflections Toggle reflections effects | ||
| Rain Reflections | Makes blocks look wet when raining |
|
| Water Reflections |
| |
| Waving Objects Toggle waving plants, flowers etc. | ||
| World Time Animation |
| |
| Waving Geometry | ||
| Waving Water |
| |
| Waving Bushes |
| |
| Waving Grass |
| |
| Waving Vines |
| |
| Waving Fire |
| |
| Waving Flowers |
| |
| Waving lily pads |
| |
| Waving Leaves |
| |
| Waving Mushrooms |
| |
| Waving Nether Warts |
| |
| Waving Saplings |
| |
| Waving Metallics |
| |
| Waving Corals |
| |
| Waving Camera & Hand | ||
| Waving Hand | Animates your fist. [+] Doesn't affect performance. |
|
| Waving Camera | Animates your character. [+] Doesn't affect performance. [-] Could lead to motion sickness in some people |
|
| SSS Amount |
|
How To Install RedHat Shaders
- Support Forge / Vanilla
- Extra features
- Good performance
- Support Fabric / Quilt
- Better performance, depend on your hardware
- No modding required Support Forge
- No modding required Older versions of Minecraft are supported
Optifine Installation Guide
Note
Your device must have Java installed to run the Forge and Optifine installers.
Quick Java Installation Guide
-
Download Java
Download the Java installer from the official website here.
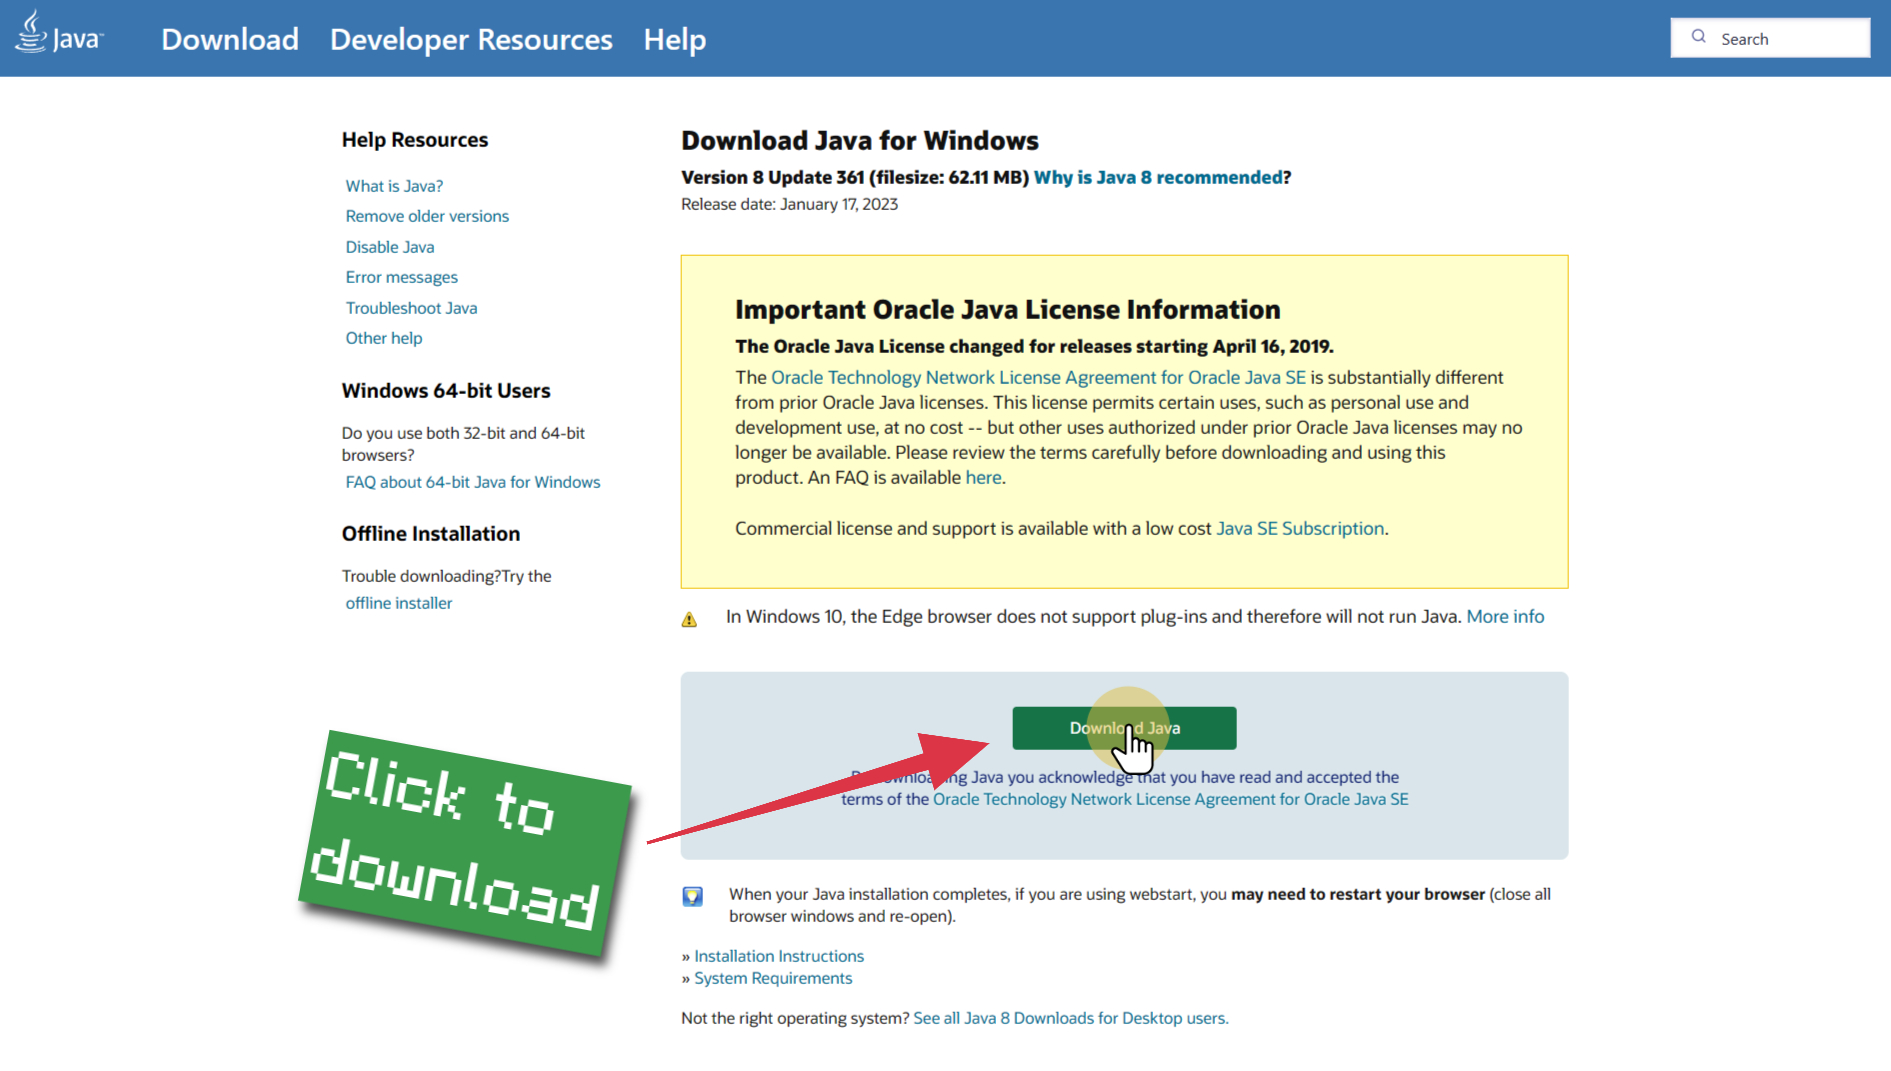
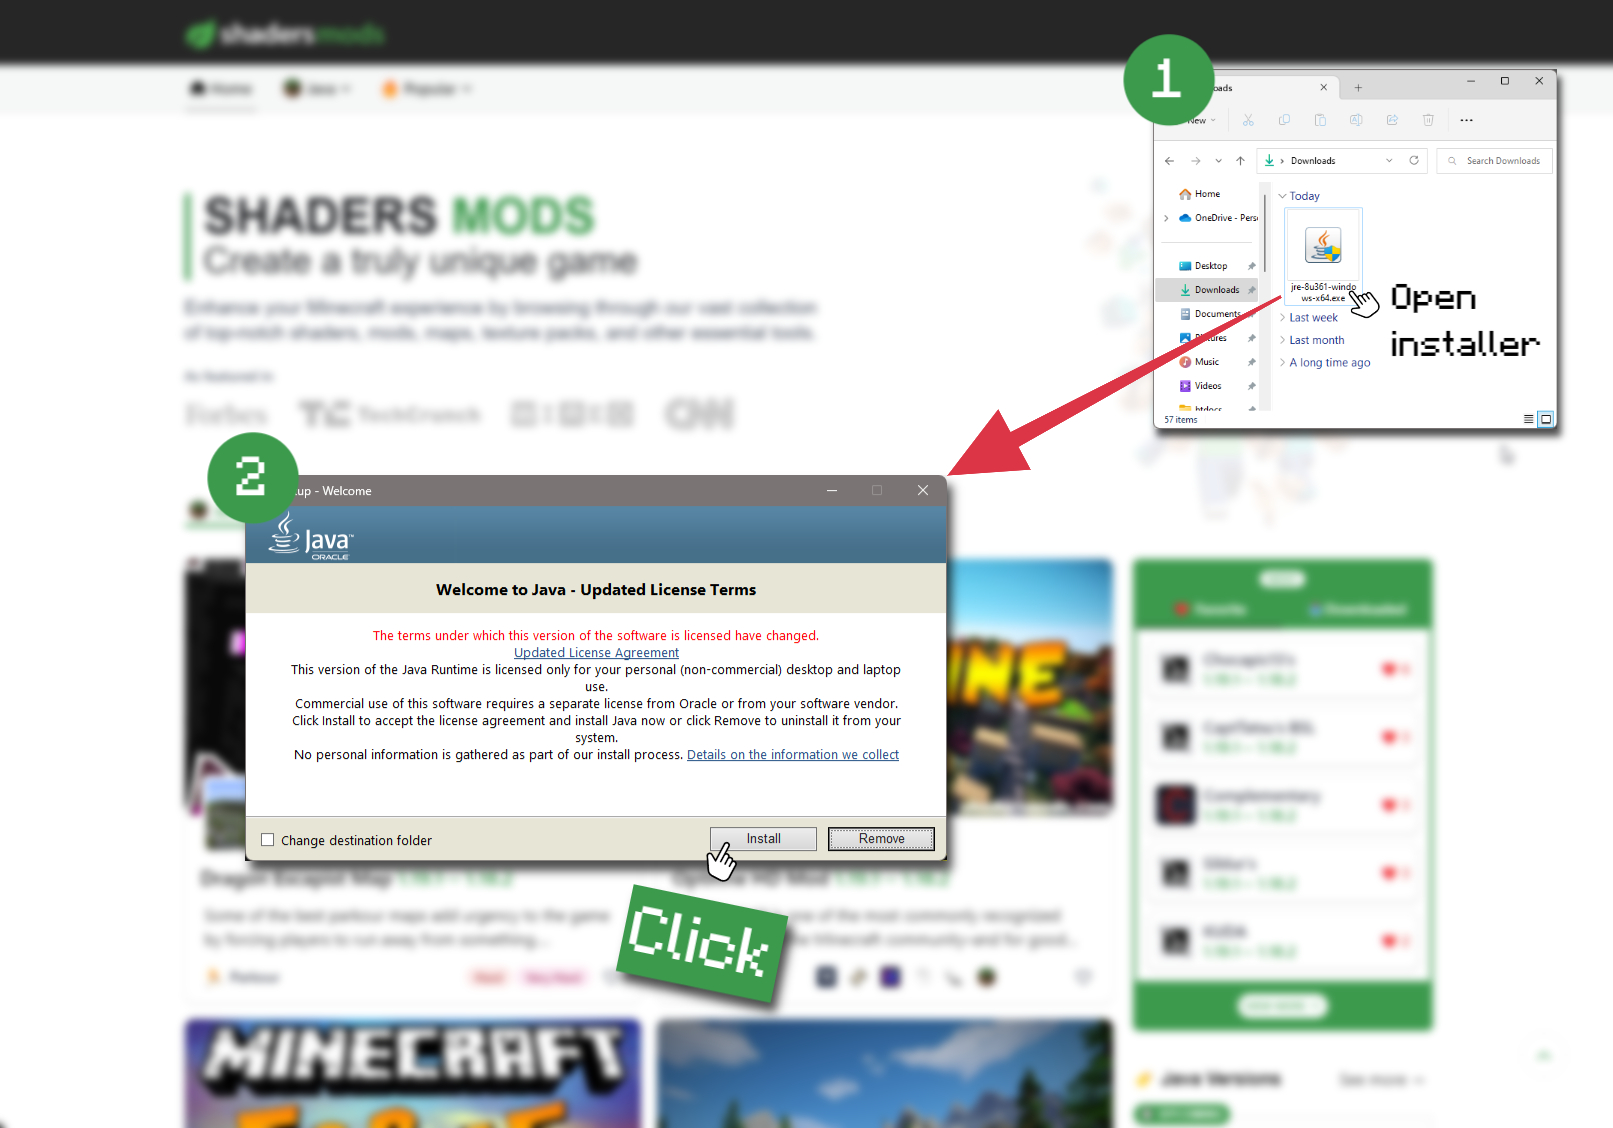
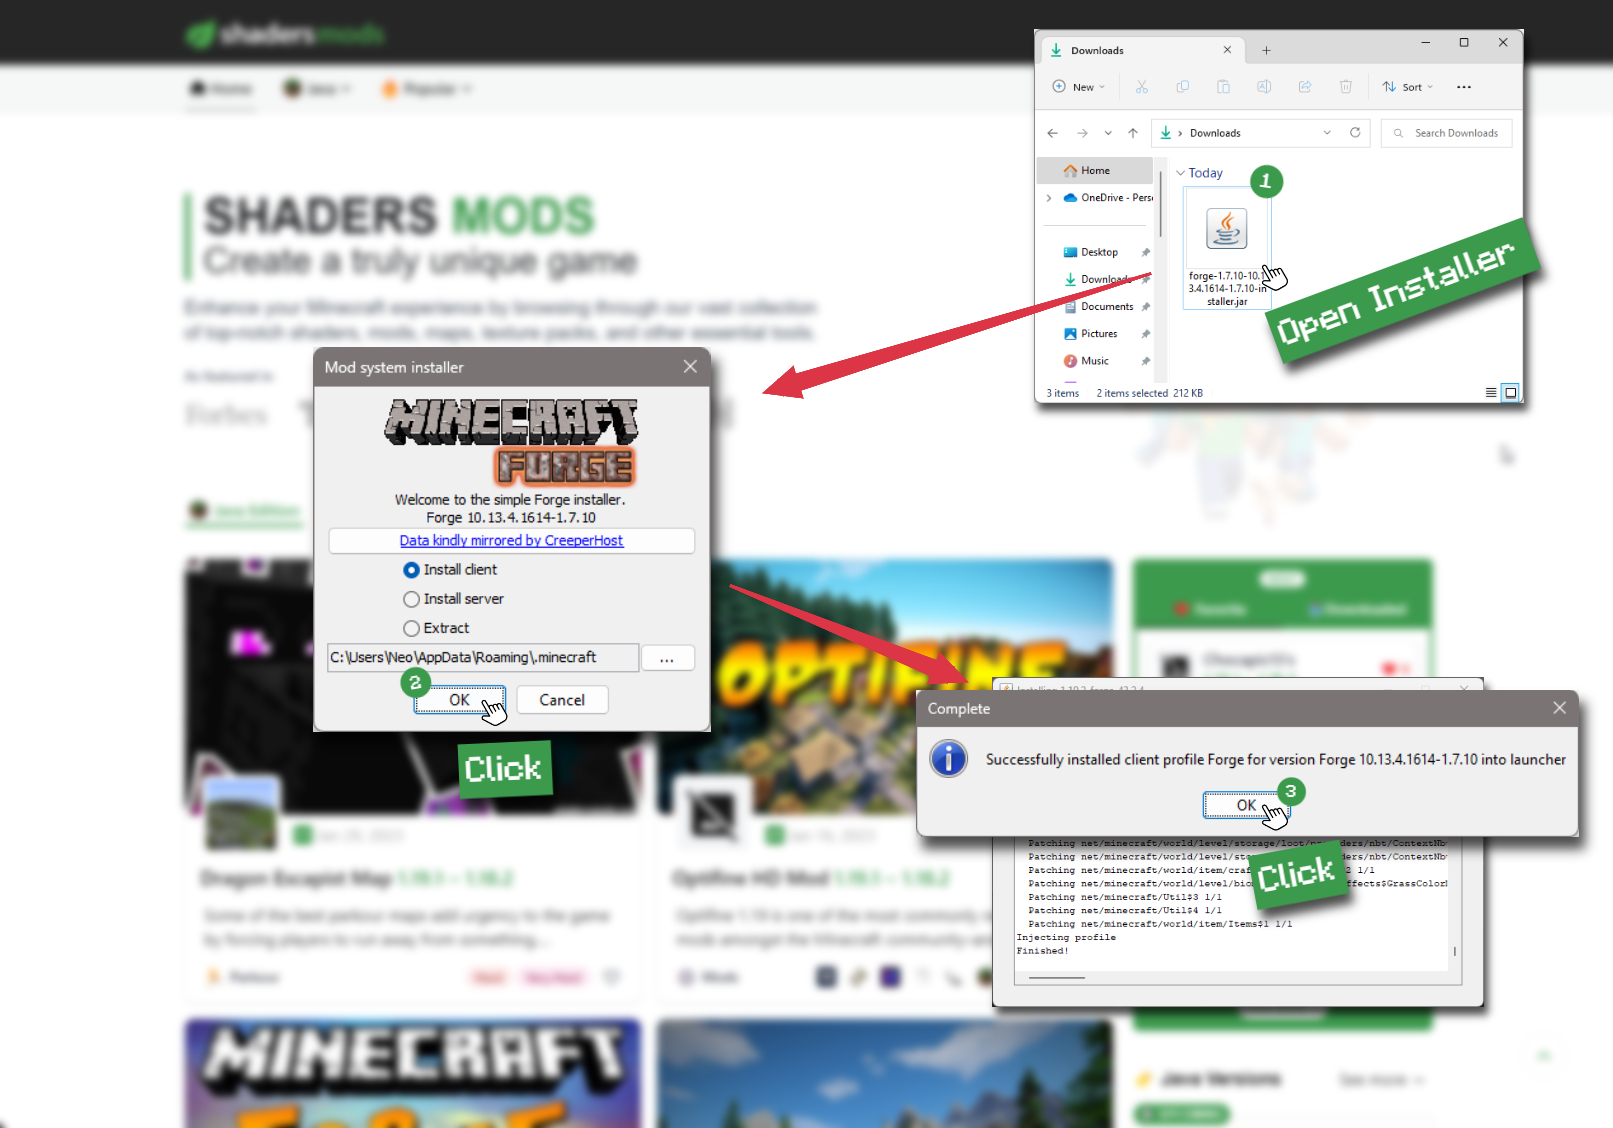
-
Open Installer
Once you have downloaded the file, run it and click the Install button.
How to install RedHat Shaders with Optifine?
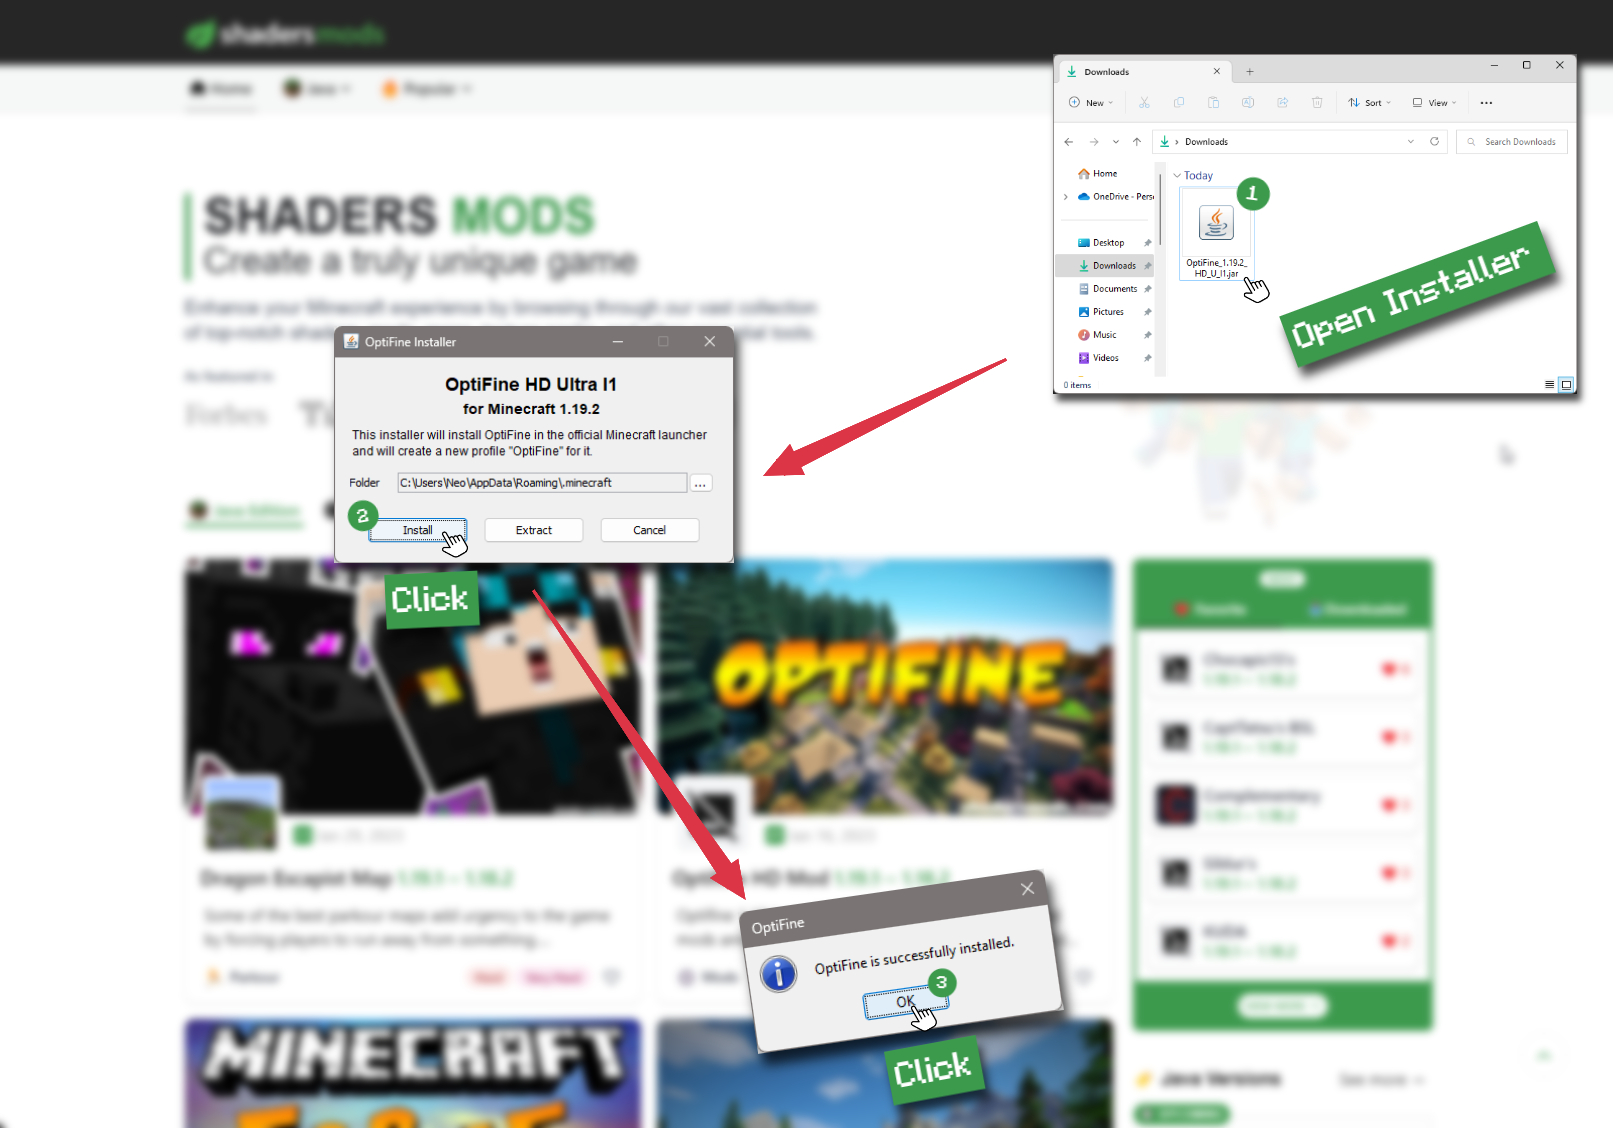
-
Download Optifine
Get the latest version of Optifine for your Minecraft version.
Download Optifine -
Install Optifine
Run the Optifine installer and follow the on-screen instructions to complete the installation.
-
Download RedHat Shaders
Go to the download section and get shaders zip file. Unzip the file if necessary, as some shader developers may bundle multiple shader versions in one zip file.
-
Launch Minecraft
Start the Minecraft launcher and make sure you have the Optifine profile selected.

-
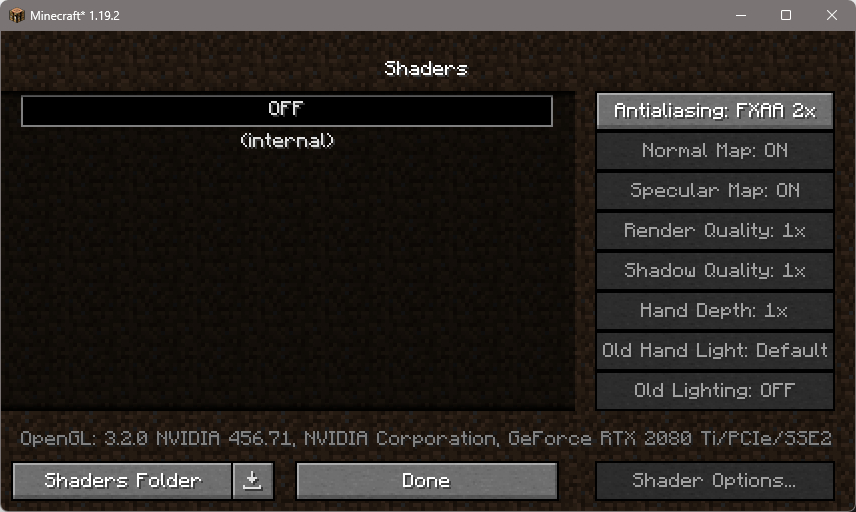
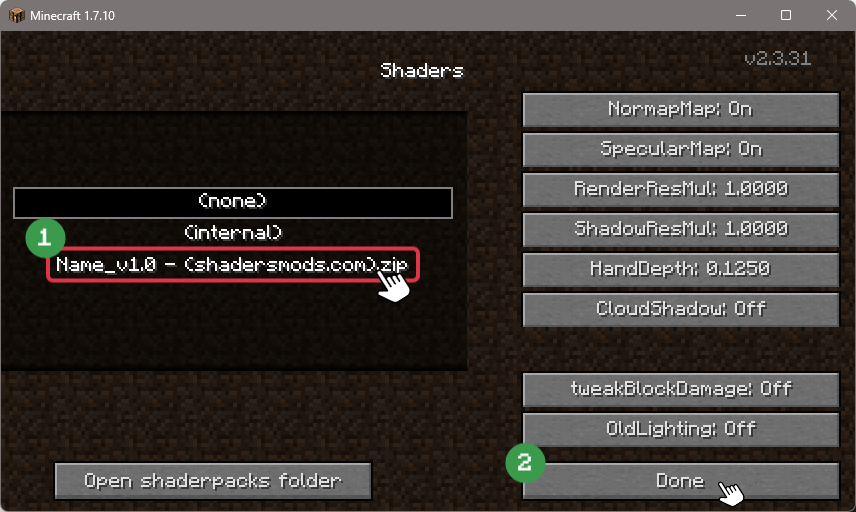
In-game Shaders menu
Go to Options > Video Settings > Shaders to access the shaders menu.
-
Open shaderpacks folder
Click on the "Shaders Folder" button to open the folder where shaders are stored, so you can add or remove shaders as desired.

-
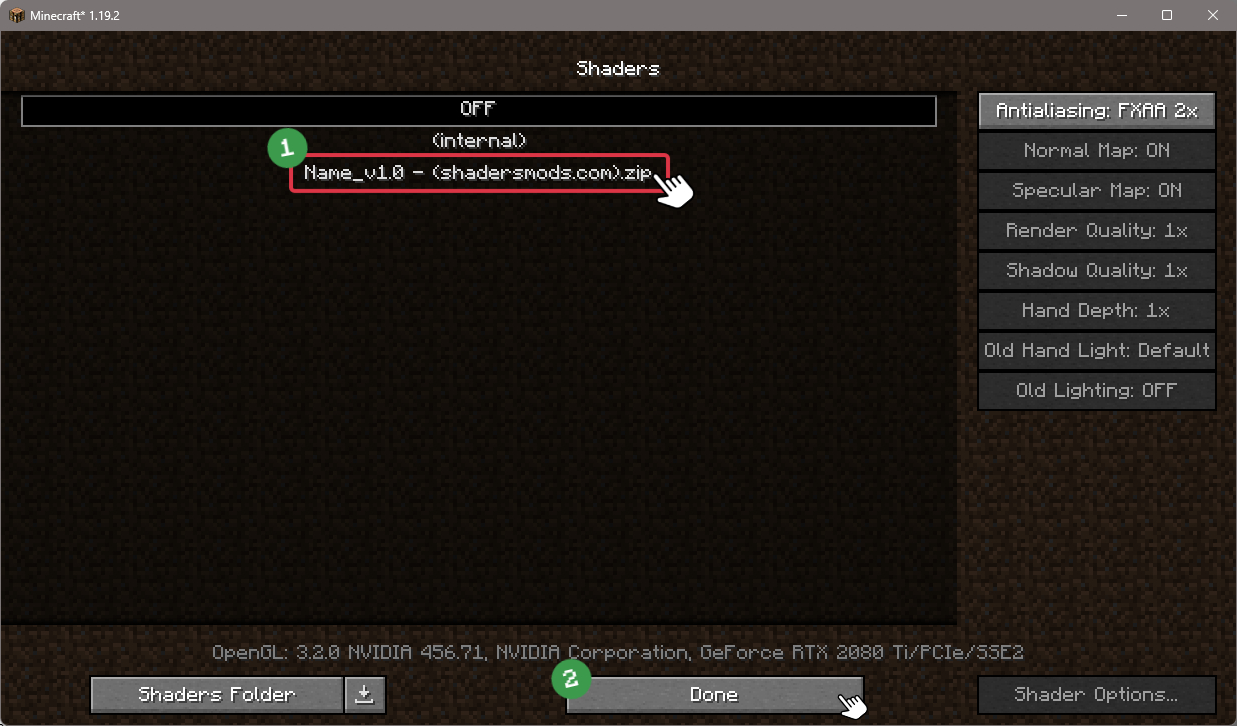
Install RedHat Shaders
Copy or move the downloaded RedHat shaders zip file into the shaderpacks folder.

-
Select RedHat Shaders
Choose RedHat shader pack from the list of available shaders in the options menu.
How to install RedHat Shaders with Forge and Optifine?
Quick Installation Guide
-
Install Forge
Obtain the latest version of Forge that is compatible with your Minecraft version.
Download Minecraft Forge -
Launch Minecraft
Start the Minecraft launcher and select the version of Minecraft you want to install Forge on. Run the game once by clicking on the "Play" button to create necessary files for Forge.

-
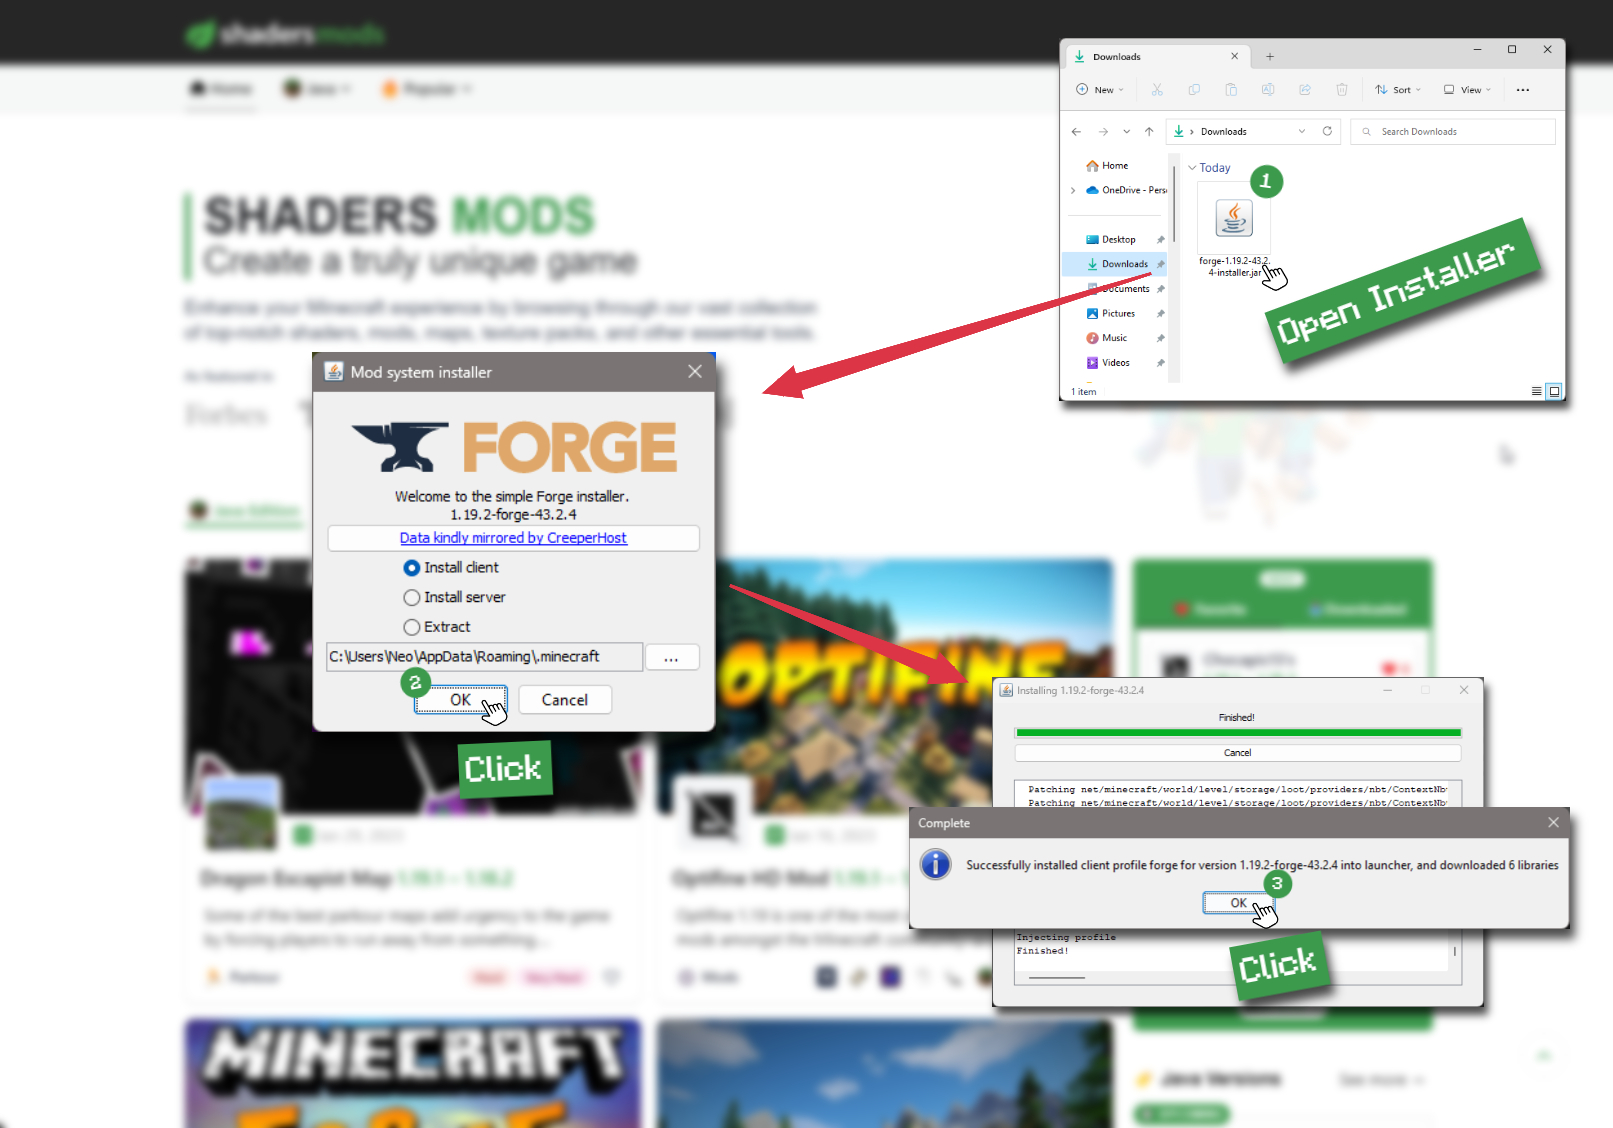
Install Forge Client
Double-click on the Forge installer jar file and choose "Install Client" in the window that appears.
-
Install Optifine
Download the Optifine jar file after Forge is installed. Move the Optifine jar file to the mods folder in the .minecraft directory.
Download Optifine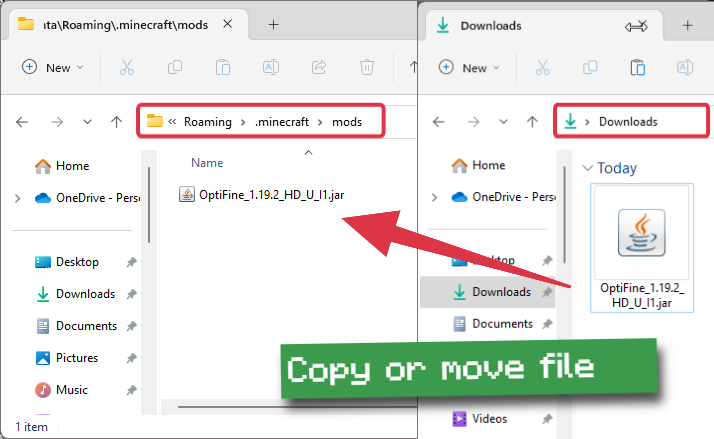
-
Launch Forge Profile
Launch Minecraft using the "Forge" profile, Optifine will be automatically loaded along with Forge.

-
Install Chocapic13's Shaders
Now the installation is the same as from the above Optifine instructions, just follow the steps starting from step 5.
Iris Installation Guide
Note
Your device must have Java installed to run the Iris installer.
Quick Java Installation Guide
-
Download Java
Download the Java installer from the official website here.
-
Open Installer
Once you have downloaded the file, run it and click the Install button.
How to install RedHat Shaders with Iris?
-
Download Iris Shaders
Find the latest version of the Iris Shaders installer and download it.
Download Iris Installer -
Install Iris Shaders
Open the downloaded jar file, and choose the preferred game version and installation type.
⯈ Iris Install:
If you don't plan on using any other mods with Iris, choose this option.⯈ Fabric Install:
Choose this option if you want to use Iris with Fabric and other mods. The Iris jar files will be copied to the mods folder within the .minecraft directory.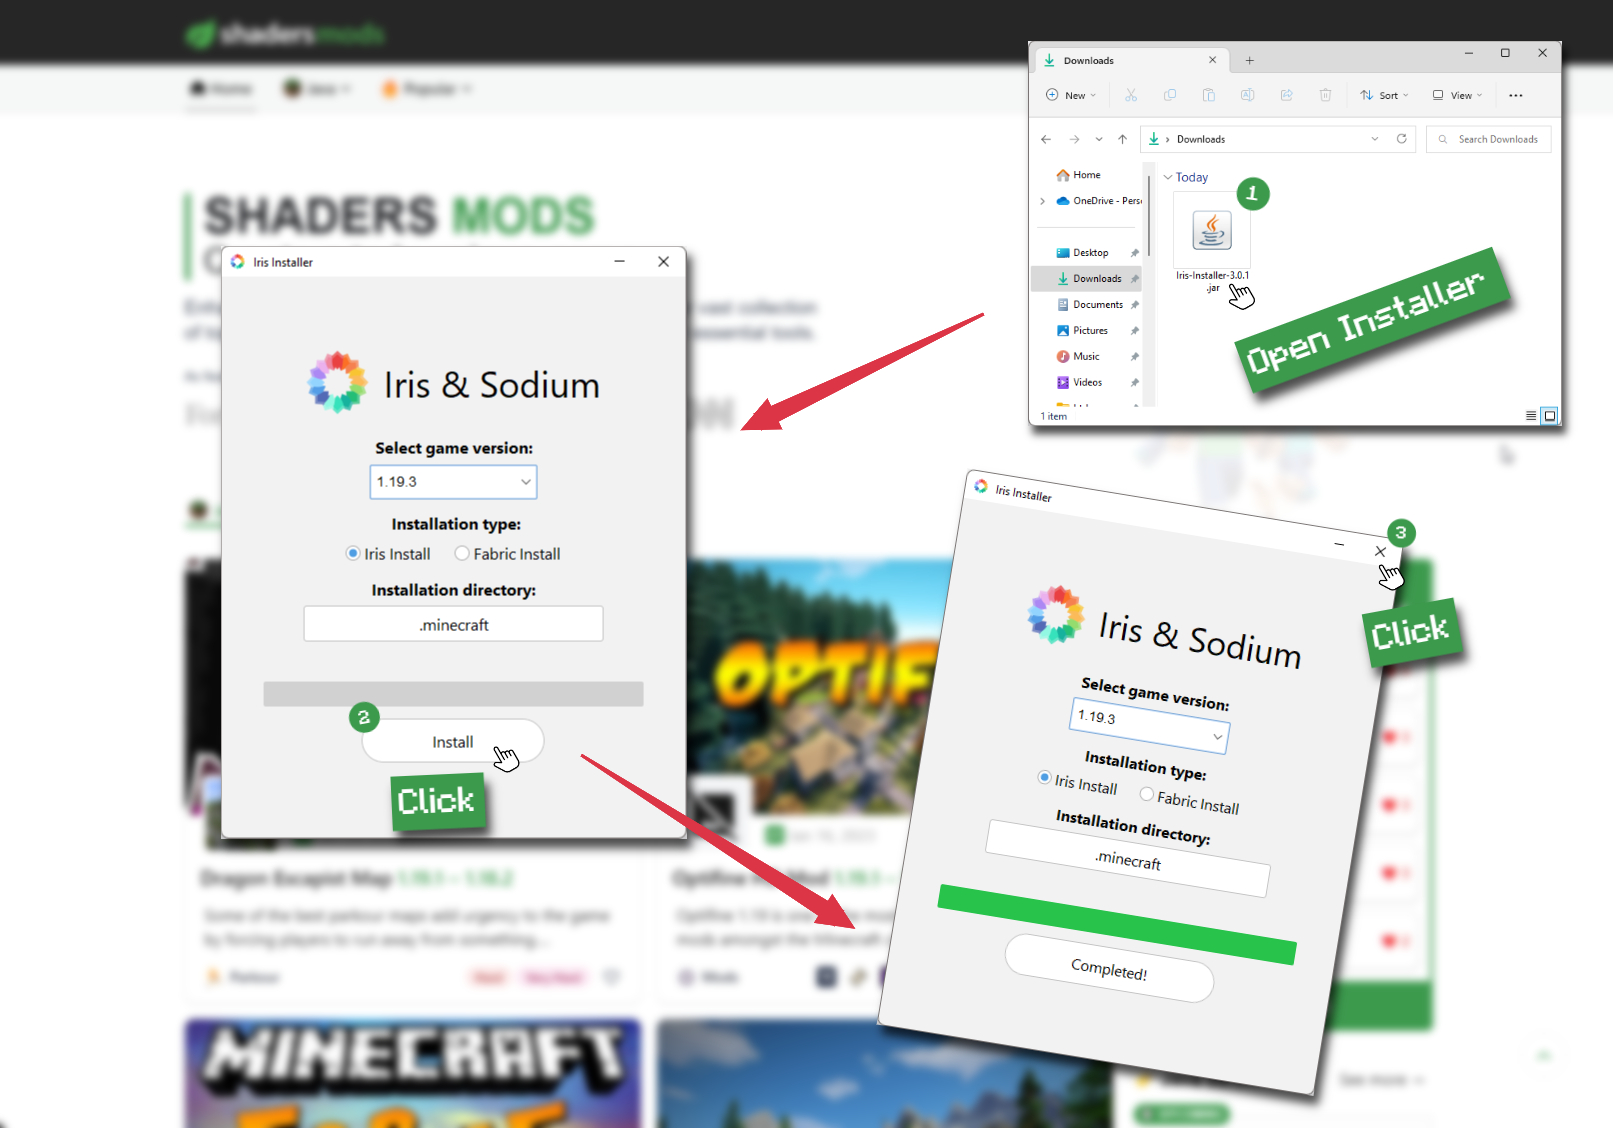
-
Start Installation
After selecting the game version and installation type, click the "Install" button to start the installation process.
-
Launch Minecraft
Start the Minecraft launcher and make sure you have the Iris profile selected.
Note
Select the Fabric profile if you opt for the Fabric installation type.
-
In-game Shader Menu
Open the Minecraft game and go to Options > Video Settings > Shader Packs to access the shaders menu.
Tip
To simplify the process, simply drag and drop the shader ZIP file directly into the Minecraft window, bypassing the next two steps.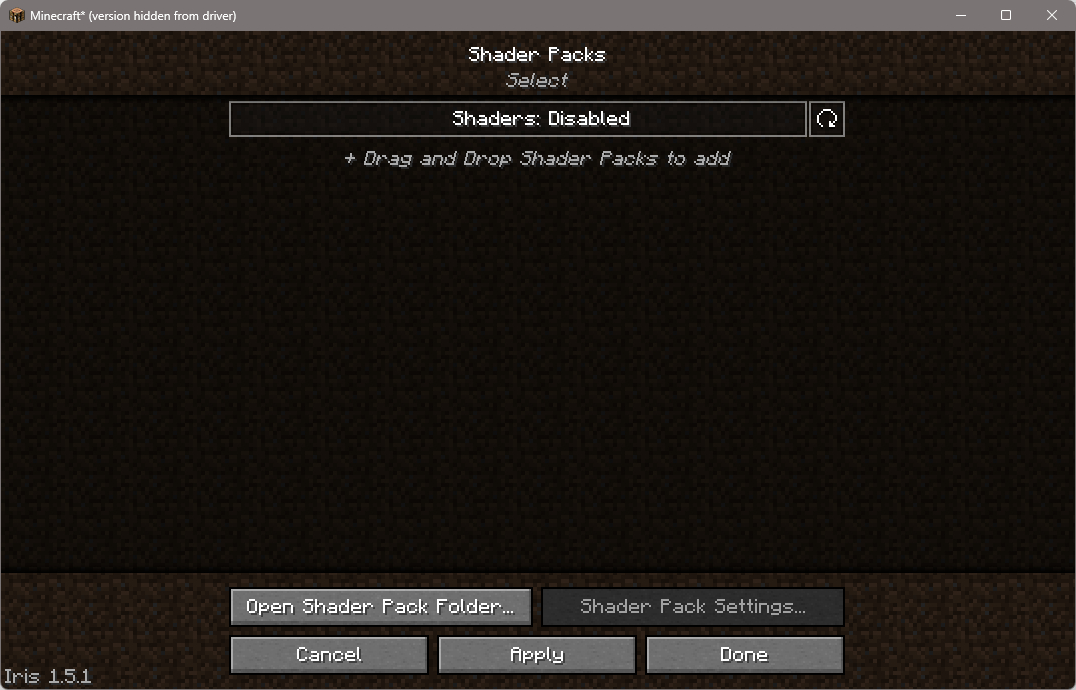
-
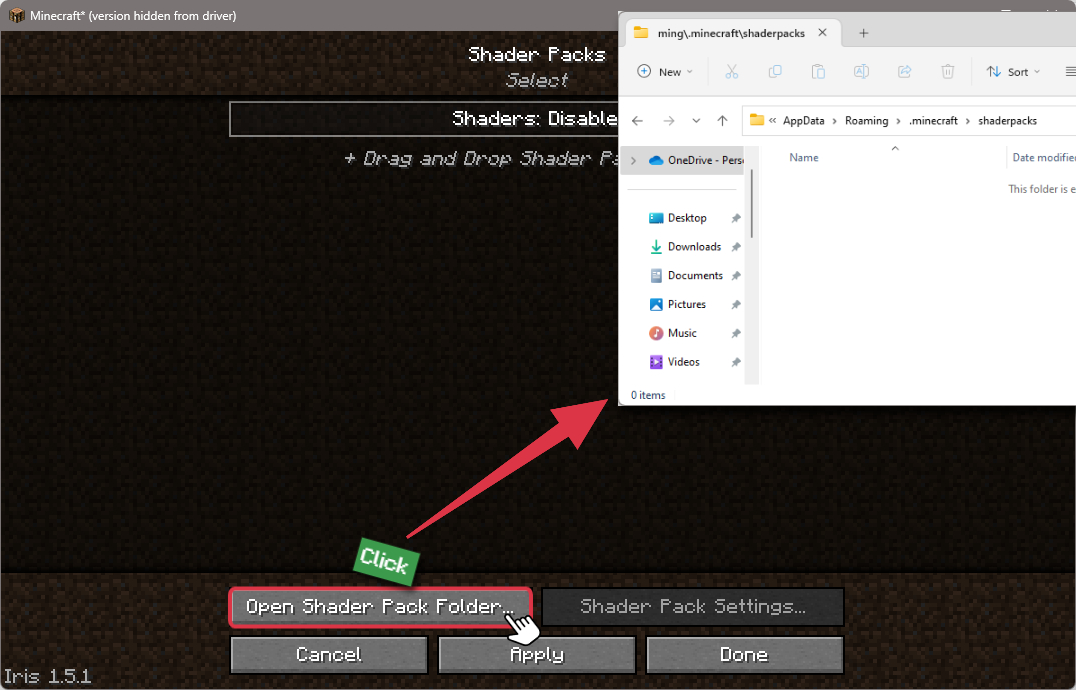
Open shaderpacks folder
Click on the "Open Shader Pack Folder" button to access the folder where shaders are stored.
-
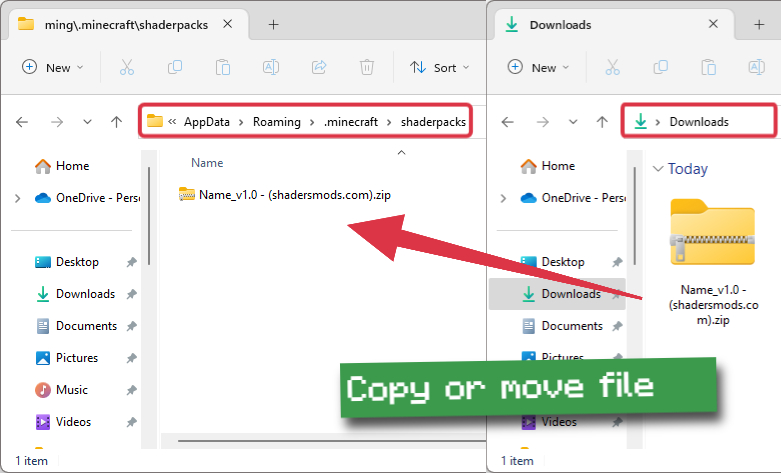
Install RedHat Shaders
Copy or move the shaders zip file into the shaderpacks folder.
-
Select RedHat Shaders
Choose installed shader pack from the list of available shaders in the options menu and click the "Apply" or "Done" button to select it.
Tip
When the shader pack is selected, its name will be changed to yellow.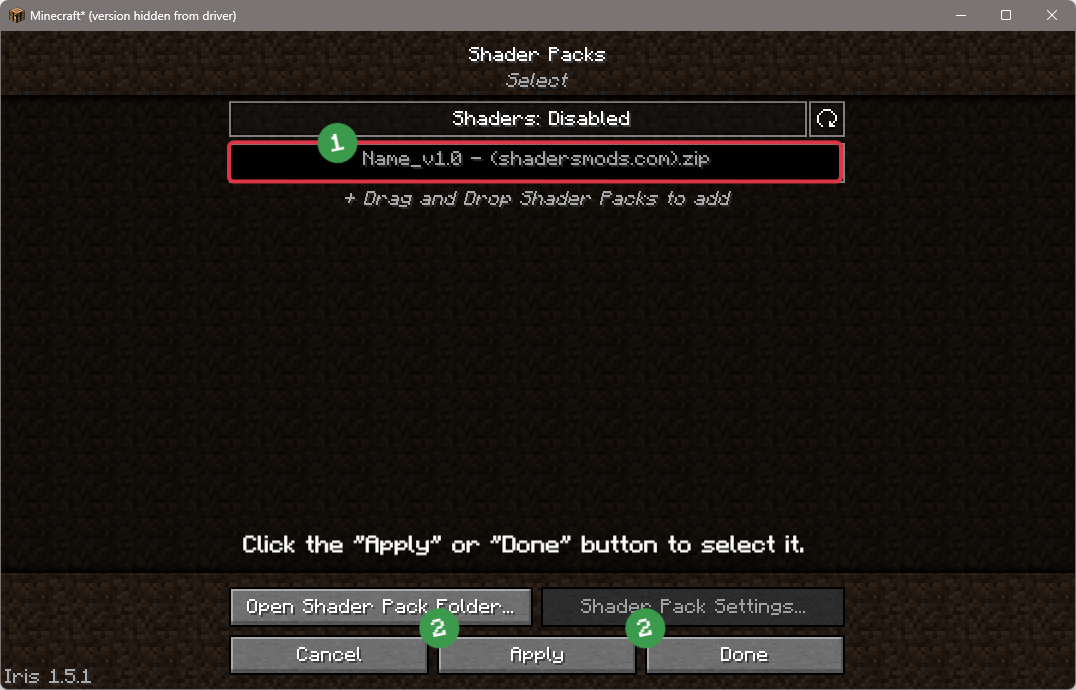
GLSL Installation Guide
Warning
How to install RedHat Shaders with GLSL Shaders Mod?
-
Install Forge
Download the latest version of Forge that is compatible with your Minecraft version.
Download Minecraft Forge -
Launch Minecraft
Start the Minecraft launcher and select the version of Minecraft you want to install Forge on. Run the game once by clicking on the "Play" button to create the necessary files for Forge.

-
Install Forge Client
Double-click on the Forge installer jar file and choose "Install Client" in the window that appears.
-
Install GLSL Shaders Mod
Download the GLSL jar file after Forge is installed. Move the GLSL jar file to the mods folder in the .minecraft directory.
Download GLSL Shaders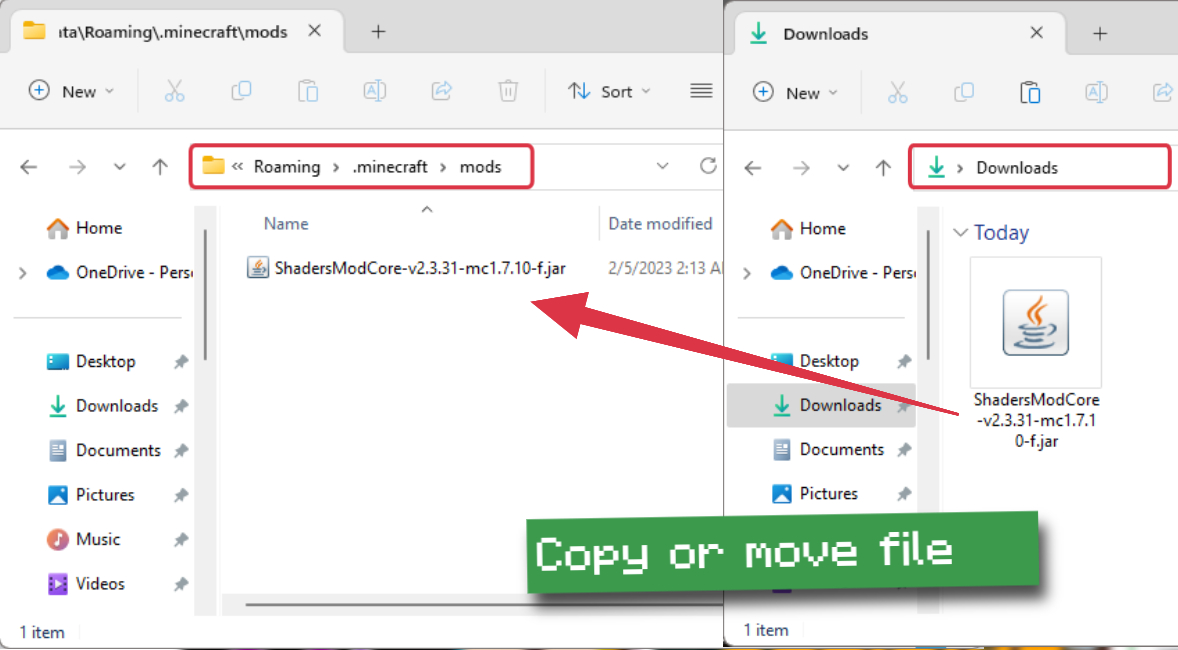
-
Launch Forge Profile
Launch Minecraft using the "Forge" profile, and GLSL Shaders will be automatically loaded along with Forge.

-
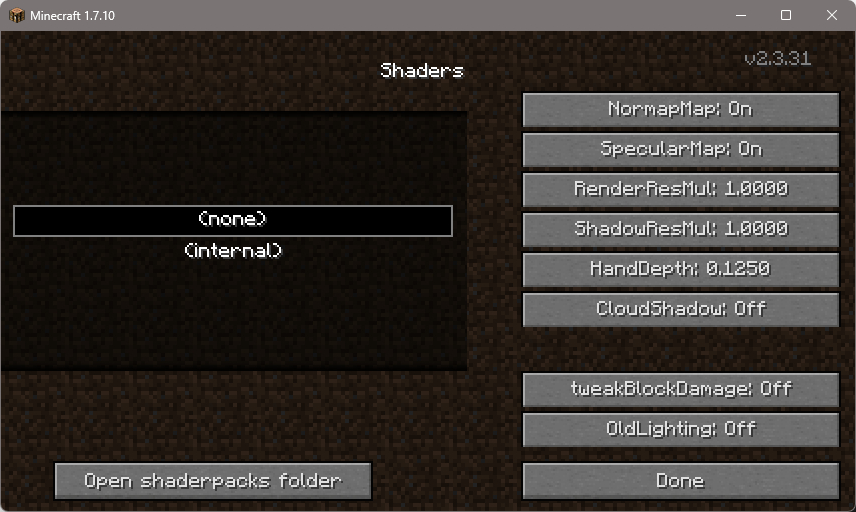
In-game Shaders menu
Go to Options > Shaders to access the shaders menu.
-
Open shaderpacks folder
Click on the "Open shaderpacks folder" button to open the folder where shaders are stored.

-
Install RedHat Shaders
Copy or move the downloaded shaders zip file into the shaderpacks folder.

-
Select RedHat Shaders
Choose RedHat shader pack from the list of available shaders in the options menu.
Requirements
- GPU with OpenGL 3.2 and at least 1GB of VRAM (AMD, NVIDIA, and Intel are all supported. Some settings may need to be decreased for Intel GPUs)
- CPU with a minimum clock speed of 1GHz
- At least 2GB of RAM allocated to the game
- Operating System: Windows (7, 8, 8.1, 10, 11) or Linux (Mesa drivers may lead to issues)
- Optifine or Iris (Iris may have some issues)
- Minecraft Version: 1.7.2 or higher
Note that using RedHat without meeting these requirements may result in performance issues or other problems.
📥 RedHat Shaders — Download
Something You Should Know
- Our links are only from the official developer, so you can be sure they are secure.
- No modifications or edits are made to the files.
🔄 Update Logs
v34.0
Improvements:
- Improved the Nether (or at least attempted to)
- Improved underwater visuals
- Removed some unused code
Bug Fixes:
- Fixed excessive volumetric light in the morning and sunset when it’s raining
- Fixed Nether not rendering in Iris.
v33.3
Bug Fixes:
- Fixed glitched lightning underwater
- Fixed missing SSAO in the code
- Fixed fallback on Iris
New Features:
- SSS shows on all blocks for a cooler and more cartoony look
- Configurable SSAO quality.