Iris Shaders Mod 1.20, 1.19.4 → 1.18.2
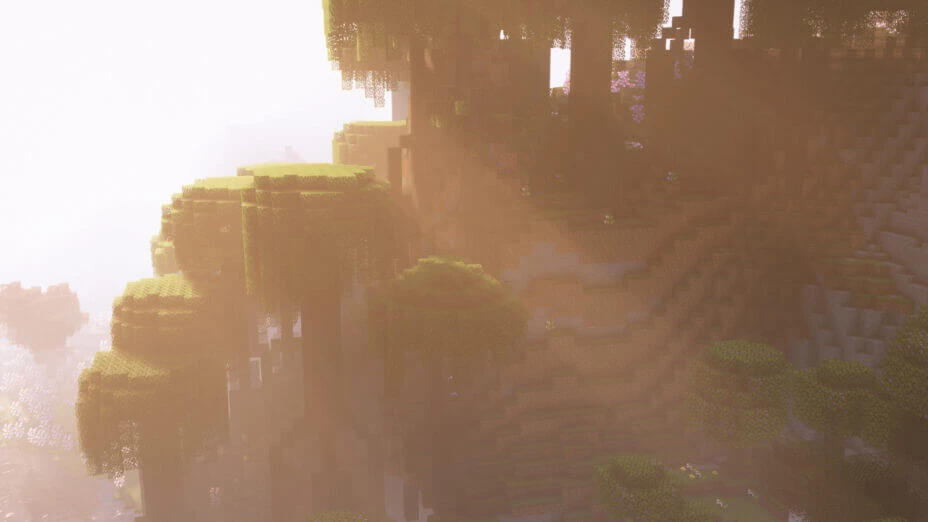
A Minecraft shader mod designed to work seamlessly with OptiFine's existing shaders.
| Developer | 👤coderbot |
|---|---|
| Category | 🍃Shader |
| Loaders | |
| Created | Mar 11, 2021 |
| Updated | Mar 6, 2023 |
| Stats |
|
If you want to use shader packs in Minecraft, it used to be that Optifine was the only loader available. The author behind Iris Shaders took issue with this and created their own shaders loader. Because the license for Optifine is so strict, content creators can’t modify it too much, or make meaningful changes. Iris, on the other hand, is an open-source tool. The code is freely available, and modifying the Iris loader is actually encouraged. It’s a great second option for players who find their shaders or other Minecraft additions don’t work with Optifine.
Paired up with the Sodium, a mod for optimizing rendering, Iris Shaders allows even mid-range PC users to play the game with shaders enabled. This causes a slowdown, but it’s less noticeable when using these two tools together. Compared to the vanilla version of the game, which only added basic support for shaders with the release of 1.17, Iris and Sodium allow for excellent framerates. No chugging or slowdown with moderate shaders, though using the high-end mods will still cause the game to take a performance hit.
The only major issue with Iris Shaders is how new the mod is. While it allows aging hardware to produce top-quality visuals, Iris isn’t compatible with several older mods and shader packs. The improved framerates, faster load times, and boost to FPS are great, but the newest mods are being made using today’s hardware. That means Iris fails in one crucial area where Optifine excels. Iris also doesn’t allow users to customize installed shader packs. You’ll need to keep using Optifine, at least until Iris has more development time put into it, if you like modifying shaders and making adjustments to suit your needs.
Many shaders are also incompatible with Iris Shaders, not functioning in any way. The current list of working shaders is short, but if you want to try Iris, the author recommends three options – Complimentary, SEUS Renewed, and Silvers. All of these shader packs are fully compatible with Iris Shaders and won’t give you any trouble.
- 1.20
- 1.19.4
- 1.19.3
- 1.19.2
- 1.19
- 1.18.2
- 1.17.1
- 1.16.5
Features
Let's take a look at what Iris Shaders Mod has to offer.
-
🎨
- Customizable Shaders
- Allows players to customize the shaders according to their preferences, including bloom, depth of field, and color grading.
-
💡
- Advanced Lighting
- Provides realistic lighting effects, including shadows, ambient occlusion, and reflections, that enhance the game's visual quality.
-
💧
- Improved Water
- Enhances the game's water effects by adding realistic waves, reflections, and transparency.
-
🌫️
- Atmospheric Fog
- Adds realistic fog effects, including volumetric and height-based fog, that improve the game's visual atmosphere.
-
🌩️
- Dynamic Weather
- Provides realistic weather effects, including rain, snow, and thunderstorms, that enhance the game's atmosphere.
-
🔧
- Optimized Performance
- Provides significant performance improvements by optimizing various game settings and reducing lag.
-
🔄
- Compatibility
- Compatible with a range of other mods and resource packs, allowing players to fully customize their gaming experience.
-
🤝
- Seamless Integration
- Can be easily installed and used alongside other mods and shaders without causing conflicts.
How To Install Iris Shaders Mod
Note
Your device must have Java installed to run the Iris installer.
Quick Java Installation Guide
-
Download Java
Download the Java installer from the official website here.

-
Open Installer
Once you have downloaded the file, run it and click the Install button.

-
Download Iris Shaders
Go to the download section and get the latest version of Iris Shaders installer.
-
Install Iris Shaders
Open the downloaded jar file, and choose the preferred game version and installation type.
⯈ Iris Install:
If you don't plan on using any other mods with Iris, choose this option.⯈ Fabric Install:
Choose this option if you want to use Iris with Fabric and other mods. The Iris jar files will be copied to the mods folder within the .minecraft directory.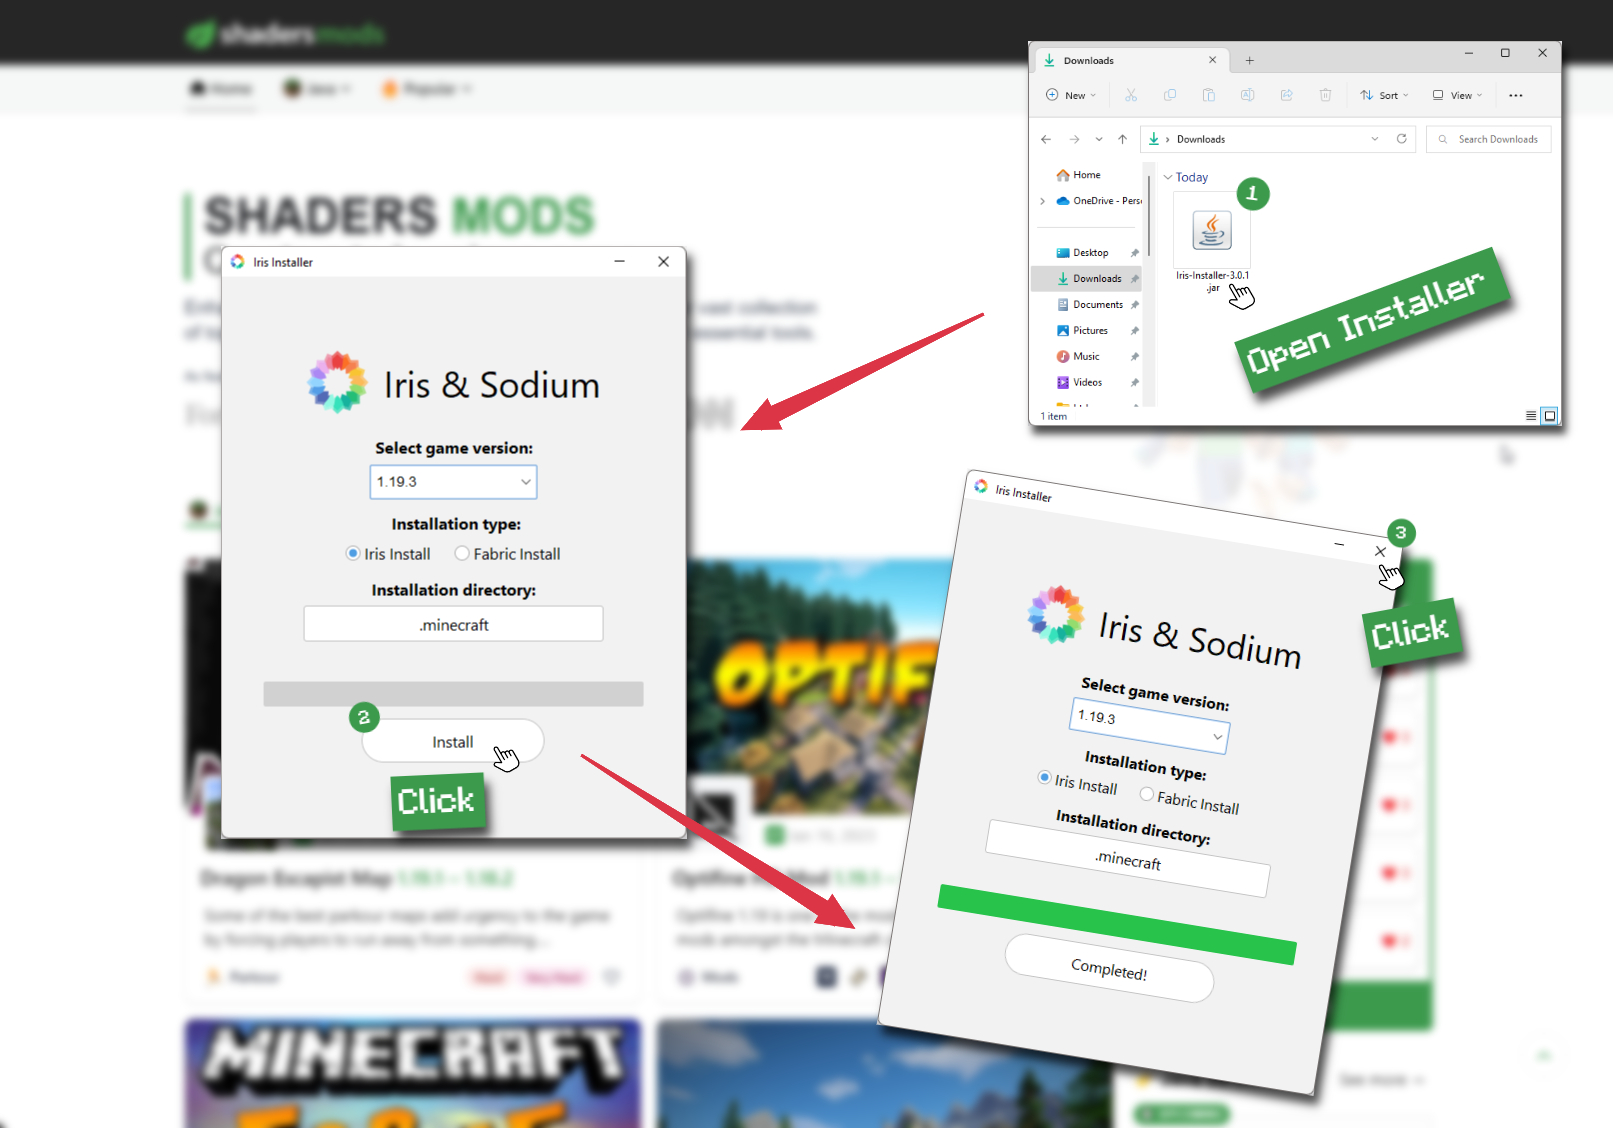
-
Start Installation
After selecting the game version and installation type, click the "Install" button to start the installation process.
-
Launch Minecraft
Start the Minecraft launcher and make sure you have the Iris profile selected.
Note
Select the Fabric profile if you opt for the Fabric installation type.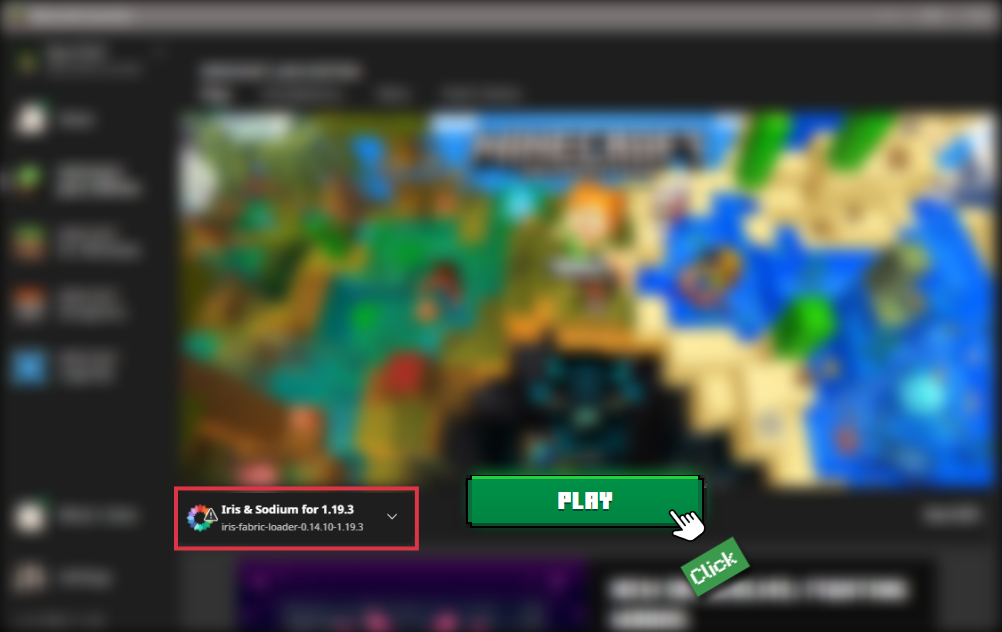
-
In-game Shader Menu
Open the Minecraft game and go to Options > Video Settings > Shader Packs to access the shaders menu.
Tip
To simplify the process, simply drag and drop the shader ZIP file directly into the Minecraft window to install a shader pack.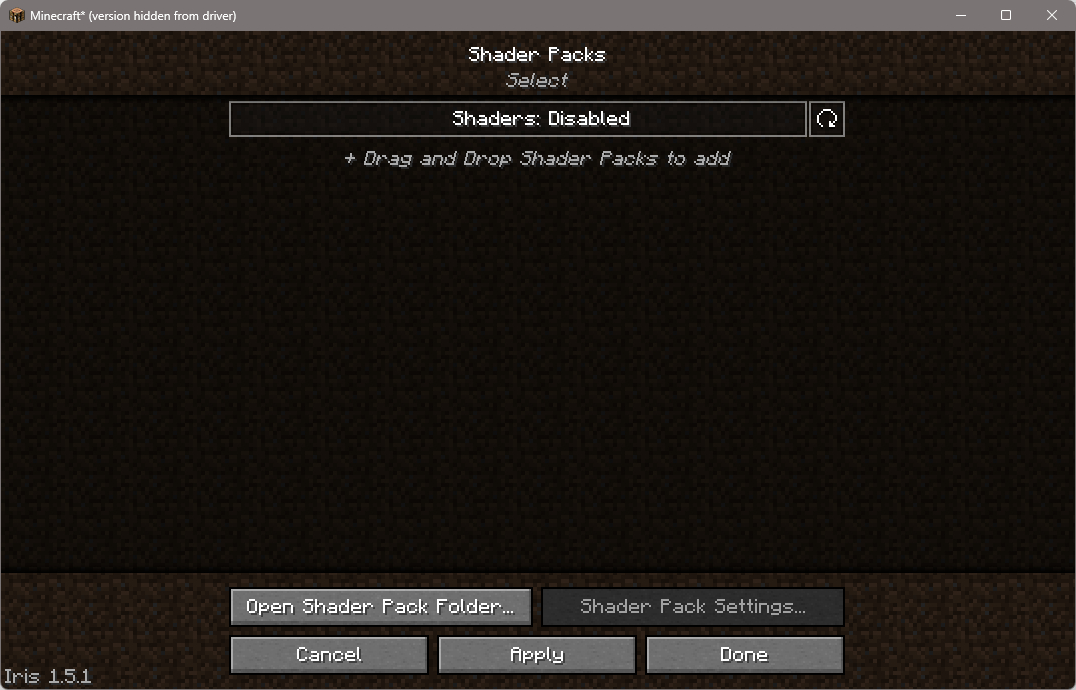
📥 Iris Shaders Mod — Download
Something You Should Know
- Our links are only from the official developer, so you can be sure they are secure.
- No modifications or edits are made to the files.
Installer:
Included standalone and mod loader versions of Iris.
🔄 Update Logs
v1.6.4
Overview
- Add the ability to change the drawn color space utilizing a compute shader and/or new API’s.
- Added support for
frustum.culling. - Allow up to 16 custom images.
- Make debug mode better.
- Fix some issues related to folder shaderpacks.
- Add code to clear unused samplers, fixing a bug related to blurry textures
- Fix conduit power night vision
- Add support for prefixes and suffixes
Translations
- Fix Traditional Chinese localization (notlin4)
- Update russian localization (Felix14_v2)
- Update Simplified Chinese localization (klkq)