

AstraLex Shaders 1.20, 1.19.4 → 1.18.2
High-end shader pack for Minecraft, based on BSL Shaders adding beautiful lighting, shadows, and reflections.
| Developer | 👤LexBoosT |
|---|---|
| Style | 🎨Cartoon |
| Support GPUs | |
| Loaders | |
| Performance Impact | Medium |
| Settings | 882 |
| Presets | 🛠️ Low+8 |
| Features | Water Reflections+46 |
| Created | Sep 3, 2020 |
| Updated | Jun 9, 2023 |
| Stats |
|
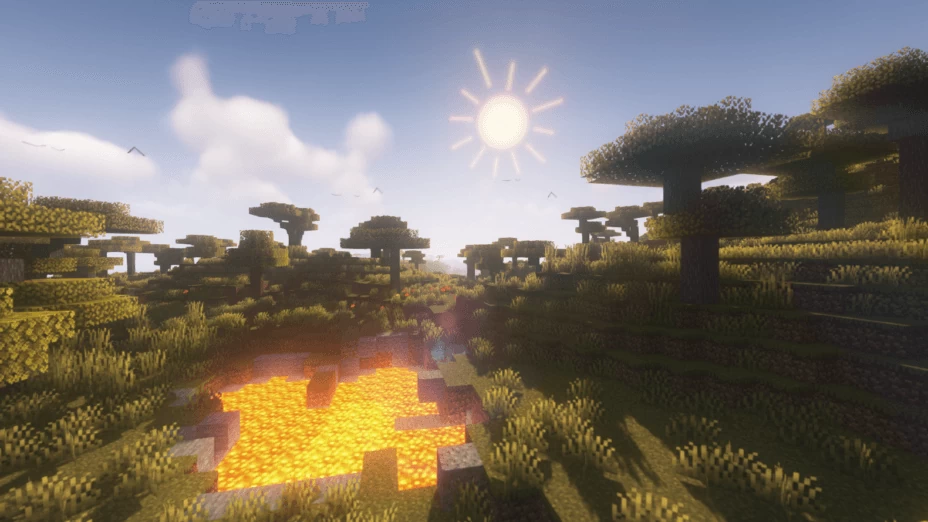
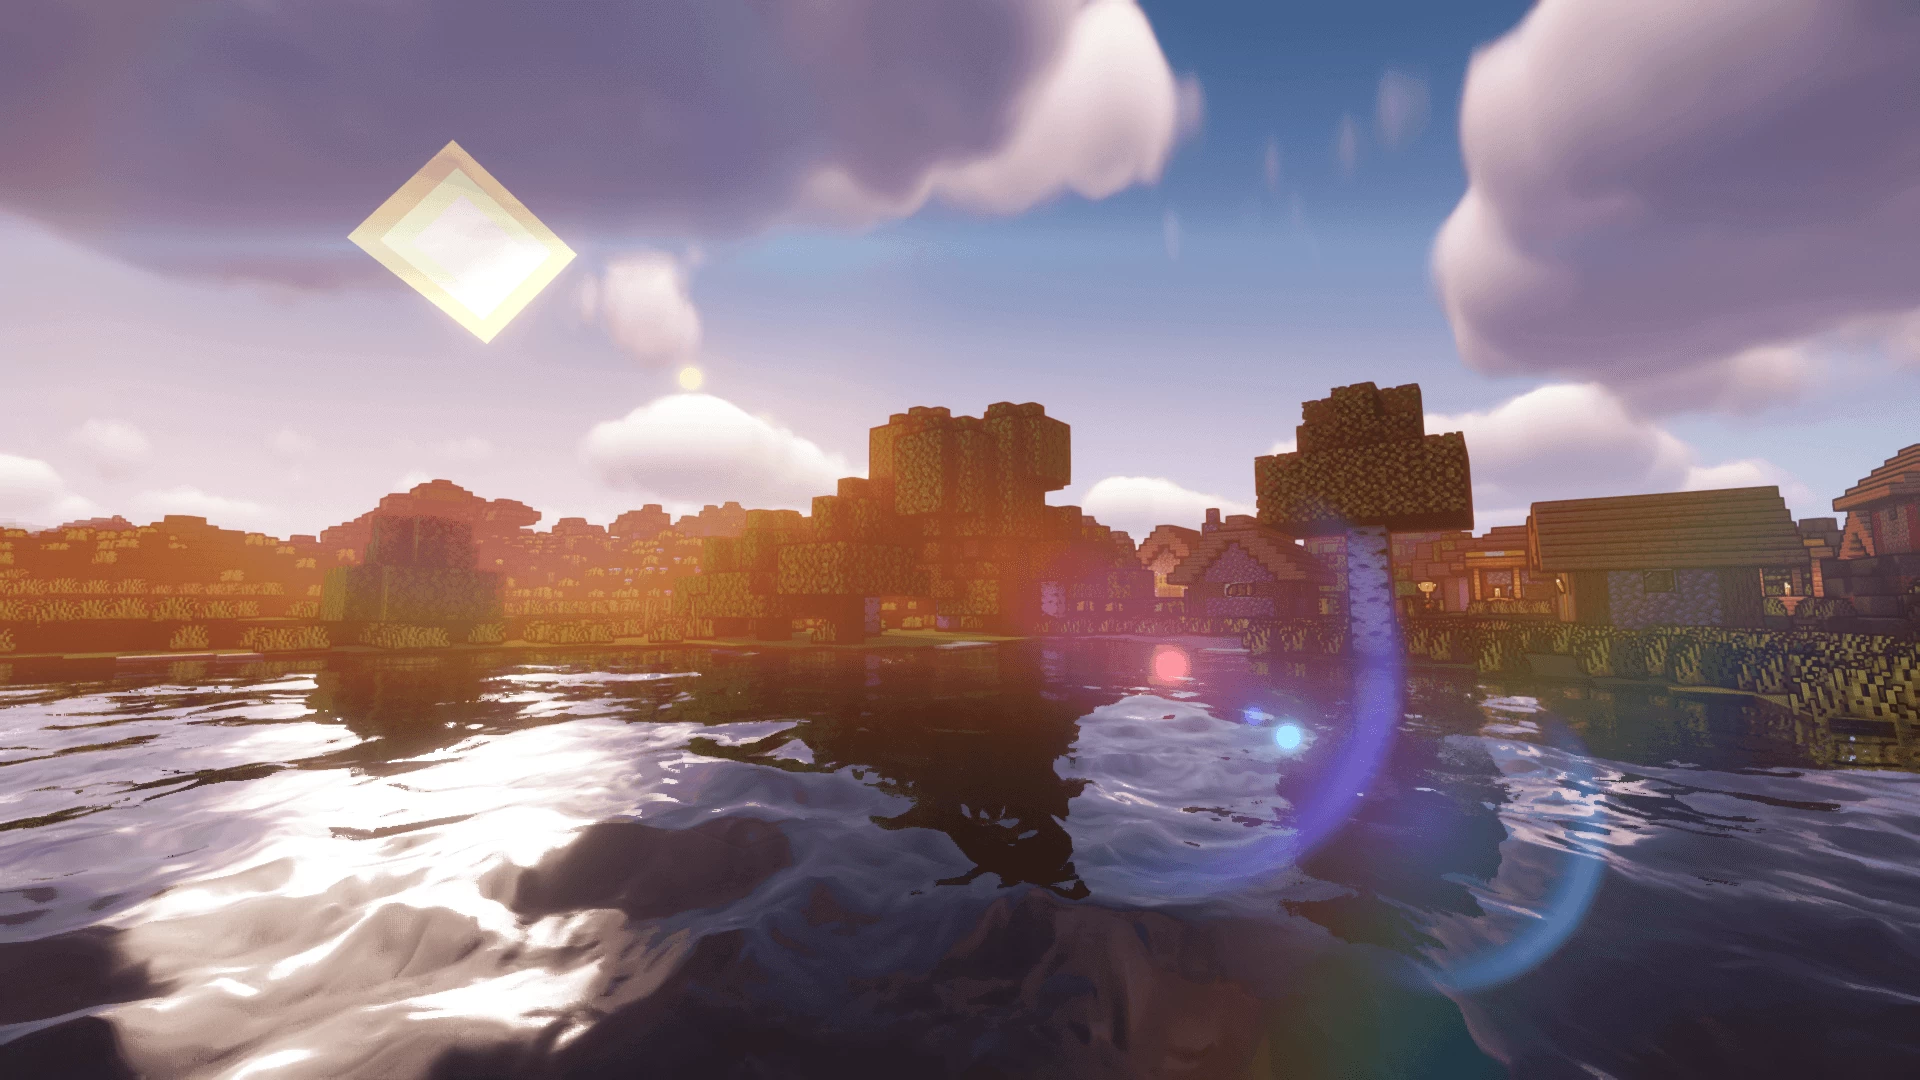
Many unique qualities are found within the new AstraLex Shader pack for Minecraft. The end goal of this shader pack is very special; to allow content creators a vastly improved visual experience to make the best possible content or to enjoy playing a better visual game experience.
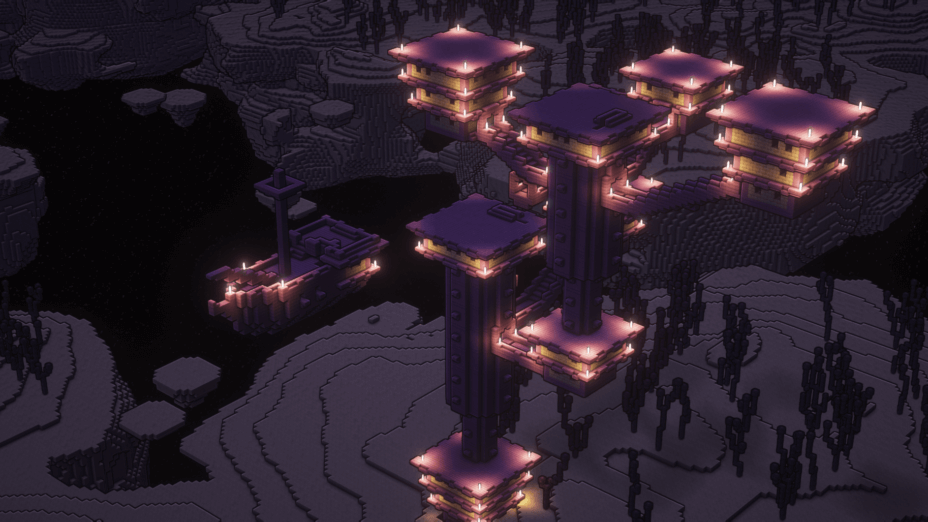
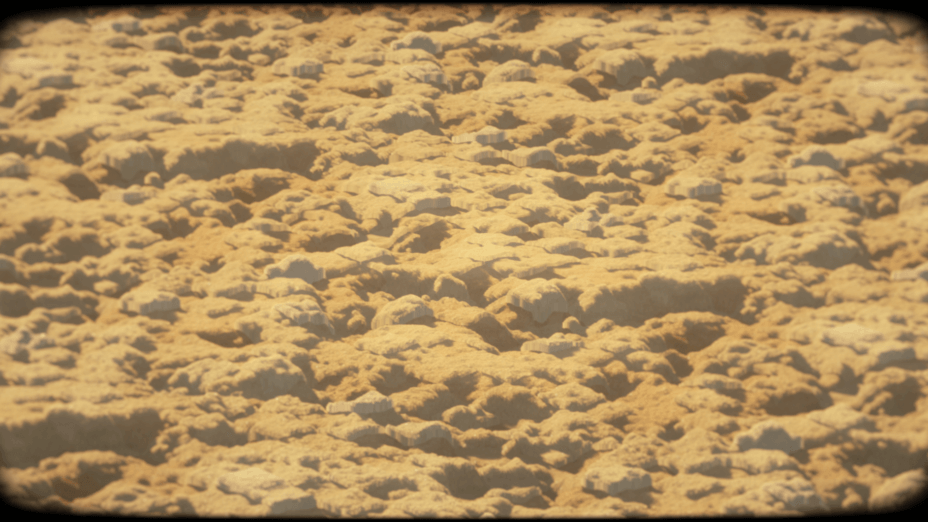
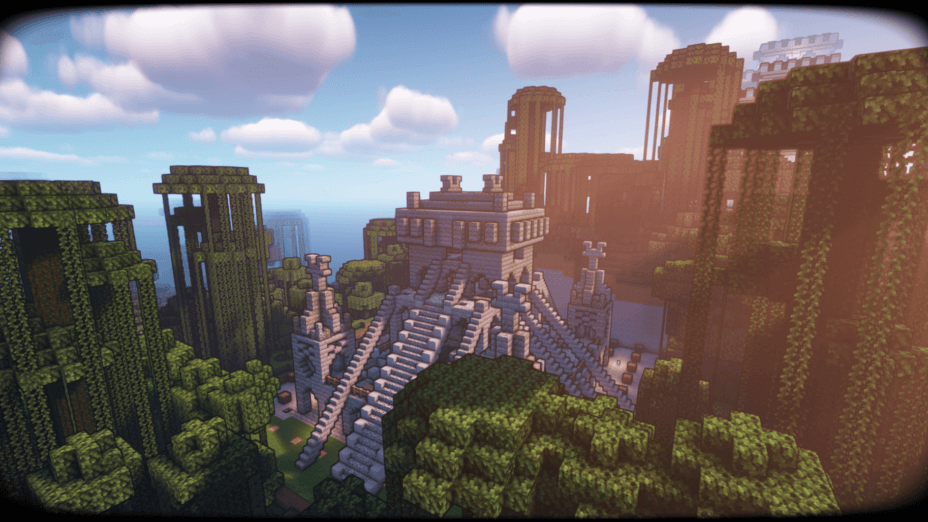
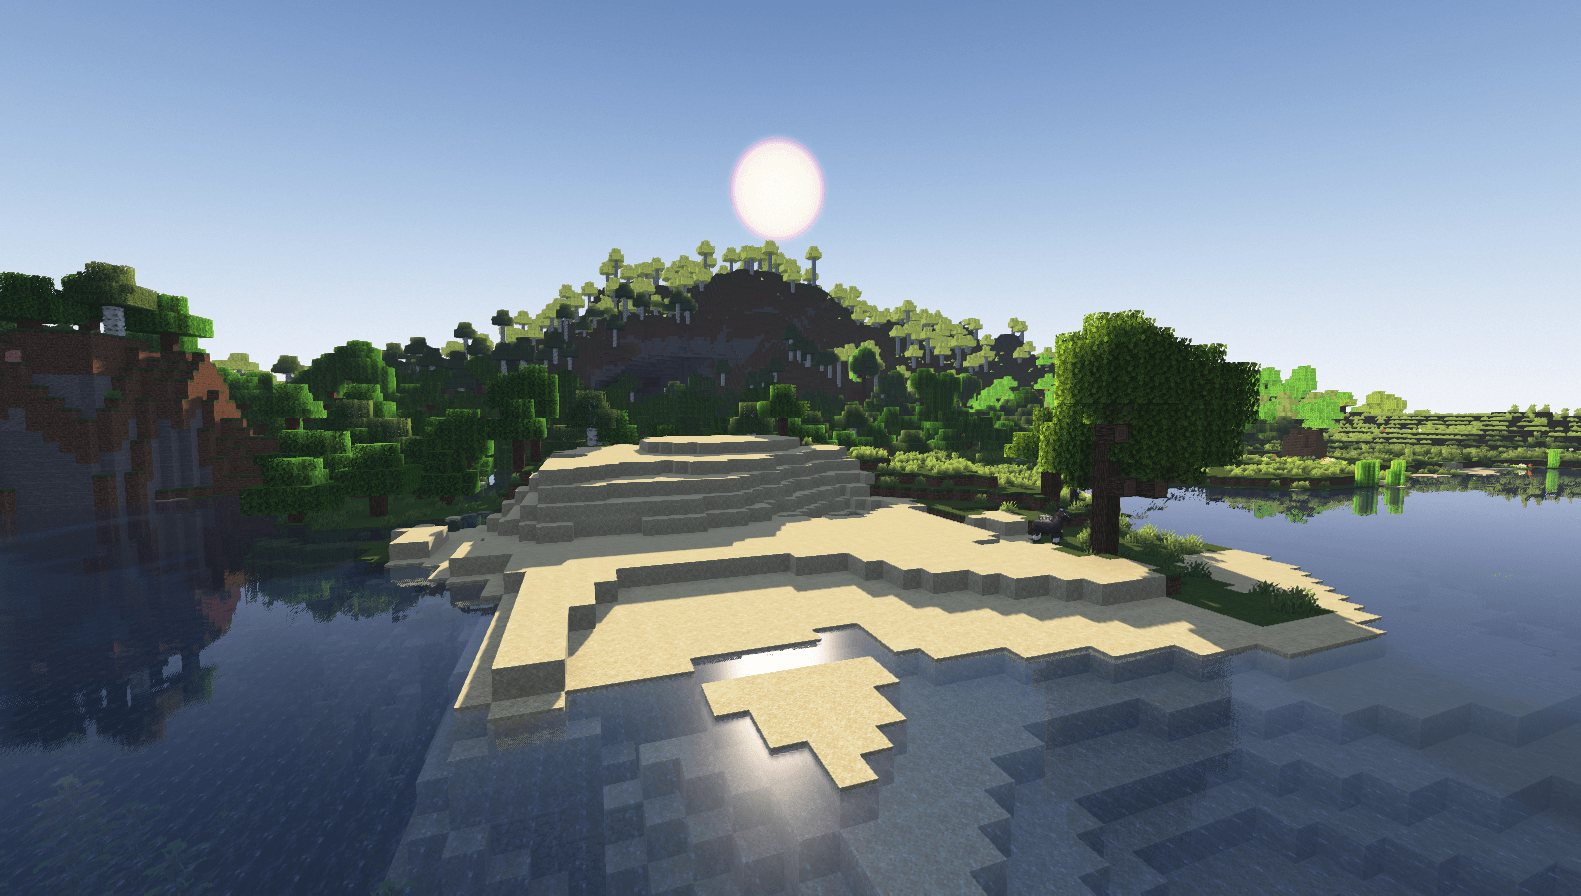
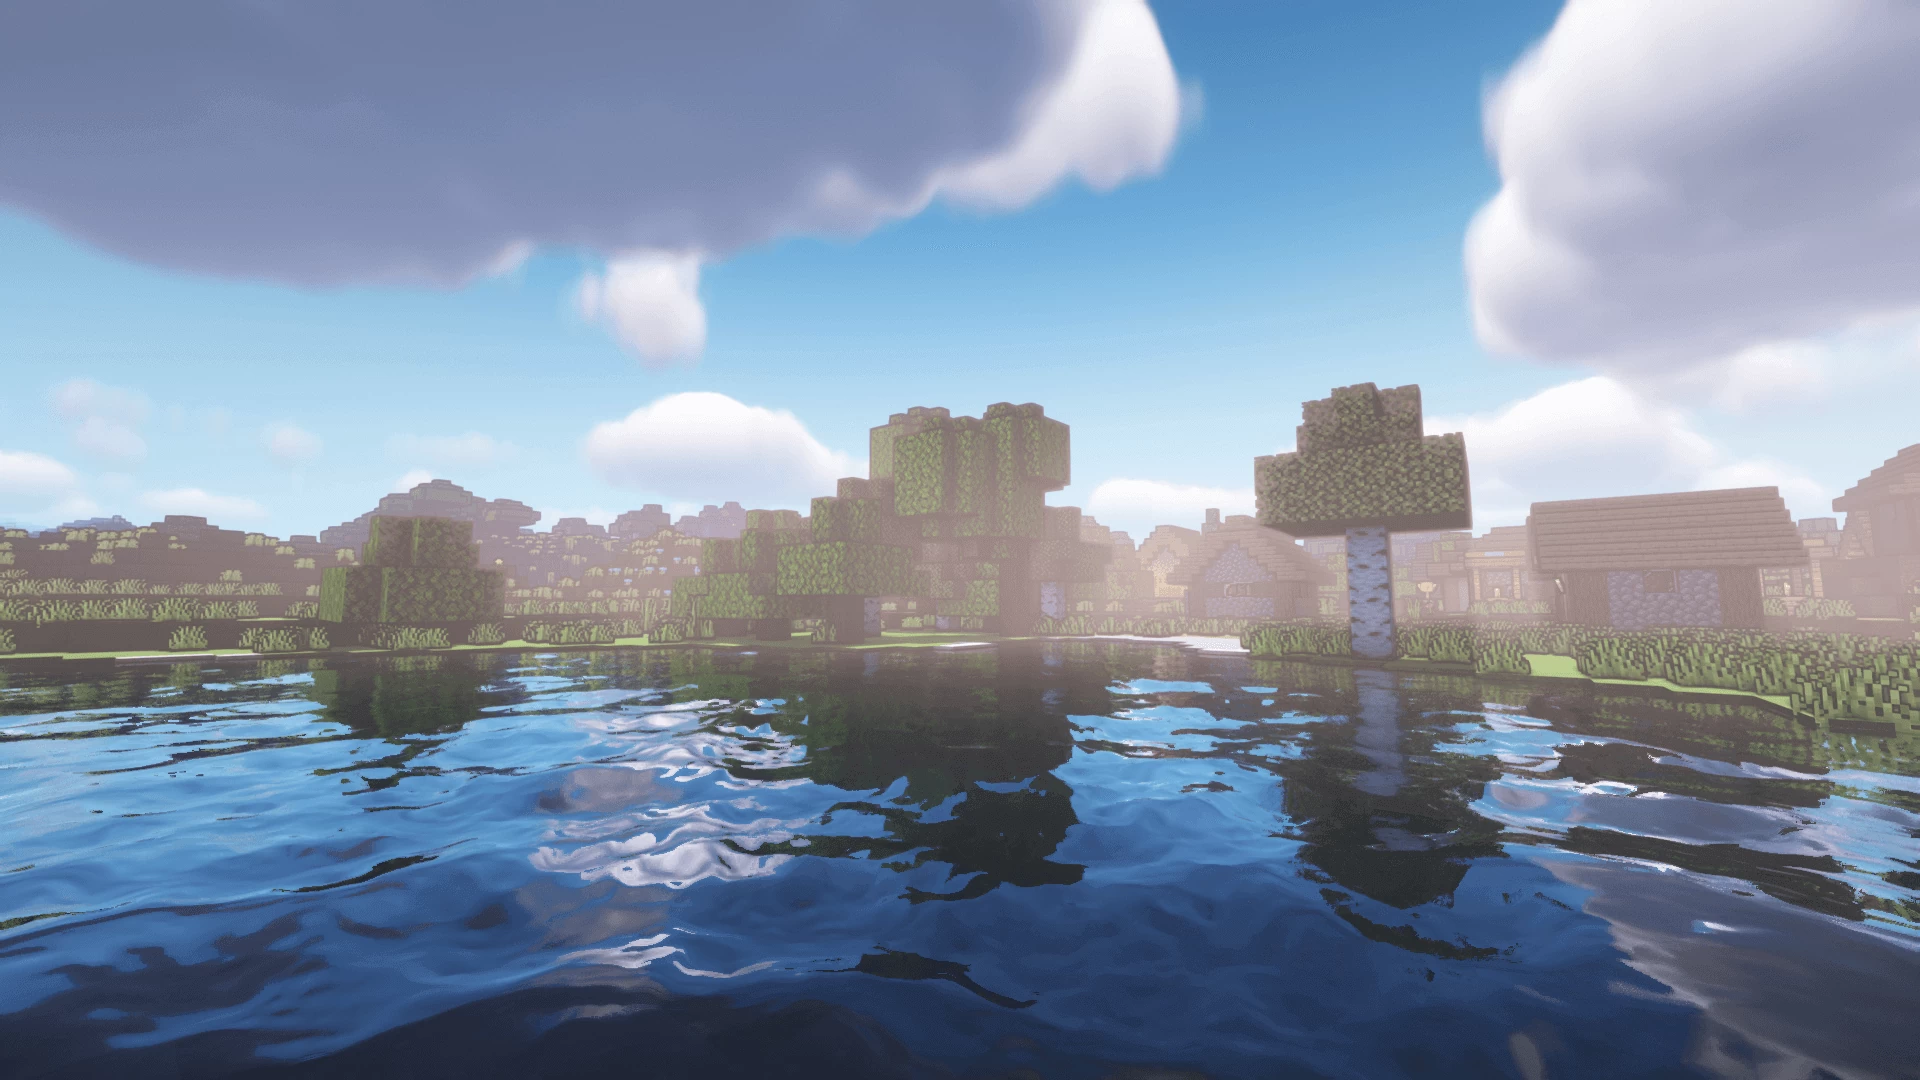
Through the use of the new AstraLex Shaders pack, Minecraft players will immediately see the significant differences in the game world. Countless visual upgrades have been made to the game world, allowing for a beautiful and immersive gaming experience.
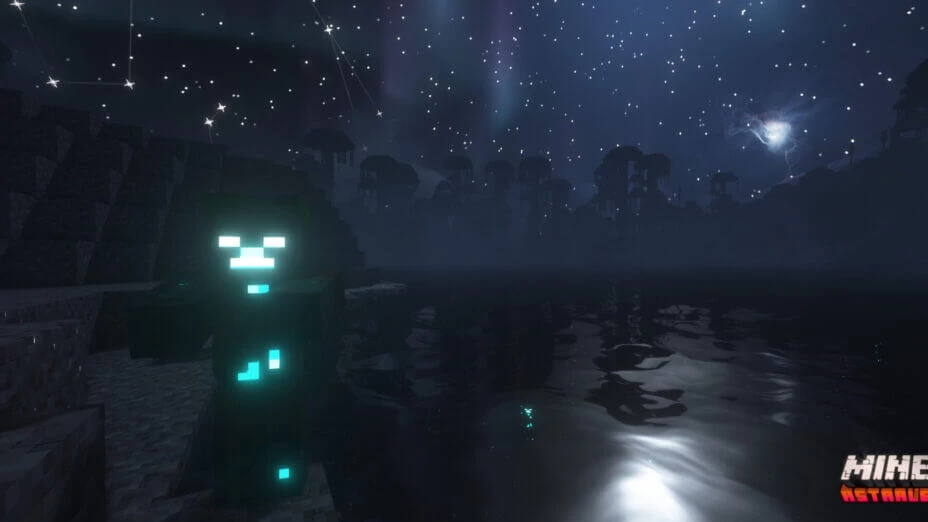
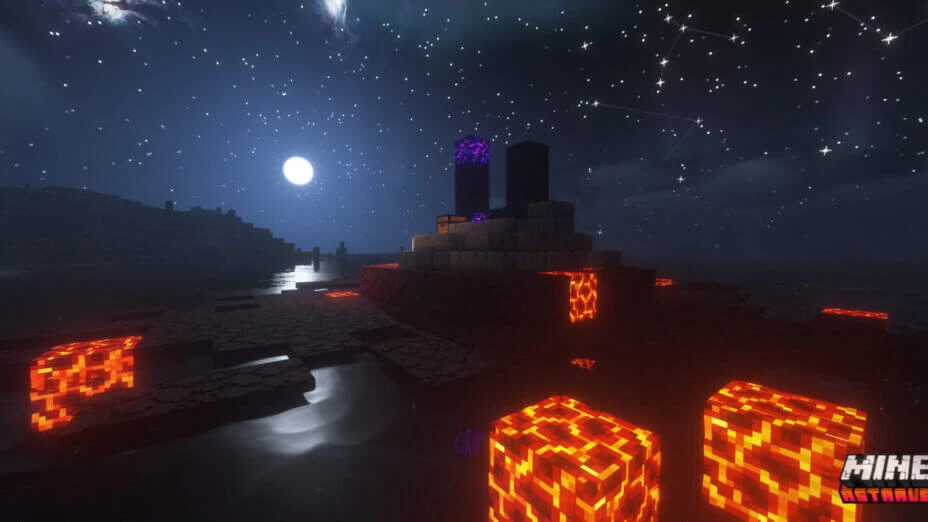
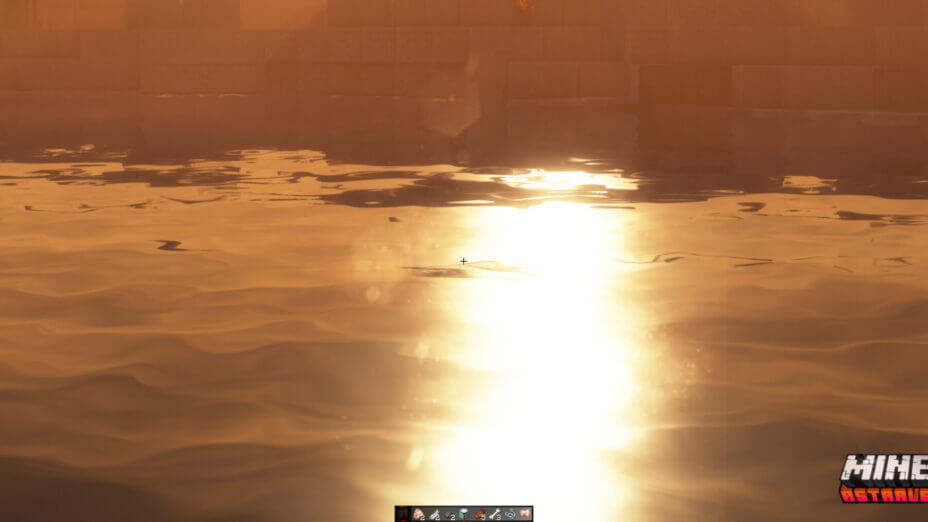
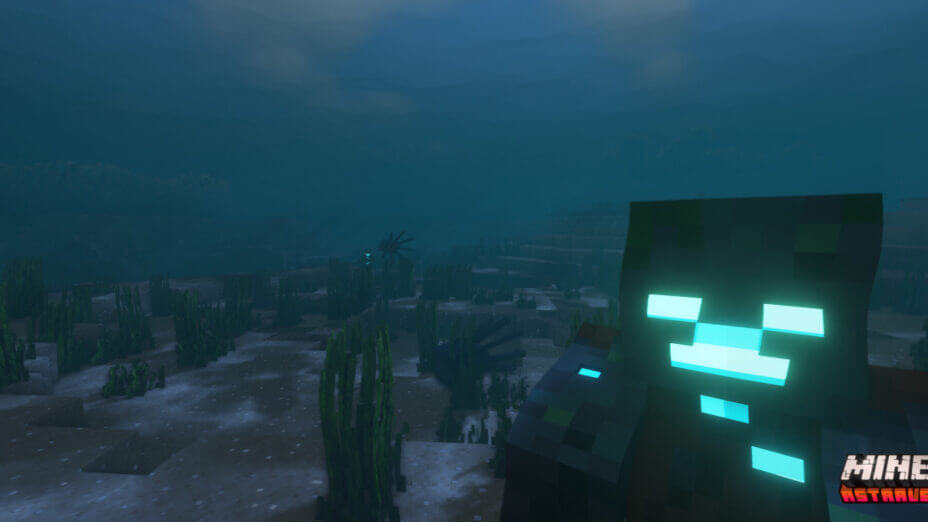
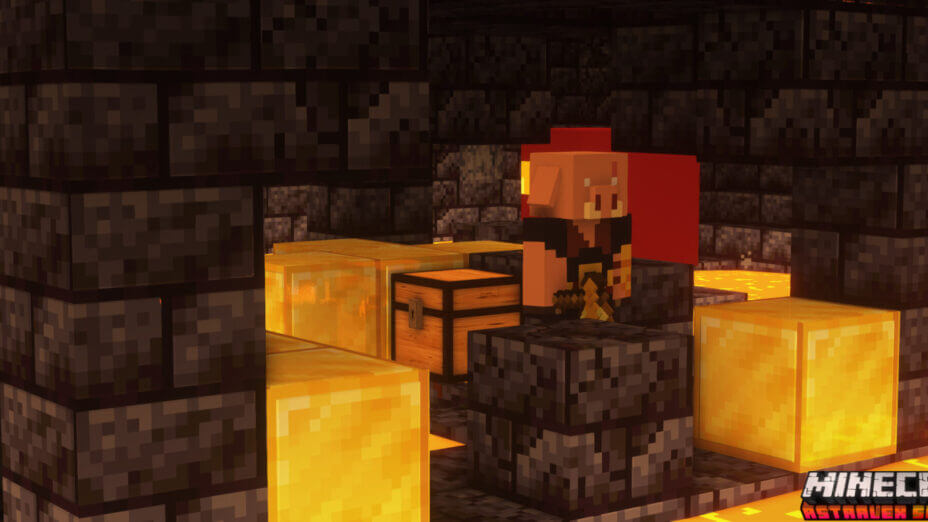
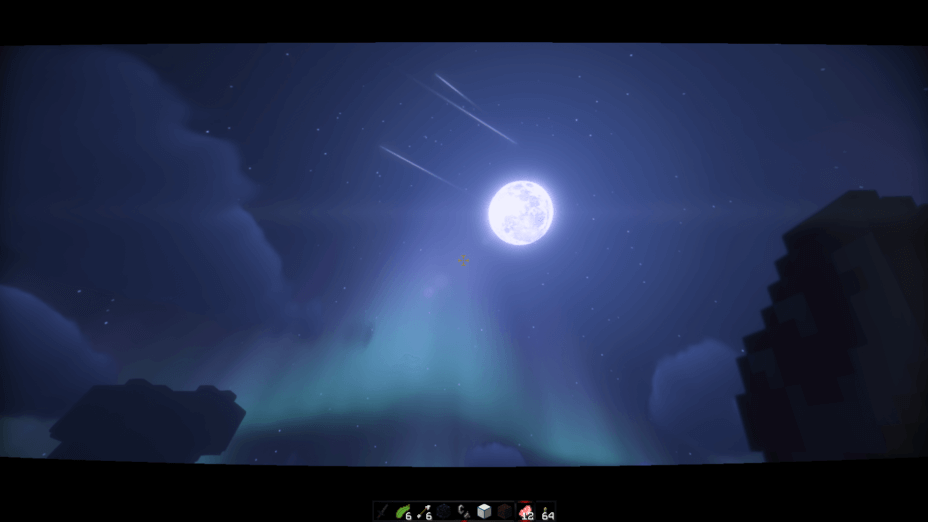
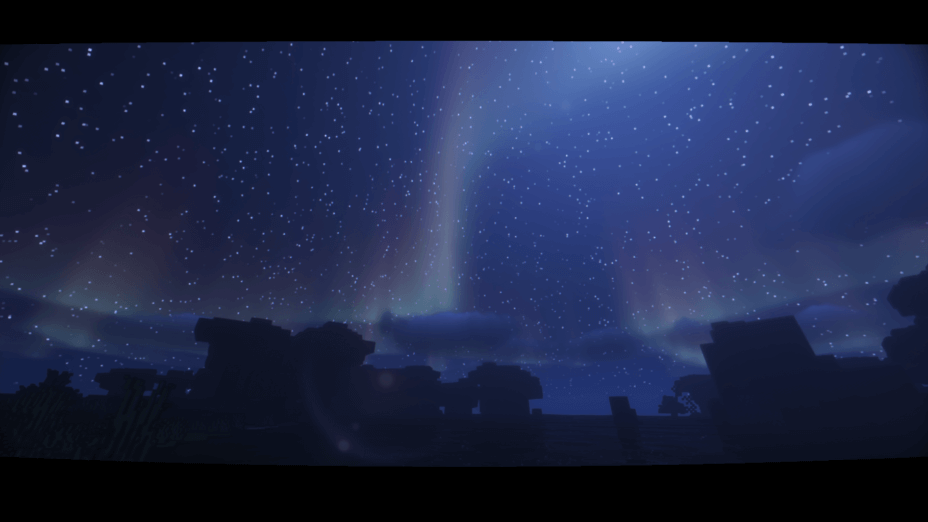
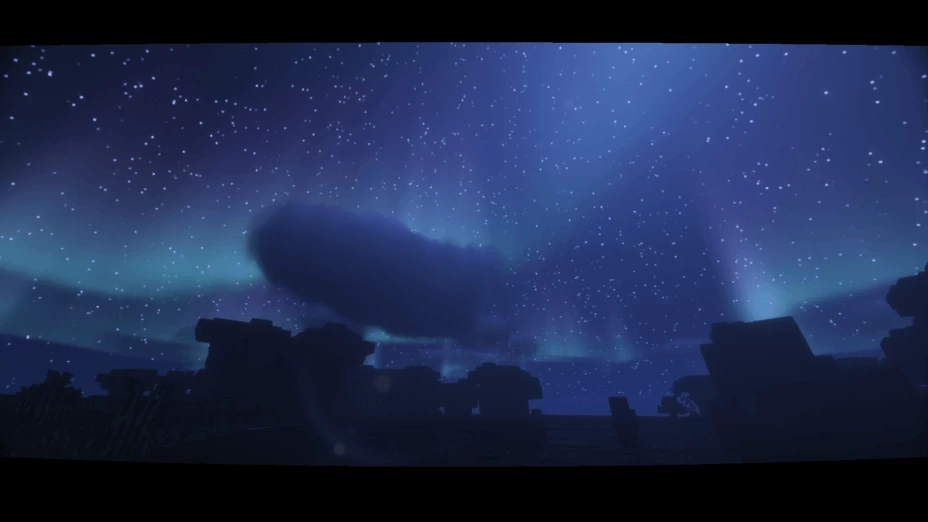
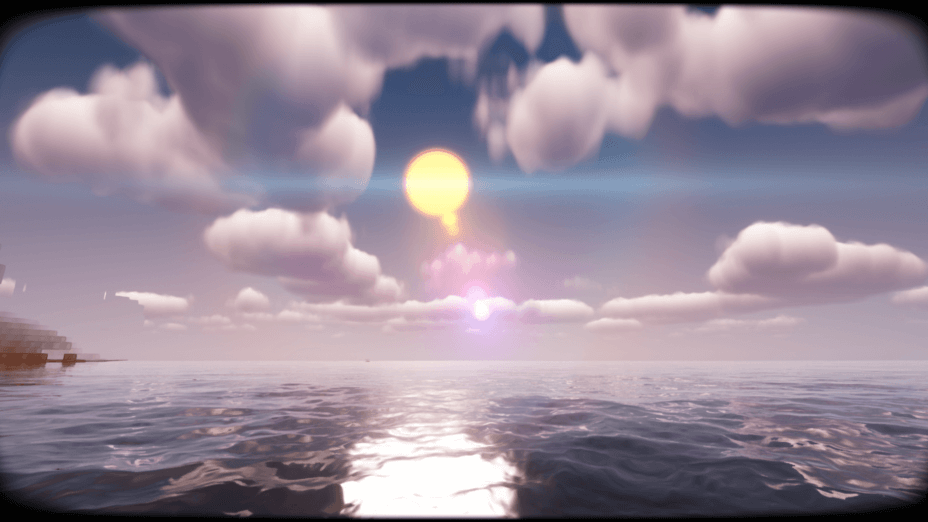
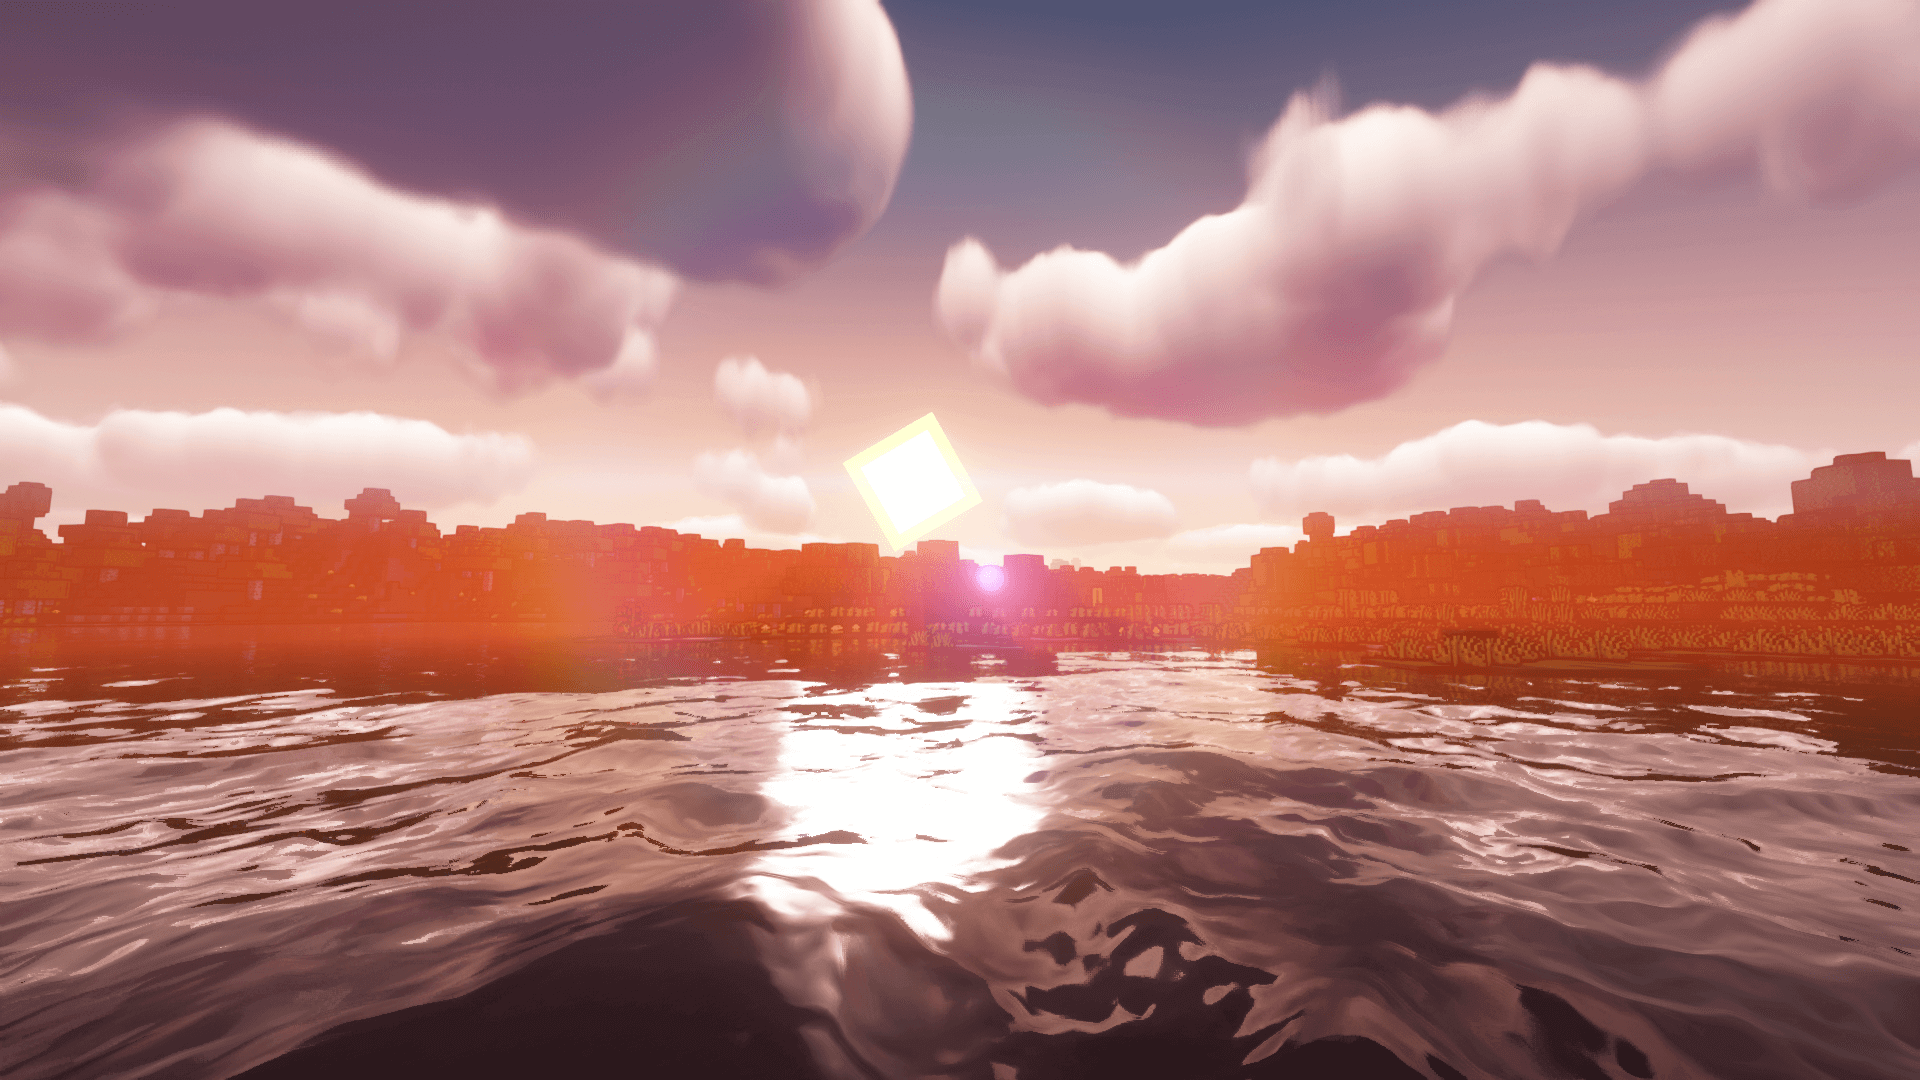
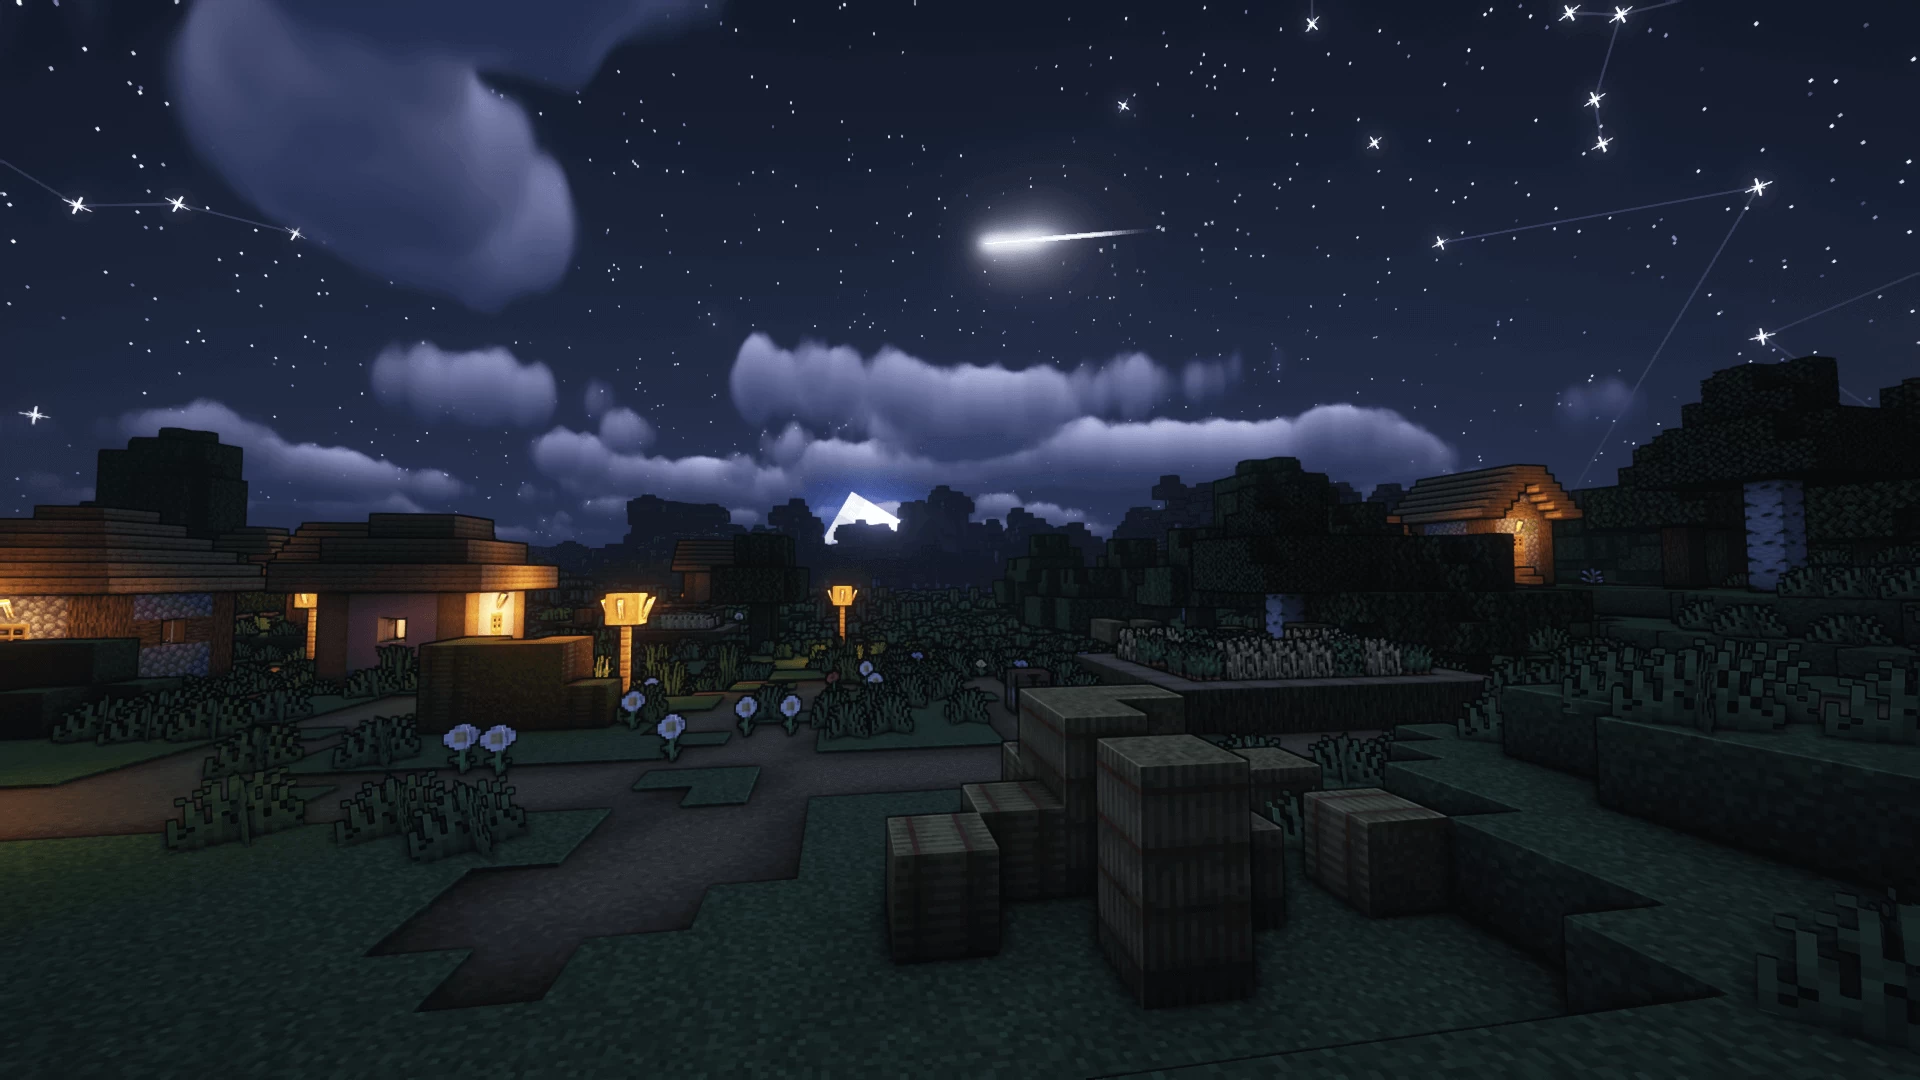
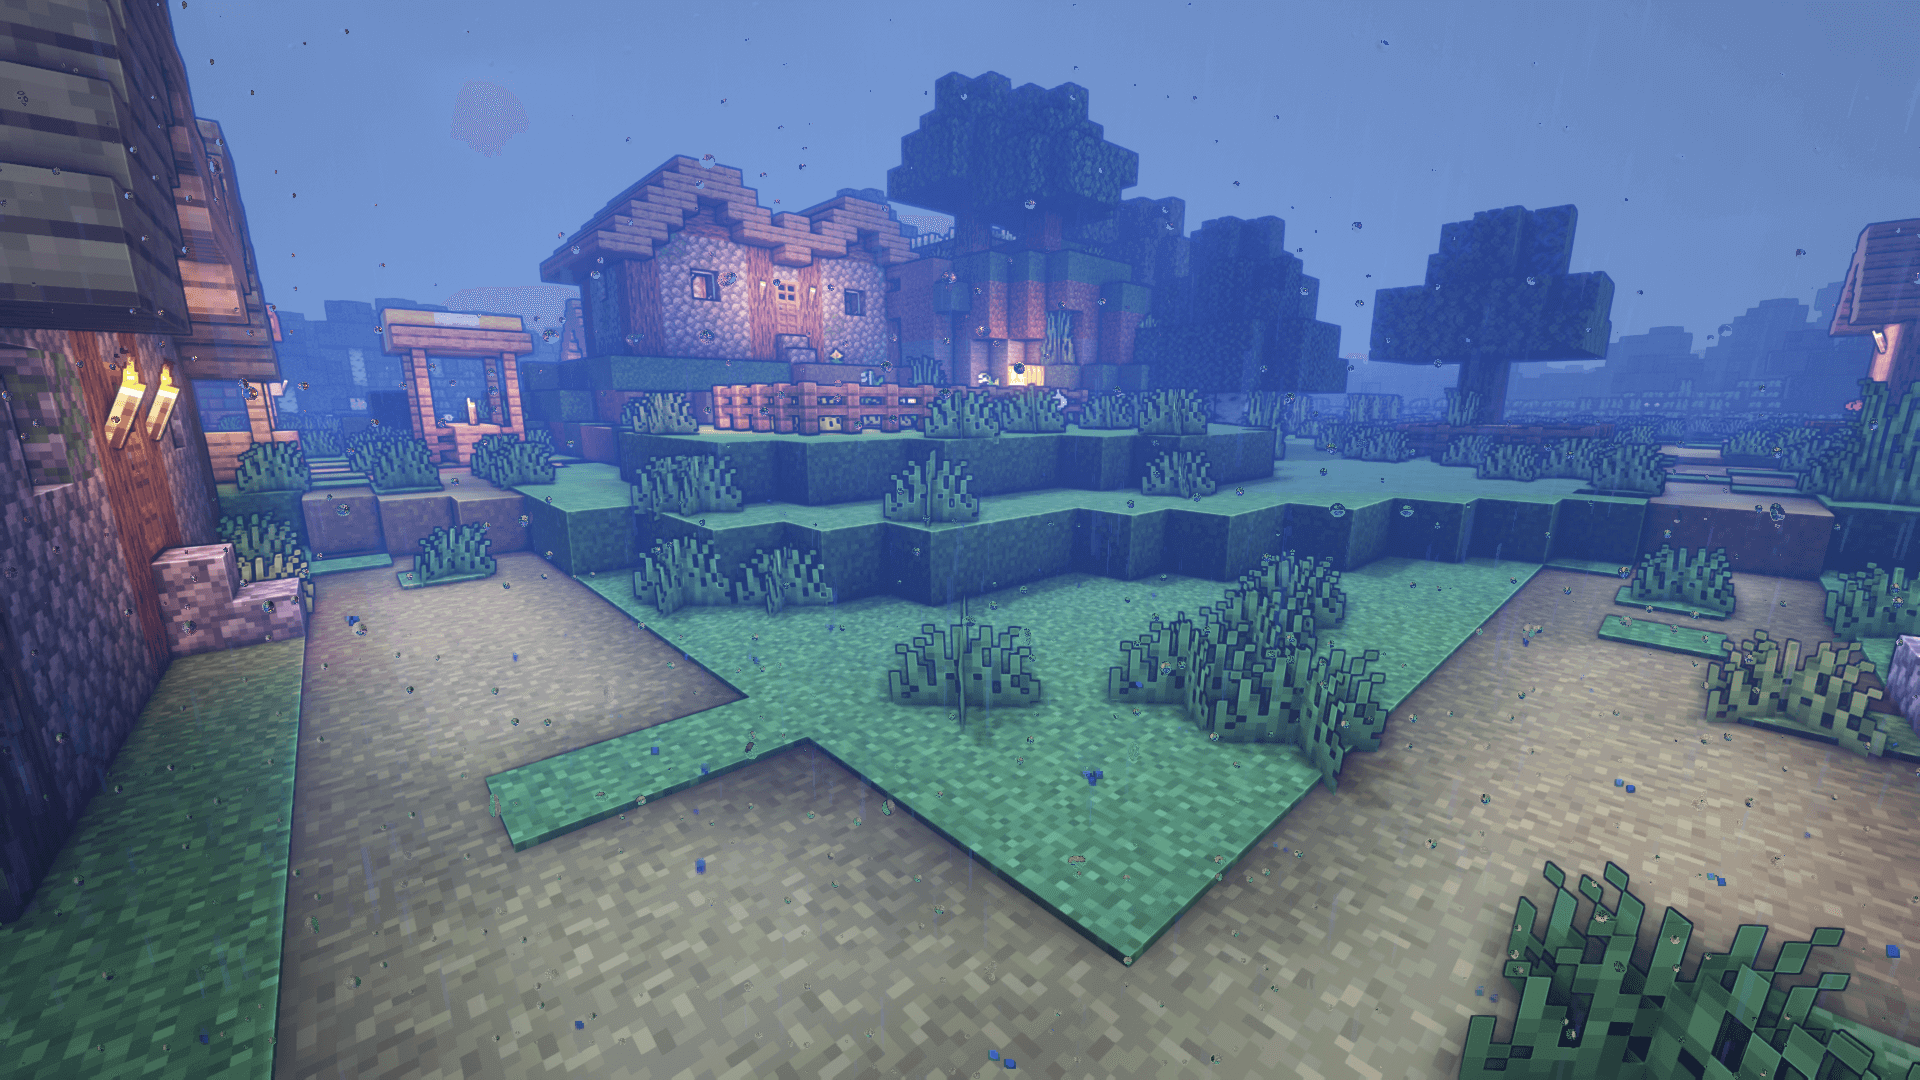
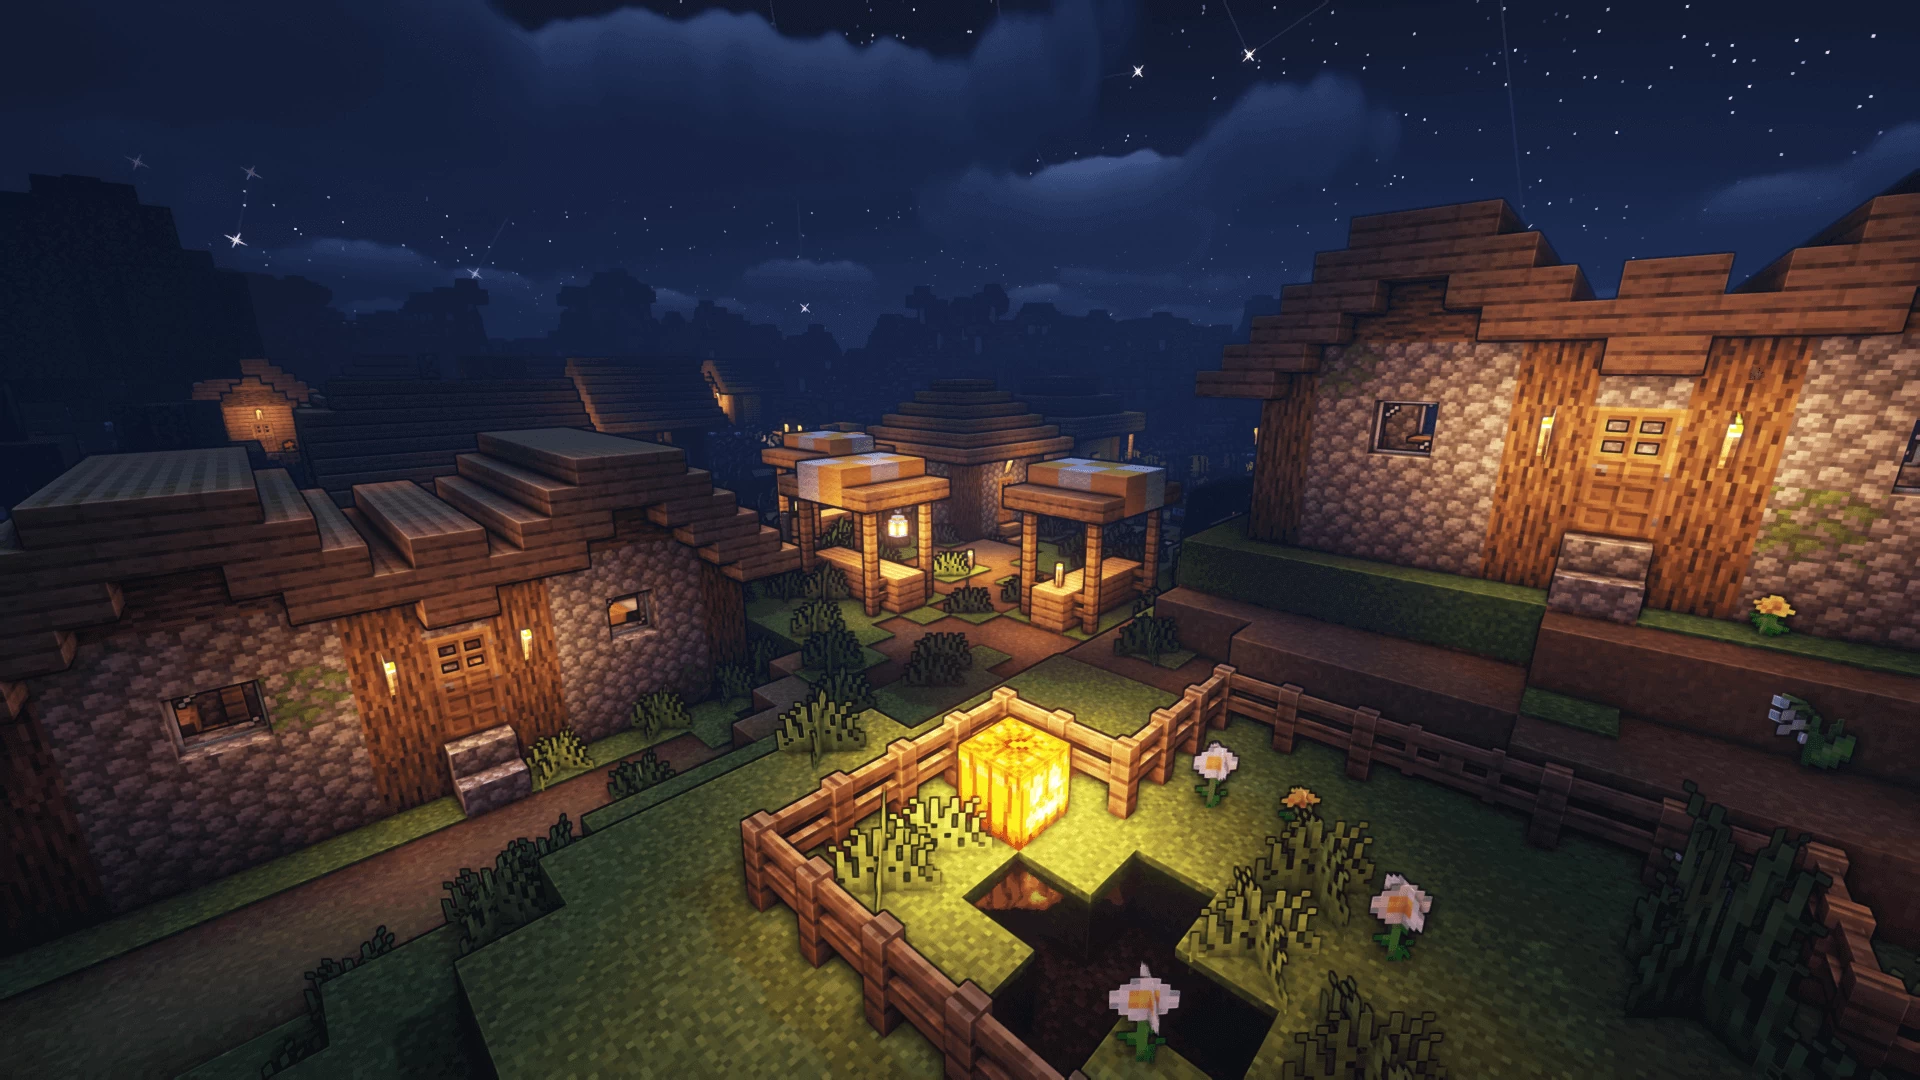
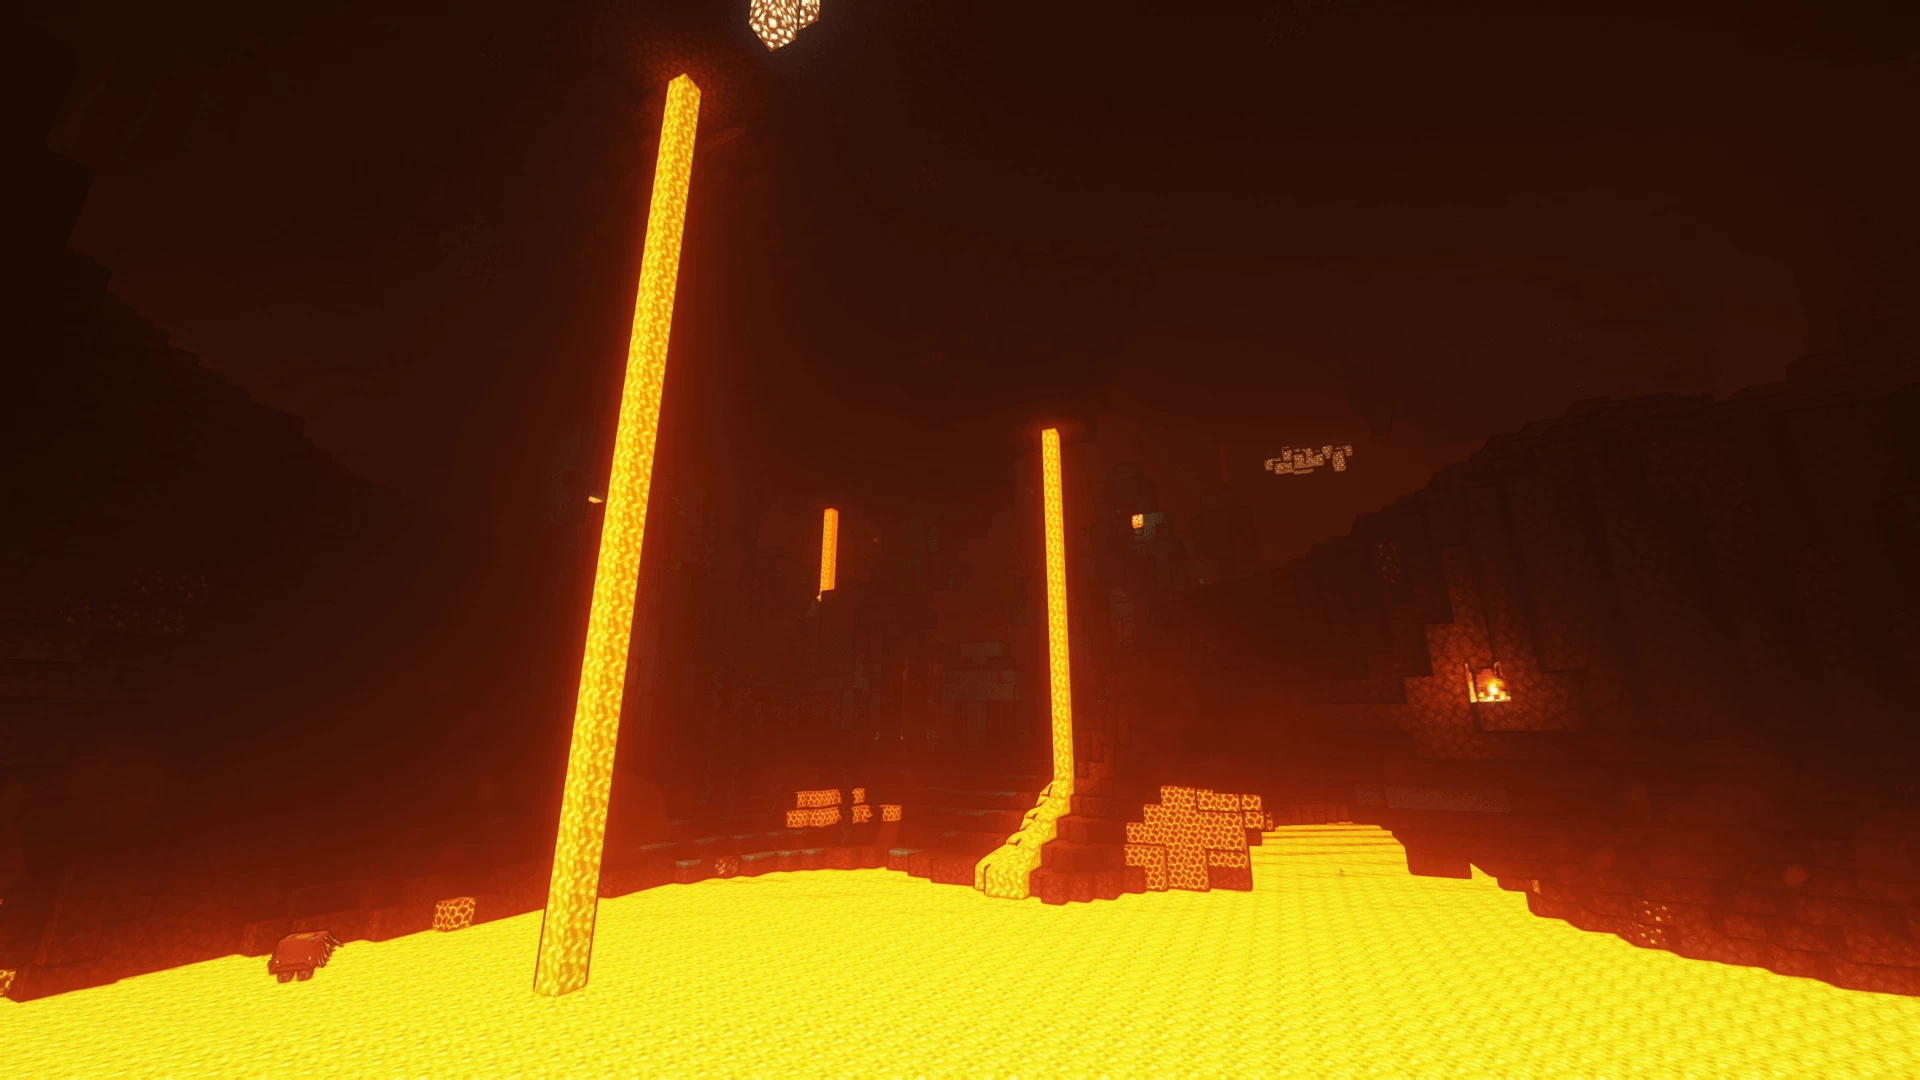
Lighting during the day and night time has been vastly improved. New god rays appear during specific times of the day or weather patterns. New sunshine and moon glow fill the world with a vibrant lighting feel that makes you feel more like you are inside the game.
A flood of visual performance upgrades is available to be tweaked within the settings tool from Optifine. With a wide range of visual performance enhancements, gamers with high-end PCs will experience a completely different Minecraft experience.
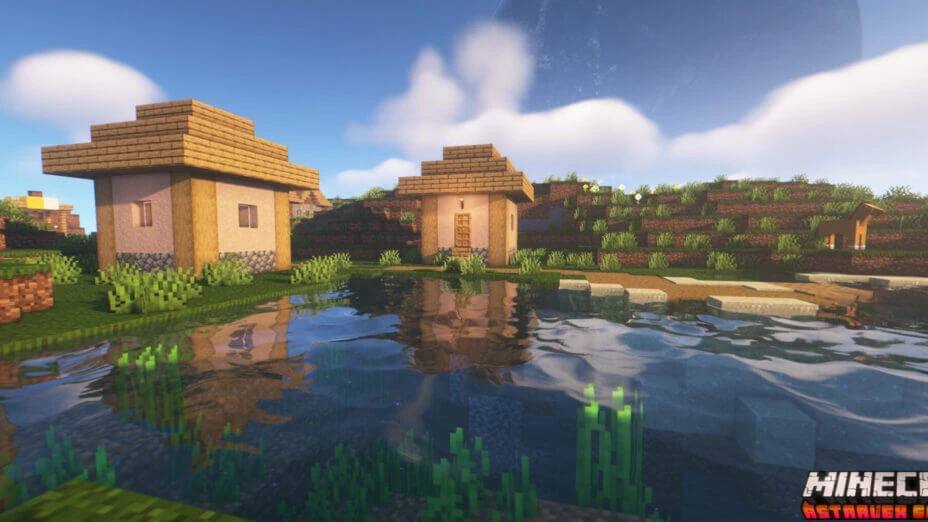
As mentioned before, this shader pack was made with Minecraft content creators in mind. With fancy lighting and visual details, there is a new level of production for videos and Minecraft media. Give your audience a taste of movie-like atmospheres made up of exciting new visual elements seen nowhere else. Now, you can take your content creation to an all-new level with the exciting upgrades offered by the AstraLex Shader (BSL Shaders Edit).
Along with graphic upgrades like HDR, much depth of field and blur adjustments give the game a more movie-like appearance. Some of the features might not be ideal for standard gameplay and survival, but for content creation and scene building, these are fantastic details to take advantage of.
AstraLex Shaders can only be used by those who have Iris Shaders or Optifine for the shaders to function correctly. AstraLex Shaders can automatically be used within your Minecraft world once Optifine / Iris is installed.
To summarize, AstraLex provides a fantastic toolset to those that are looking to make more cinematic Minecraft content to share with a wider audience or to enjoy on your favorite world or servers.
- 1.20
- 1.19.4
- 1.19.3
- 1.19.2
- 1.19.1
- 1.19
- 1.18.2
- 1.18.1
- 1.18
- 1.17.1
- 1.17
- 1.16.5
- 1.16.4
- 1.16.3
- 1.16.2
- 1.16.1
- 1.16
- 1.15.2
- 1.15.1
- 1.15
- 1.14.4
- 1.14.3
- 1.14.2
- 1.14.1
- 1.14
- 1.13.2
- 1.13.1
- 1.13
- 1.12.2
- 1.12.1
- 1.12
- 1.11.2
- 1.11.1
- 1.11
- 1.10.2
- 1.10.1
- 1.10
- 1.9.4
- 1.9.3
- 1.9.2
- 1.9.1
- 1.9
- 1.8.9
- 1.8.8
- 1.8.7
- 1.8.6
- 1.8.5
- 1.8.4
- 1.8.3
- 1.8.2
- 1.8.1
- 1.8
- 1.7.10
- 1.7.9
- 1.7.8
- 1.7.7
- 1.7.6
- 1.7.5
- 1.7.4
- 1.7.2
- 1.7
- 1.6.4
- 1.6.2
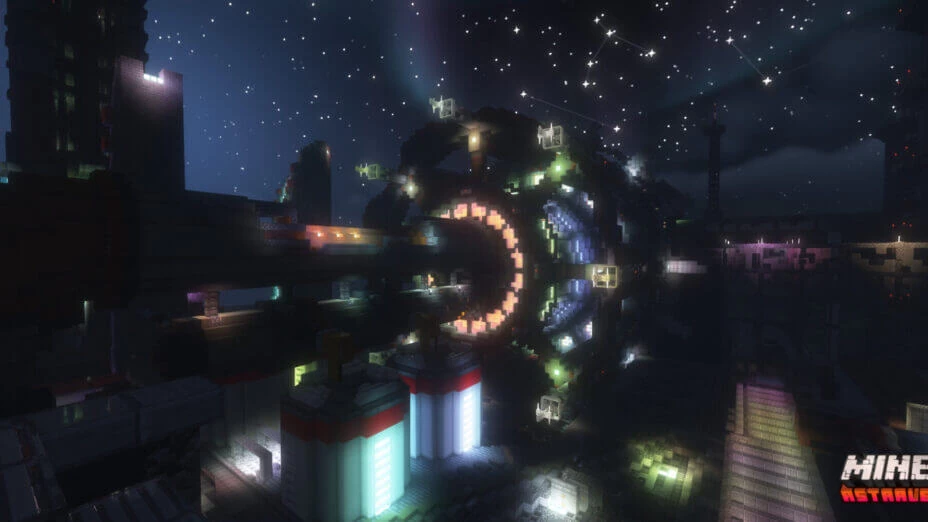
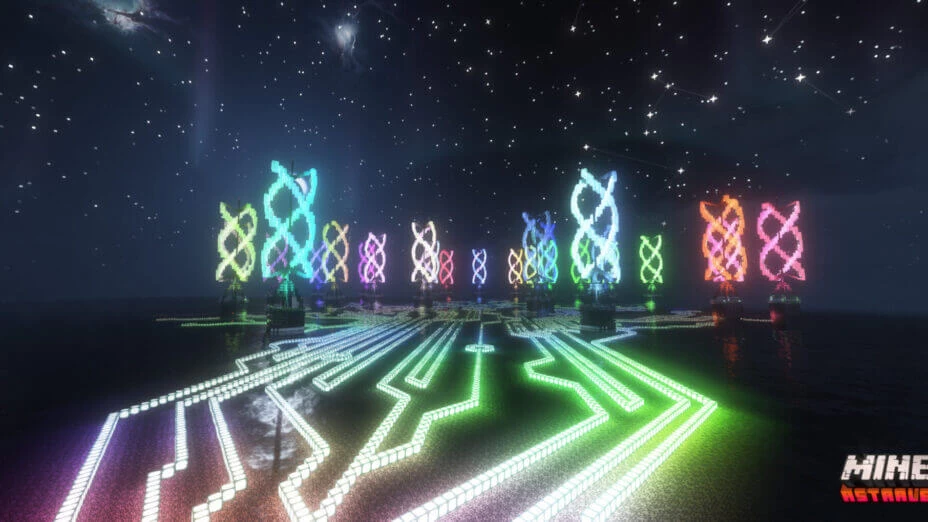
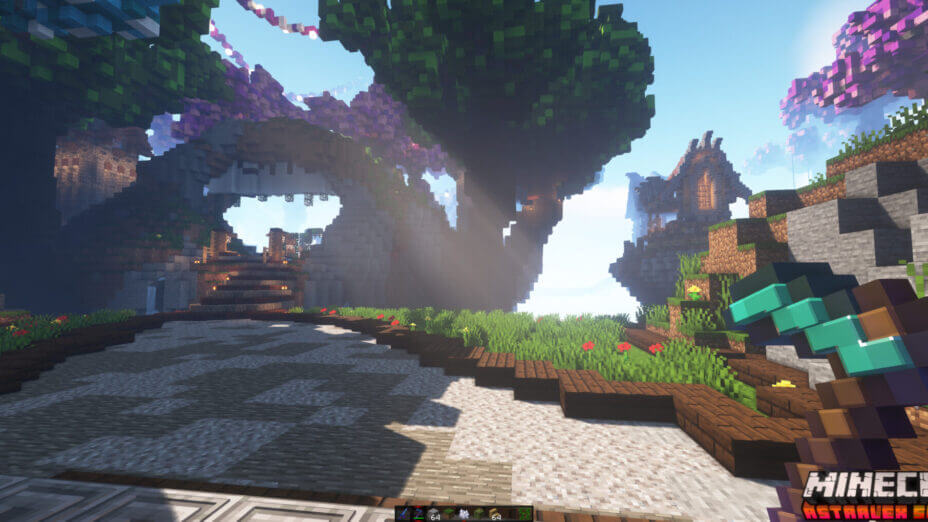
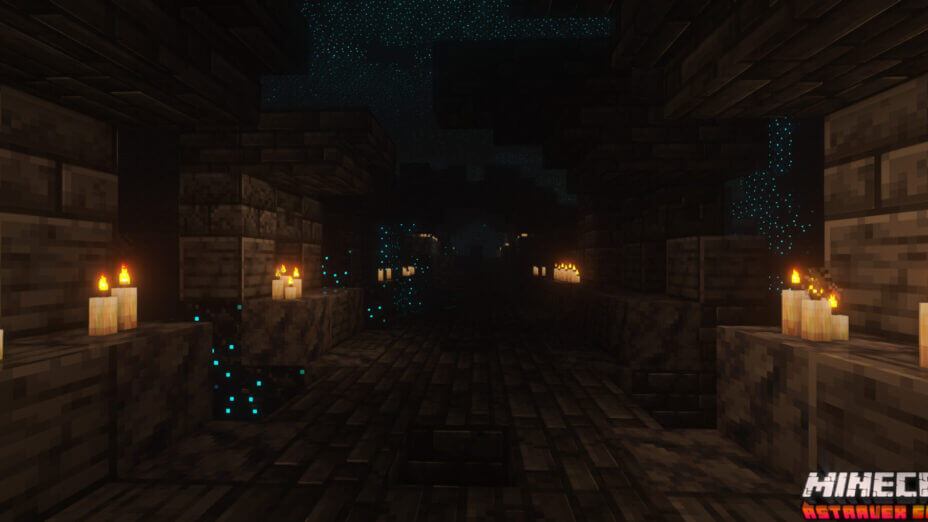
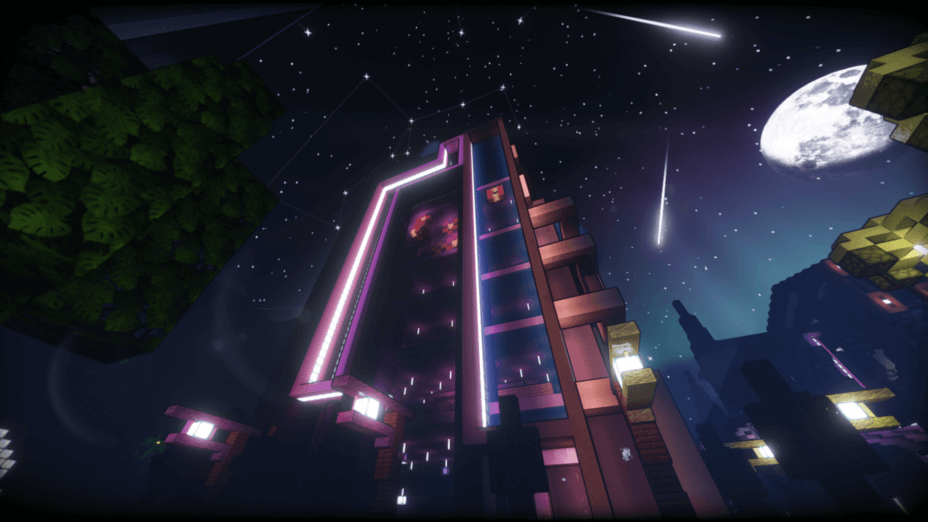
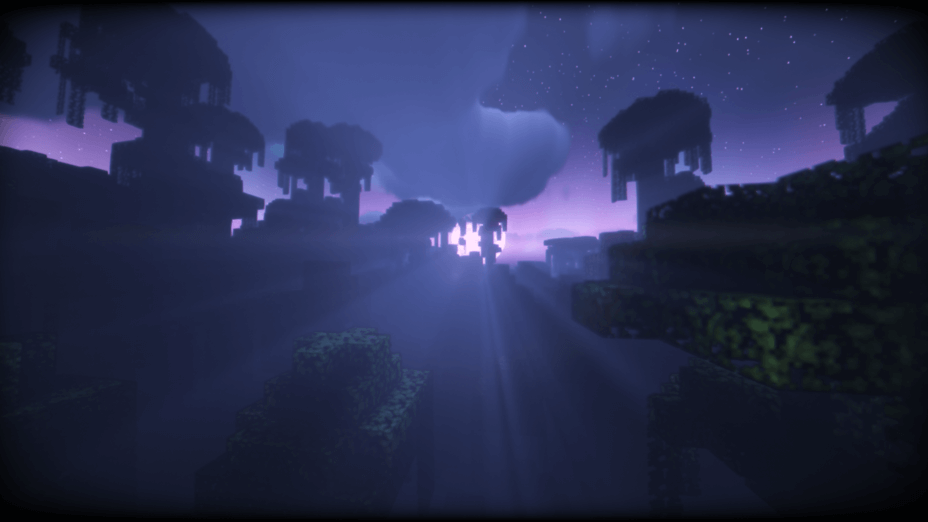
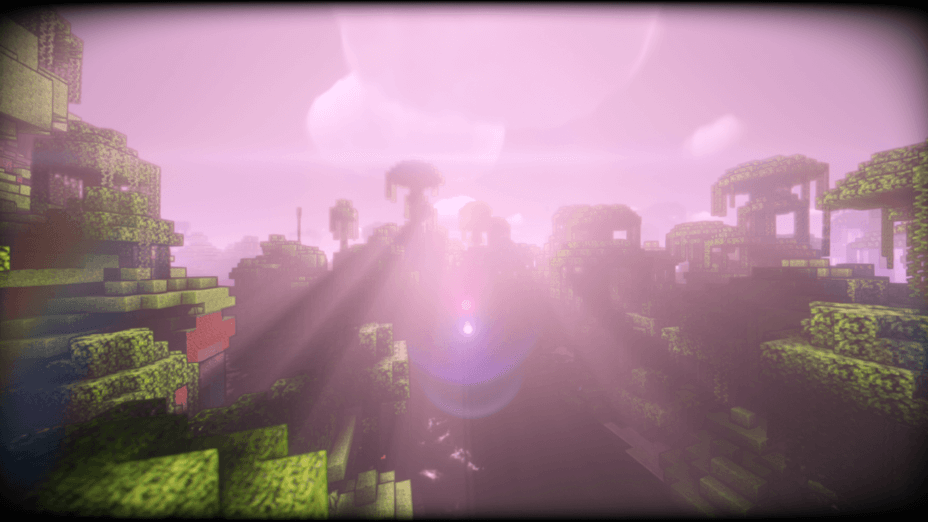
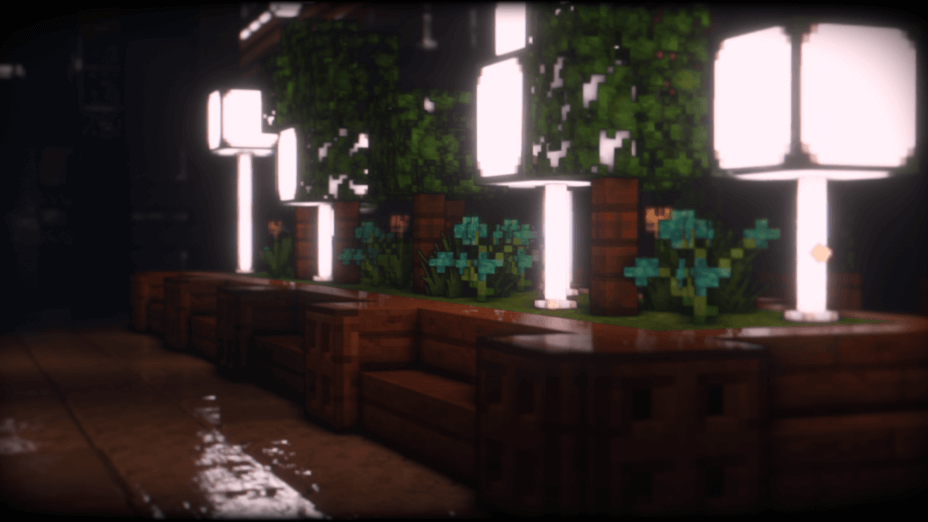
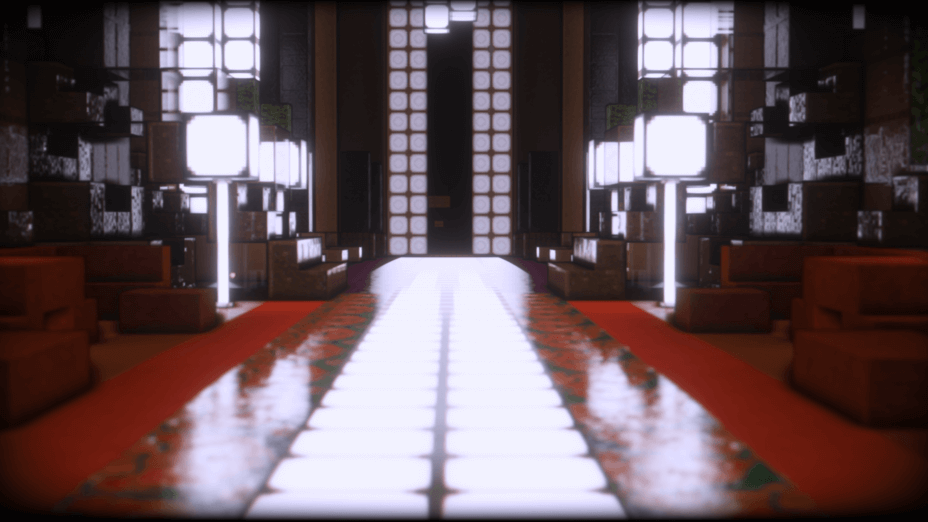
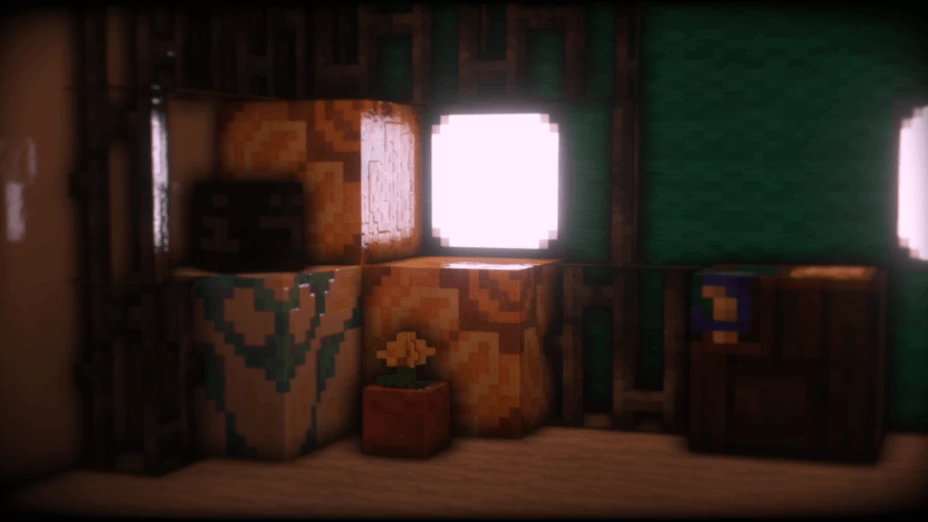
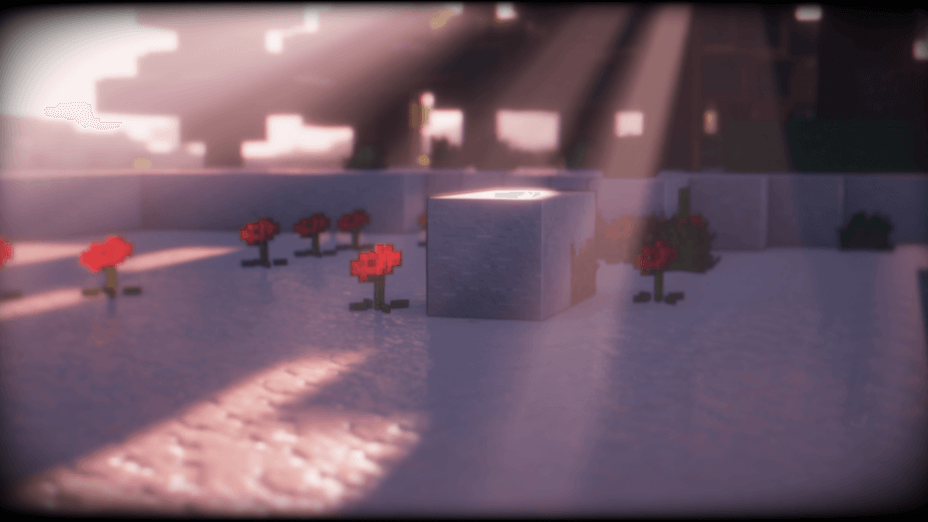
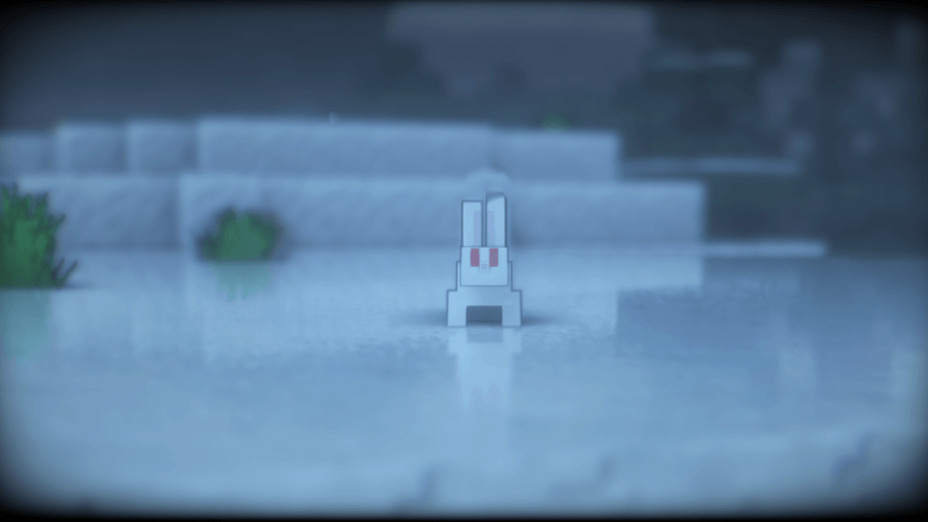
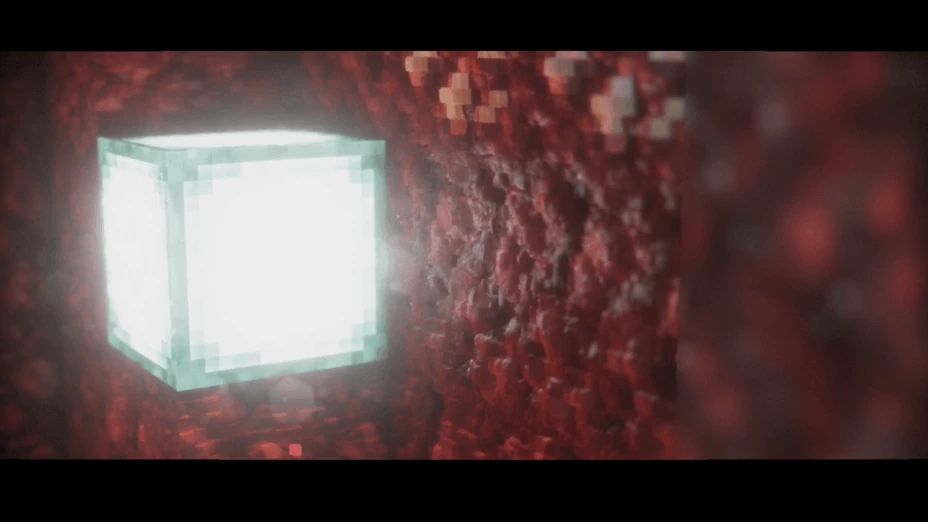
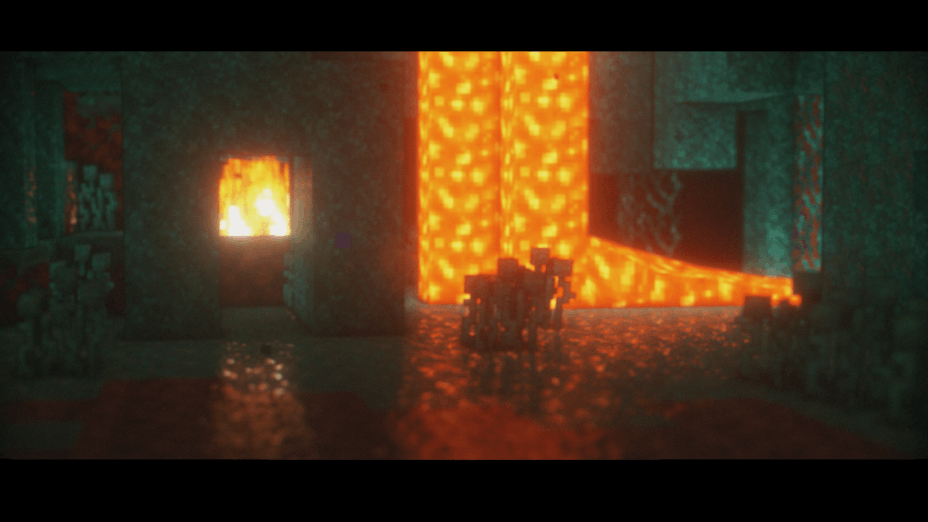
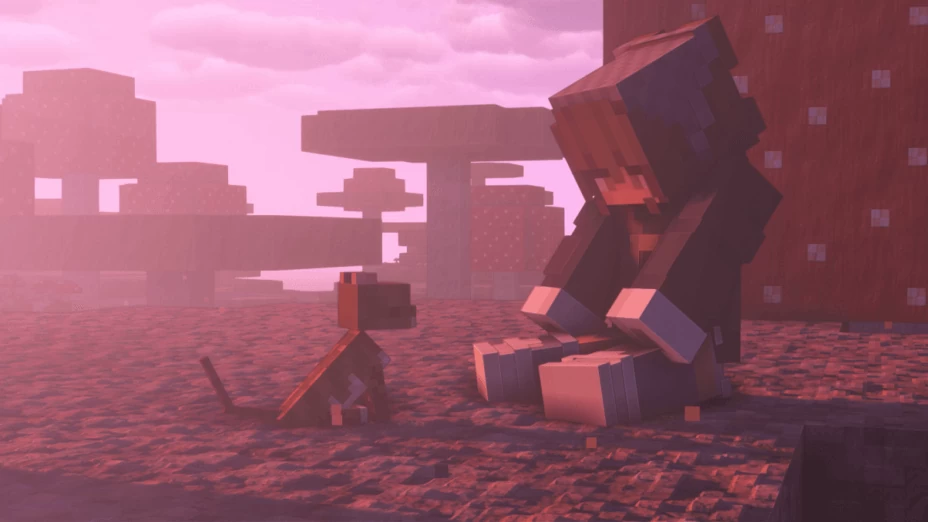
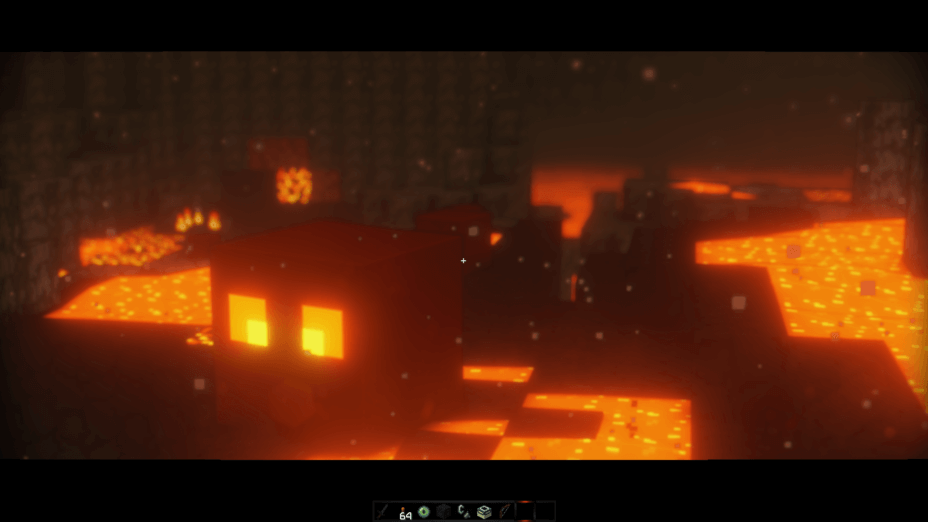
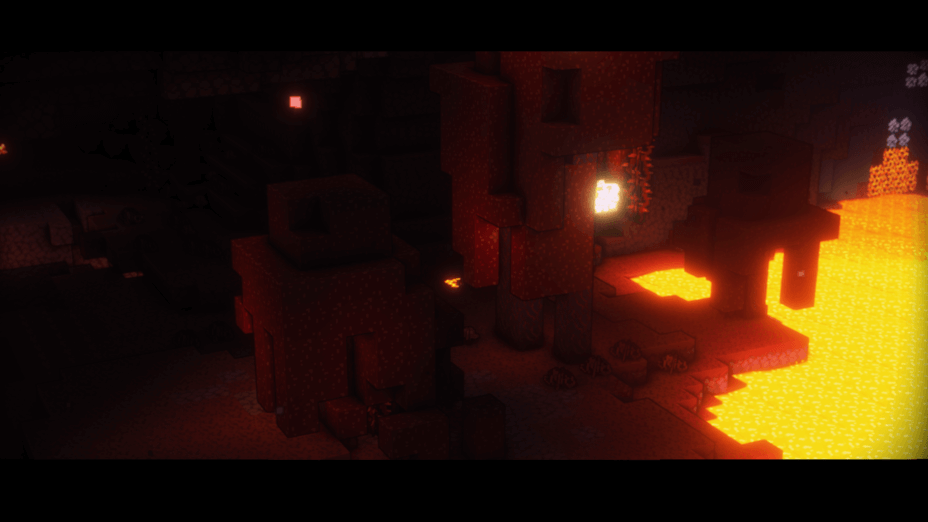
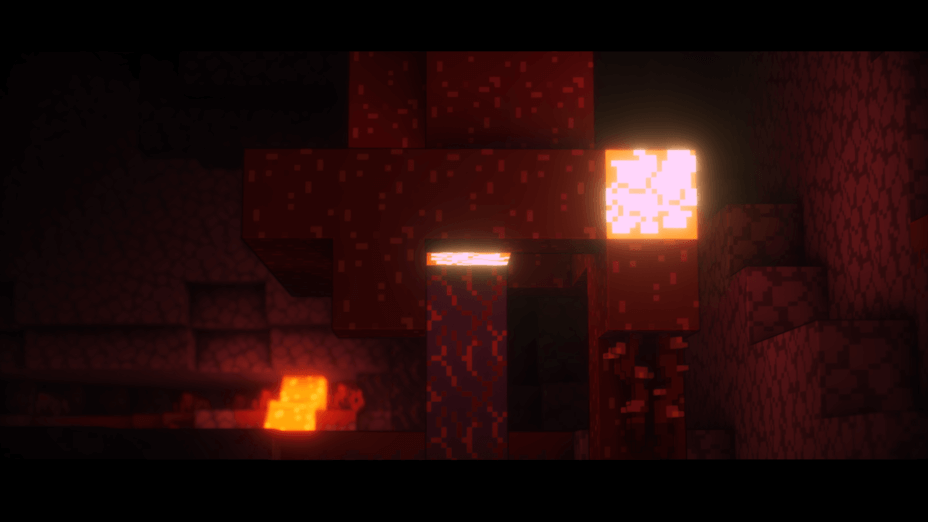
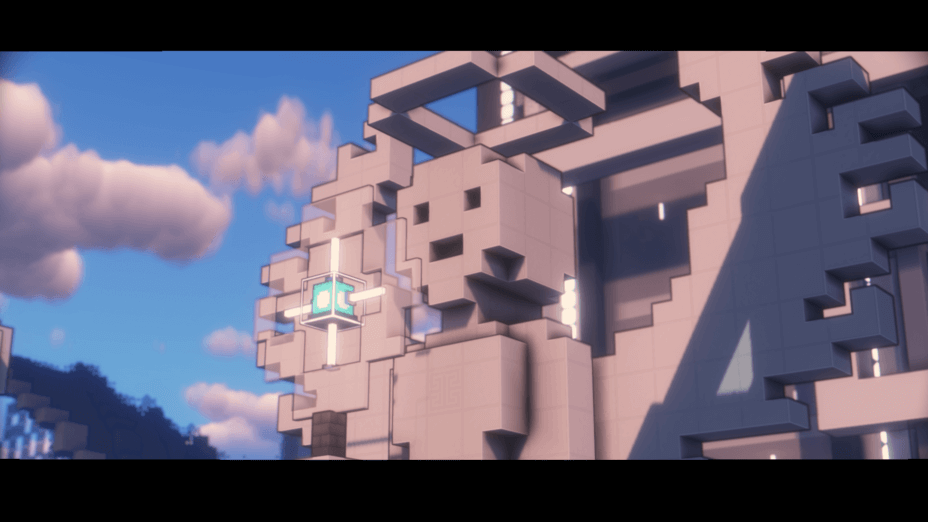
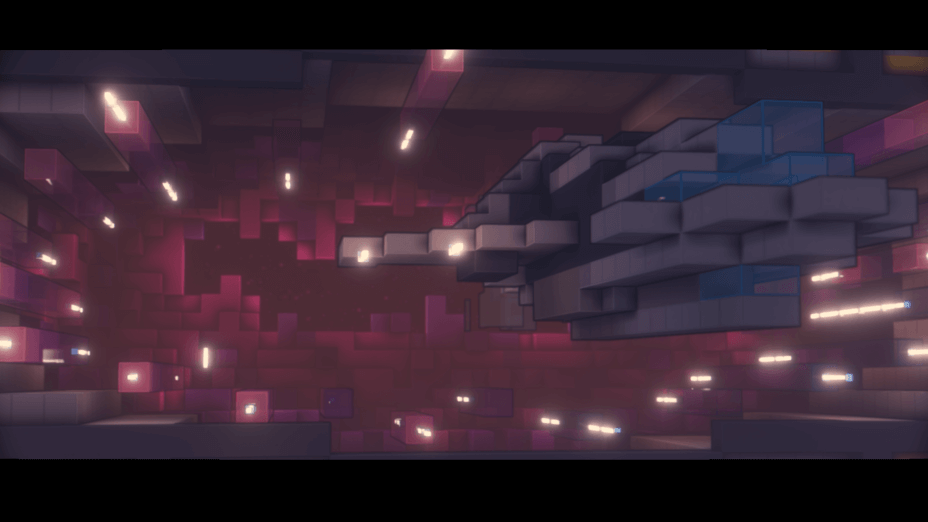
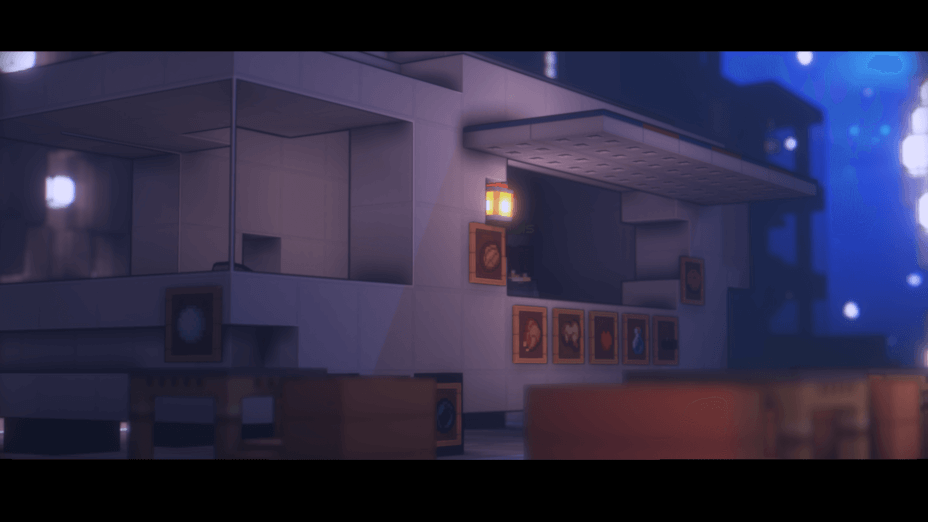
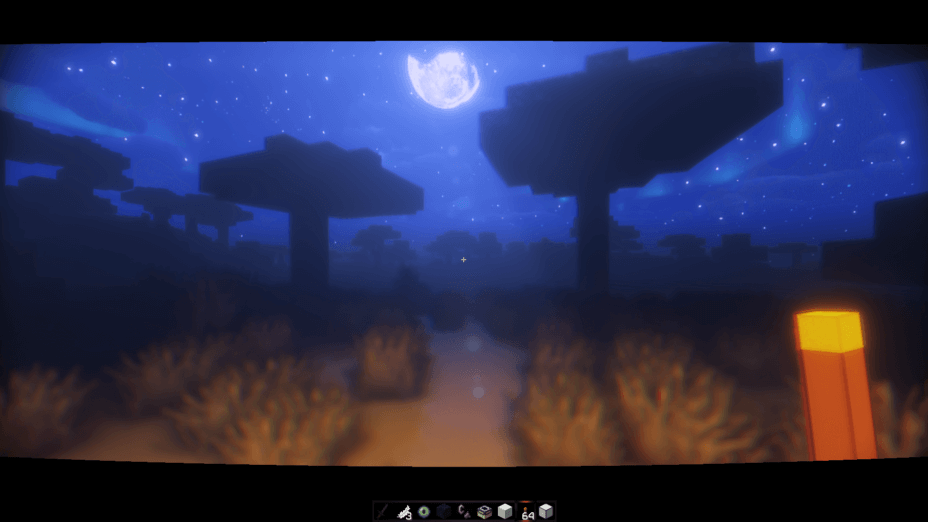
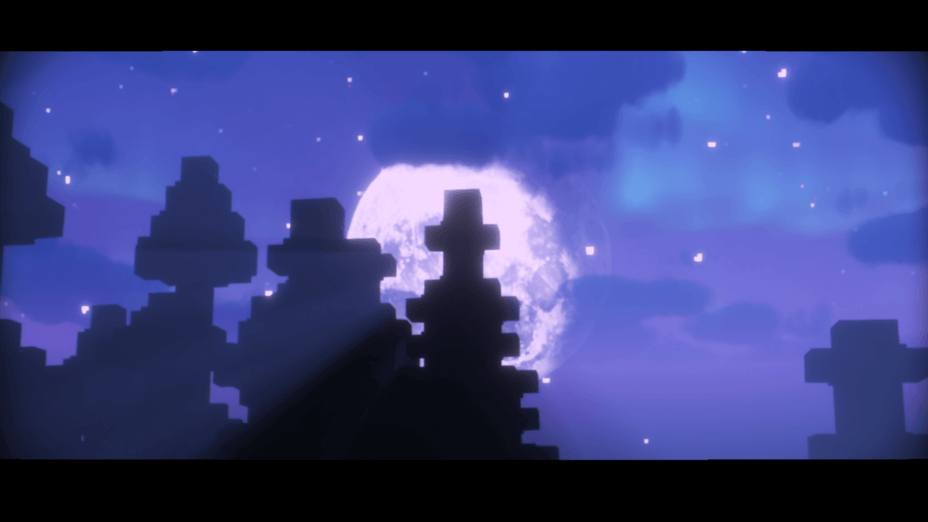
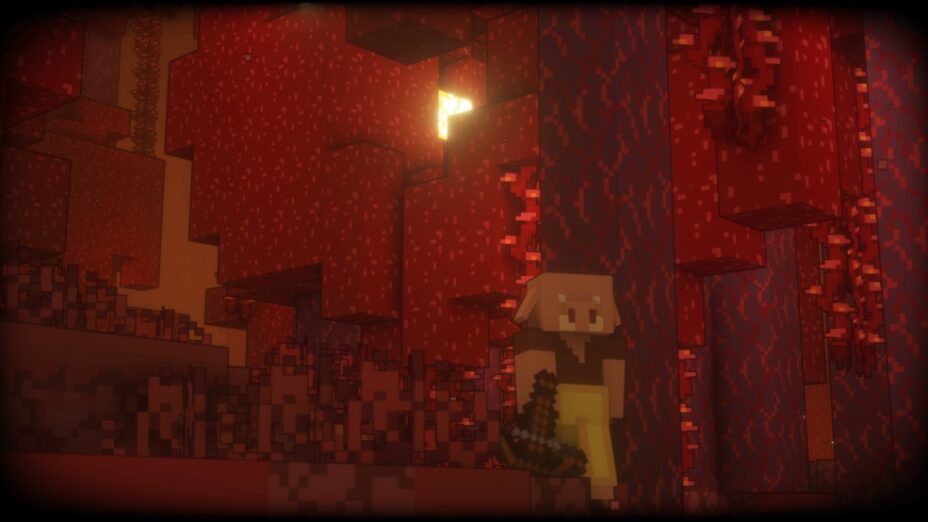
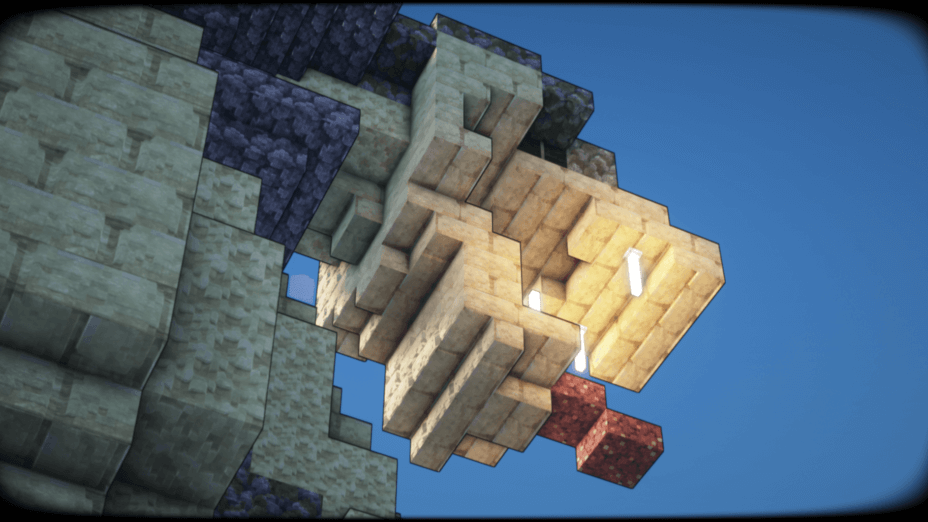
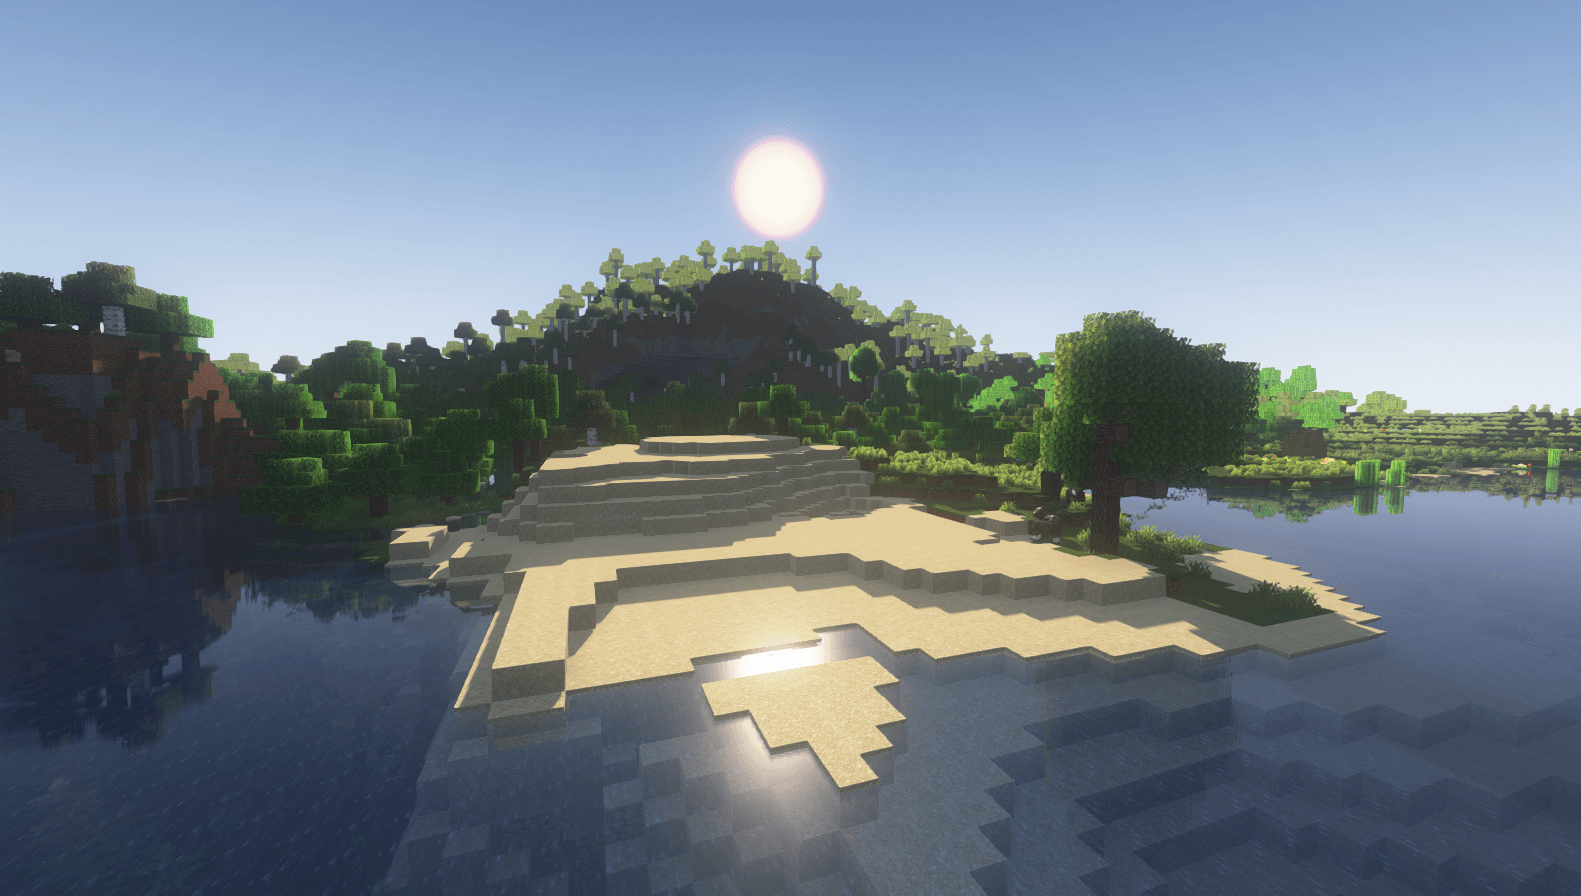
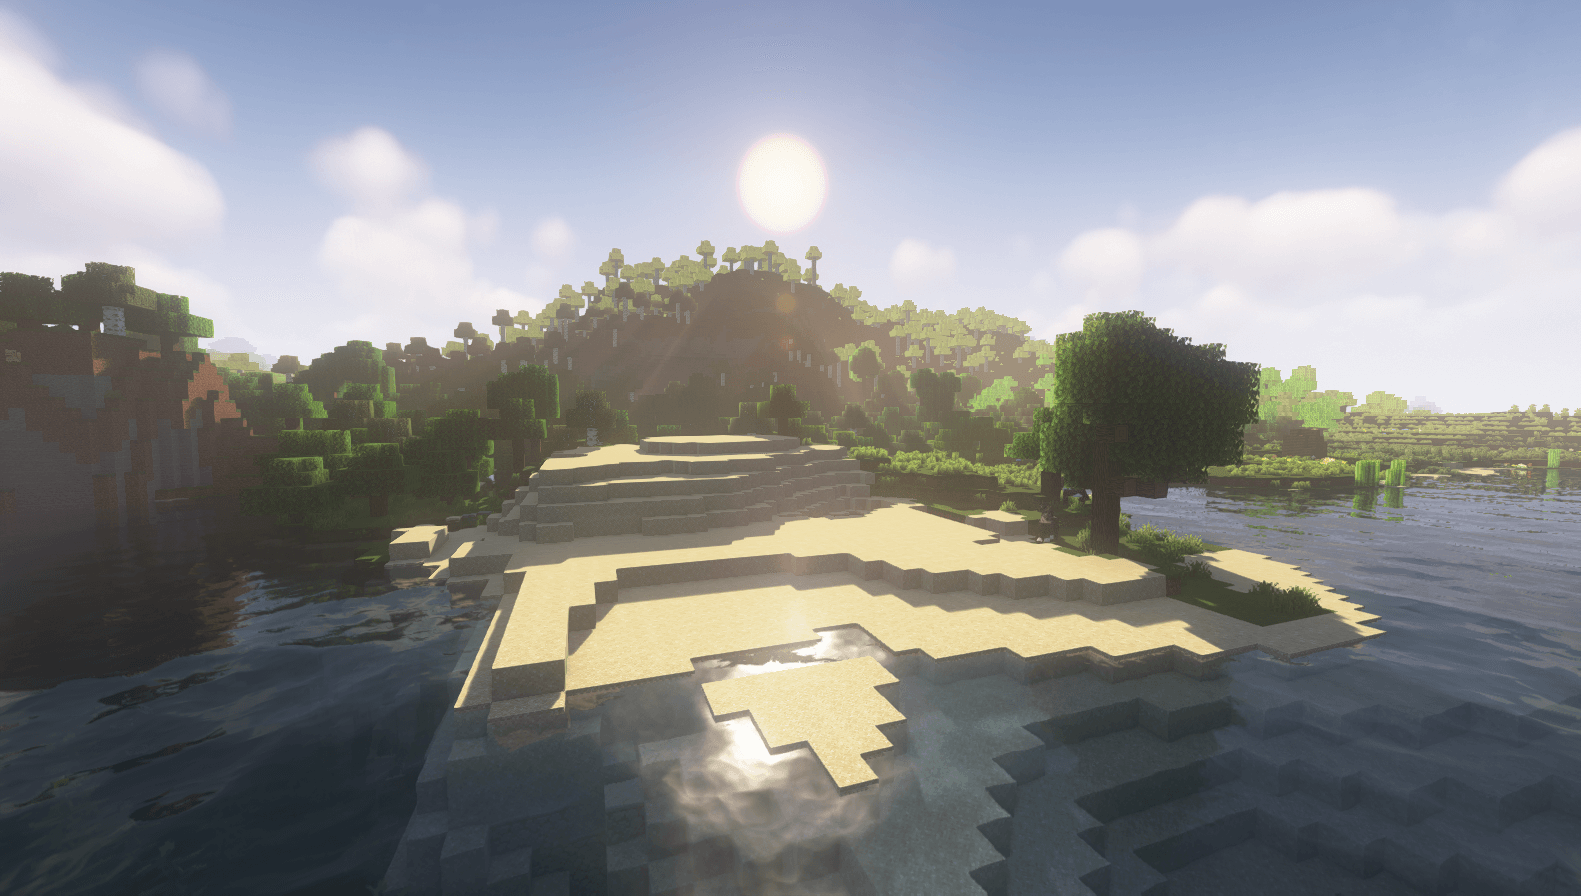
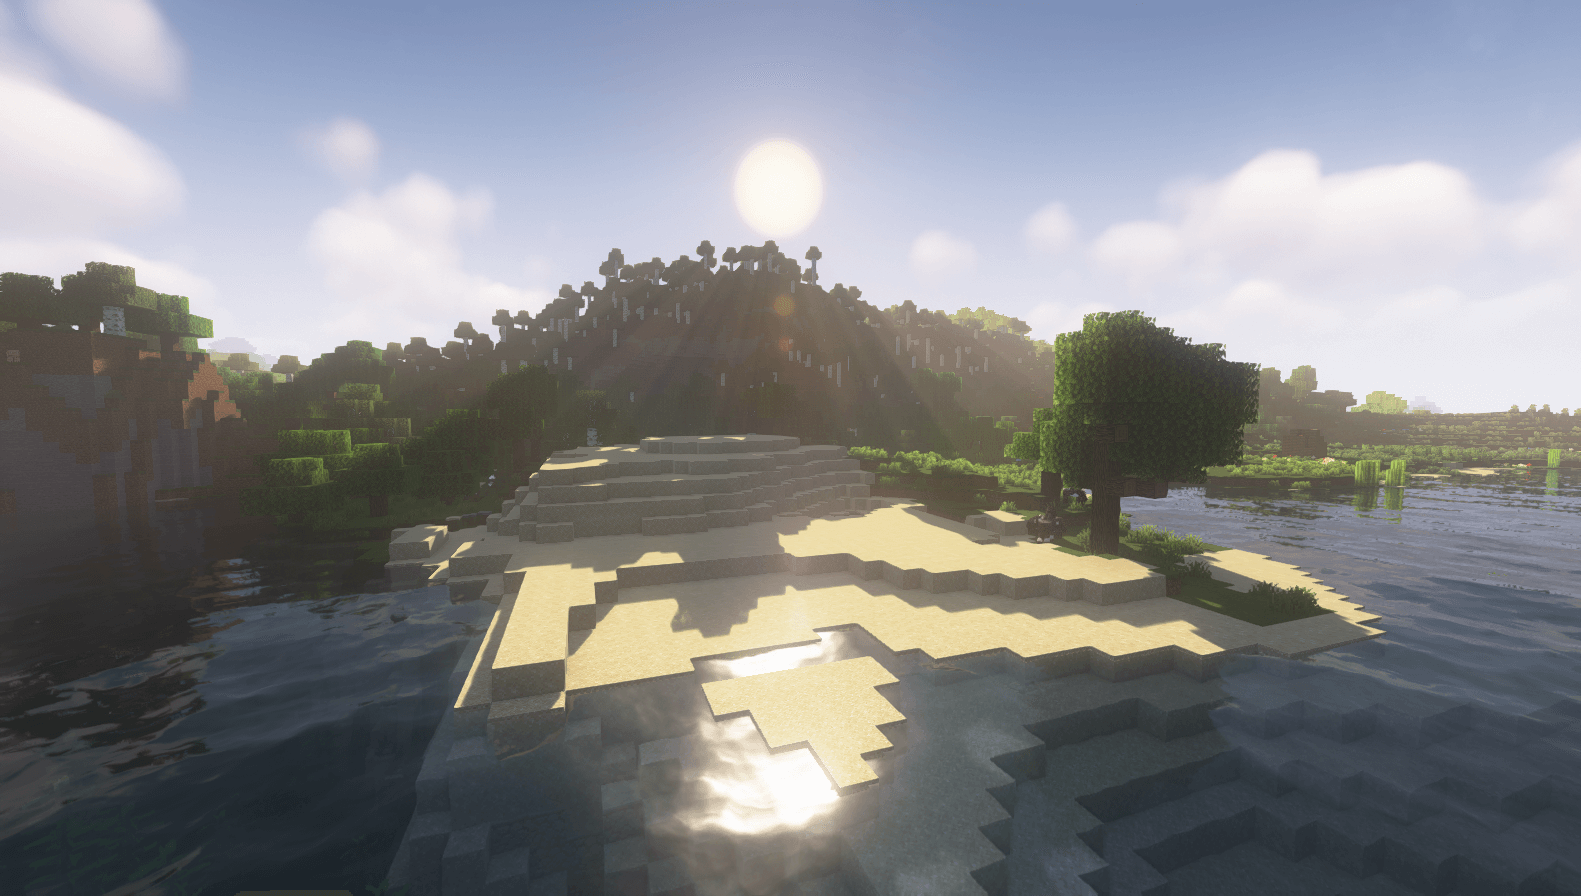
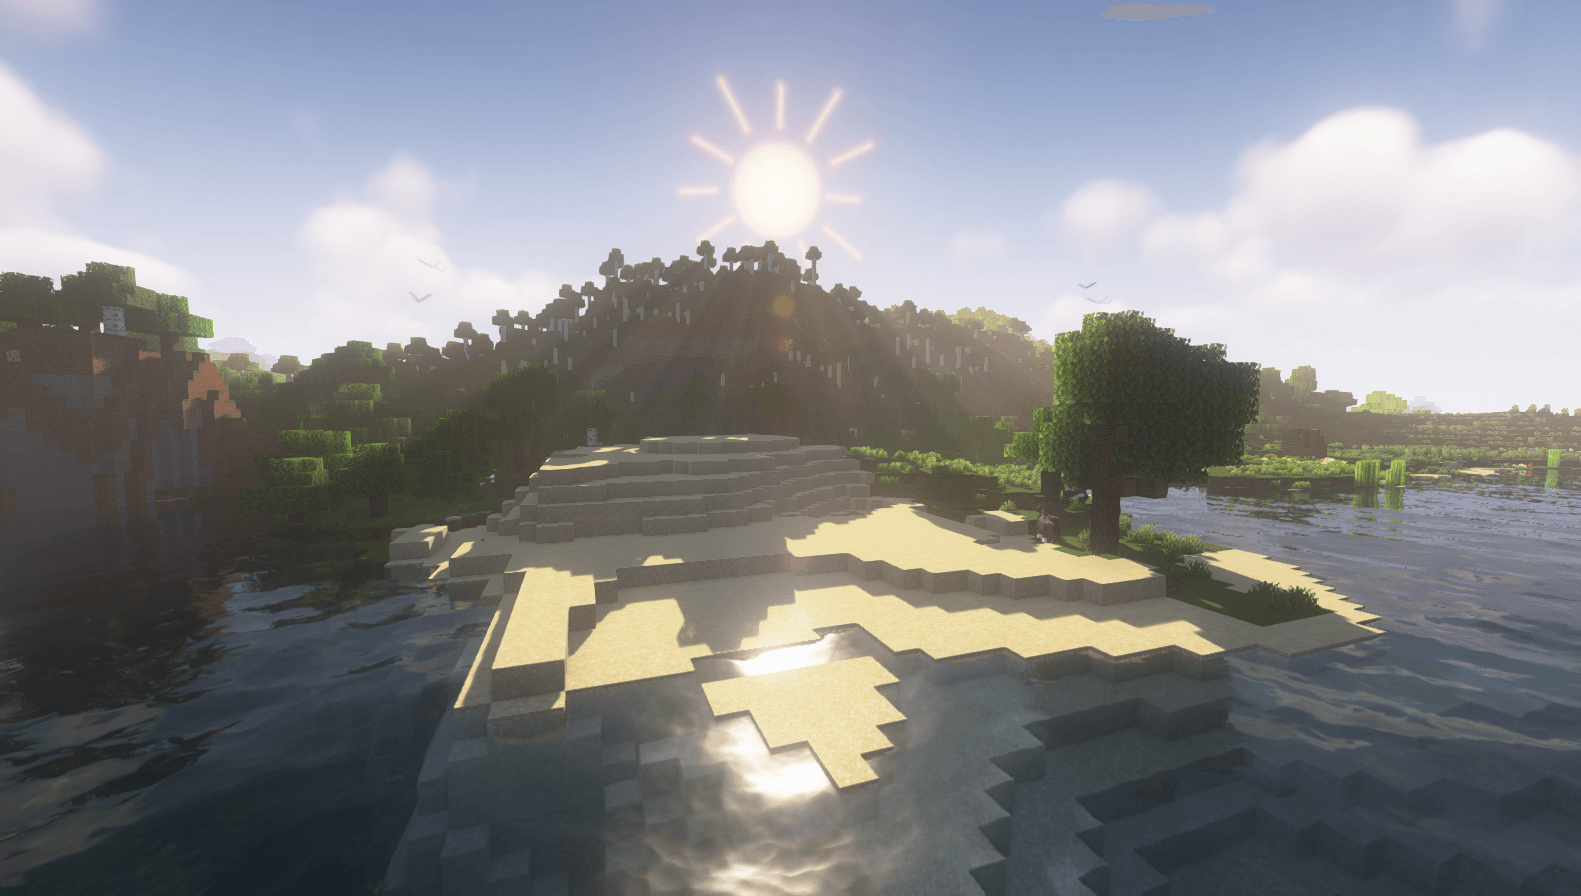
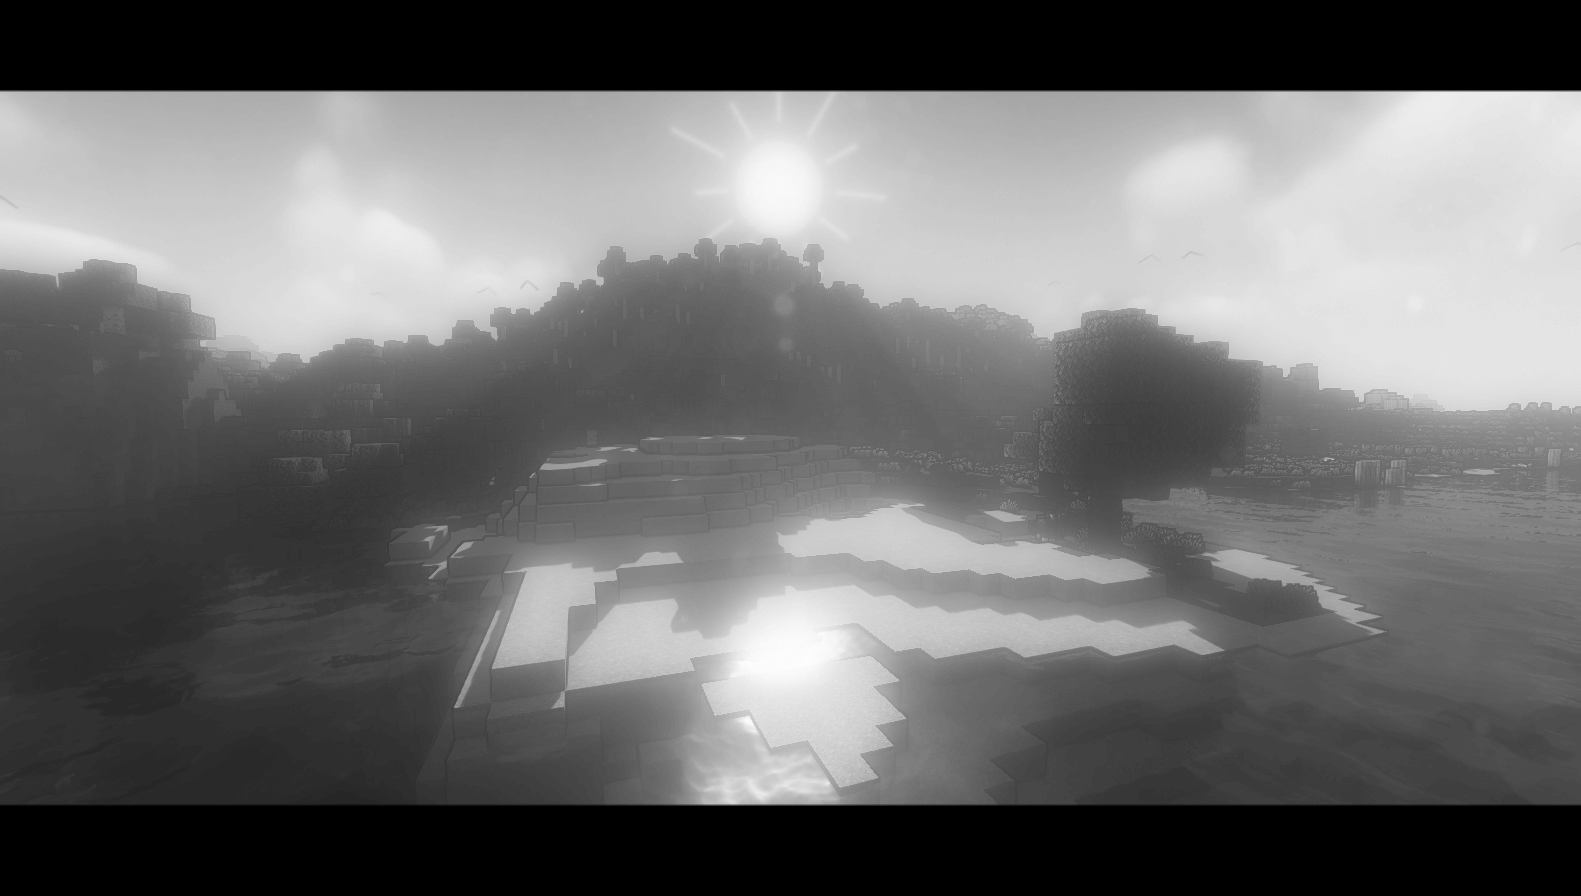
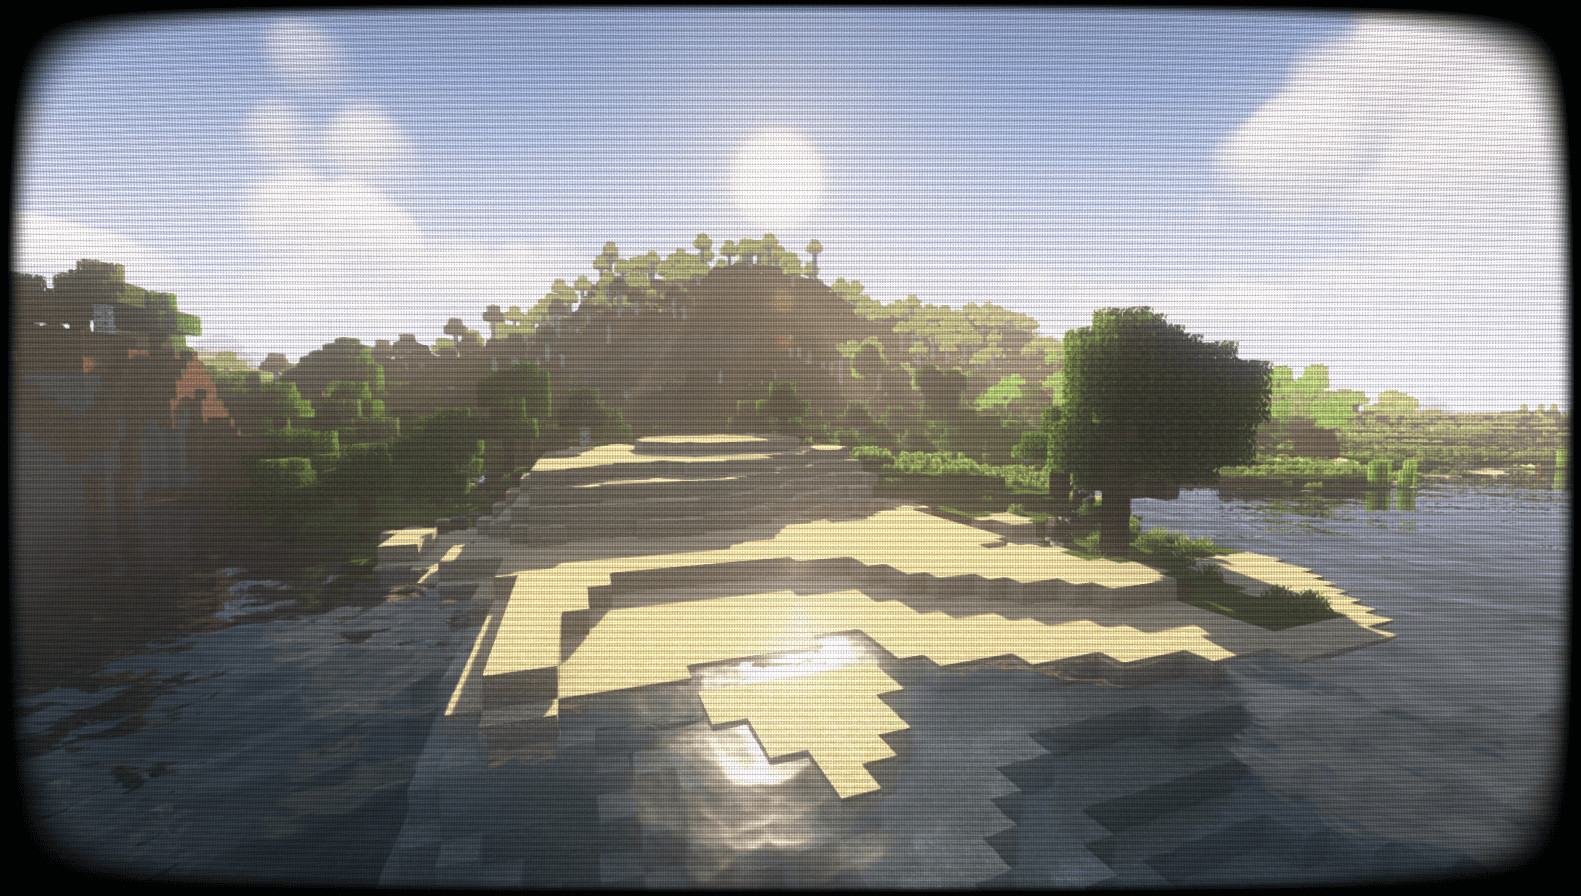
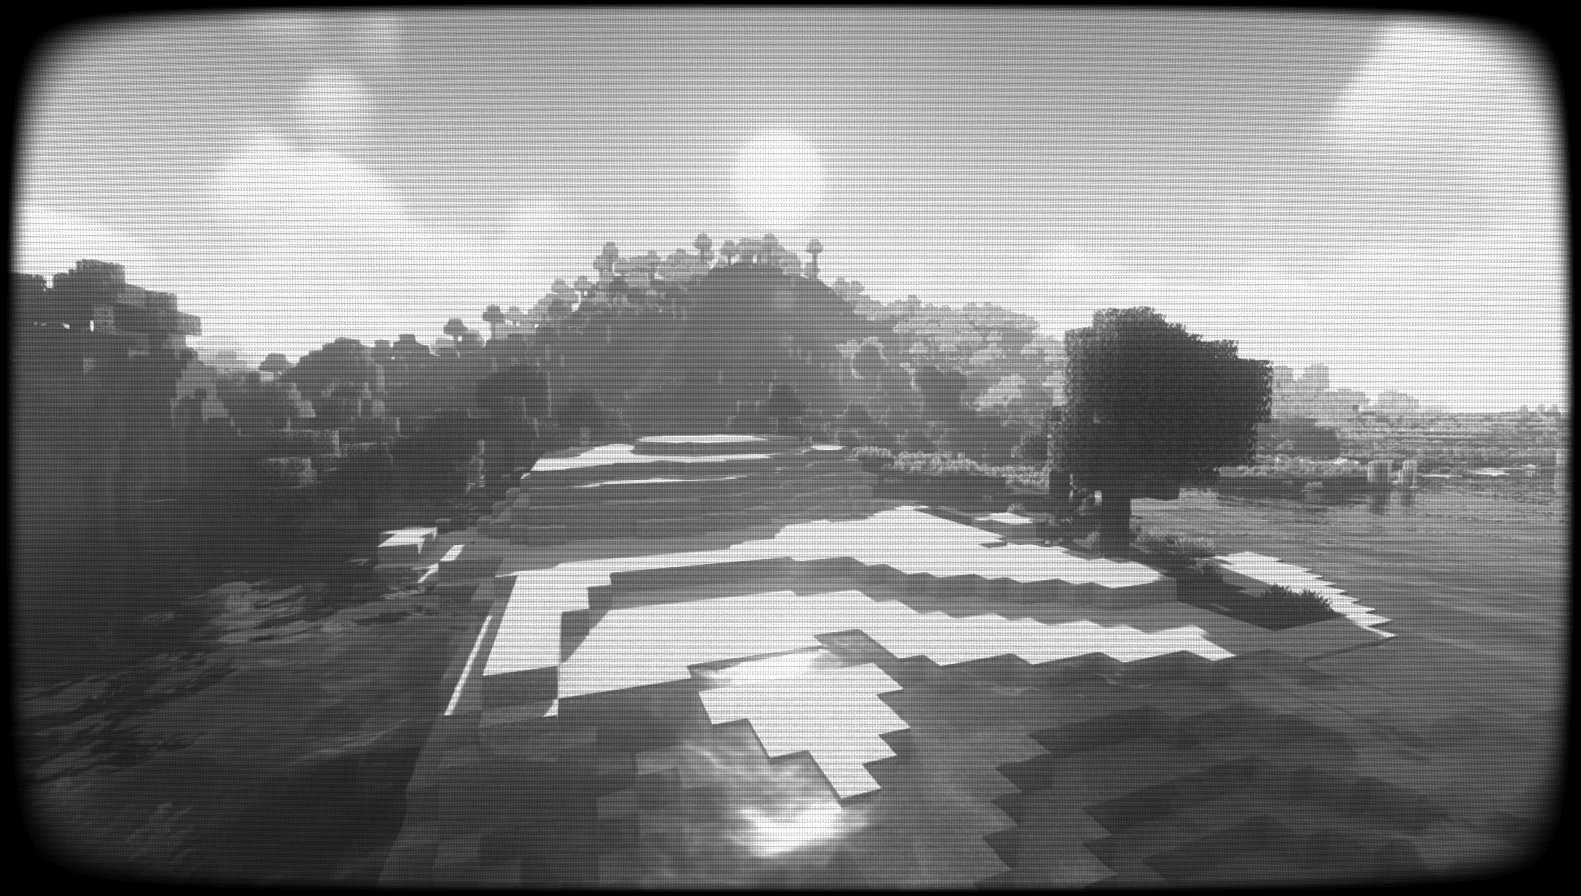
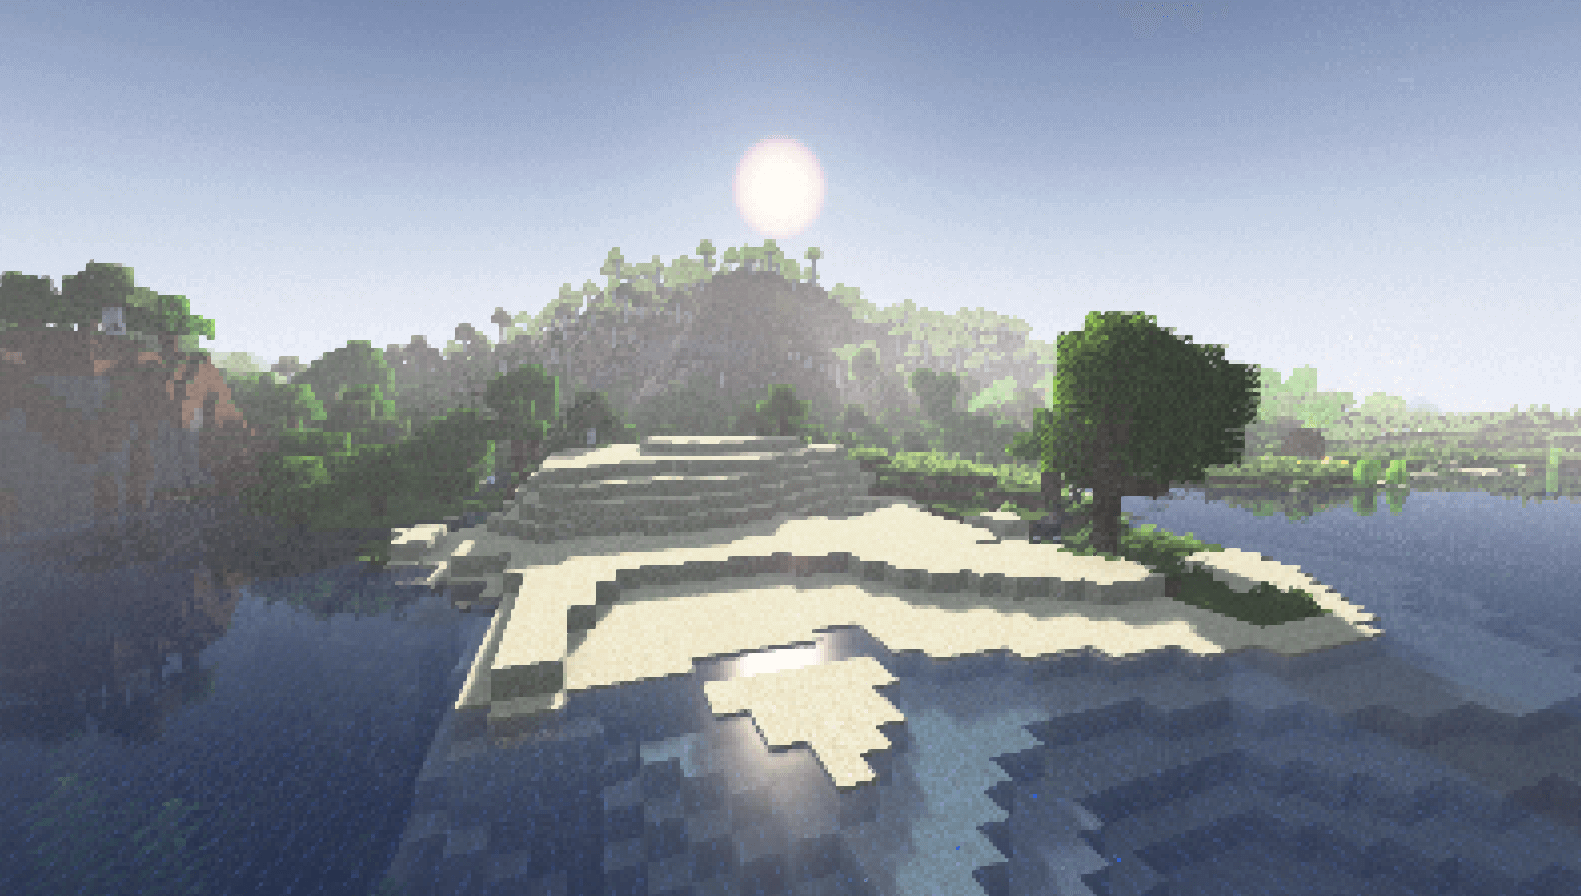
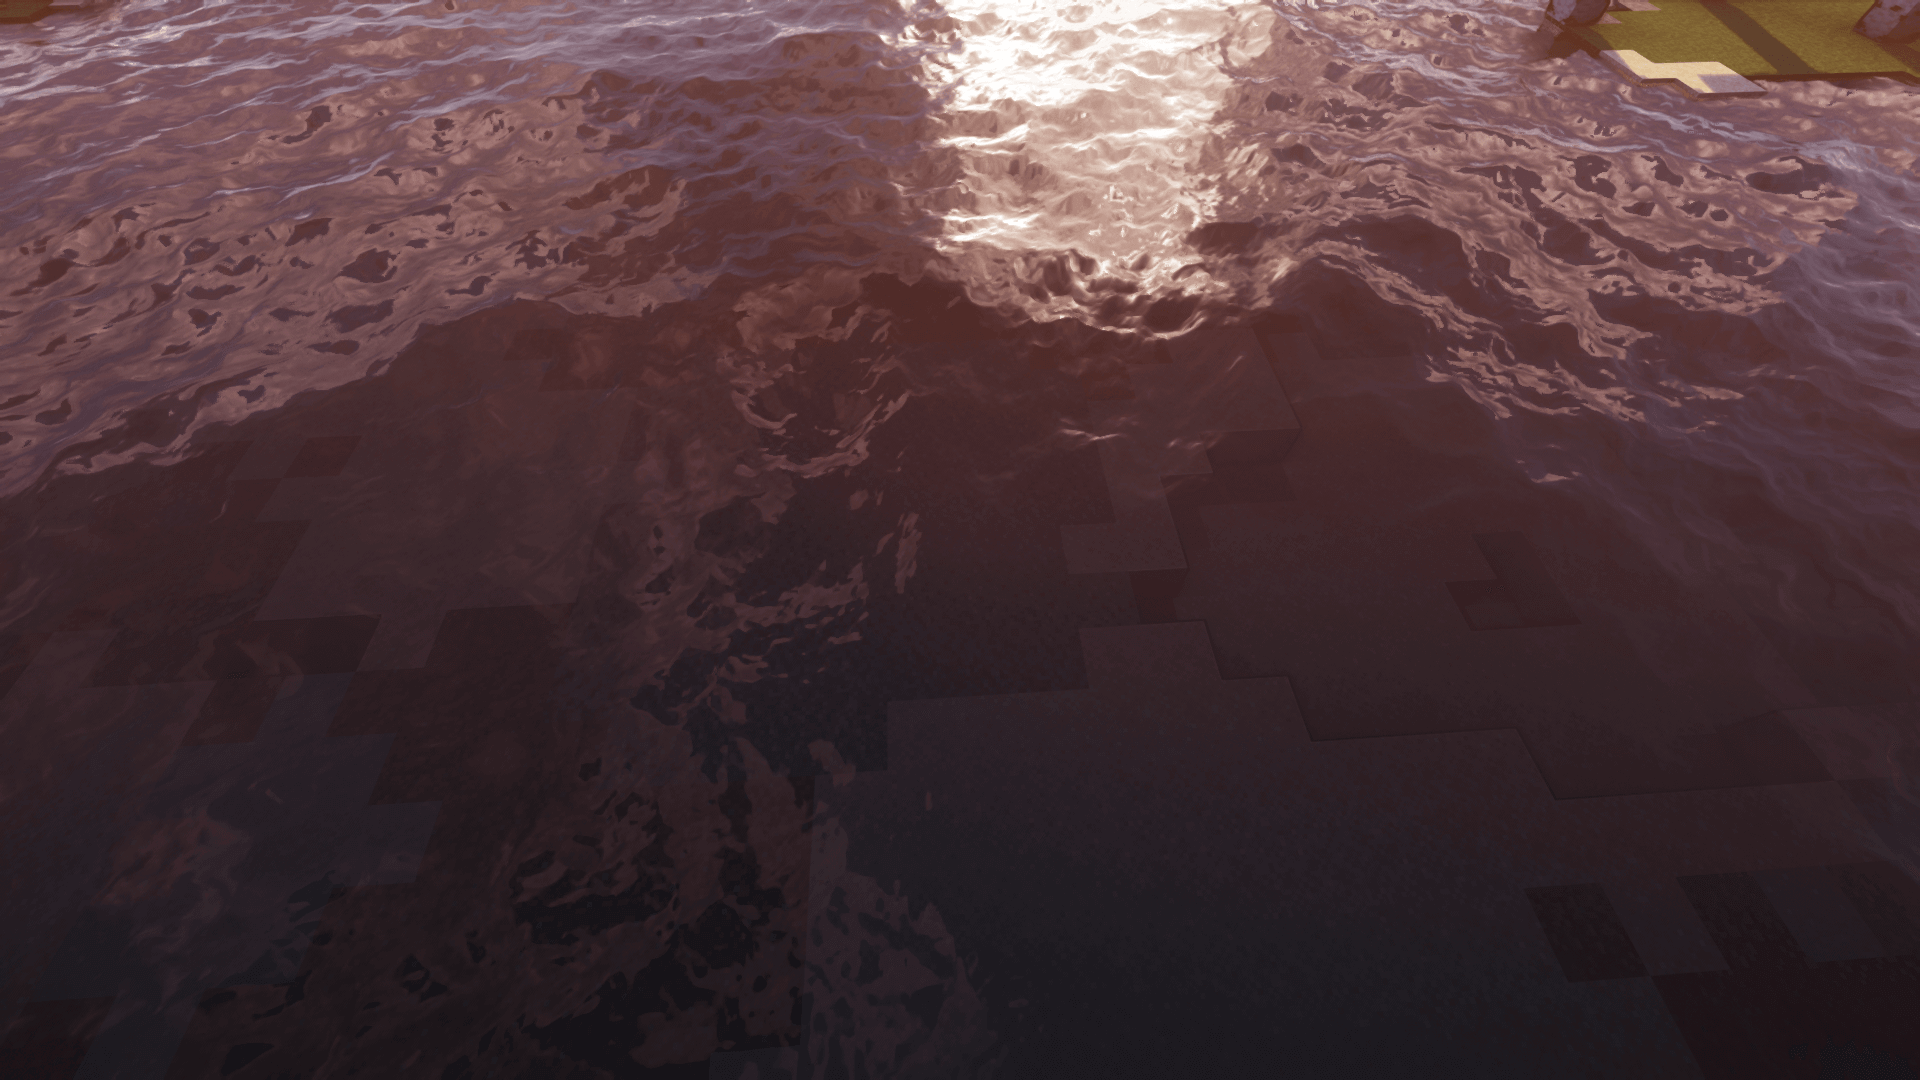
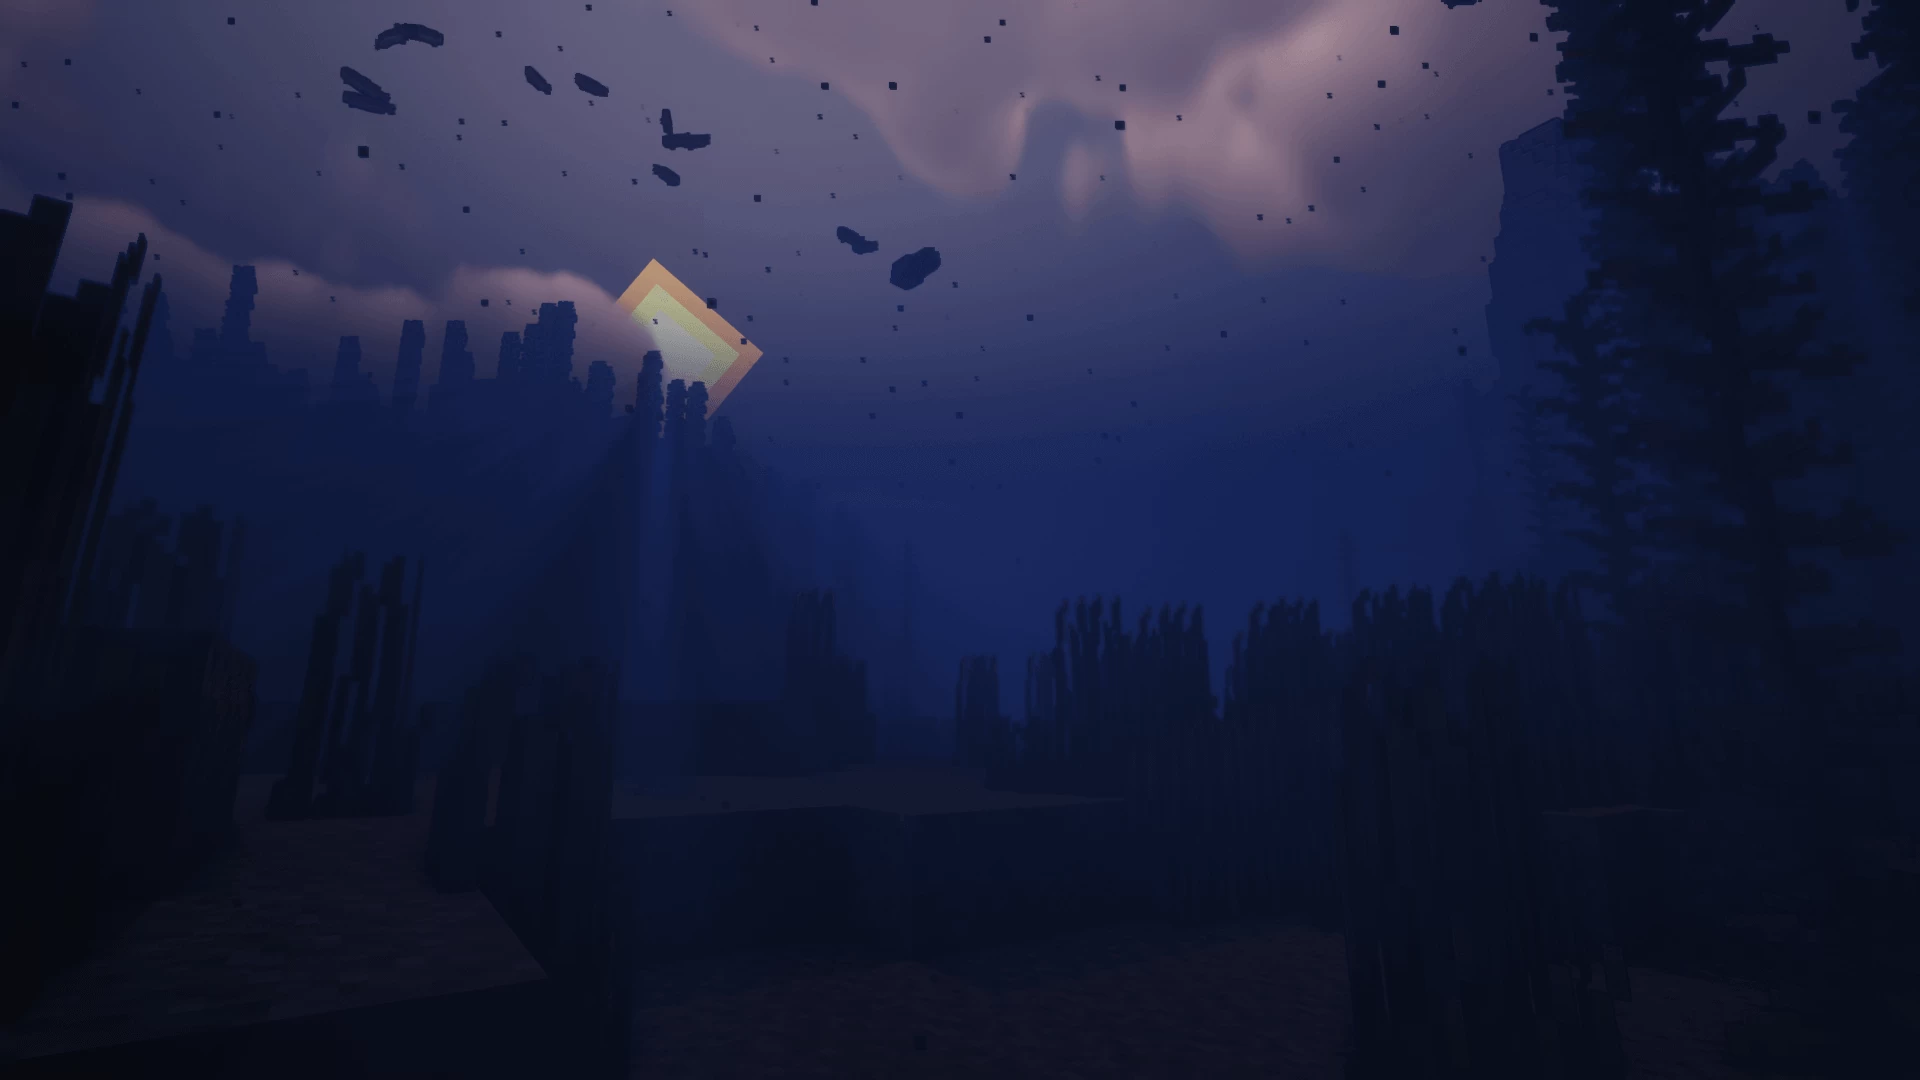
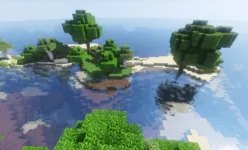
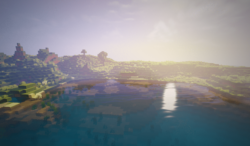
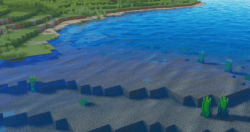
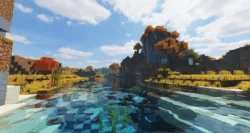
AstraLex Shaders — Preset Screnshoots
Features
Over 46 new features are available in AstraLex Shaders to enhance your gaming experience.
📊 Performance Impacts
Decrease in performance can vary from device to device, driver version, and many other factors, you should test yourself on your machine for the best result.
-
- None
- No performance decreases
-
- Small
- ~5%
-
- Medium
- ~10%
-
- High
- ~25%
-
- Extreme
- +50%
-
- Ambient OcclusionMedium
- Simulating how light interacts with objects and surfaces.
-
- Atmospheric SkySmall
- Simulates realistic atmospheric scattering.
-
- BloomSmall
- Enhance the game's lighting and create a more realistic and immersive visual experience
-
- BlurSmall
- Simulate how fast-moving objects appear to blur in a photograph or video.
-
- BrightNone
- Adjust the overall brightness of the game's graphics
-
- CausticHigh
- Simulating the way light is refracted and reflected by the water's surface
-
- CinematicExtreme
- Create more cinematic and visually-stunning scenes in the game.
-
- CustomizationNone
- Customize various aspects of the game's visual effects.
-
- Depth of FieldMedium
- Making objects closer to the camera appear sharp and in focus, while objects farther away appear out of focus and blurry.
-
- Dirty LensSmall
- Simulates the effect of a dirty or scratched camera lens.
-
- HDRMedium
- Enhance the lighting and color in the game.
-
- Lens FlareSmall
- Simulating the way light scatters and reflects inside a camera lens.
-
- LightMedium
- Enhance the game's overall visual quality.
-
- Motion BlurHigh
- Simulates the way that fast-moving objects appear to blur in the real world.
-
- Moving CloudsMedium
- Simulates the movement of clouds across the sky and can be used to create the appearance of a dynamic and ever-changing sky
-
- Normal MapSmall
- Add depth and detail to surfaces without increasing the number of polygons.
-
- Ocean WavesHigh
- Simulating the movement of waves on the surface of the ocean.
-
- Parallax WaterMedium
- Enhances the realism of water by simulating the parallax effect.
-
- PBRHigh
- Enhances the realism of textures and materials by simulating the way light interacts with surfaces in a more physically accurate way.
-
- Photorealistic SkyboxesMedium
- Replacing the in-game sky with high-resolution, realistic images of the sky.
-
- Rain ReflectionsMedium
- Reflections during rainy weather by simulating the way light reflects off of wet surfaces.
-
- Ray-Traced ReflectionsExtreme
- Simulating how light behaves in the real world.
-
- Realistic NightskyMedium
- More realistic and immersive night sky.
-
- Realistic RainMedium
- More natural and immersive rain experience.
-
- Realistic SkyMedium
- More realistic and immersive sky experience.
-
- Realistic WaterHigh
- More realistic and immersive water experience.
-
- ShadowsSmall
- Simulate how light is blocked and scattered by objects in the environment.
-
- Sun RaysMedium
- Simulate the appearance of sunlight streaming through trees leaves, objects, clouds, or other atmospheric conditions.
-
- SunriseSmall
- More realistic and immersive sunrise experience.
-
- SunsetSmall
- More realistic and immersive sunset experience.
-
- TAAMedium
- Smooth out jagged edges and reduce the "stair-stepping" effect that can occur when rendering graphics.
-
- Tone MappingSmall
- Adjusting the brightness, contrast, and saturation levels.
-
- Underwater ReflectionsMedium
- Simulate the appearance of light reflecting off of the water's surface.
-
- VibrantSmall
- More saturated colors and realistic lighting.
-
- VignetteNone
- Darkening effect around the edges of the screen
-
- Volumetric CloudsHigh
- Simulate the way that clouds appear to have volume and depth in the real world rather than just flat textures.
-
- Volumetric FogHigh
- Create the appearance of fog that is lit from within, casting shadows and creating a sense of depth.
-
- Volumetric LightHigh
- Simulating the scattering of light in the atmosphere and in the environment.
-
- Volumetric NetherHigh
-
- Volumetric The EndHigh
-
- Water ReflectionsMedium
- Simulating reflections on the surface of the water.
-
- Water WavesMedium
- Movement of waves on the surface of the water.
-
- Waving GrassSmall
- Simulating the way it moves and sways in the wind.
-
- Waving PlantsSmall
- Simulating the way they move and sway in the wind.
-
- Waving TreesSmall
- Adds movement to the leaves and branches of trees, making them look more alive and realistic.
-
- Wet EffectSmall
There are 9 profiles pre-built into AstraLex Shaders to adjust the level of intensity of these effects.
| Profiles |
Low |
Medium |
High |
Ultra |
LexBoosT |
Borderland |
Old TV |
Old TV B&W |
Playstation 1 |
|---|---|---|---|---|---|---|---|---|---|
Anti-aliasing
| |||||||||
Ender Filmic Tonemap
| |||||||||
Nether Filmic Tonemap
| |||||||||
Overworld Filmic Tonemap
| |||||||||
Depth Hands | |||||||||
Height Hands | |||||||||
Advanced Materials
| |||||||||
Fading animation
| |||||||||
Ambient Occlusion
| |||||||||
RAINBOWS | |||||||||
Aurora
| |||||||||
Auto Exposure
| |||||||||
Cinema 16/9 Bands
| |||||||||
Bloom
| |||||||||
Radius | |||||||||
Bloom Start Effect
| |||||||||
Burning Effect
| |||||||||
Child Birds Drawing
| |||||||||
Clouds_Reflections | |||||||||
Color Block Selector | |||||||||
Start Effect Custom Color
| |||||||||
Colored Shadow
| |||||||||
Corruption Effect
| |||||||||
CRT | |||||||||
CRT Border | |||||||||
Hands Shift | |||||||||
Desert Refract
| |||||||||
Directional Lightmap[*]
| |||||||||
Dirty Lens
| |||||||||
Distortion | |||||||||
Depth of Field
| |||||||||
Downscale
| |||||||||
Ender DOF Strength
| |||||||||
Flash Entities
| |||||||||
Frosted Lens
| |||||||||
۞Galaxy۞
| |||||||||
Galaxy Reflection
| |||||||||
Lens Flare Double_RAINBOWS | |||||||||
Light Shaft
| |||||||||
Light Shaft Ender
| |||||||||
Mesa Refract
| |||||||||
Metal_Aurora_Reflections
| |||||||||
Metal_Clouds_Reflections | |||||||||
Motion Blur
| |||||||||
Motion Blur Strength | |||||||||
Underwater Refraction
| |||||||||
Hands Movements 2 | |||||||||
۞Nebula۞
| |||||||||
Nebula Reflection
| |||||||||
Nether DOF Strength
| |||||||||
Nether Refract
| |||||||||
Style
| |||||||||
Overworld DOF Strength
| |||||||||
Parallax Occlusion Mapping[*]
| |||||||||
۞Planet۞
| |||||||||
Planet Reflection
| |||||||||
Posterization
| |||||||||
Projected Caustics
| |||||||||
Raindrop on Screen
| |||||||||
Style
| |||||||||
Rain Reflection[*]
| |||||||||
Rough Reflection[*]
| |||||||||
Specular Reflection[*]
| |||||||||
Translucent Reflections
| |||||||||
Scanline | |||||||||
Black Scanline Band | |||||||||
Self Shadows[*]
| |||||||||
Shadow Distance | |||||||||
Shadowmap Quality | |||||||||
Specular HighLight Rough[*]
| |||||||||
Movements Speed | |||||||||
Stars_Reflections | |||||||||
Sun Rays
| |||||||||
Sunglare
| |||||||||
Sun Path Rotation | |||||||||
Taa Shadow Filtering
| |||||||||
UnderWater Blur
| |||||||||
Blur Based Bloom (UBBB)
| |||||||||
Reticle
| |||||||||
Water Caustics
| |||||||||
Water Mode | |||||||||
Water Refraction
| |||||||||
Water Reverb
|
AstraLex Shaders allow you to change more than 882 settings to suit your needs.
| Settings |
Description |
Options |
|---|---|---|
| Profile | ||
| Version :۞70.0۞ | Credits: Capt Tatsu, EminGT, ShinoNeiluj |
|
| ...﴾۞ AstraLex (BSL_Edit)۞﴿ | ||
| ۞ Super Secret | ||
| Cave Detector | Allows you to see caves, mineshaft, etc. Use a block of dirt in the cellars to see through the walls. |
|
| Debug Menu | ||
| DEBUG_ARMOR_GLINT |
| |
| DEBUG_BASIC |
| |
| DEBUG_BEACON_BEAM |
| |
| DEBUG_BLOCK |
| |
| DEBUG_CLOUDS |
| |
| DEBUG_ENTITIES |
| |
| DEBUG_HANDS |
| |
| DEBUG_SKYBASIC |
| |
| DEBUG_SKYTEXTURED |
| |
| DEBUG_TERRAIN |
| |
| DEBUG_TEXTURED |
| |
| DEBUG_WATER |
| |
| Sculk Sensor Active Fix Allows you to correct the color of the sculk sensor when it is active. Used when changing the temperature of light blocks with Blocklight By Temp. | ||
| Red |
| |
| Green |
| |
| Blue |
| |
| Sculk Sensor Active Intensity | This is a color intensity fix for the Sculks Sensors when you have BlockLight by Temp enabled. |
|
| ۞Advanced Materials | ||
| Advanced Materials | Enables the use of specular and normal mapping which allows for more detail on various things. [*]This option requires a resource pack which contains specular and/or normal maps, disable this if you don't use one. [*]Options which requires advanced materials are indicated by [*]. |
|
| Material Format[*] | Determines the specular and normal map format used by the resourcepack. [*]Texture artists usually tell which format is used in their resourcepack, using the wrong format may give weird results. |
|
| Reflections | ||
| Reflections | Enables screen space reflection. [*]This toggle only affects water and translucent reflection, rain and specular reflection won't be affected. |
|
| Translucent Reflections | Allows reflection to be rendered on translucent surfaces. |
|
| Reflections Sun/Moon |
| |
| Specular Reflection[*] | Enables reflection on smooth or metallic surfaces. |
|
| Rough Reflection[*] | Allows surfaces with lower smoothness to render blurry reflections. [-]May contain minor artifacts. |
|
| Specular HighLight Rough[*] | Allows rough surfaces to have weak gloss. |
|
| Rough Noise[*] | Adjusts grain on Rough reflection. |
|
| Smooth/Metal Reflection[*] | Adjusts the strength of smoothness/metal reflections. |
|
| Sky Reflection Falloff | Adjusts how far sky reflection fades out under low skylight. |
|
| Parallax | ||
| Parallax Occlusion Mapping[*] | Adds displacement on a surface using height map. |
|
| Parallax Depth[*] | Adjusts parallax deepness. |
|
| Self Shadows[*] | Allows a surface to cast shadow to itself using heightmap. |
|
| Self Shadowing Angle[*] | Adjusts the self shadowing angle, higher value allows the shadow to travel further. |
|
| Self Shadows Samples[*] | Adjusts the quality of self shadowing. |
|
| Self Shadows Strength[*] | Adjusts the strenght of self shadowing. |
|
| Parallax Quality[*] | Adjusts the quality of parallax occlusion mapping and self shadows. |
|
| Parallax Distance[*] | Adjusts how far parallax occlusion mapping and self shadows can be rendered. |
|
| Parallax on Entities[*] | Disable or enable parallax on various entities. (For mods support) |
|
| Directional Lightmap[*] | Adds normal mapping to vanilla lighting. [-]Lightmap may glitch with this effect enabled. |
|
| Dir. Lightmap Strength[*] | Adjusts the intensity of Directional Lightmap. |
|
| Normal Plants/Leaves[*] | Adjusts plant shading. [*]Disable this if non-flat plant model is used or normal map applied on plants. |
|
| Normal Dampening[*] | Reduces normal map strength to prevent reflections being too noisy. |
|
| ۞Post Process | ||
| Motion Blur Menu | ||
| Motion Blur | Enables camera motion based blurring. |
|
| Motion Blur Strength | Adjusts motion blur intensity. |
|
| Depth of Field Menu | ||
| Depth of Field | Depth Of Field: Blurs the objects that the player isn't looking at to simulate focusing. |
|
| Chromatic Aberration | Optical aberration that produces different focus depending on the wavelength. We then observe a blurry image with iridescent contours. |
|
| Distance Blur | Adds a blur in the distance. DOF must be activated! |
|
| Overworld DOF Strength | Adjusts the strength of the DOF in the Overworld. |
|
| Overworld Chr. Aberration |
| |
| Overworld Distance Strength | Adjusts the strength of distance blur in the Overworld. |
|
| Nether DOF Strength | Adjusts the strength of the DOF in the Nether. |
|
| Nether Chr. Aberration |
| |
| Nether Distance Strength | Adjusts the strength of distance blur in the Nether. |
|
| Ender DOF Strength | Adjusts the strength of the DOF in the Ender. |
|
| Ender Chr. Aberration |
| |
| Ender Distance Strength | Adjusts the strength of distance blur in the Ender. |
|
| Focus Speed | Adjusting Focus speed | |
| Chromatic Strength | Adjusts the Strength of chromatic aberration. |
|
| Rainy Distance Multiplier | Adjusts Strength of Distance Blur when it rain. Distance Blur must be activated!. |
|
| Bloom Menu | ||
| Bloom | Allows bright areas to glow. |
|
| Bloom Dimension Config [*] | ||
| Overworld Bloom Strength | Adjusts bloom intensity. |
|
| Nether Bloom Strength | Adjusts bloom intensity. |
|
| End Bloom Strength | Adjusts bloom intensity. |
|
| Radius | Adjusts how far the glow spreads. |
|
| Bloom Tile Size |
| |
| Hand Bloom Reduction | Allows you to reduce the intensity of Bloom on the hands. |
|
| Hand Bloom Strength |
| |
| Lens Flare Menu | ||
| Lens Flare Double_RAINBOWS |
| |
| Lens Flare Strength Day | Adjusts lens flare intensity. |
|
| Lens Flare Strength Night |
| |
| Dirty Lens Menu | ||
| Dirty Lens | Adds dusty particle effect to bloom. [*]Requires bloom. |
|
| Dirty Lens Strength |
| |
| Frosted Lens Menu | ||
| Frosted Lens | Adds a frozen vignette when in a snow biome. Before Minecraft 1.16.5 version you have a simple noise effect, otherwise you have a better quality of vignette. |
|
| Frost Strength | Adjusts the strength of frost. |
|
| Coloring Strength | Allows you to adjust the color strength of the vignette. |
|
| Rainy Weather Only | Allows the vignette to be activated only when it is snowing. Otherwise will be present in the Snow biome regardless of the weather. |
|
| Dynamic Coloring | Allows you to change the color of the vignette depending on the lighting of the block you have in hand. Dynamic Hand Light must be enabled. |
|
| Color Grading Menu | ||
| Color Grading | Enables color grading. [*]This option doesn't need to be enabled to change tonemap, saturation, and vibrance sliders. |
|
| Aces Tonemap | ||
| Overworld Filmic Tonemap |
| |
| Nether Filmic Tonemap |
| |
| Ender Filmic Tonemap |
| |
| Tonemapping | ||
| Tonemap Exposure |
| |
| Tonemap White Curve | Adjusts how quickly the tonemap can reach white. |
|
| Tonemap Lower Curve | Adjusts contrast of darker colors. |
|
| Tonemap Upper Curve | Adjusts contrast of brighter colors. |
|
| Saturation | Adjusts saturation of all colors. |
|
| Vibrance | Adjusts saturation of less saturated colors, well saturated colors are less affected. |
|
| Tonemapping + | ||
| HDR | ||
| HDR |
| |
| Global Exposure |
| |
| Under Exposure |
| |
| Zelda BOTW Tonemap |
| |
| Breath Of The Wild Saturation |
| |
| Red Channel | ||
| Red - Red Value |
| |
| Red - Green Value |
| |
| Red - Blue Value |
| |
| Red Strength Value |
| |
| Minimal Red Value |
| |
| Red Curve Value |
| |
| Green Channel | ||
| Green - Red Value |
| |
| Green - Green Value |
| |
| Green - Blue Value |
| |
| Green Strength Value |
| |
| Minimal Green Value |
| |
| Green Curve Value |
| |
| Blue Channel | ||
| Blue - Red Value |
| |
| Blue - Green Value |
| |
| Blue - Blue Value |
| |
| Blue Strength Value |
| |
| Minimal Blue Value |
| |
| Blue Curve Value |
| |
| Tint | ||
| Tint - Red Value |
| |
| Tint - Green Value |
| |
| Tint - Blue Value |
| |
| Tint Strength Value |
| |
| Tint Mix Value |
| |
| Auto Exposure | Enables automatic adjustment to overall brightness. |
|
| Anti-aliasing | Enables anti-aliasing. FXAA : Faster, works properly with screenshot size. TAA : Slower, captures subpixel detail and improves some effects. [*]Please disable Antialiasing in Shaders menu while this option is enabled. |
|
| Classic Exposure | Enables increased exposure when going indoors. |
|
| Settings FXAA | ||
| FXAA Subpixel Smoothing | Adjusts how much smoothing should FXAA apply to tiny details. |
|
| FXAA Contrast Sensitivity | Adjusts how much edge contrast required to apply FXAA. |
|
| FXAA Brightness Sensitivity | Adjusts how much edge brightness required to apply FXAA. |
|
| Sharpen AA | Sharpen AA is Downscalling/Upscaling AA based on MC render Quality. |
|
| ۞Sky | ||
| Sky Configuration | ||
| Sky Color | ||
| Red |
| |
| Day Rain - Intensity | Adjusts the intensity of the sky during the day when it's raining. |
|
| Morning/Evening - Intensity | Adjusts the intensity of the sky during morning and evening. |
|
| Green |
| |
| Night Rain - Intensity | Adjusts the intensity of the sky during the night when it's raining. |
|
| Noon - Intensity | Adjusts the intensity of the sky during noon. |
|
| Blue |
| |
| Night - Intensity | Adjusts the intensity of the sky during night. |
|
| Intensity |
| |
| Vanilla Sky | Use vanilla sky color. |
|
| Sky Reflec Dark Area | Adjusts the visibility of sky reflection on water in dark area when there is an opening above you. |
|
| Underground Sky Fix | Hides the sky when the player is in dark area and under sea level (Y: 62). [-]Not suitable for low superflat worlds. |
|
| RP Custom Sky | Enables vanilla sky overlays which include square sun/moon and custom resource pack skies. Disable "Round Sun/Moon" option if you want to use vanilla sun/moon. |
|
| Blurry Sky | Makes the sky slightly blurry. |
|
| Sky Ground | Darkens the bottom part of the sky. [*]This option is affected by fog density slider. |
|
| Day Density |
| |
| Day Exposure |
| |
| Skybox Brightness | Adjusts skybox brightness. [*]Set to 1.00 when subtractive skybox exists. |
|
| Night Density |
| |
| Night Exposure |
| |
| Night Brightness | Adjusts the general lighting brightness during the night. |
|
| Weather Density |
| |
| Weather Exposure |
| |
| Near Horizon |
| |
| Far Horizon |
| |
| Ender Sky Configuration | ||
| Ender Sky Custom Color | Enable or disable Custom Sky color. |
|
| Custom End Sky Color | ||
| Red |
| |
| Green |
| |
| Blue |
| |
| Intensity |
| |
| Lost Glare/Black Hole Menu | ||
| Lost Glare | Adds a halo of light to the base of the LightShaft. Ender Light Shaft must be enabled. |
|
| Black Hole | Activate the Black Hole. Lost Glare must be enabled. |
|
| Red |
| |
| Red |
| |
| Green |
| |
| Green |
| |
| Blue |
| |
| Blue |
| |
| Intensity |
| |
| Clouds Configuration | ||
| Style | Choose Realistic or Vanilla Clouds. [+]This effect benefits from TAA. |
|
| Clouds Configuration | ||
| Thickness | Adjusts clouds thickness, higher thickness makes artifacts more visible. |
|
| Opacity | Adjusts cloud opacity. |
|
| Brightness Multiplier | Adjusts cloud brightness. |
|
| Amount | Adjusts clouds amount. |
|
| Height | Adjusts clouds height. |
|
| Vanilla Clouds Opacity | Adjusts Opacity for Vanilla Clouds. |
|
| Day Clouds Visibility |
| |
| Dither Height Quality | Adjusts dithering height for the cloud. Using the 'Cloud Covering' option adjust your quality. |
|
| Night Clouds Visibility |
| |
| Cloud Covering | Adjusts Cloud Covering values. |
|
| Rain Clouds Visibility |
| |
| Speed | Adjusts clouds speed. |
|
| Rain Clouds Covering | Adjusts covering of cloud when it rain. |
|
| Metal_Clouds_Reflections | Active or not the Clouds reflection on metal |
|
| Clouds_Reflections | Active or not the Clouds reflection on water |
|
| Stars Configuration | ||
| Stars Distance | Adjust Stars Distance |
|
| Stars | Enables stars. |
|
| Stars_Reflections | Active or not the Stars reflection on water |
|
| Stars Coverage | Choose the star coverage style. Style 1 |
|
| Sunset/Sunrise Stars | Stars appear from the beginning of sunset and sunrise. |
|
| Water Reflection Strength | Adjusts Strength of Stars reflections on Water. |
|
| Stars Jitter | Makes the stars twinkle in the Overworld and the End. |
|
| Distance of the Moon | Allows you to adjust the distance of the stars compared to the moon. Ideal if you use a resource pack with big moon. |
|
| Jitter Speed | Allows you to adjust the star flicker speed. |
|
| Fade around the Moon | Adjusts the fade of the stars around the moon. |
|
| Intensity Stars Lighting | Adjust Intensity of Stars Lighting. Too high a value may adversely affect the reflection of stars on the water if Stars reflection option is enabled. |
|
| Ender Stars Config | ||
| End Stars | Add Stars in Ender Sky |
|
| Style | Choose you style. 1- White Stars. 2- Colored Stars (Pink/Blue). |
|
| Aurora Configuration | ||
| Aurora | Enables aurora. [+]This effect benefits from TAA. |
|
| Aurora Color | Change Aurora color Style. |
|
| Aurora PerBiome Weather | Enable or Disable Aurora when WEATHER_PERBIOME is enable. |
|
| Aurora_Reflections | Active or not the Aurora reflection on water |
|
| Aurora TECHNO Config | ||
| Upper Speed Color |
| |
| Lower Speed Color |
| |
| Upper Color Start |
| |
| Lower Color Start |
| |
| Aurora Distance | Adjusts Aurora Distance. |
|
| Metal_Aurora_Reflections | Active or not the Aurora reflection on metal |
|
| Aurora Custom Config | ||
| Color |
| |
| Color |
| |
| Red |
| |
| Red |
| |
| Green |
| |
| Green |
| |
| Blue |
| |
| Blue |
| |
| Intensity |
| |
| Intensity |
| |
| Aurora Size | Adjusts Aurora size. |
|
| Color Gradient |
| |
| Aurora Visibility |
| |
| Ender Aurora Menu | ||
| Ender Aurora |
| |
| Color |
| |
| Color |
| |
| Aurora Distance |
| |
| Red |
| |
| Red |
| |
| Aurora Size |
| |
| Green |
| |
| Green |
| |
| Aurora Visibility |
| |
| Blue |
| |
| Blue |
| |
| Aurora Speed |
| |
| Intensity |
| |
| Intensity |
| |
| Color Gradient |
| |
| Aurora Speed |
| |
| ShootingStars Configuration | ||
| Shooting Stars | Enable or disable Shooting Stars. |
|
| Shooting Speed | Adjusts the speed of shooting stars. 5 |
|
| Shooting Stars Intensity |
| |
| Shooting Stars Thickness | Adjusts thickness of shooting stars. |
|
| Timing display | Adjust the spacing for display the shooting stars in sky. 1 |
|
| Shooting Stars Fade | Adjusts fade of shooting stars. 1.0 |
|
| Number of Shooting Stars | Adjusts number of shooting stars in the sky. |
|
| Shooting Stars Reflection | Add Shooting Stars Reflection on water. |
|
| Ender Shooting Stars | Enable or disable Shooting Stars in Ender. |
|
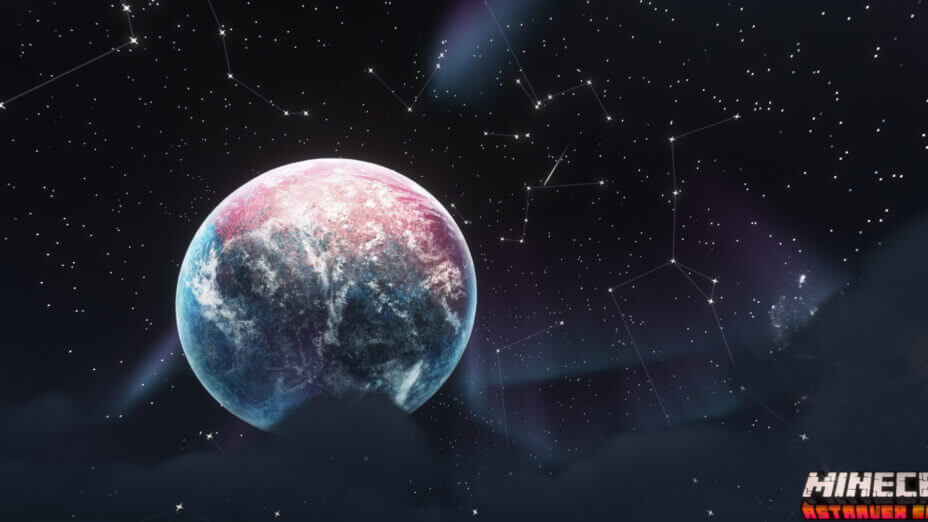
| Planet/Nebula/Galaxy Configuration | ||
| ۞Planet۞ | Added a planet in the sky from midnight until the middle of the day. Only for 1.16+! |
|
| ۞Nebula۞ | Add a nebula in the sky. Only for 1.16+! |
|
| ۞Galaxy۞ | Add a galaxy in the sky. Only for 1.16+! |
|
| Planet Size -> X |
| |
| Nebula Size -> X |
| |
| Galaxy Size -> X |
| |
| Planet Size -> Y |
| |
| Nebula Size -> Y |
| |
| Galaxy Size -> Y |
| |
| Distance from the Moon | Distance in degrees. |
|
| Distance from the Moon | Distance in degrees. |
|
| Distance from the Moon | Distance in degrees. |
|
| Rotation Around the Moon | Rotation in degrees. |
|
| Rotation Around the Moon | Rotation in degrees. |
|
| Rotation Around the Moon | Rotation in degrees. |
|
| Rotation of Planet | Rotation in degrees. |
|
| Rotation of Nebula | Rotation in degrees. |
|
| Rotation of Galaxy | Rotation in degrees. |
|
| Planet Opacity -> |
| |
| Nebula Opacity -> |
| |
| Galaxy Opacity -> |
| |
| Planet/Nebula/Galaxy Reflection | ||
| Reflection |
| |
| Planet Reflection | Added planet reflection on water. |
|
| Nebula Reflection | Added nebula reflection on water. |
|
| Galaxy Reflection | Added Galaxy reflection on water. |
|
| Reflection Intensity Day |
| |
| Reflection Intensity |
| |
| Reflection Intensity |
| |
| Reflection Intensity Night |
| |
| ShiningStars Configuration | ||
| ۞ Shining Stars | Add Shining Stars in the sky |
|
| ShiningStars Reflection | Add ShiningStars reflection on water. |
|
| ۞ Constellations | Add Constellation in the Sky |
|
| Reflection Strength | Adjusts intensity of ShiningStars Reflection on water. |
|
| Shining Stars Brightness | Adjust Shining Stars Brightness |
|
| Lines Transparency | Adjust lines's constellation tranparency |
|
| Stars Flickering | Turn star Flickering on or off |
|
| Lines Thickness | Adjust Lines Thickness |
|
| Flickering Speed | Adjusts the star Flickering speed |
|
| Lines Color |
| |
| ShiningStars Thickness | Adjusts ShiningStars thickness. |
|
| Red |
| |
| ShiningStars Size | Adjusts Stars Size. |
|
| Green |
| |
| Stars Quantity |
| |
| Blue |
| |
| Sun/Moon Config | ||
| Round Sun & Moon | ||
| Round Sun & Moon | Enables shader based sun & moon. [*]Disable vanilla sun & moon in Video Settings > Details > Sun & Moon |
|
| Sun/Moon Diameter | Adjusts diameter for Sun/Moon. A larger value results in a smaller sun / moon. |
|
| ۞ |
| |
| ۞ |
| |
| Sun/Moon Sweetness | Allows you to change the gradient of the sun/moon. |
|
| Red |
| |
| Red |
| |
| Sun Rays | Added Animated Sun Rays |
|
| Green |
| |
| Green |
| |
| Distance of Sun |
| |
| Blue |
| |
| Blue |
| |
| Sun Rays Configuration | ||
| Color Style | Sun Color corresponds to the color of the Sun adjustable on the previous page. Custom |
|
| ۞ |
| |
| ۞ |
| |
| Numbers of Rays |
| |
| Amplitude Line 1/2 |
| |
| Red |
| |
| Red |
| |
| Amplitude Line 2/2 |
| |
| Green |
| |
| Green |
| |
| Rotation Speed |
| |
| Blue |
| |
| Blue |
| |
| Amplitude Speed |
| |
| Intensity |
| |
| Intensity |
| |
| Intensity of Rays |
| |
| Intensity of Sun |
| |
| Intensity of Moon |
| |
| Sunglare Configuration | ||
| Sunglare | Enable or disable Sunglare |
|
| Sunglare Weather | Enable or Disable a luminous halo around the sun / moon when it rain. |
|
| Sunglare Out of Water | Adjusts the Strength of the luminous halo around the sun / moon when you are out of the water. |
|
| Sunglare Under Water | Adjusts the Strength of the luminous halo around the sun / moon when you are under the water. |
|
| Sun Glare |
| |
| Moon Glare |
| |
| New Moon Configuration | ||
| New Moon Stuff Disabler | Allows to disable LensFlare, Sunglare, Lightshafts and Moon reflection on water when moonphase set to new moon. |
|
| New Moon Lightmap Control | Allows you to adjust the ambient brightness during the new moon. New Moon Stuff Disabler must be activated! |
|
| Bigger Sun | Adds 33% diameter to the sun compared to the diameter of the moon. |
|
| Moon Phase Settings | ||
| Moon Phase Influence | Enables moon phase dependant night time brightness. |
|
| Moon Phase - Full Moon | Multiplies the night brightness during full moon when Moon Phase Influence is enabled. |
|
| Moon Phase - Partial Moon | Multiplies the night brightness during partial moon when Moon Phase Influence is enabled. |
|
| Moon Phase - New Moon | Multiplies the night brightness during new moon when Moon Phase Influence is enabled. |
|
| Horizon Sun/Moon | Makes the sun/moon disappear below the horizon level. |
|
| Sun Reflection | Adjusts Sun reflection strength. |
|
| Moon Reflection |
| |
| Child Birds Drawing Menu | ||
| Child Birds Drawing |
| |
| Numbers of Birds per Groups |
| |
| Birds Line Thickness |
| |
| Birds Height |
| |
| Birds Amplitude |
| |
| ۞Water | ||
| Water Mode | Determine whether vanilla water texture should be used. Realistic : shader's flat water color, no texture. RTX : RTX Style with colored texture. Tinted Vanilla : vanilla texture with shader's water color. |
|
| Water Fog Density | Adjusts water fog density |
|
| Normals | Enables realtime-generated normal mapping for water. |
|
| Parallax | Enables water displacement. |
|
| Water Color | ||
| Red |
| |
| Green |
| |
| Blue |
| |
| Intensity |
| |
| Alpha |
| |
| Water Mode | Determine whether vanilla water texture should be used. Realistic : shader's flat water color, no texture. RTX : RTX Style with colored texture. Tinted Vanilla : vanilla texture with shader's water color. |
|
| Underwater Color | ||
| Red |
| |
| Green |
| |
| Blue |
| |
| Intensity |
| |
| Water Effects | ||
| Absorption | Add water Absorption. Need to turn Colored Shadow ON. |
|
| Water Caustics | Adds the reflection of the sun on the surface of the water when you are in the water, at the bottom of the water. Light_Shaft must be enabled! |
|
| Absorption Alpha Color |
| |
| Projected Caustics | Adds the reflection of the sun on the surface of the water when you are out of the water, at the bottom of the water. Light_Shaft must be enabled! |
|
| Color Multiplier |
| |
| Visibility | Adjusts visibility of Projected Caustics in OverWorld. |
|
| Water Refraction | Allows you to add refraction on the surface of the water, whether the head is above or below the surface. |
|
| Eyes in Water | ||
| UnderWater Blur | Add Blur in water. It is advised to use this option only if you are not using UBBB option. |
|
| Underwater Refraction | ENABLE or DISABLE Water refraction when you eyes is in water |
|
| Water Blur Factor | Adjust Blur in water |
|
| Water Reverb | In water, add transparent reflexion on surface on water. Only for Default Water Style. |
|
| Underwater Blur Hands | Enable or Disable underwater Blur on Hands. |
|
| Refraction Multiplier | Adjusts the percentage of refraction |
|
| Underwater Sky Opacity | Add a Sky opacity when eyes is underwater. |
|
| Refraction Speed | Adjusts the speed of refraction |
|
| Blur Based Bloom (UBBB) | Add Blur in water based on Bloom. It is advised to use this option only if you are not using Underwater Blur Option. |
|
| Underwater Sky Brightness | Adjusts Underwater Sky Brightness. |
|
| UBBB Bloom Strength |
| |
| UBBB Blur Strength |
| |
| Water Detail | Adjusts Water Details |
|
| Sharpness | Adjusts the sharpness of water normals. |
|
| Bumpiness | Adjusts the intensity of custom water normals. |
|
| Speed | Adjusts the noise speed for custom water normals. |
|
| AA On Water | Enable or Disable AA on Water. Improve Stars reflection on Water when is disable. Work only for 1.17+!. |
|
| Water Fresnel Strength |
| |
| Waving Liquid | Disables or enables the wave effect on the liquid (Water + Lava) at the same time. |
|
| Ice Fresnel Strength |
| |
| ۞Waving Blocks | ||
| Grass |
| |
| Crops |
| |
| Plants |
| |
| Tall Plants |
| |
| Leaves |
| |
| Vines |
| |
| Lilypad |
| |
| Fire |
| |
| Water |
| |
| Lava |
| |
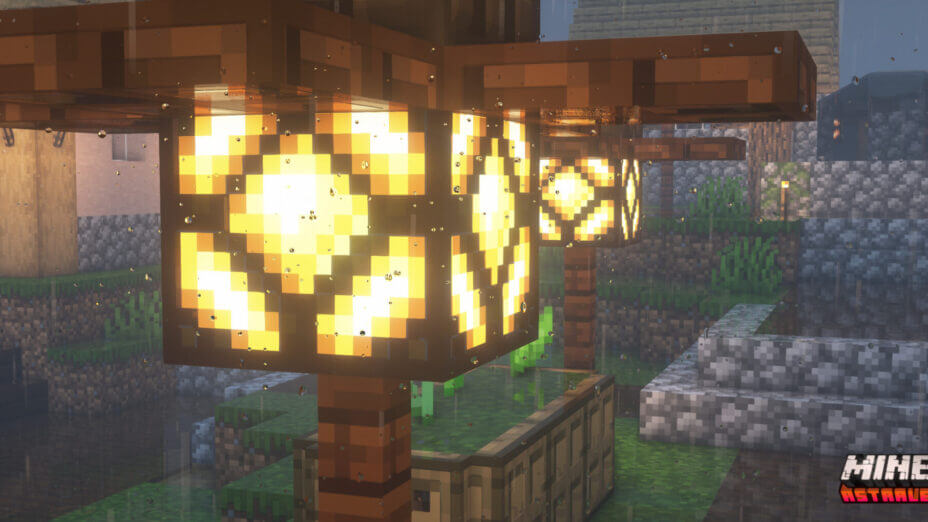
| Lantern |
| |
| Chain |
| |
| ۞World | ||
| Weather Menu | ||
| Weather | Enables rain and snowfall. |
|
| Screen Drops | ||
| Raindrop on Screen | Adds raindrops to your screen when it's raining. |
|
| Raindrop Settings | ||
| Static Drop |
| |
| Drop Layer N1 |
| |
| Drop Layer N2 |
| |
| Drop Speed |
| |
| Raindrops in Cold Biomes | Disable or enable Raindrop on screen in cold biomes. |
|
| Weather Opacity | Adjusts weather opacity. |
|
| Custom Rain/Snow Color Config | ||
| Custom Rain/Snow Color | Adjust you Rain/Snow Color. |
|
| Red |
| |
| Green |
| |
| Blue |
| |
| Intensity |
| |
| Per Biome Weather | Use varied weather color for different biomes. [-]Works in singleplayer only. |
|
| Rain Reflection Menu | ||
| Rain Reflection[*] | Allows surfaces to be wet while raining. [*]Requires specular reflection. |
|
| Puddles on Water[*] | Add puddles on water. [*]Requires specular reflection. |
|
| Rain OFF on | Allows you to disable the reflection of the rain and the ripples on the following blocks: 0 |
|
| Dry Spawn Delay[*] | Adjusts the reflection spawn delay when it rains. 1 - fast / 2 - long. [*]Requires specular reflection. |
|
| Dryness Delay[*] | Adjusts the delay of the reflection of the rain on the ground. 1 |
|
| Rain Style | Gives an eventful rain effect. |
|
| Weather Dynamic Hand Light | Add Dynamic Hand Light on weather. Dynamic Hand Light must be enable. |
|
| Fog Menu | ||
| Fog | Enables fog. |
|
| Fog Dimension Config | ||
| Fog Overworld | Adjusts the density of fog in the Overworld. |
|
| Rain Fog Strength | Adjusts Fog when it rain. |
|
| Fog Nether | Adjusts the density of fog in the Nether. |
|
| Fog Nether Color Mult | Increase Brightness of Fog Color for Nether. |
|
| Fog End | Adjusts the density of fog in the Ender. |
|
| Fog Under Lava/Snow powder | ||
| Lava Fog | Allows you to adjust the intensity of the fog when your head is under the lava. |
|
| Snow Powder | Allows you to adjust the intensity of the fog when your head is in the snow powder. |
|
| SunVisibility Fog | Force fog according to the visibility of the sun |
|
| Distant Fade Style | Spherical works like vanilla fog. Cylindrical ignores Y axis. |
|
| Underground Fog | Add subtil Fog in underground. |
|
| Distant Fade | Fades far chunk borders. [*]This option is affected by fog density. |
|
| Biomes Refraction Menu | ||
| Nether Refract | Add Haze effect on Nether. |
|
| Desert Refract | Add Haze effect on Desert. |
|
| Mesa Refract | Add Haze effect on Mesa. |
|
| Nether Refract Strength | Adjust effect. |
|
| Desert Refract Strength | Adjust effect. |
|
| Mesa Refract Strength | Adjust effect. |
|
| Effect OFF During | Turns the heat effect on or off when you enter in Soul Sand Valley. |
|
| Effect OFF During | Turns the heat effect on or off when it's raining or when it's dark. |
|
| Effect OFF During | Turns the heat effect on or off when it's raining or when it's dark. |
|
| Weather Color | ||
| Rain (Normal) | ||
| Red |
| |
| Green |
| |
| Blue |
| |
| Intensity |
| |
| Snowfall | ||
| Red |
| |
| Green |
| |
| Blue |
| |
| Intensity |
| |
| Desert Sandstorm | ||
| Red |
| |
| Green |
| |
| Blue |
| |
| Intensity |
| |
| Mesa Sandstorm | ||
| Red |
| |
| Green |
| |
| Blue |
| |
| Intensity |
| |
| Swamp Rain | ||
| Red |
| |
| Green |
| |
| Blue |
| |
| Intensity |
| |
| Mushroom Island Rain | ||
| Red |
| |
| Green |
| |
| Blue |
| |
| Intensity |
| |
| Savanna Cloudy | ||
| WEATHER_VR |
| |
| WEATHER_VG |
| |
| WEATHER_VB |
| |
| WEATHER_VI |
| |
| Dimension Color | ||
| Nether Color | ||
| Nether Wastes | ||
| Red |
| |
| Green |
| |
| Blue |
| |
| Intensity |
| |
| Soul Sand Valley | ||
| Red |
| |
| Green |
| |
| Blue |
| |
| Intensity |
| |
| Crimson Forest | ||
| Red |
| |
| Green |
| |
| Blue |
| |
| Intensity |
| |
| Warped Forest | ||
| Red |
| |
| Green |
| |
| Blue |
| |
| Intensity |
| |
| Basalt Deltas | ||
| Red |
| |
| Green |
| |
| Blue |
| |
| Intensity |
| |
| Vanilla Nether | Use vanilla nether color. |
|
| End Color | ||
| Red |
| |
| Green |
| |
| Blue |
| |
| Intensity |
| |
| Ambiant Luminosity |
| |
| Force Ambiant Luminosity | Use this option if you want a very dark sky to have a clear ground. |
|
| WHITE/BLACK WORLD | ||
| WHITE WORLD | Replaces textures with flat white color. |
|
| BLACK_WORLD | Replaces textures with black color. Lighting don't work with this mod! |
|
| PARTICLES |
| |
| TERRAIN |
| |
| SPIDER EYES |
| |
| HANDSW |
| |
| ENTITIES |
| |
| DAMAGED BLOCK |
| |
| BEACON |
| |
| WATER |
| |
| SKY |
| |
| Surface Light | ||
| Day Light Intensity | Multiplies all sun/moon light colors on surfaces (doesn't affect the sky). |
|
| Day Ambience Intensity | Multiplies all sun/moon ambience colors on surfaces (doesn't affect the sky). |
|
| Night Light Intensity | Multiplies all sun/moon light colors on surfaces (doesn't affect the sky). |
|
| Night Ambience Intensity | Multiplies all ambience colors on surfaces (doesn't affect the sky). |
|
| RAINBOWS | ||
| RAINBOWS | Add RAINBOWS |
|
| FIXED RAINBOWS | Allows to leave the rainbow at a given height, regardless of the time (between 2000 and 12000). |
|
| RAINBOWS Position |
| |
| RAINBOWS DIAMETER | Diameter of the RAINBOWS |
|
| RAINBOWS THICKNESS | Thickness of the RAINBOWS |
|
| RAINBOWS Intensity |
| |
| RAINBOWS DISTANCE | Distance where is the RAINBOWS |
|
| ۞Visual | ||
| Cel Shading | ||
| BSL Cel Shading | ||
| Style | Enables outline effect. |
|
| 🌊 Water Promo Outline | Add Pormo Outline in Water. |
|
| Tripwire Outline |
| |
| Full Border Mod | ||
| Full Border | Enable or Disable FULL_BORDER. Add black line in border of blocks. Disable Promo Outline for best effect. |
|
| Border Size | Adjust border's size. |
|
| Border Radius | Adjust border's radius. |
|
| Screen Effects | ||
| CRT EFFECTS ( OLD TV ) | ||
| Distortion | ||
| Distortion | Add distortion to the screen. Good effect with 16/9 Bands activated. |
|
| Distortion Strength | Adjusts distortion Strength. |
|
| Cinema 16/9 Bands Menu | ||
| Cinema 16/9 Bands |
| |
| -->Top<-- |
| |
| -->Bottom<-- |
| |
| CRT Border | Adds the CRT Border around the screen for an old TV effect. |
|
| Downscale/Posterization/Dither | ||
| Downscale | Allows to divide the resolution. |
|
| Dithering | Image processing to render it with a limited color palette |
|
| Posterization | Posterization occurs when a continuous gradation in an image is replaced by a smaller number of colors. |
|
| Resolution Scale | Modify the resolution scale. |
|
| Dithering Samples | Adjust Dither |
|
| Posterization Limit | Set number of tones available for a color. |
|
| Barrel Vignette |
| |
| CRT Border Strength | Adjust border of CRT BORDER. 1 |
|
| Scanline | Add horizontal lines like a CRT screen |
|
| CRT | Add the framing effect for a pixel effect like old TVs. |
|
| Black Scanline Band | Adds a black band that scrolls up and down |
|
| Scanline Strength |
| |
| CRT Strength |
| |
| Band Strength |
| |
| Scanline Thickness |
| |
| CRT Thickness |
| |
| Band Thickness |
| |
| Scanline Speed |
| |
| Band Speed |
| |
| Band Interval |
| |
| Film Grains Config | ||
| Film Grain | Add a grain effect to the screen. If the effect flickers, switch to CAMERA_NOISE (turn off CAMERA_NOISE) for a similar but less relevant effect. |
|
| Grain Strength | Adjusting the grain strength on the screen |
|
| Vignette Config | ||
| BSL Vignette |
| |
| Vignette Strength |
| |
| Ultra Vignette | Customized vignette |
|
| Vignette Inner | Adjust inner radius. |
|
| Vignette Outer | Adjust outer radius. |
|
| Vignette Strength | Adjusts strength/intensity. |
|
| Vignette Curvature | Vignette roundness, higher |
|
| Darkness Menu | ||
| Darkness Effects | Enable or disable Darkness Effects. |
|
| Darkness Bloom Multiplier | Allows you to adjust the Bloom when you fight the Warden. |
|
| Darkness |
| |
| Darkness Fog | Allows to adjusts the fog for the Darkness. |
|
| Screen Dimming | Allows you to adjust screen dimming. |
|
| Start Effects | ||
| Fading animation | Fading animation when you move. |
|
| Bloom Start Effect | Increases Bloom during the startup effect. Bloom must be enabled!. |
|
| Bloom Start Strength |
| |
| Start Effect Custom Color | Adds a splash effect colorized with the color of his choice. Use the RGB sliders to choose your color. |
|
| Red |
| |
| Green |
| |
| Blue |
| |
| Intensity |
| |
| Hands | ||
| Depth Hands | Adjust Depth of hands. |
|
| Height Hands | Adjust the height of the hands. |
|
| Hands Shift | Allows you to shift your hands to the right |
|
| Hands Movements | Hand swaying effect. You can combine HAND_MOVEMENTS_2 at the same time |
|
| Hands Movements 2 | Hand swaying effect. You can combine HAND_MOVEMENTS at the same time |
|
| Movements Speed | Adjusts Movements Speed for Hands Movements/Camera at the same time. |
|
| Soft Particles | Allows particle to blend smoothly with its surroundings. |
|
| Emissive Particles | Allows emissivity for ender/redstone particles. |
|
| Invisible String |
| |
| ۞Lighting | ||
| Shadows | ||
| Colored Shadow | Enables tinted shadow from translucents. [+]Used for colored volumetric light shafts. [-]Slightly higher performance cost when using shadow filtering. |
|
| Sub Surface Scattering Menu | ||
| Sub Surface Scattering | Allows light to penetrate and scatter through leaves/foliages. |
|
| SSS on Entities | Add a very light SSS on the entities. |
|
| SSS Day Strength |
| |
| SSS Entities Strength |
| |
| SSS Night Strength |
| |
| SSS Foliage Strength |
| |
| SSS Quality |
| |
| SSS Leaves Strength |
| |
| Shadowmap Quality | Adjusts shadowmap size. [*]Higher resolution gives sharper shadows, but reduces performance. |
|
| Shadow Filtering | Enables shadow filtering. [+]This effect benefits from TAA. |
|
| Shadow Distance | Adsusts shadow distance. |
|
| Taa Shadow Filtering |
| |
| Sun Path Rotation | Adjusts sun angle. |
|
| Entities Shadows? | Enable or disable entities Shadows. |
|
| Shading Strength | Changes the shading darkness on surfaces. Affects everywhere including caves. |
|
| Ambiant Occlusion | ||
| Ambient Occlusion | Adds soft shadows around surface contact or intersection. |
|
| AO Strength | Adjusts ambient occlusion strength. |
|
| AO Quality | Adjusts ambient occlusion quality. Low quality is rendered in half resolution. [*] Low quality is internally switched to Medium if TAA is off. |
|
| AO FovScale | Adjusts ambient thickness. |
|
| Vanilla AO Strength | Adjusts Vanilla Ambiant Occlusion Strength | |
| Light Shaft | ||
| Light Shaft | Adds volumetric rays from sun / moon. [+]This effect benefits from TAA. [*]Performance depends on Shadowmap Resolution. |
|
| Light Shaft Config | ||
| Light Shaft Strength | Adjusts light shafts strength. |
|
| Day Contrast | Allows you to adjust the contrast of the lightshaft color during the day. |
|
| Night Contrast | Allows you to adjust the contrast of the lightshaft color during the night. |
|
| Circumference | Allows you to choose sun lighting at 360 degrees or less. 0 |
|
| Weather Multiplier Menu | ||
| Noon Multiplier |
| |
| Night Multiplier |
| |
| Rain Multiplier (Day) | Adjusts light shaft strength when it's raining (Day). |
|
| Rain Multiplier (Night) | Adjusts light shaft strength when it's raining (Night). |
|
| Lightshaft Smoker Overworld | ||
| Smoker Lighshaft |
| |
| Lightshaft Smoker Speed |
| |
| Underwater Light Shaft Menu | ||
| Underwater Multiplier |
| |
| Underwater Lightshaft Size | Adjust the size of Lighshafts underwater. 50.0 |
|
| Underwater Lightshaft Color | ||
| Red |
| |
| Green |
| |
| Blue |
| |
| Intensity |
| |
| Day Contrast | Allows you to adjust the contrast of the underwater lightshaft color during the day. |
|
| Night Contrast | Allows you to adjust the contrast of the underwater lightshaft color during the night. |
|
| Light Shaft Ender | ||
| Light Shaft Ender | Enable or disable Light Shaft in Ender World |
|
| Light Shaft Strength | Adjusts light shafts strength in Ender. |
|
| Red |
| |
| Green |
| |
| Lightshaft Smoker |
| |
| Blue |
| |
| Ender Smoker Speed | Adjusts Ender Light Shaft Speed speed. |
|
| Intensity |
| |
| Blocks Lighting | ||
| Block Shine |
| |
| Lighting Power Day | Adjust Power Lighting of blocklight of day. |
|
| Lighting |
| |
| Lighting Power Night | Adjust Power Lighting of blocklight of night. |
|
| Red |
| |
| Lighting Power Inside | Adjust Power Lighting of blocklight when you are inside. |
|
| Blocklight by Temp | Enable or disable blocklighting temperature control. Disable the RGB color control! |
|
| Green |
| |
| Lighting Power Underwater | Adjust Power Lighting of blocklight when you are under water. |
|
| Temperature | Adjust the blockligthing by temperature |
|
| Blue |
| |
| Intensity for Temp Light |
| |
| Intensity |
| |
| EminGT Random Colored Light | Allows to have the luminous marigolds of random colors according to the position of these. |
|
| Minimum Light Changes the amount of light in the very dark areas. | ||
| Red |
| |
| Green |
| |
| Blue |
| |
| Out of Water Intensity |
| |
| Underwater Intensity |
| |
| Light Flickering | ||
| Light Flickering | Active Light Flickering. Gives a flickering effect of light on the emissive blocks |
|
| Bloom Flickering | Activate the Bloom Flickering. Gives a flickering effect on the Bloom following the tempo of the flickering Light. Light Flickering and Bloom must be activated! |
|
| Flickering Speed | Adjust the flickering speed |
|
| Flickering Strength 1 | Adjusts the strength of the first effect. |
|
| Flickering Strength 2 | Adjusts the strength of the second effect. |
|
| Flickering Strength 3 | Adjusts the strength of the second effect. |
|
| Lighting Color | ||
| Light (Morning) | ||
| Red |
| |
| Green |
| |
| Blue |
| |
| Intensity |
| |
| Ambient (Morning) | ||
| Red |
| |
| Green |
| |
| Blue |
| |
| Intensity |
| |
| Light (Day) | ||
| Red |
| |
| Green |
| |
| Blue |
| |
| Intensity |
| |
| Ambient (Day) | ||
| Red |
| |
| Green |
| |
| Blue |
| |
| Intensity |
| |
| Light (Evening) | ||
| Red |
| |
| Green |
| |
| Blue |
| |
| Intensity |
| |
| Ambient (Evening) | ||
| Red |
| |
| Green |
| |
| Blue |
| |
| Intensity |
| |
| Light (Night) | ||
| Red |
| |
| Green |
| |
| Blue |
| |
| Intensity |
| |
| Ambient (Night) | ||
| Red |
| |
| Green |
| |
| Blue |
| |
| Intensity |
| |
| Sunset/Sunrise Saturation |
| |
| Dynamic Hand Light | ||
| Colored Dynamic Hand Light | Colors the emissive light according to the luminous object in hand |
|
| Dist Max Light | Maximum light distance |
|
| Dist Decline | decline of light from maximum distance of DIST_MAX_LIGHT to DIST_DECLINE |
|
| Max Light | Lighting strength |
|
| Dimension Blocks Brightness | ||
| ۞Overworld Blocks Brightness | ||
| Lava |
| |
| Fire |
| |
| Lantern |
| |
| Soul Lantern |
| |
| Shroomlight |
| |
| Redstone Lamp |
| |
| Sea Lantern |
| |
| Glowstone |
| |
| Jack O Lantern |
| |
| Candle |
| |
| Torch / End Rod |
| |
| Enchanted Table |
| |
| Soul Campfire |
| |
| Campfire |
| |
| Text Sign |
| |
| Magma Block |
| |
| Froglights |
| |
| Crying / Respawn Anchor |
| |
| ۞Sculk Overworld۞ | ||
| Sculk Catalyst |
| |
| Sculk Shrieker |
| |
| Sculk Vein |
| |
| Sculk |
| |
| Sculk Sensor |
| |
| ۞Bonus Overworld۞ | ||
| Redstone Emissive Block?[*] | Need enable Advanced Materials! |
|
| Redstone Block |
| |
| Lapis Emissive Block?[*] | Need enable Advanced Materials! |
|
| Lapis Block |
| |
| ۞Ametyst Overworld۞ | ||
| Ametyst (Small) |
| |
| Ametyst (Medium) |
| |
| Ametyst (Large) |
| |
| Ametyst (Cluster) |
| |
| ۞Glowing Block Overworld۞ | ||
| Glow Berries |
| |
| Glow Spore Blossom |
| |
| Emissive Power |
| |
| Emissive Power |
| |
| Glow Lichen |
| |
| Glow Pickel |
| |
| Emissive Power |
| |
| Emissive Power |
| |
| ۞Nether Blocks Brightness | ||
| Lava |
| |
| Fire |
| |
| Lantern |
| |
| Soul Lantern |
| |
| Shroomlight |
| |
| Redstone Lamp |
| |
| Sea Lantern |
| |
| Glowstone |
| |
| Jack O Lantern |
| |
| Candle |
| |
| Torch / End Rod |
| |
| Enchanted Table |
| |
| Soul Campfire |
| |
| Campfire |
| |
| Text Sign |
| |
| Magma Block |
| |
| Froglights |
| |
| Crying / Respawn Anchor |
| |
| ۞Sculk Nether۞ | ||
| Sculk Catalyst |
| |
| Sculk Shrieker |
| |
| Sculk Vein |
| |
| Sculk |
| |
| Sculk Sensor |
| |
| ۞Bonus Nether۞ | ||
| Redstone Emissive Block?[*] | Need enable Advanced Materials! |
|
| Redstone Block |
| |
| Lapis Emissive Block?[*] | Need enable Advanced Materials! |
|
| Lapis Block |
| |
| ۞Ametyst Nether۞ | ||
| Ametyst (Small) |
| |
| Ametyst (Medium) |
| |
| Ametyst (Large) |
| |
| Ametyst (Cluster) |
| |
| ۞Glowing Block Nether۞ | ||
| Glow Berries |
| |
| Glow Spore Blossom |
| |
| Emissive Power |
| |
| Emissive Power |
| |
| Glow Lichen |
| |
| Glow Pickel |
| |
| Emissive Power |
| |
| Emissive Power |
| |
| ۞Ender Blocks Brightness | ||
| Lava |
| |
| Fire |
| |
| Lantern |
| |
| Soul Lantern |
| |
| Shroomlight |
| |
| Redstone Lamp |
| |
| Sea Lantern |
| |
| Glowstone |
| |
| Jack O Lantern |
| |
| Candle |
| |
| Torch / End Rod |
| |
| Enchanted Table |
| |
| Soul Campfire |
| |
| Campfire |
| |
| Text Sign |
| |
| Magma Block |
| |
| Froglights |
| |
| Crying / Respawn Anchor |
| |
| ۞Sculk Ender۞ | ||
| Sculk Catalyst |
| |
| Sculk Shrieker |
| |
| Sculk Vein |
| |
| Sculk |
| |
| Sculk Sensor |
| |
| ۞Bonus Ender۞ | ||
| Redstone Emissive Block?[*] | Need enable Advanced Materials! |
|
| Redstone Block |
| |
| Lapis Emissive Block?[*] | Need enable Advanced Materials! |
|
| Lapis Block |
| |
| ۞Ametyst Ender۞ | ||
| Ametyst (Small) |
| |
| Ametyst (Medium) |
| |
| Ametyst (Large) |
| |
| Ametyst (Cluster) |
| |
| ۞Glowing Block Ender۞ | ||
| Glow Berries |
| |
| Glow Spore Blossom |
| |
| Emissive Power |
| |
| Emissive Power |
| |
| Glow Lichen |
| |
| Glow Pickel |
| |
| Emissive Power |
| |
| Emissive Power |
| |
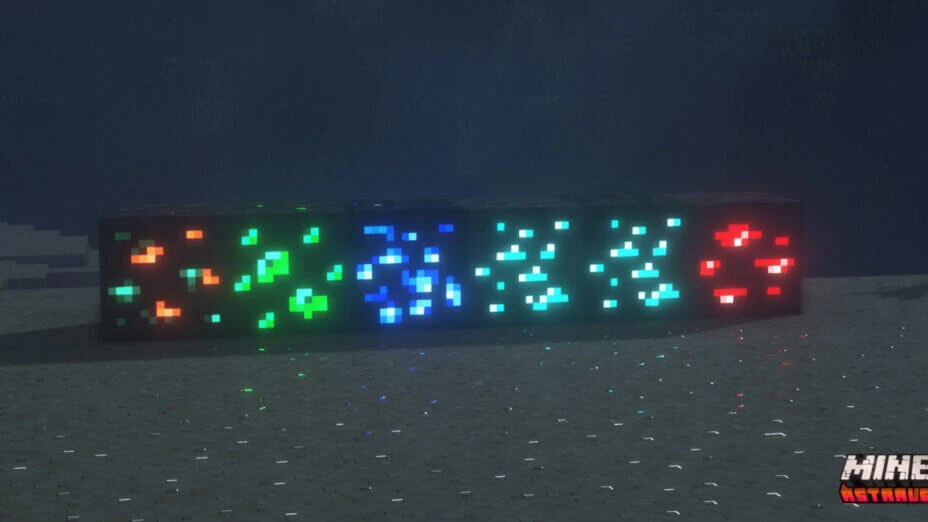
| Emissive Ores | Makes ores glow. |
|
| Emissivity | Allows certain surfaces to be brighter. |
|
| Emissive Ores Strength | Allows you to choose the desired intensity for the ores. |
|
| Emissive Multiplier | Adjusts the strength of all blocks that emit light. |
|
| Pickaxe Revelation | Allows you to make ores glow with a pickaxe in hand. [+] "Emissive Ores" option must be enable. |
|
| ۞Other Cool Effects | ||
| TECHNO-XP Menu | ||
| TECHNO-XP | The color of your XP balls become RAINBOWS. |
|
| Intensity |
| |
| Beacon Beam Menu | ||
| Emissive Beam |
| |
| Intensity Overworld |
| |
| Intensity Nether |
| |
| Intensity Ender |
| |
| Double Layer | Delete the second layer of Beacon Beam |
|
| Reticle | Add a reticle for bow, crossbow, trident, snowball ... |
|
| Flash Entities Menu | ||
| Flash Entities | Ensures perfect visibility of mobs in the dark once a weapon is in hand ;-) |
|
| Entity Damage Flash | Enables damaged entities and nearby creeper to flash. |
|
| Intensity Flash Entities |
| |
| Triggering Items | ||
| Sword |
| |
| Axe |
| |
| Bow/CrossBow |
| |
| Trident |
| |
| Snowball |
| |
| Fishing Rod |
| |
| Egg |
| |
| Red |
| |
| Green |
| |
| Oscillation | Adds oscillation effect to entities with Flash Entities mode enabled |
|
| Blue |
| |
| Oscillation Speed | Adjusts the oscillation speed |
|
| Concentration Menu | ||
| Concentration | Adds a black bar to the bottom and top of the screen when you sneak. |
|
| Bands Thickness. | Adjusts thickness of bottom and top bands. |
|
| If Cinema 16/9 Bands is Enabled | ||
| Addition for 16/9 bands | Allows to adjusts thickness of band when you have Cinema 16/9 Bands enabled for see the effect with. |
|
| Shortcut to Cinema 16/9 Bands | ||
| Cinema 16/9 Bands Menu | ||
| Cinema 16/9 Bands |
| |
| -->Top<-- |
| |
| -->Bottom<-- |
| |
| Color Block Selector Choose your style of color for the cubes's selector. RGB or Techno. Best effect with Bloom activated. Warning! it also colors the fishing line. | ||
| Color Block Selector |
| |
| Style |
| |
| Style |
| |
| Style |
| |
| Red |
| |
| TECHNO Speed | Adjusts speed of Techno selector block |
|
| HARLEQUIN Speed | Adjusts speed of Harlequin selector block. |
|
| Green |
| |
| HARLEQUIN Obstruction | Adjusts color obstruction of HARLEQUIN effect. |
|
| Blue |
| |
| Intensity |
| |
| Enchantment Glint Menu | ||
| Magical Glint | Glint has a rainbow effect on enchanted stuff |
|
| Magical Glint Speed | Set the speed of effect |
|
| Enchantment Glint Intensity | Adjusts the intensity of enchantment glint on enchanted items. |
|
| Show DARK Zones Menu | ||
| Show DARK Zones | Show dark area |
|
| Color Dark Zones Levels Choose your color for dark area and Danger Zone. | ||
| Graduated Color | Allows you to graduate the color between the various zones. |
|
| Blinking Effect |
| |
| Zones |
| |
| Zones |
| |
| Red |
| |
| Red |
| |
| Green |
| |
| Green |
| |
| Blue |
| |
| Blue |
| |
| Intensity |
| |
| Intensity |
| |
| Damage Effect Menu | ||
| Red Vignette Effect | Add red vignette effect on screen when you take damage. |
|
| Burning Effect | Add refraction on screen when you burn. |
|
| Corruption Effect | Add corruption effect on screen when you take damage. |
|
| Burning Strength | Adjust refraction of this effect. |
|
| Corruption Plus Effect | Add more effect on Corruption. Corruption must be enable! |
|
| RGB Line Intensity | Adjusts the color intensity of Corruption Plus. |
|
| Color Mobs Eyes | Enable or Disable Colored Eyes |
|
| Break Texture Anim | Enable or disable Breaking texture animation |
|
| New END Portal Menu | ||
| New END Portal | NEW portal for ENDER. |
|
| Emissive Strength |
| |
| Eyes Color | Choose the color of the eyes for spider, enderman,dragon. |
|
| Hyper Speed Menu | ||
| Hyper Speed | HYPER_SPEED.comment |
|
| Only for Sprint | Enable this effect only when you sprinting. |
|
| Hyper Speed Strenght |
| |
| New NETHER Portal | ||
| Emissive Nether Portal | Emissive effect for Nether portal. Need enable Advanced Materials! |
|
| Three-Dimensionnal Depth |
| |
| Overworld Emissivness |
| |
| Nether Emissivness |
| |
| Ender Emissivness |
|
Comparison
Our comparison tool makes it easy to compare AstraLex Shaders with Minecraft vanilla and other shader packs.


How To Install AstraLex Shaders
- Support Forge / Vanilla
- Extra features
- Good performance
- Support Fabric / Quilt
- Better performance, depend on your hardware
Optifine Installation Guide
Note
Your device must have Java installed to run the Forge and Optifine installers.
Quick Java Installation Guide
-
Download Java
Download the Java installer from the official website here.
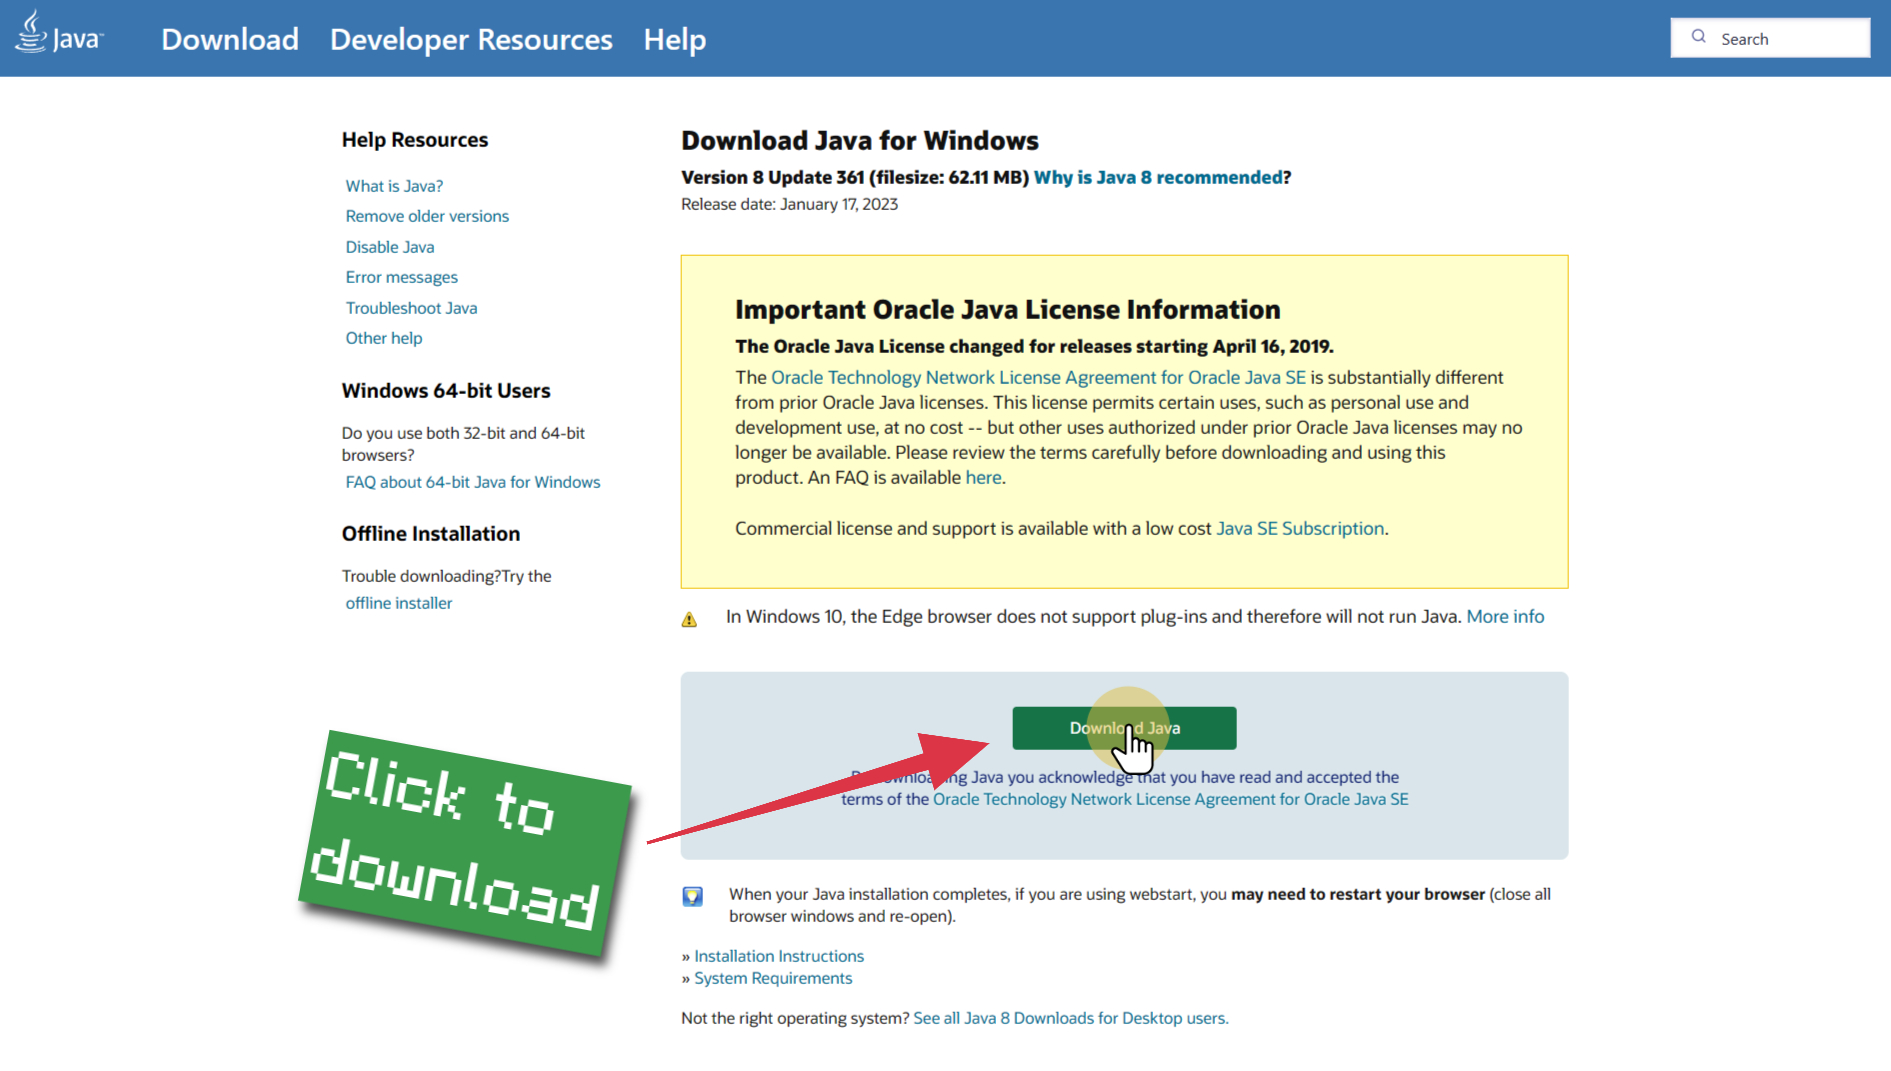
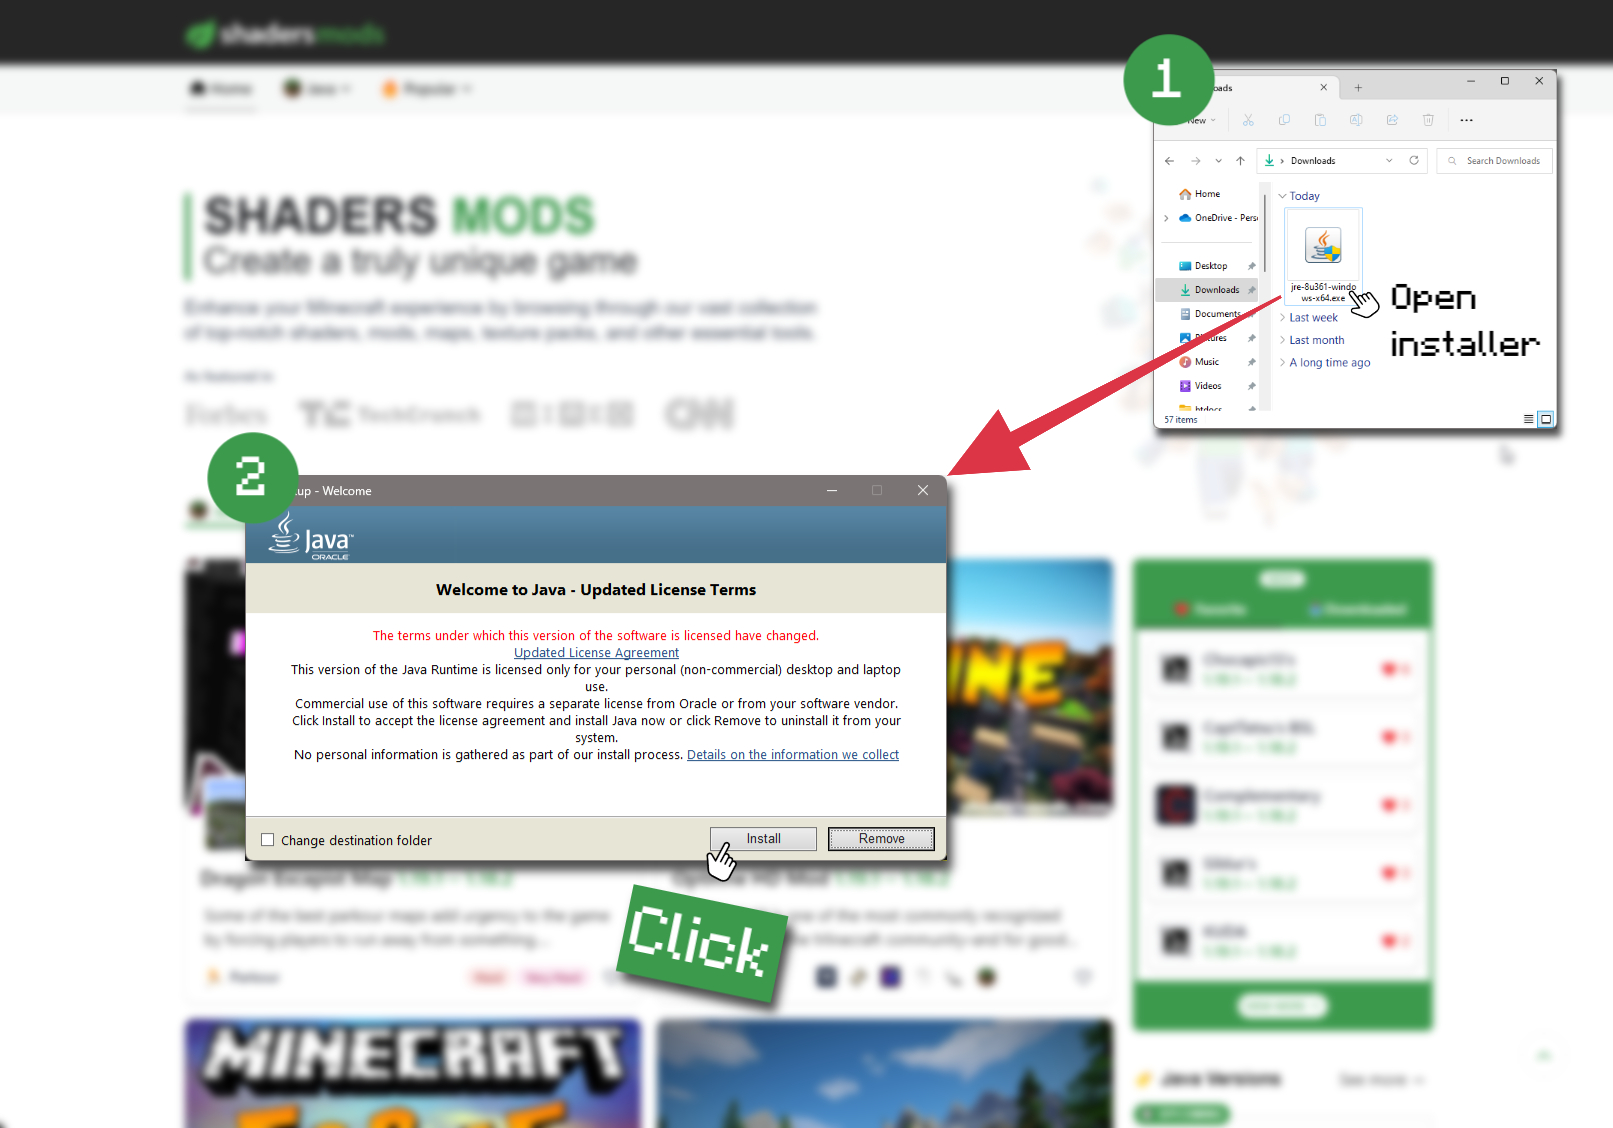
-
Open Installer
Once you have downloaded the file, run it and click the Install button.
How to install AstraLex Shaders with Optifine?
-
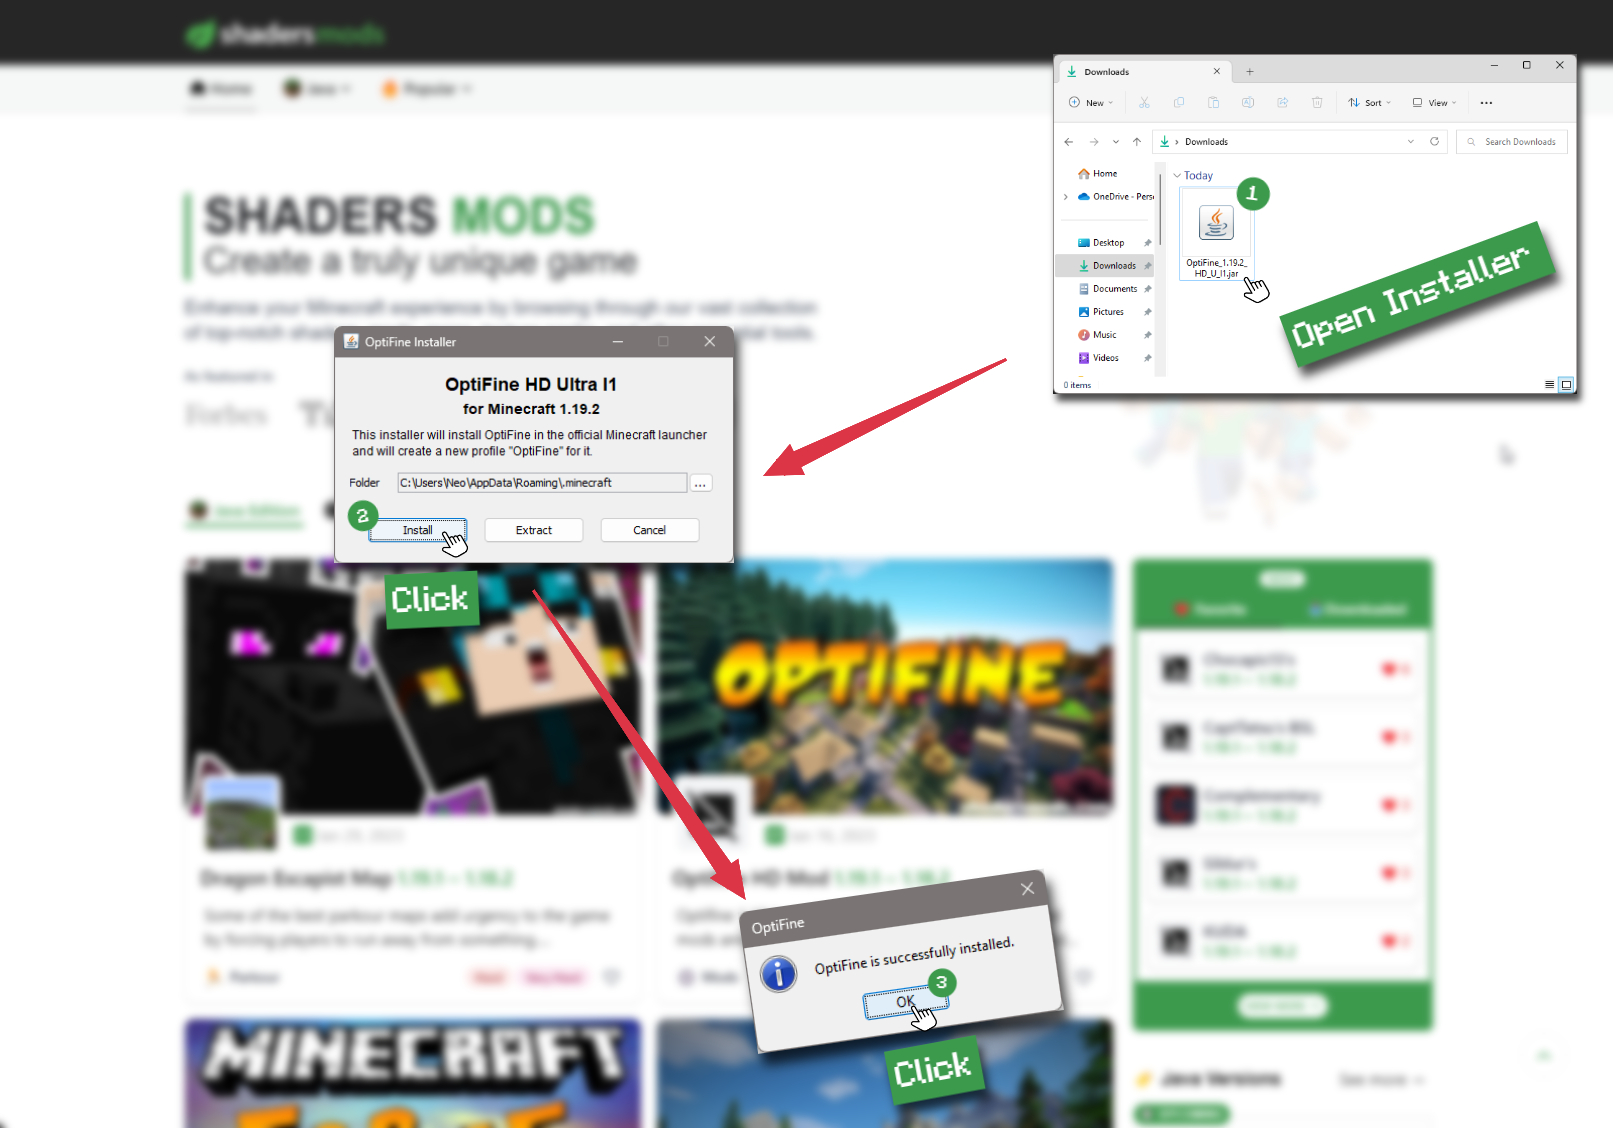
Download Optifine
Get the latest version of Optifine for your Minecraft version.
Download Optifine -
Install Optifine
Run the Optifine installer and follow the on-screen instructions to complete the installation.
-
Download AstraLex Shaders
Go to the download section and get shaders zip file. Unzip the file if necessary, as some shader developers may bundle multiple shader versions in one zip file.
-
Launch Minecraft
Start the Minecraft launcher and make sure you have the Optifine profile selected.

-
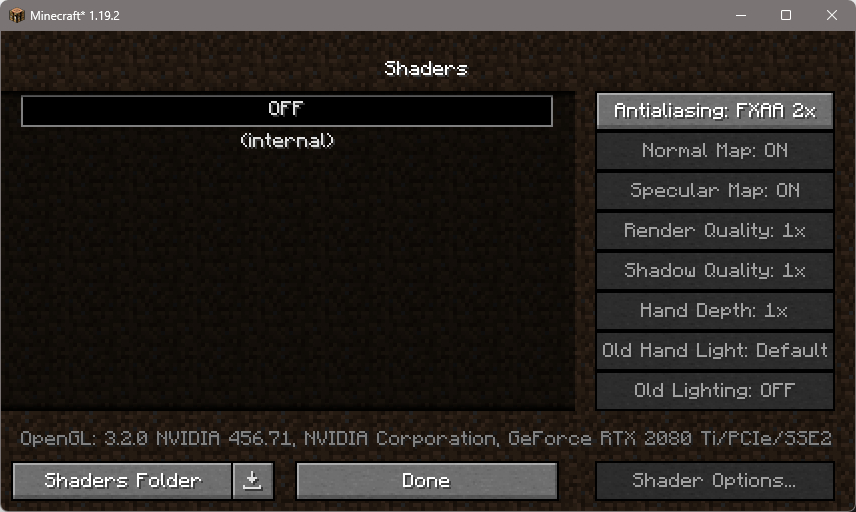
In-game Shaders menu
Go to Options > Video Settings > Shaders to access the shaders menu.
-
Open shaderpacks folder
Click on the "Shaders Folder" button to open the folder where shaders are stored, so you can add or remove shaders as desired.

-
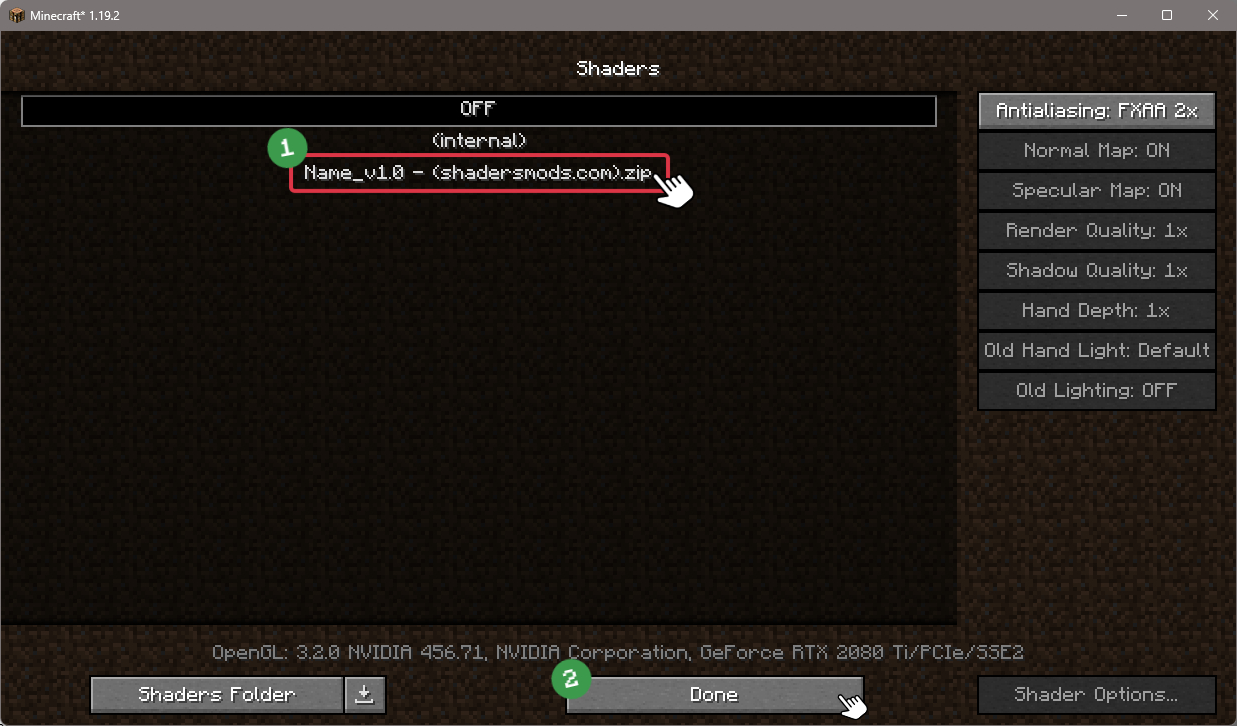
Install AstraLex Shaders
Copy or move the downloaded AstraLex shaders zip file into the shaderpacks folder.

-
Select AstraLex Shaders
Choose AstraLex shader pack from the list of available shaders in the options menu.
How to install AstraLex Shaders with Forge and Optifine?
Quick Installation Guide
-
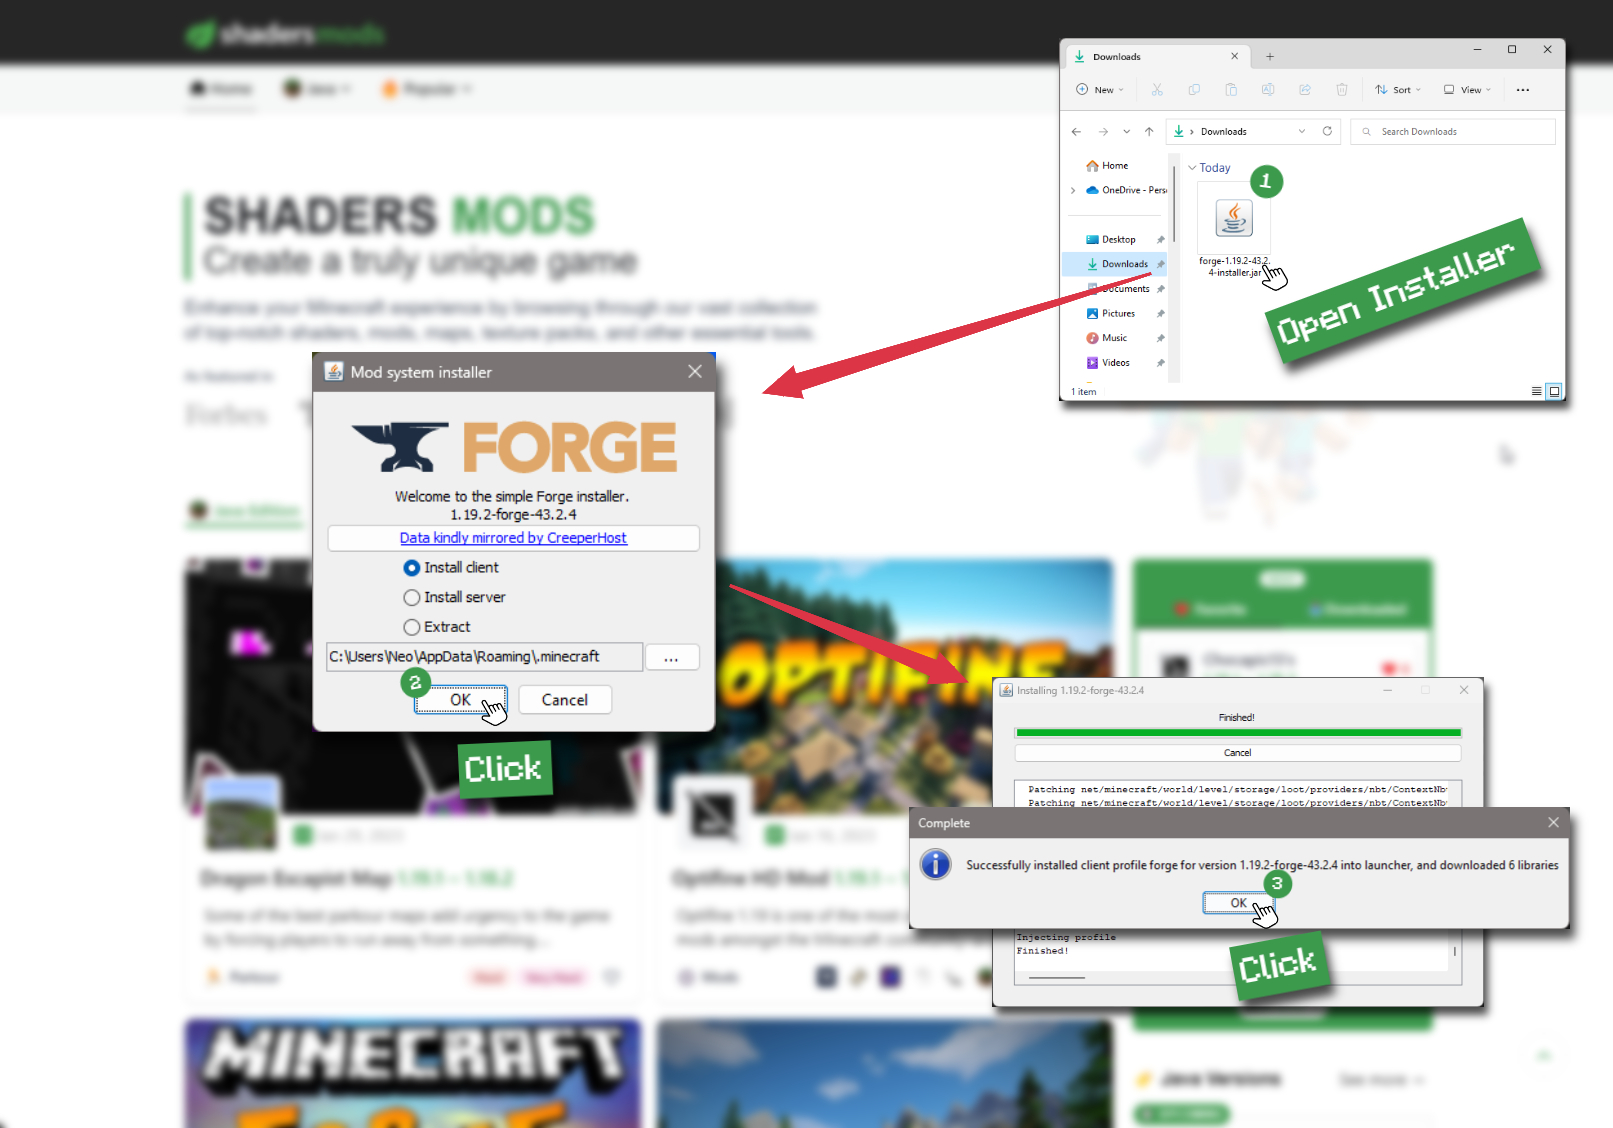
Install Forge
Obtain the latest version of Forge that is compatible with your Minecraft version.
Download Minecraft Forge -
Launch Minecraft
Start the Minecraft launcher and select the version of Minecraft you want to install Forge on. Run the game once by clicking on the "Play" button to create necessary files for Forge.

-
Install Forge Client
Double-click on the Forge installer jar file and choose "Install Client" in the window that appears.
-
Install Optifine
Download the Optifine jar file after Forge is installed. Move the Optifine jar file to the mods folder in the .minecraft directory.
Download Optifine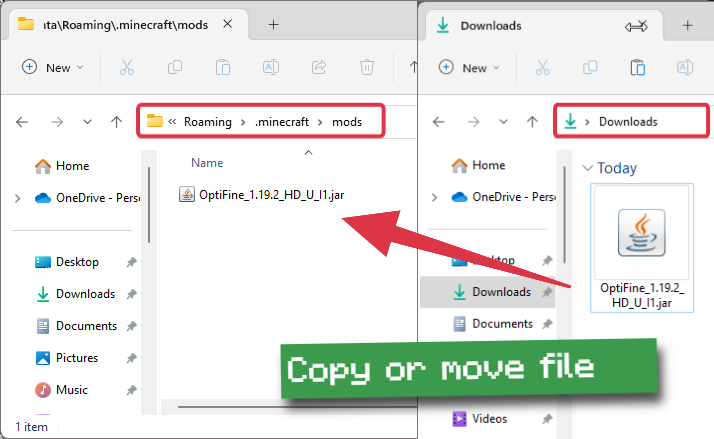
-
Launch Forge Profile
Launch Minecraft using the "Forge" profile, Optifine will be automatically loaded along with Forge.

-
Install Chocapic13's Shaders
Now the installation is the same as from the above Optifine instructions, just follow the steps starting from step 5.
Iris Installation Guide
Note
Your device must have Java installed to run the Iris installer.
Quick Java Installation Guide
-
Download Java
Download the Java installer from the official website here.
-
Open Installer
Once you have downloaded the file, run it and click the Install button.
How to install AstraLex Shaders with Iris?
-
Download Iris Shaders
Find the latest version of the Iris Shaders installer and download it.
Download Iris Installer -
Install Iris Shaders
Open the downloaded jar file, and choose the preferred game version and installation type.
⯈ Iris Install:
If you don't plan on using any other mods with Iris, choose this option.⯈ Fabric Install:
Choose this option if you want to use Iris with Fabric and other mods. The Iris jar files will be copied to the mods folder within the .minecraft directory.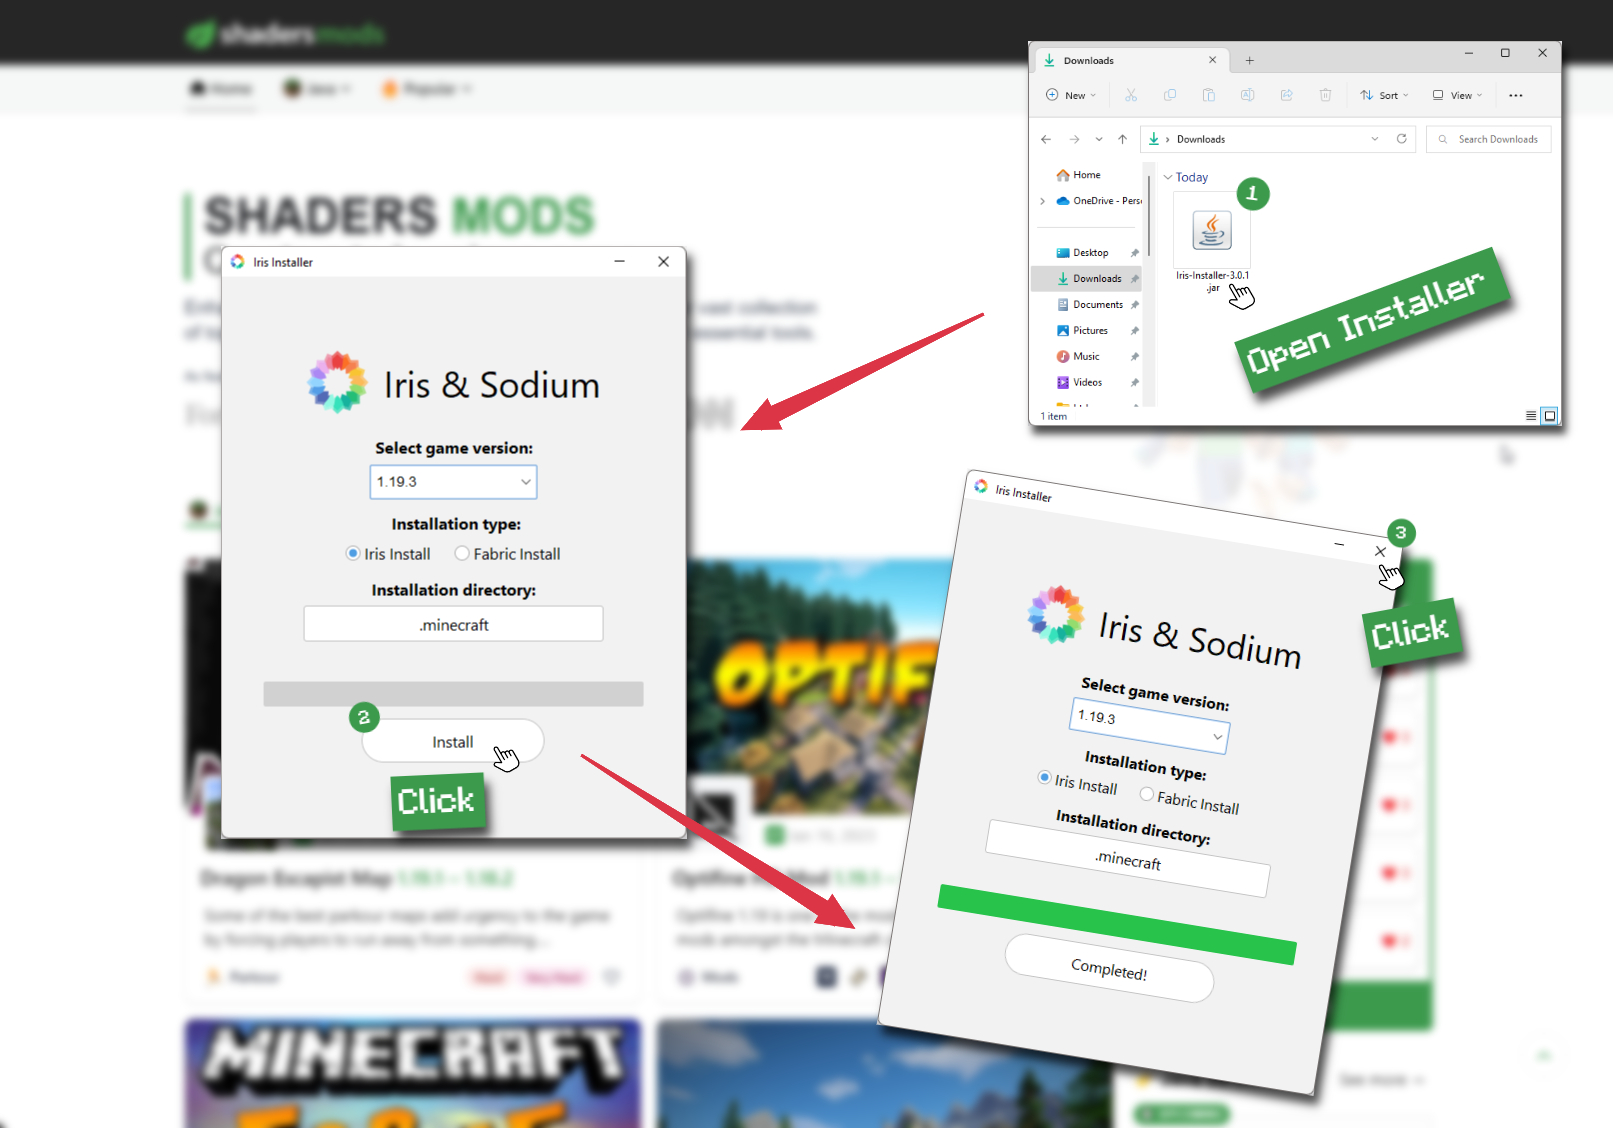
-
Start Installation
After selecting the game version and installation type, click the "Install" button to start the installation process.
-
Launch Minecraft
Start the Minecraft launcher and make sure you have the Iris profile selected.
Note
Select the Fabric profile if you opt for the Fabric installation type.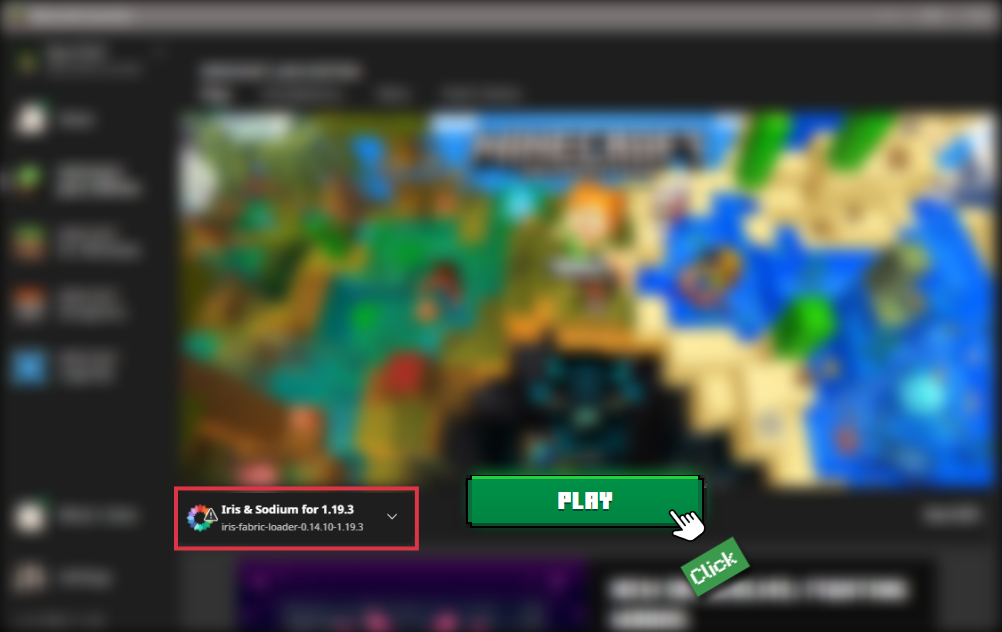
-
In-game Shader Menu
Open the Minecraft game and go to Options > Video Settings > Shader Packs to access the shaders menu.
Tip
To simplify the process, simply drag and drop the shader ZIP file directly into the Minecraft window, bypassing the next two steps.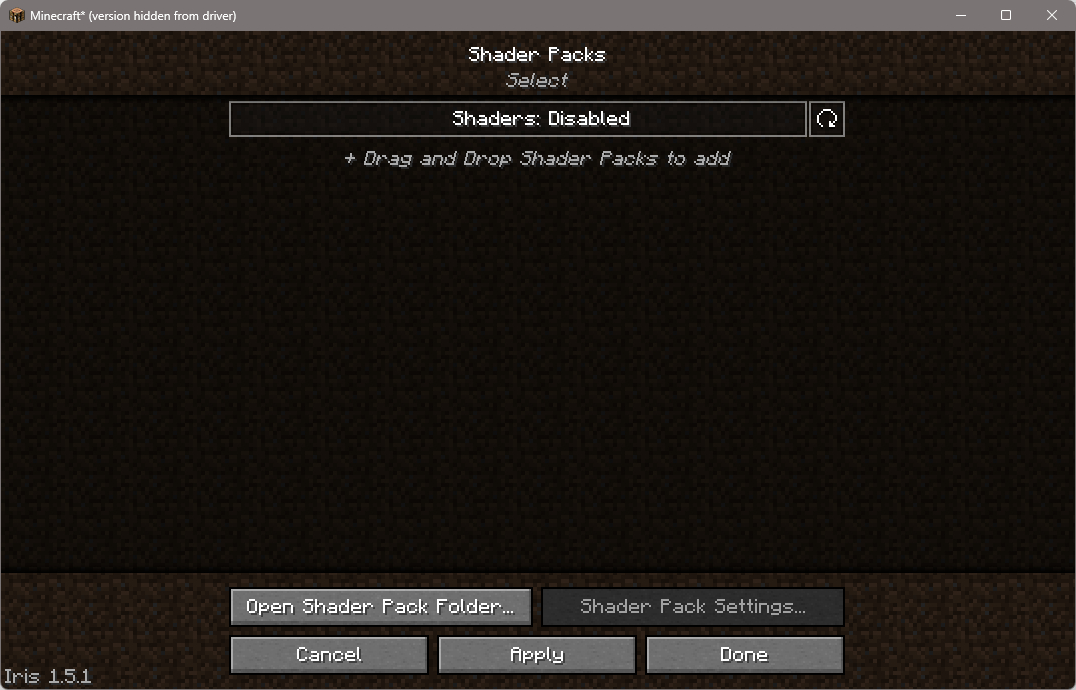
-
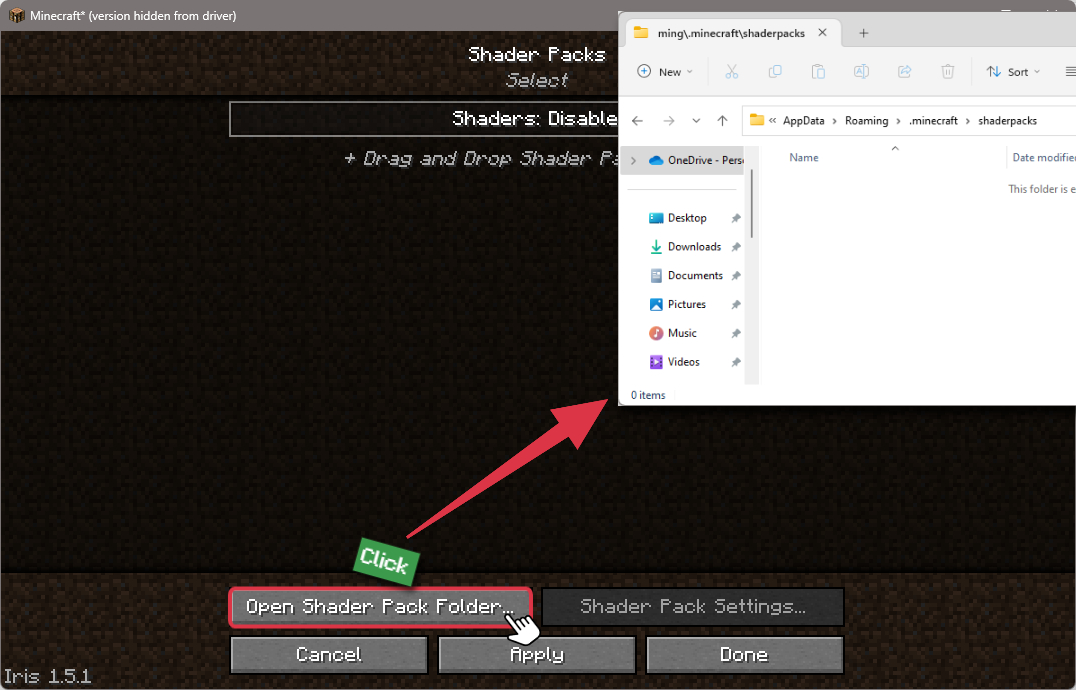
Open shaderpacks folder
Click on the "Open Shader Pack Folder" button to access the folder where shaders are stored.
-
Install AstraLex Shaders
Copy or move the shaders zip file into the shaderpacks folder.
-
Select AstraLex Shaders
Choose installed shader pack from the list of available shaders in the options menu and click the "Apply" or "Done" button to select it.
Tip
When the shader pack is selected, its name will be changed to yellow.
📥 AstraLex Shaders — Download
Something You Should Know
- Our links are only from the official developer, so you can be sure they are secure.
- No modifications or edits are made to the files.
🔄 Update Logs
V79.0
- Full Compatible 1.20.
- Added 2, 10, 14 chunks for shadows distance.
- Reduced hand movements by half when underwater.
- Added suspicious sand ID for disable puddles on it.
- Fixed Handlight bug with Sculk Sensor.
V78.3
Added
- Bloom Multiplier slider.
- “Weather Emissive Flowers” option to enable emissivity during rain. (Enable by default).
Changed
- Default Bloom Strength increased.
Fixed
- Bad waving for crops.
Comments (41)
How do i deactivate the blur?
cool
i Got over 30 Fps But Can you Please take awat the black border when you Crouch.
Heads up, Anything transparent does not show up in reflections. This counts for Ice, Water, Glass, or anything of that matter. Also, reflections need an extend option, I’m in a 3×3 hallway and the walls don’t reflect each-other until I get next to one of the walls.
The water is displayed very dark during the early daytime hours, is this normal???
to download it with optifine is to :download and install optifine 2 igo into the game if your mincraft launcher is open close it then reopen it 3 make a world and press esc 4 press options 5 press shaders 6 it will ask you to drop the shader in the shader folder 7 when you see the name of the shader in the game press 8 have fun with you shader.
I really love this shader but its adding a strange shape in the sky, its a square made out of random objects in the game so im not sure how to fix that if anyone has suggestions i’d love to hear them. its really odd, like a inventory floating in the sky
My computer is handleing it at 260fps but he sounds like car XD
Bruh it won’t download
Me : Wow , these shaders looks cool
My “GPU : ITS OVER 9000!”