Oceano Shaders 3.0 1.20, 1.19.4 → 1.18.2
Enhance the graphics of Minecraft with stunning effects, such as realistic shadows and vivid colors.
| Developer | 👤LittleRoofie |
|---|---|
| Style | 🌅Realistic |
| Support GPUs | |
| Loaders | |
| Performance Impact | Medium |
| Settings | 243 |
| Presets | 🛠️ Paper+3 |
| Features | Cinematic+36 |
| Created | Sep 4, 2019 |
| Updated | Jan 11, 2021 |
| Stats |
|
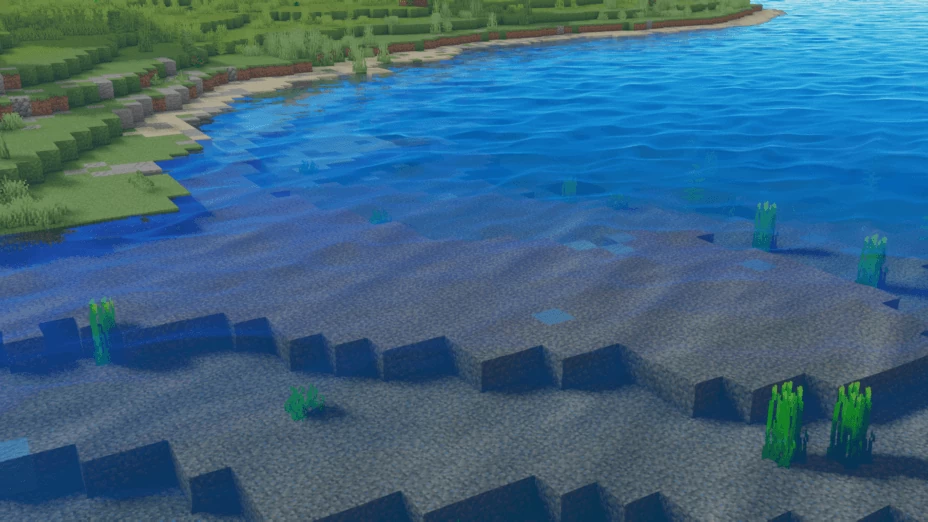
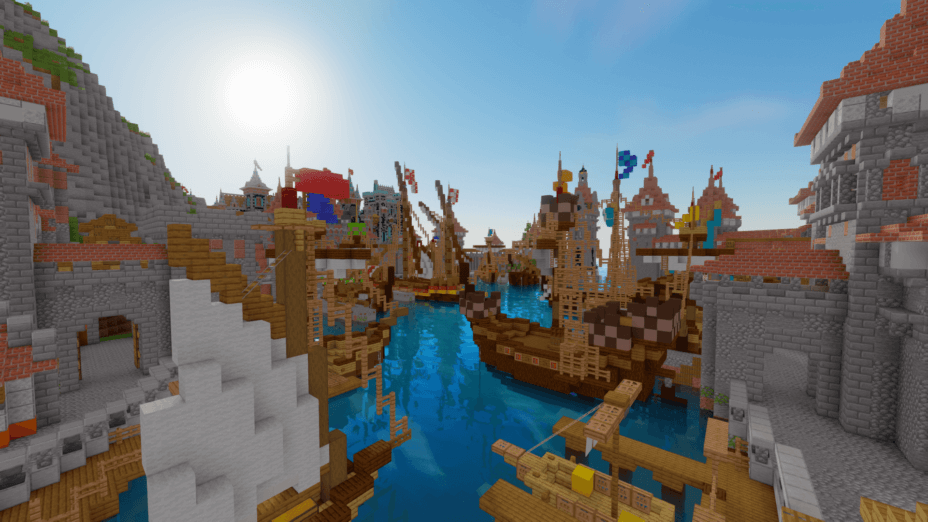
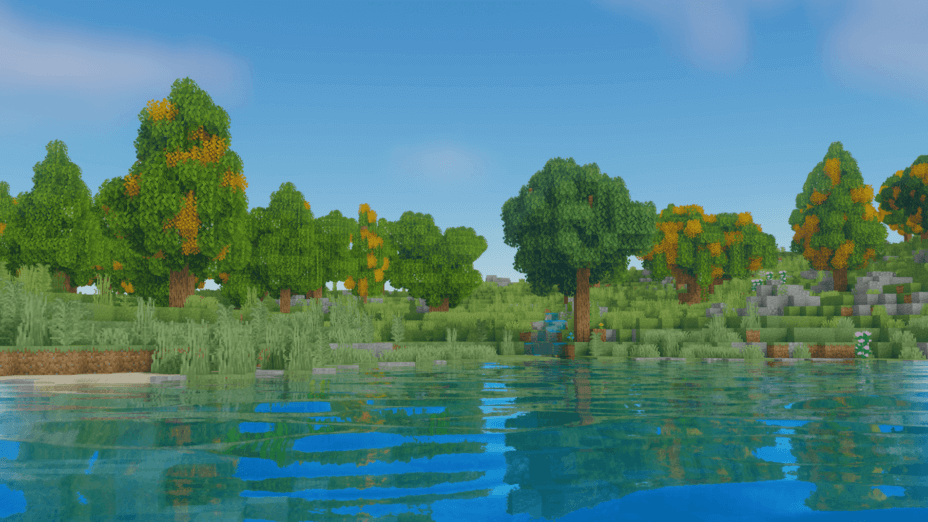
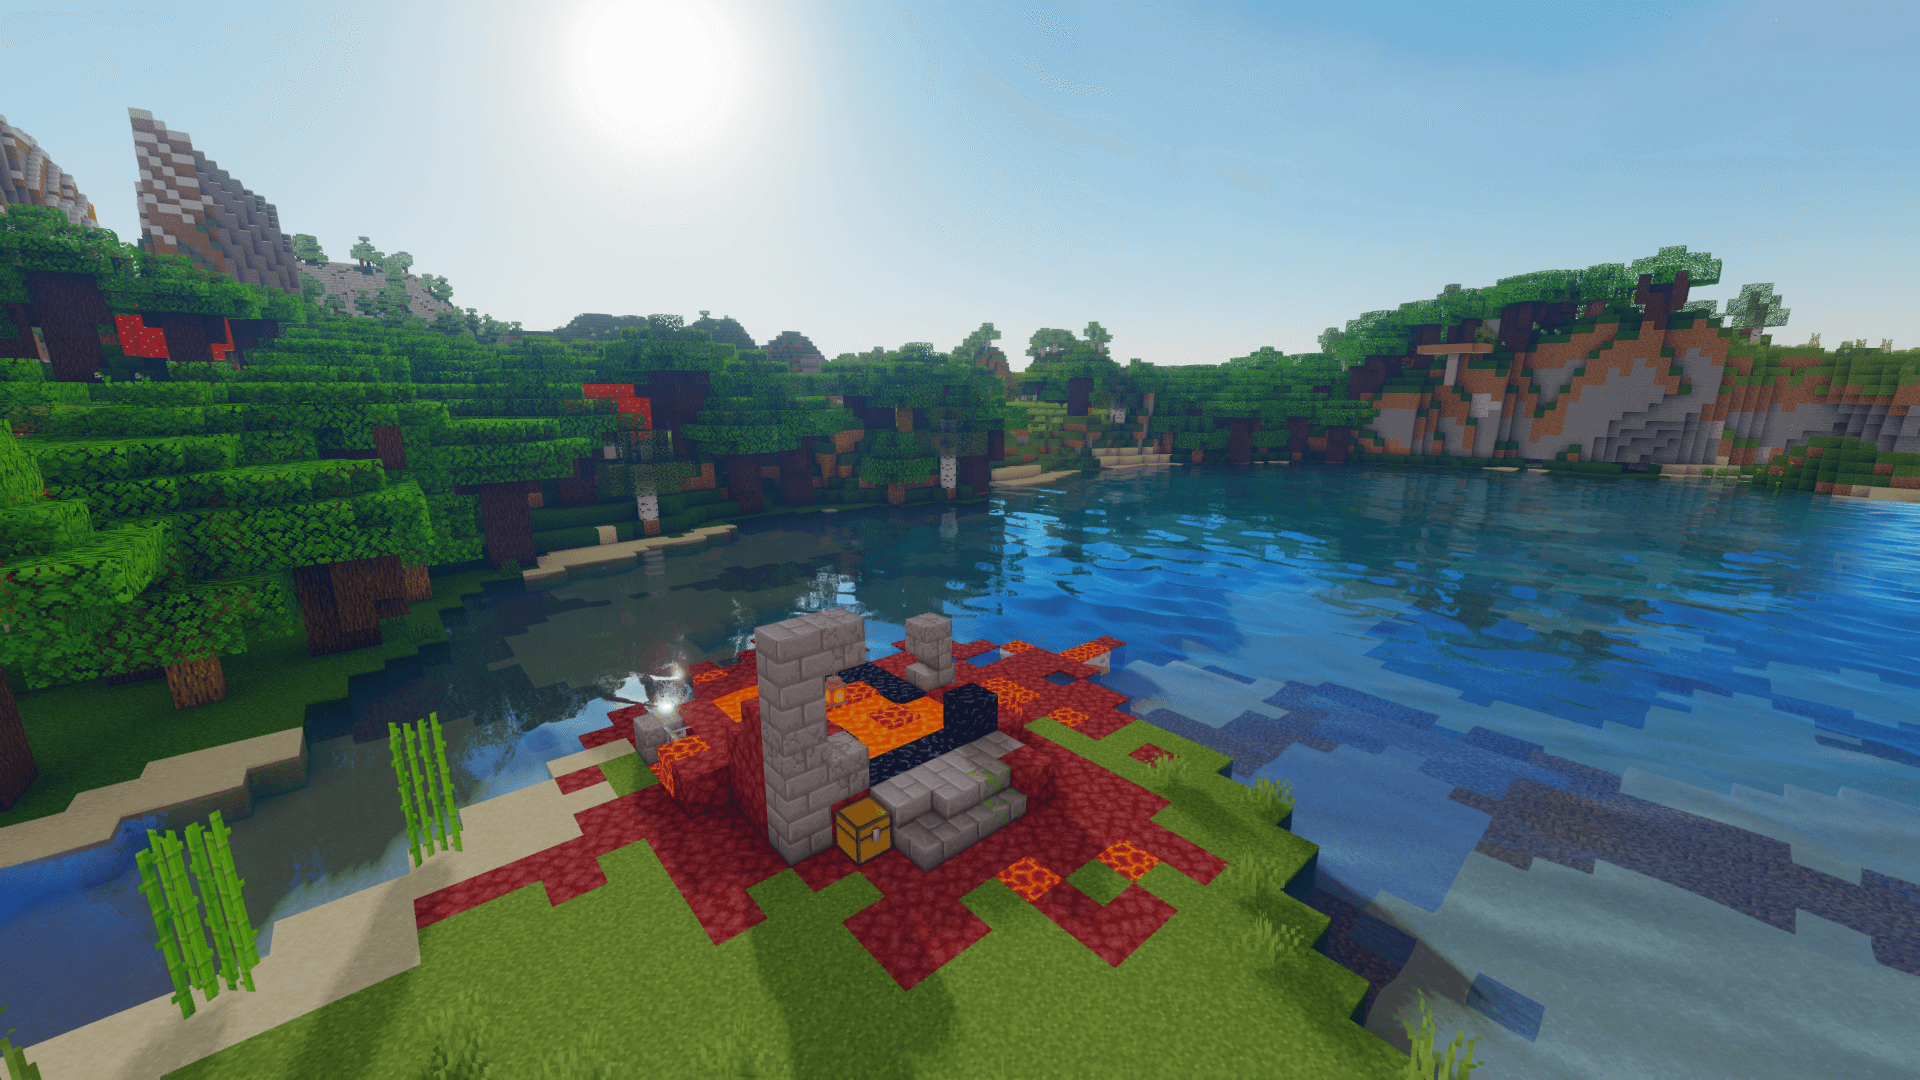
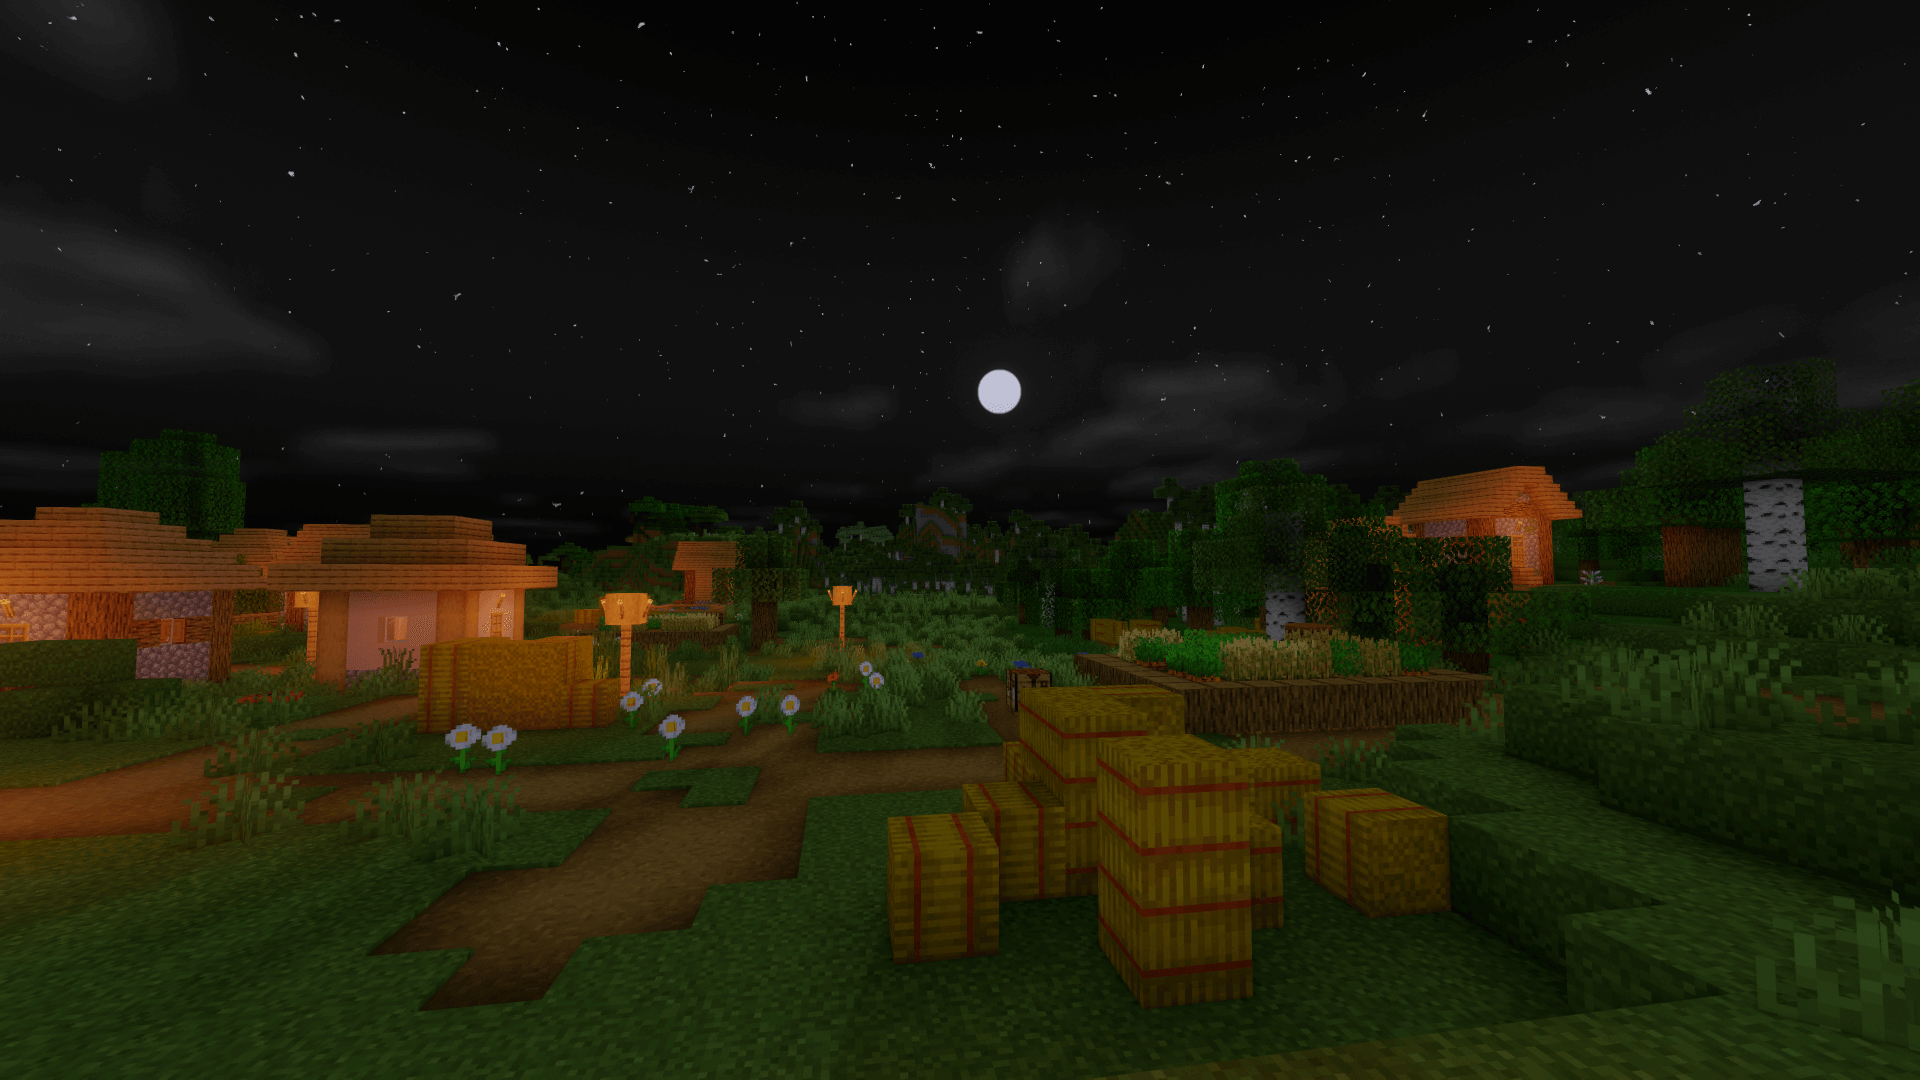
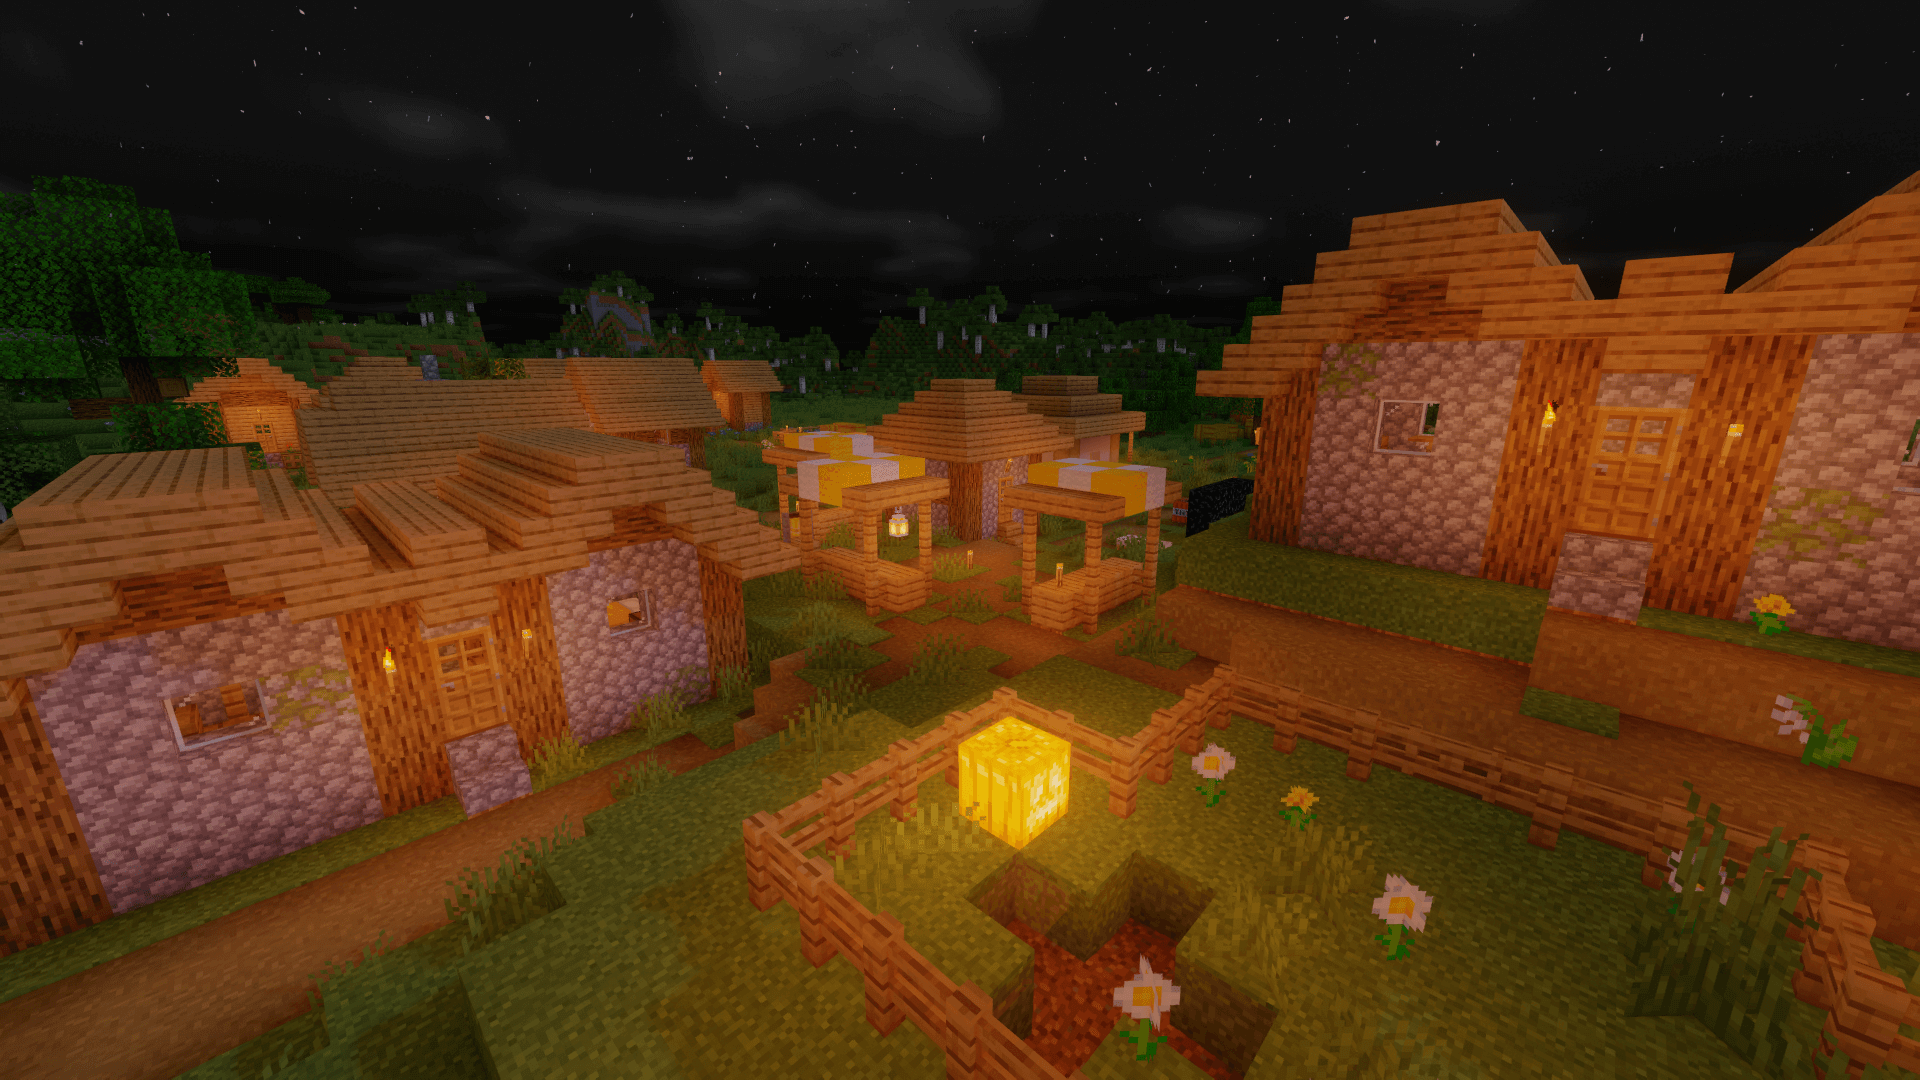
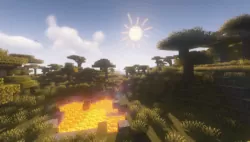
The Oceano Shaders 3.0 shader pack is one of Minecraft’s most popular shader packs to date. With nearly one million gamers enjoying this shader, there is no doubt that giving this pack a try is worthwhile. With new visual element upgrades, there are plenty of exciting new game features to enjoy.
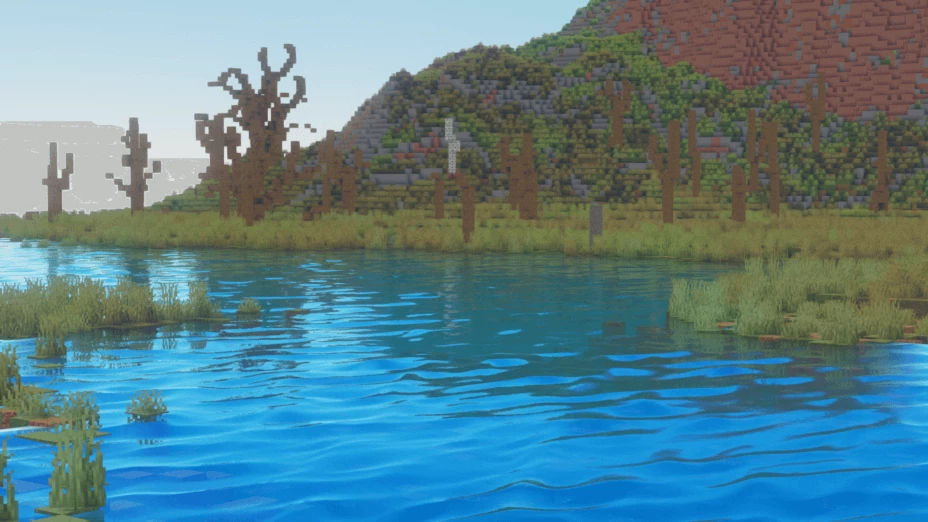
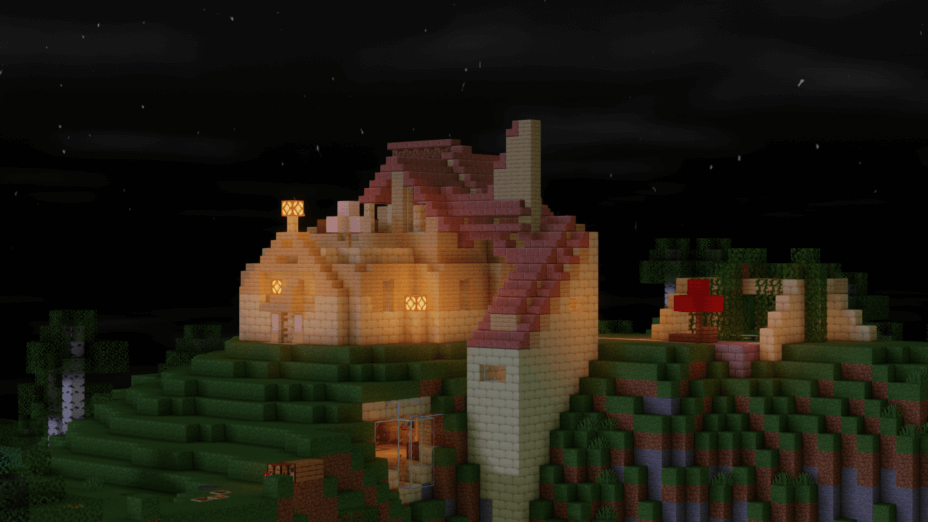
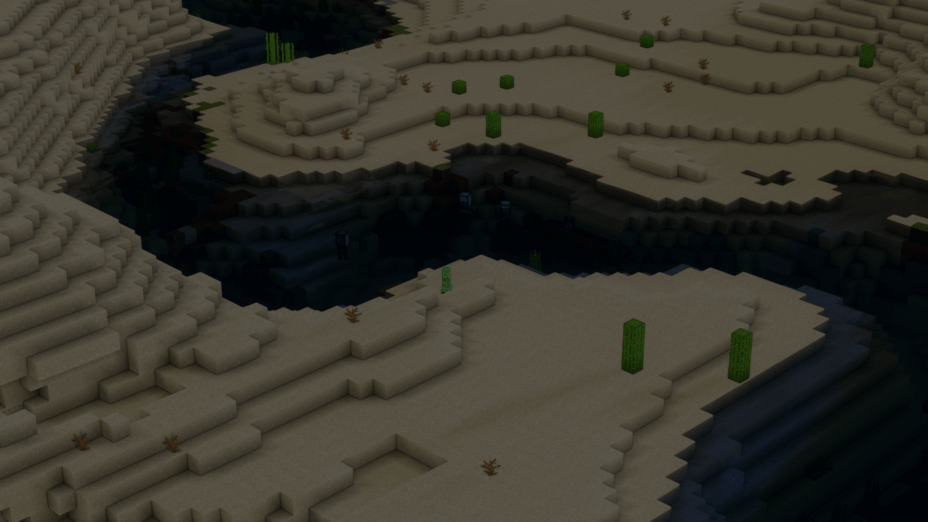
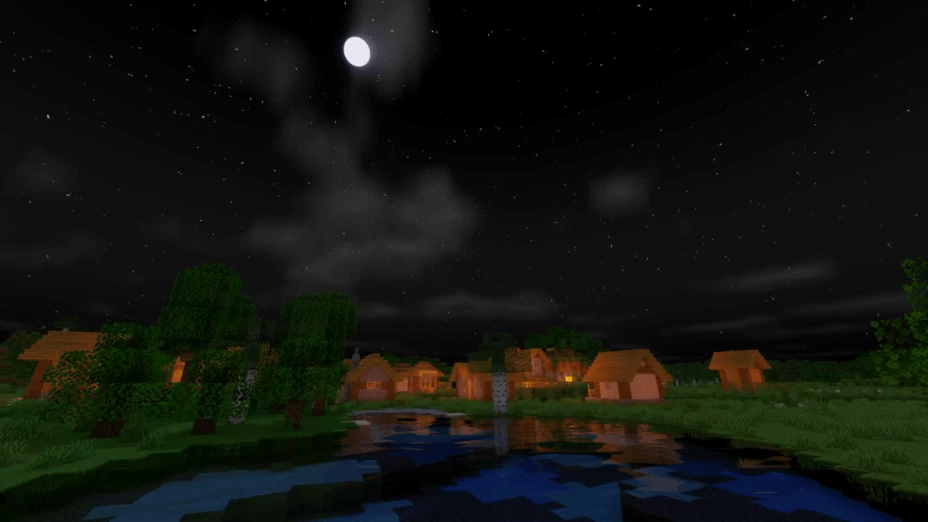
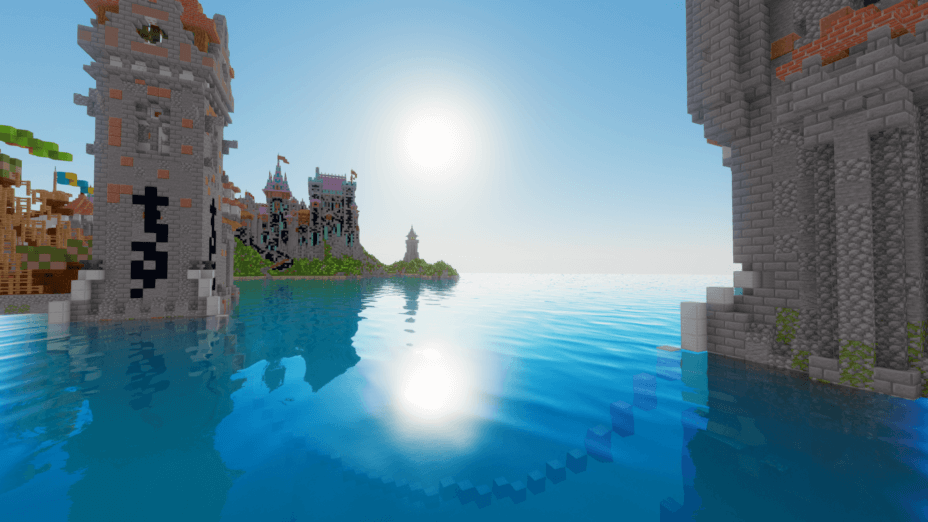
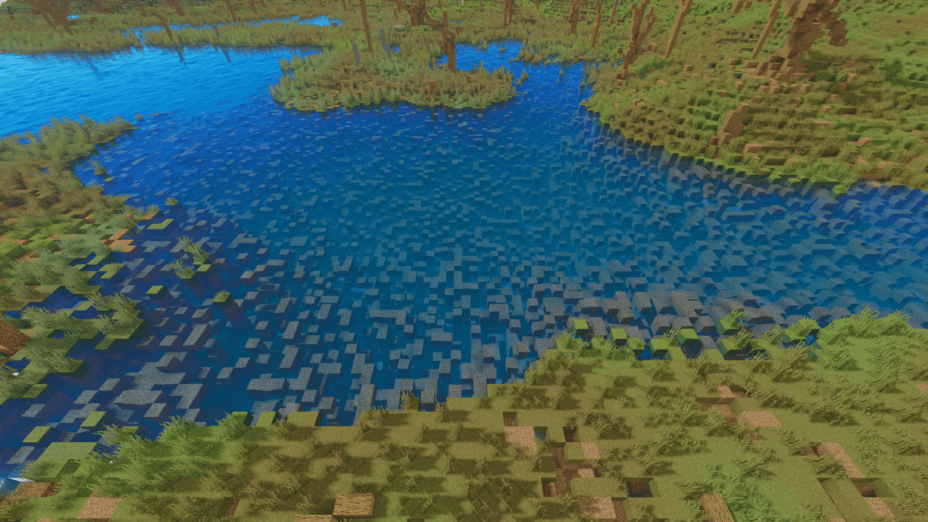
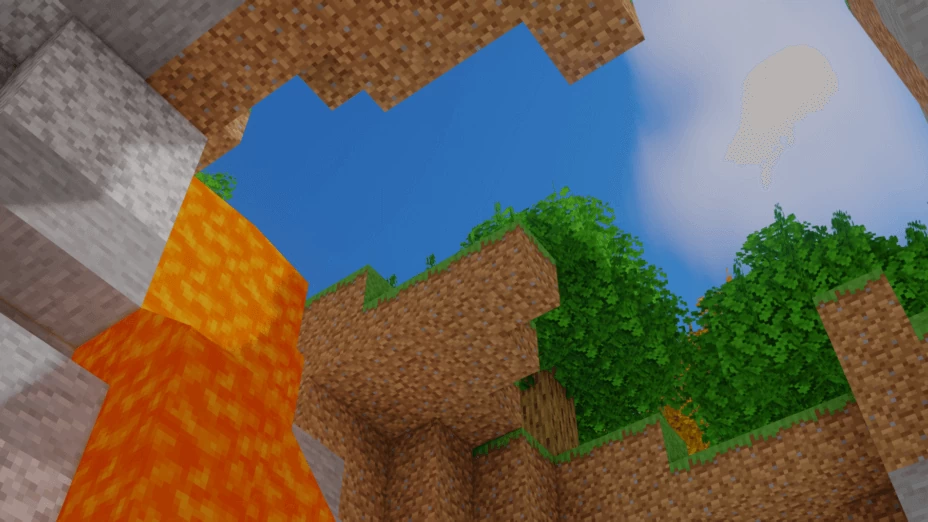
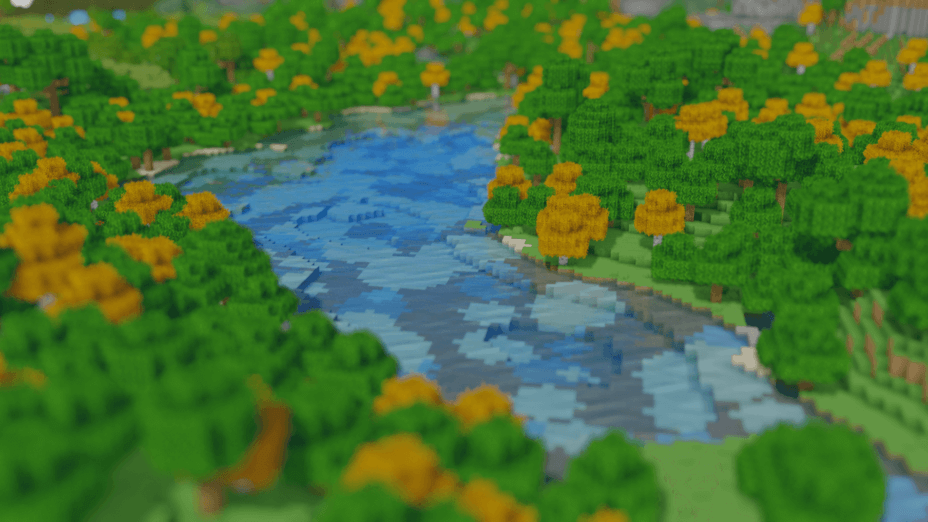
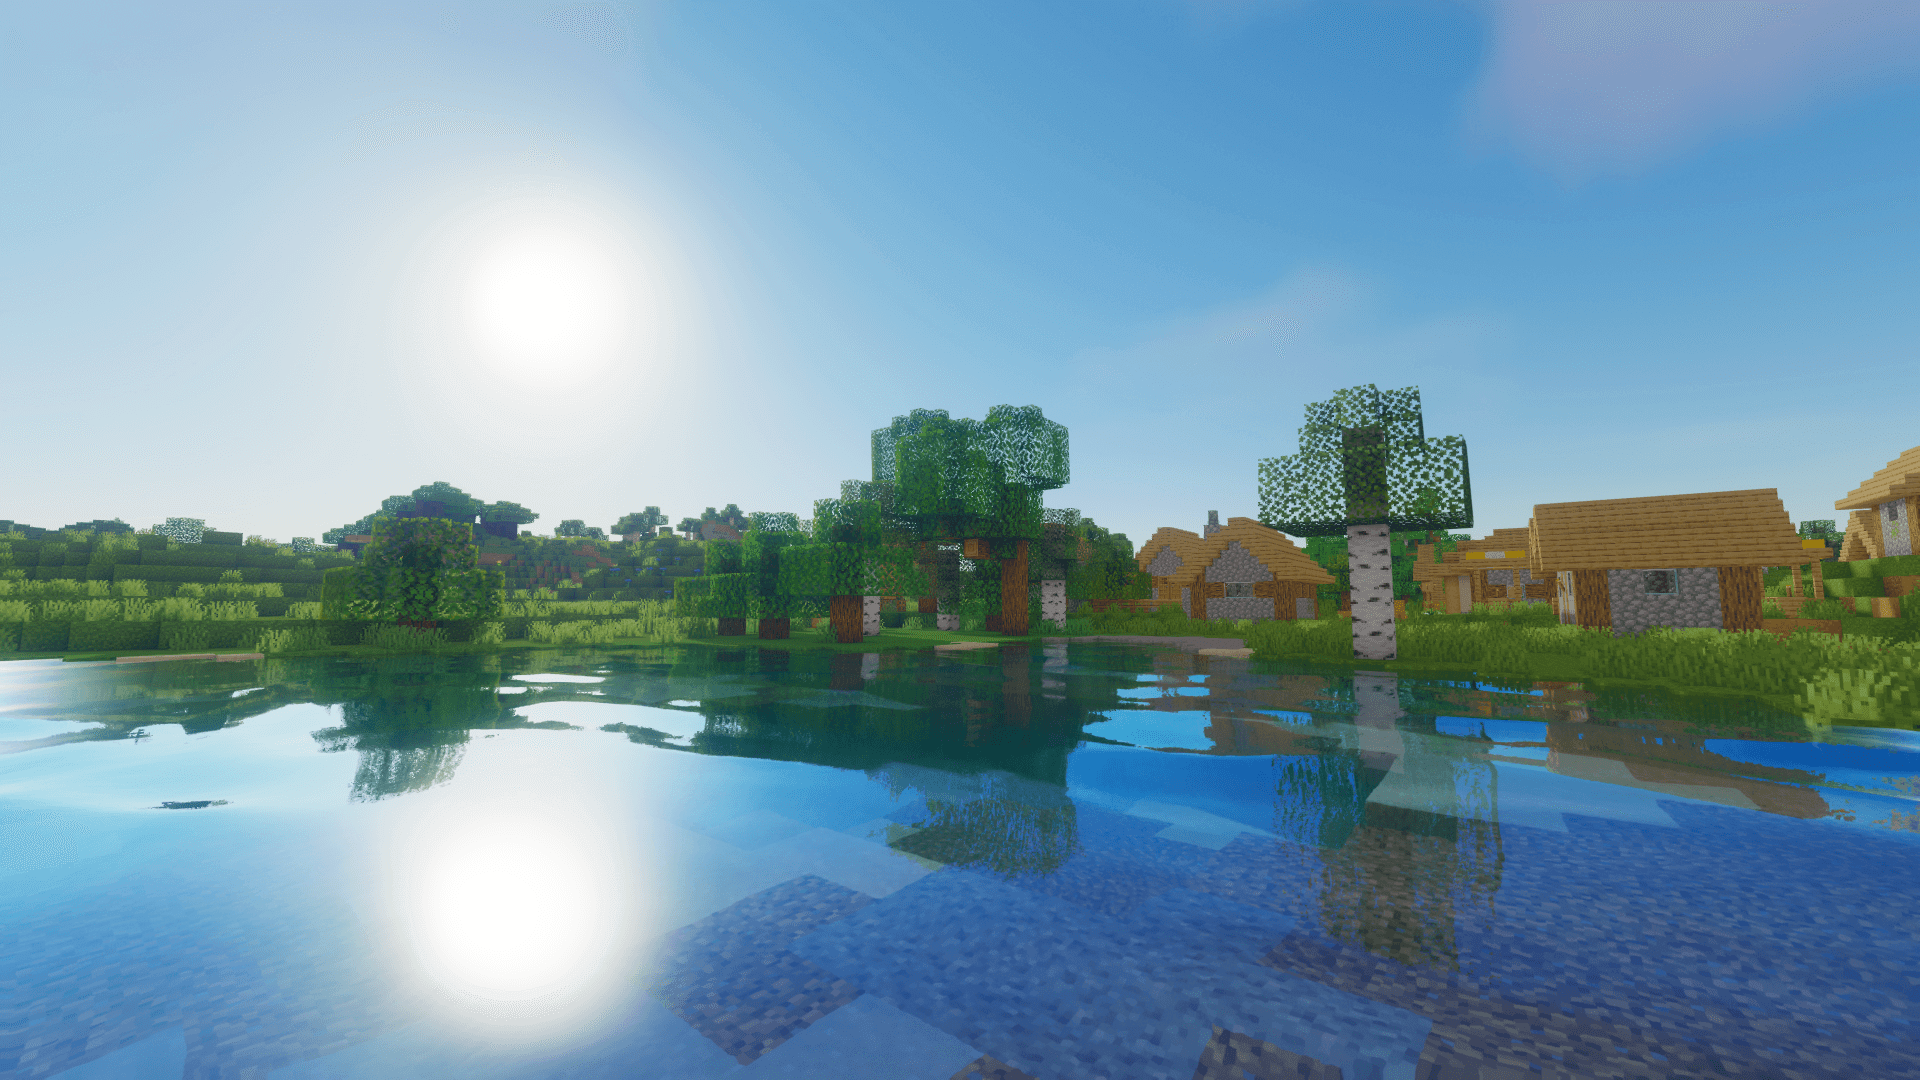
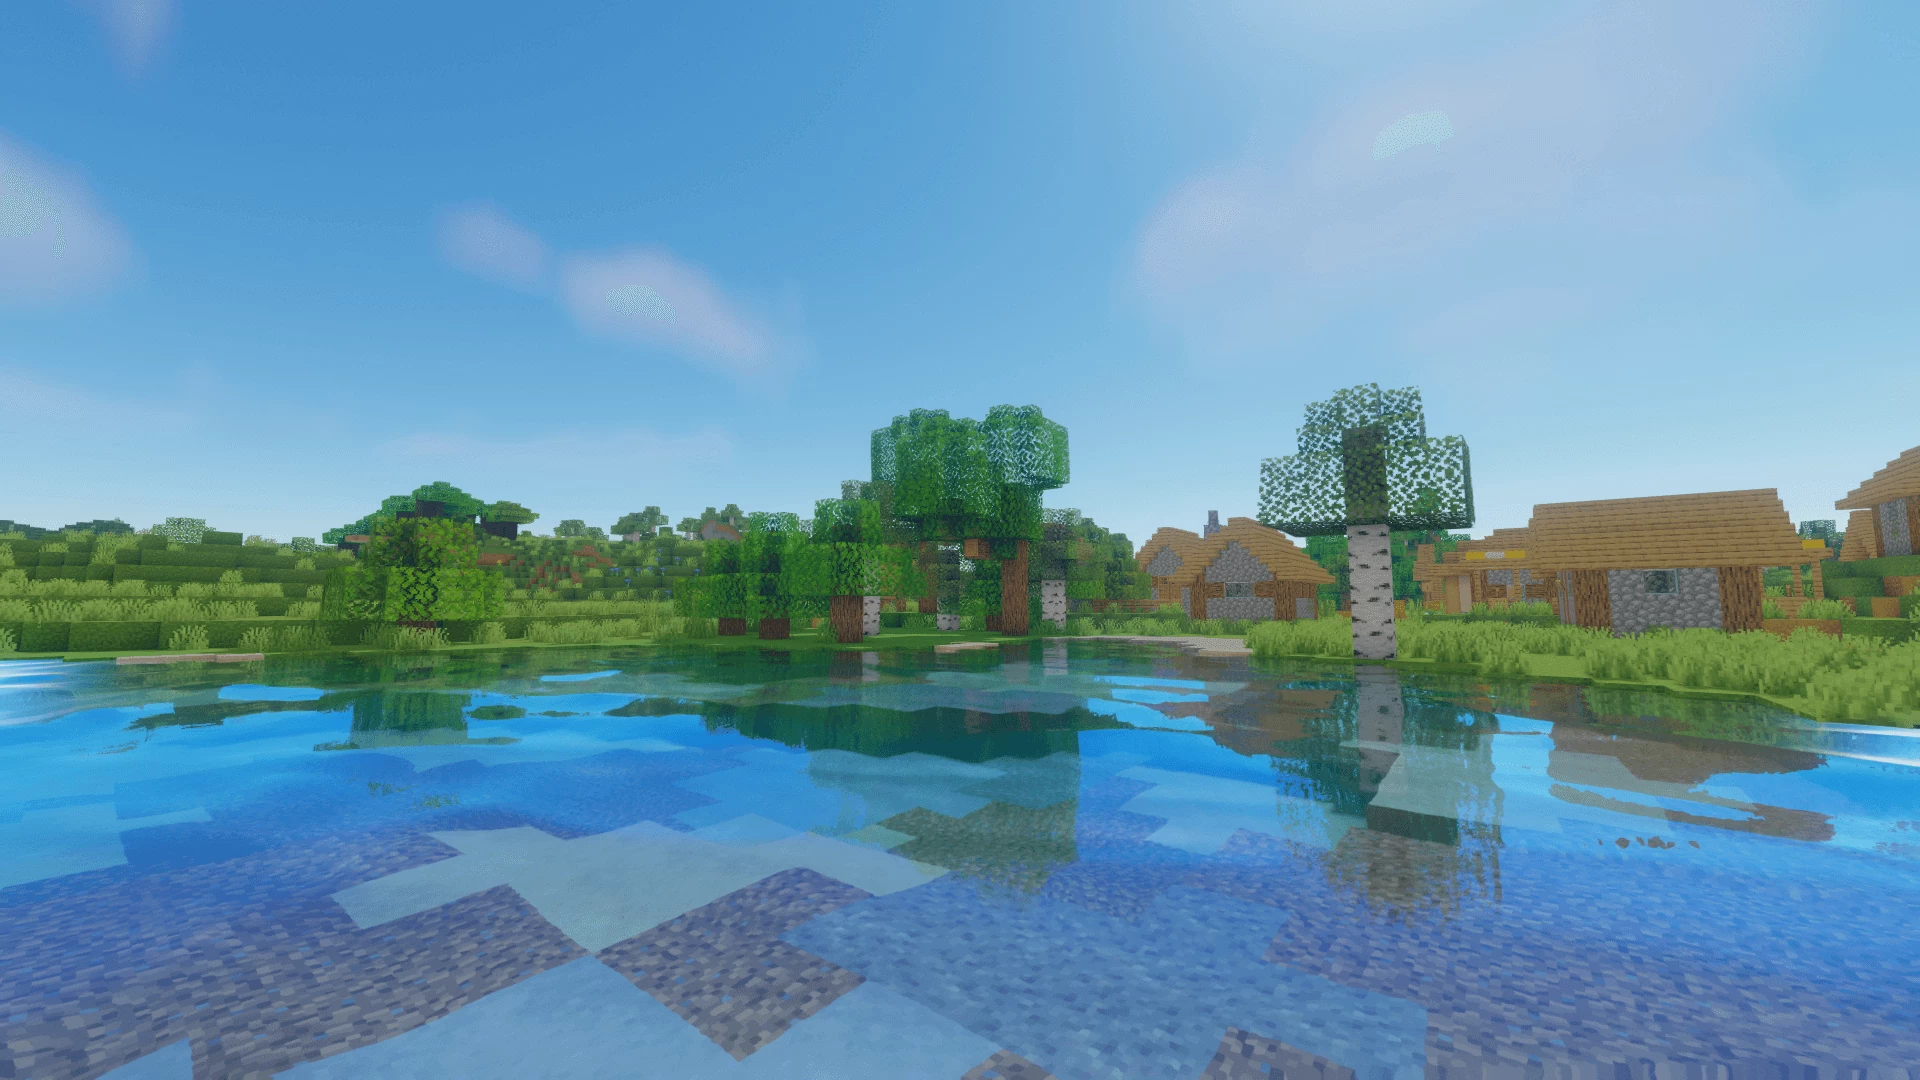
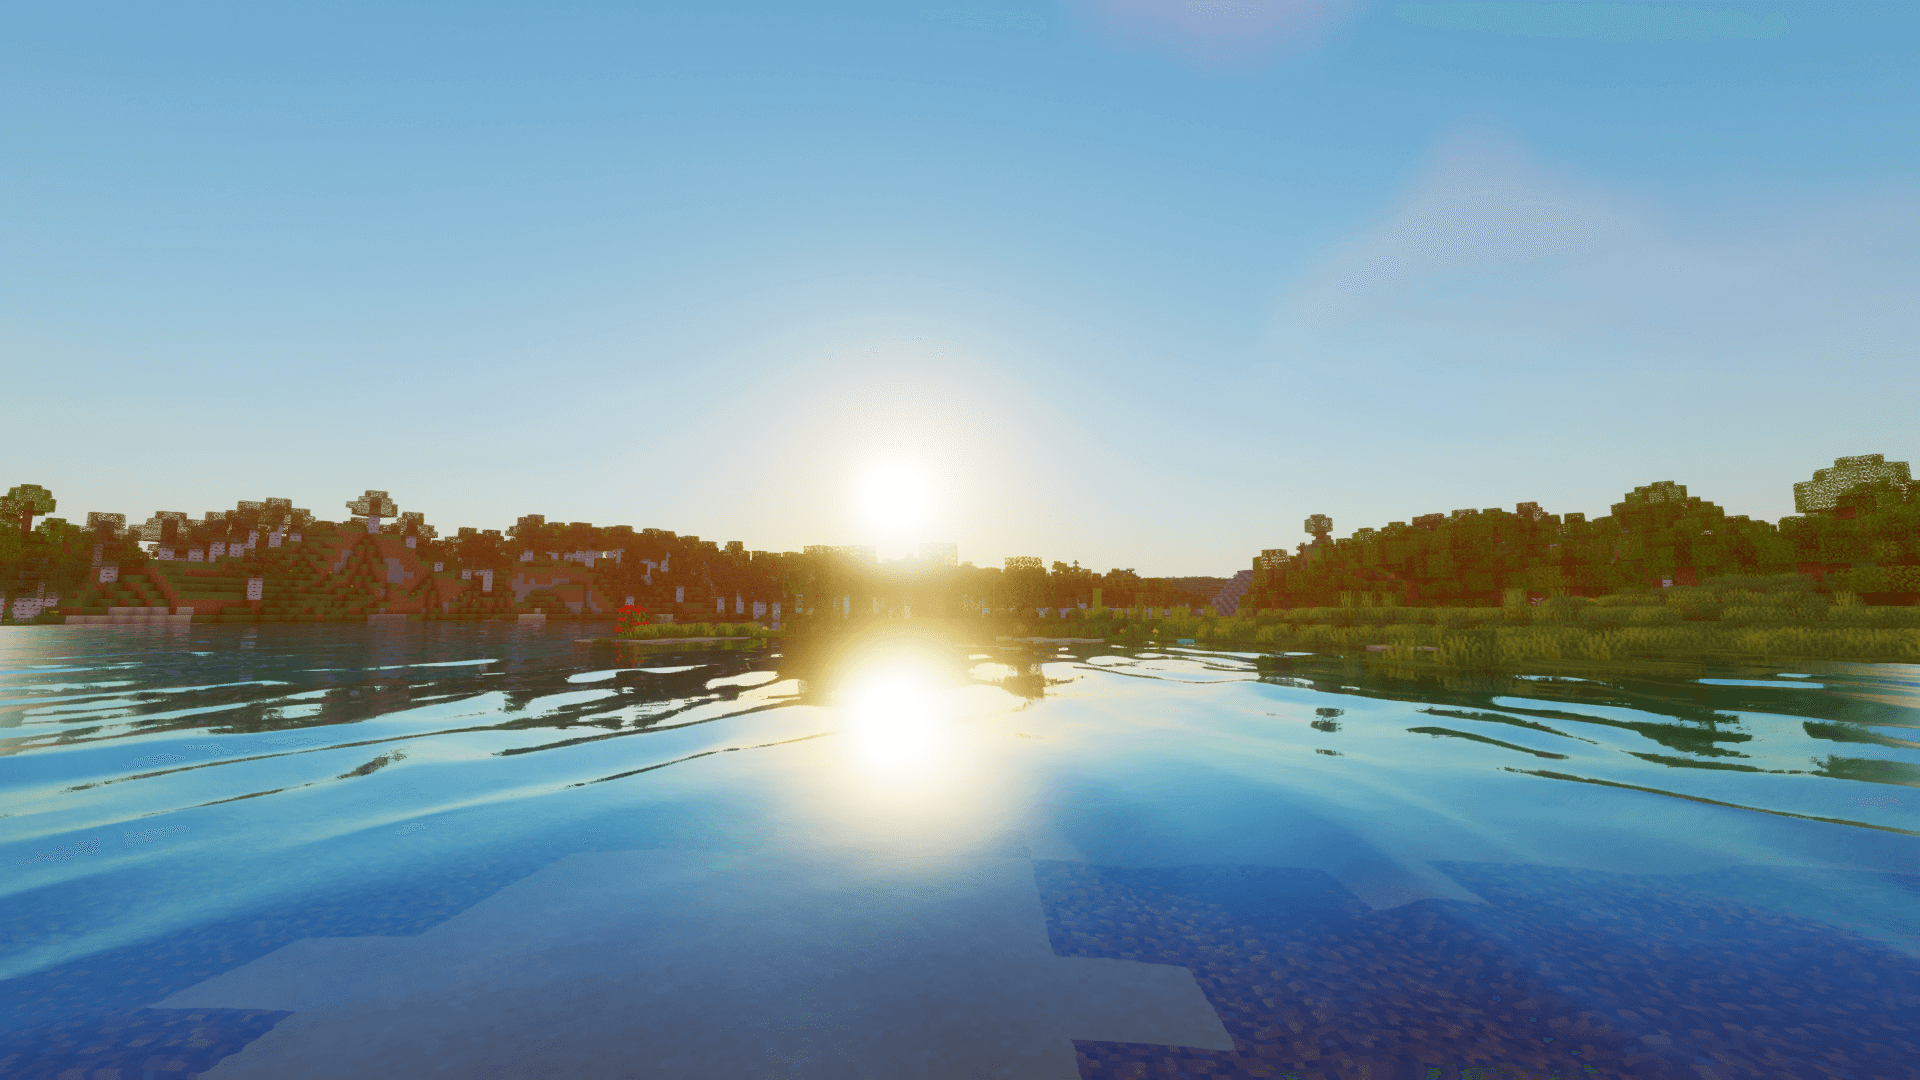
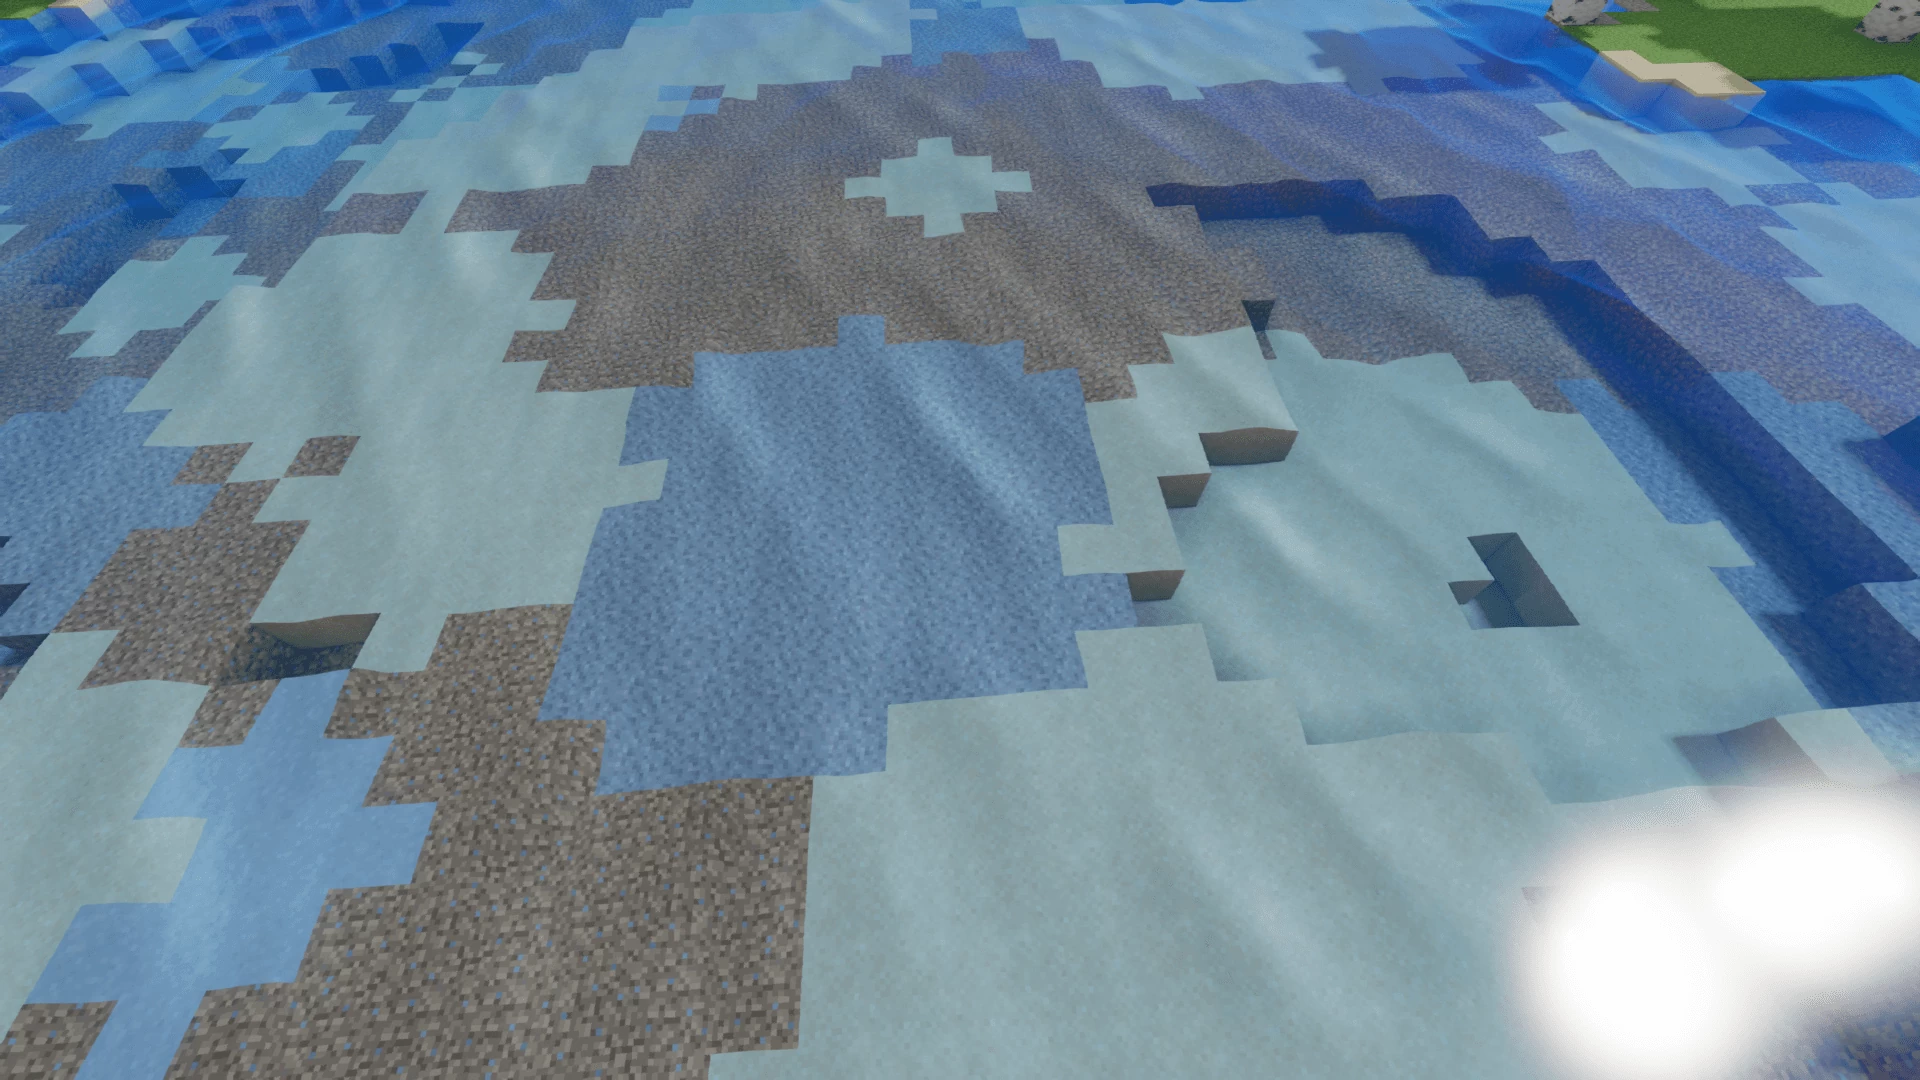
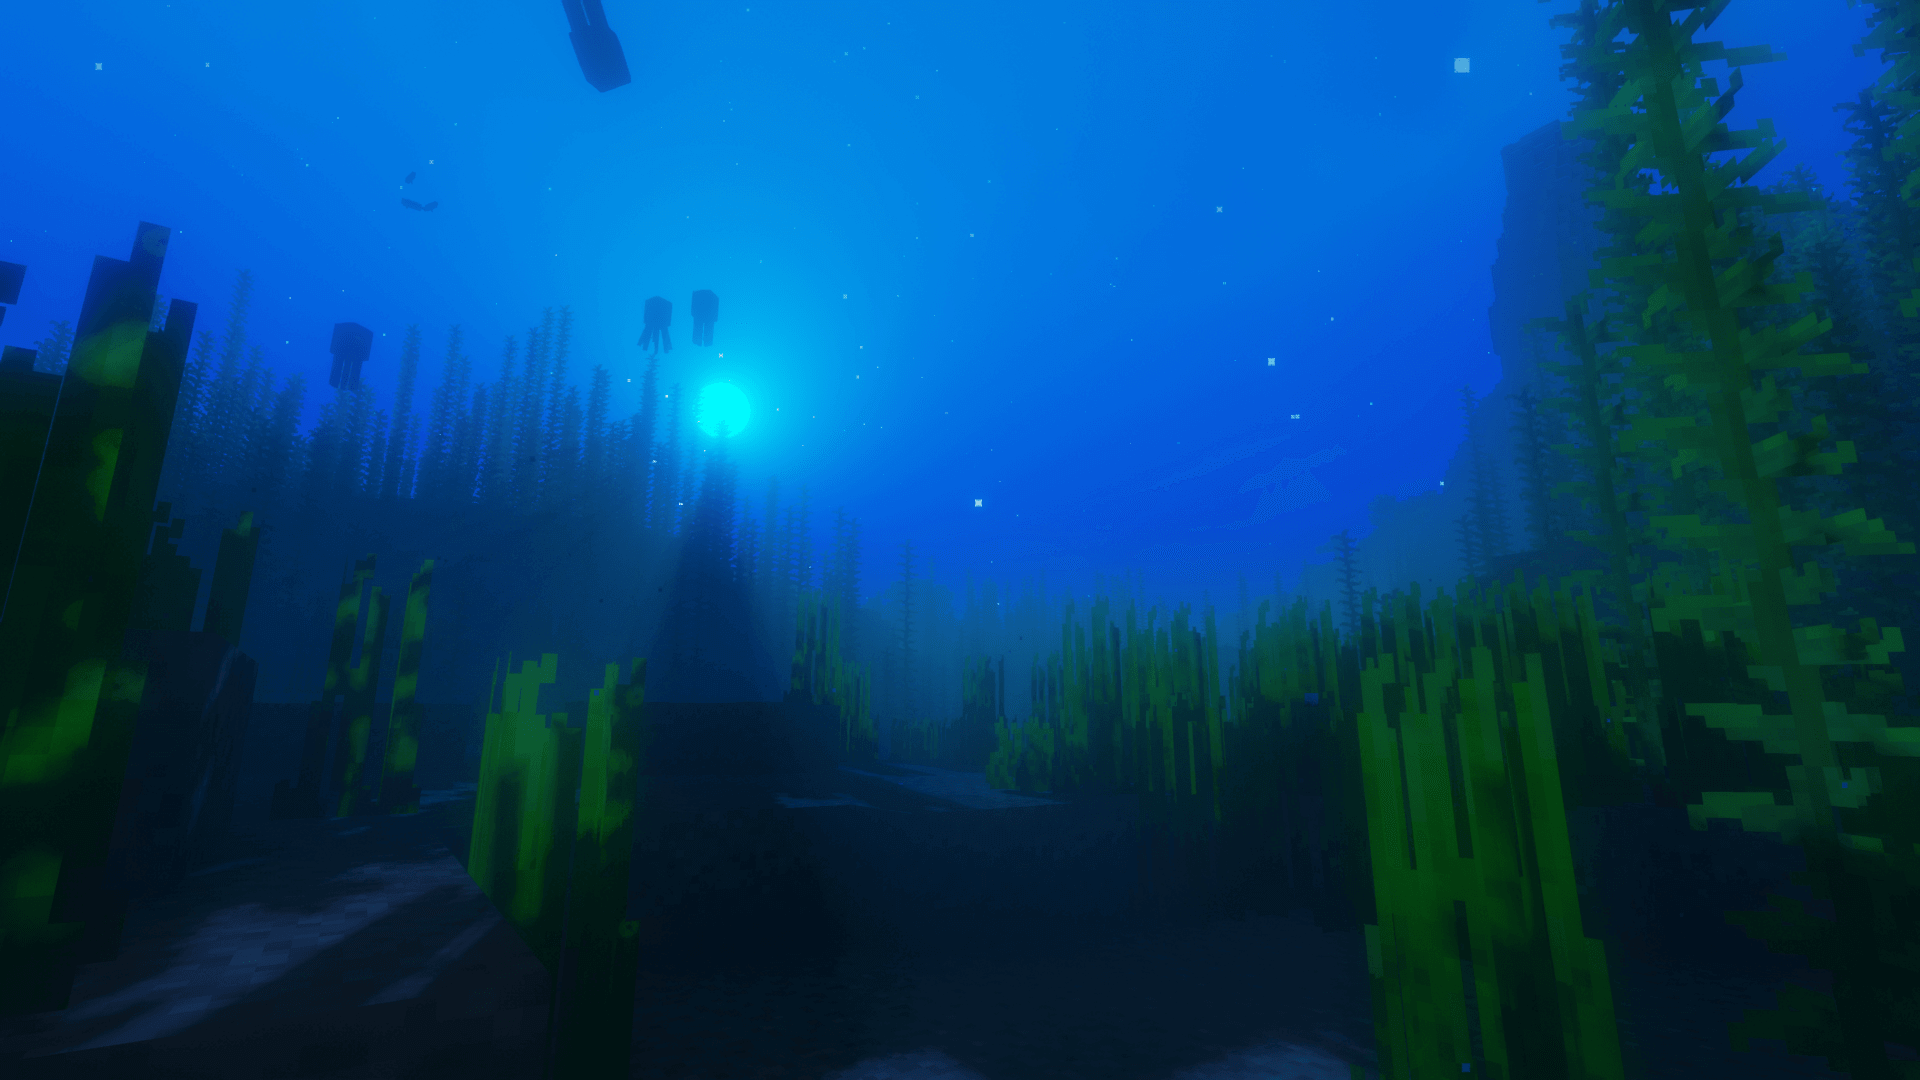
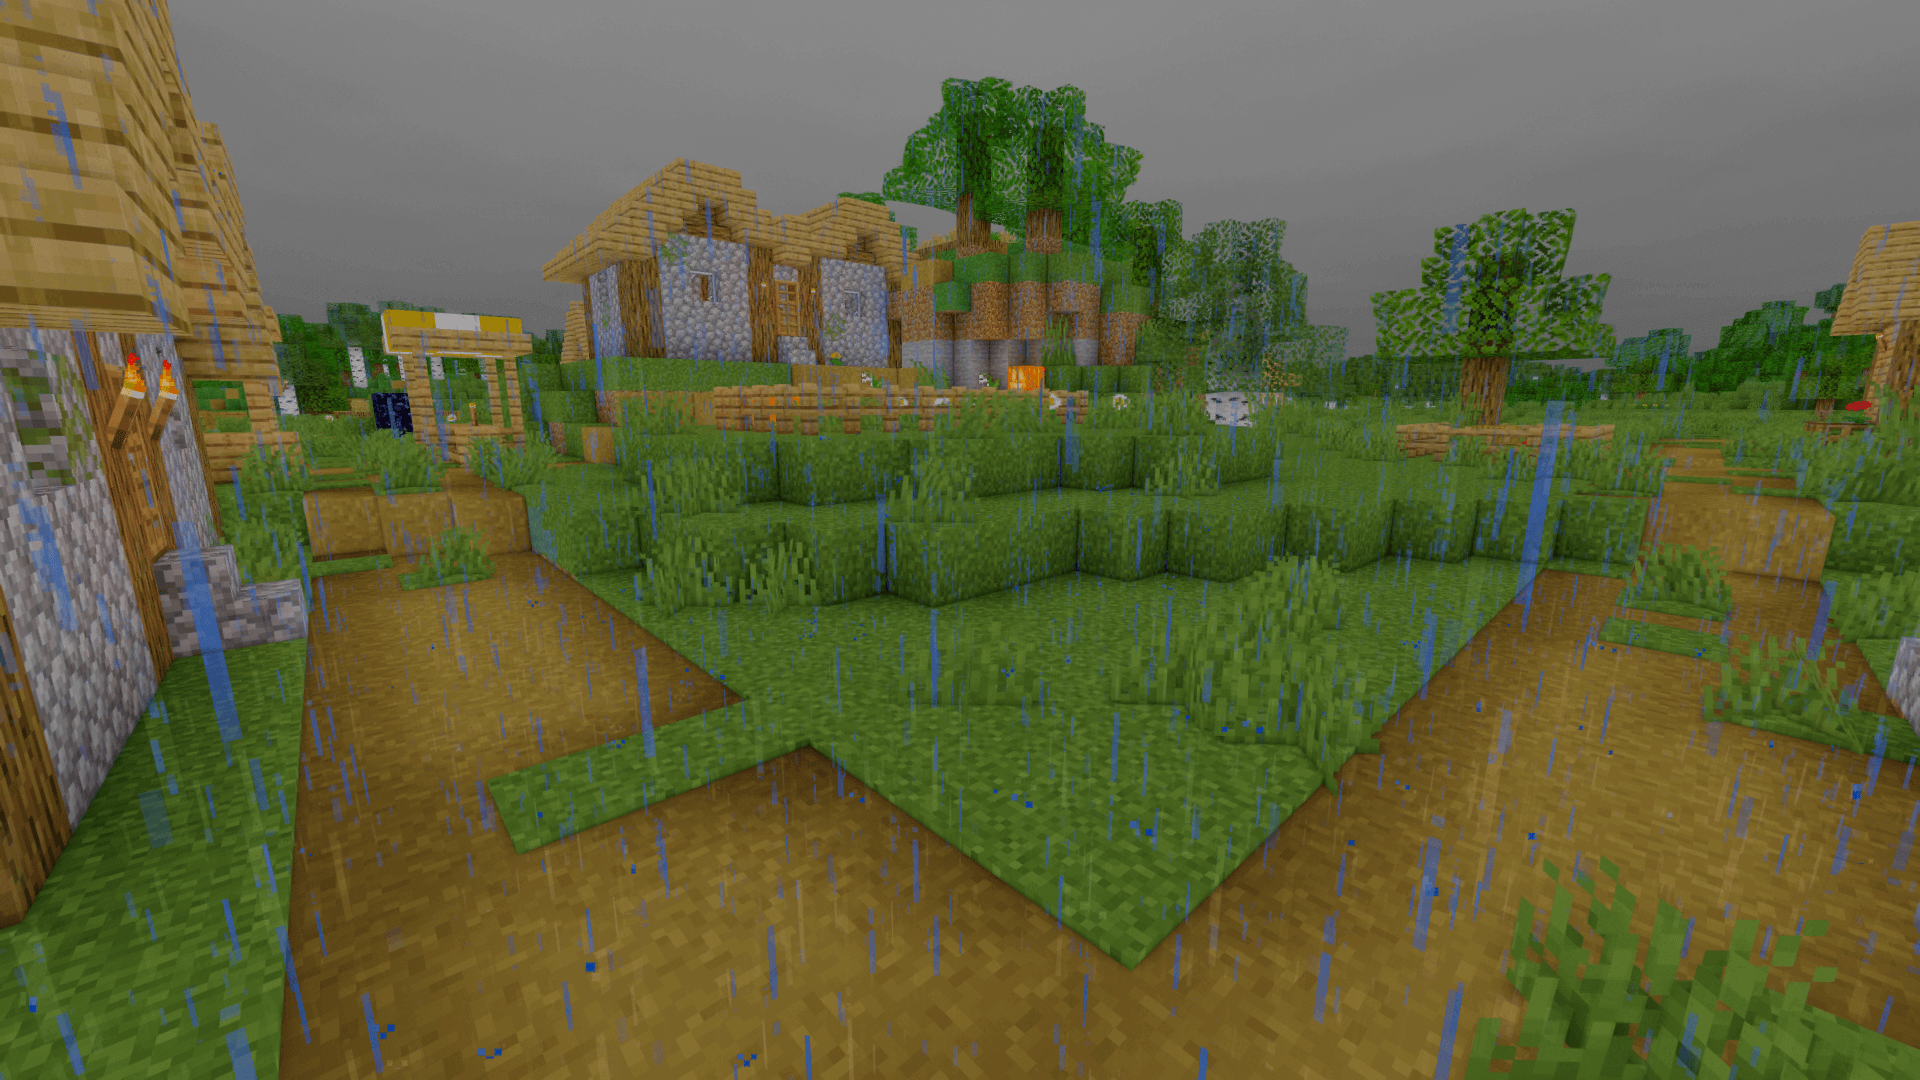
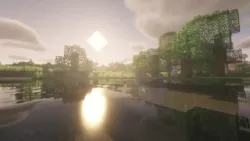
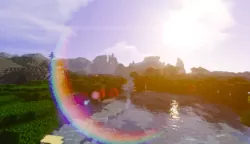
This shader pack is a significant upgrade to the Vanilla Minecraft version, bringing in new details of lighting, shadows, water, and sky textures to improve the immersion of the Minecraft world. There are new visual elements such as distance blur and tilt-shift for long-range views. This shader pack is especially beautiful for creating still images of the Minecraft world you play in or developing unique content to share with your community.
Along with the upgrades to the visuals of Minecraft, many of the performance settings have been tweaked. This means that graphics and processing power are altered by adjusting and introducing in-game performance details.
Oftentimes, introducing new visual elements and upgrades to lighting and shadows will be more demanding graphically. Using a wide range of settings, you can optimize the shader pack to work properly for your computer. Many older PCs might find this shader pack to be slightly demanding in terms of performance.
You may see a drastic change in the game’s frames per second when you load up the Oceano Shaders 3.0 pack. This demanding shader will certainly cost a lot of performance, so be sure to look at your PC’s stats when running the pack to ensure you are getting the best fps and not overheating your machine.
Oceano Shaders 3.0 can only be used by those who have Iris Shaders or Optifine installed for the shaders to function properly. Oceano Shaders 3.0 can automatically be used within your Minecraft world once the shader loader is installed and you successfully installed this shader pack.
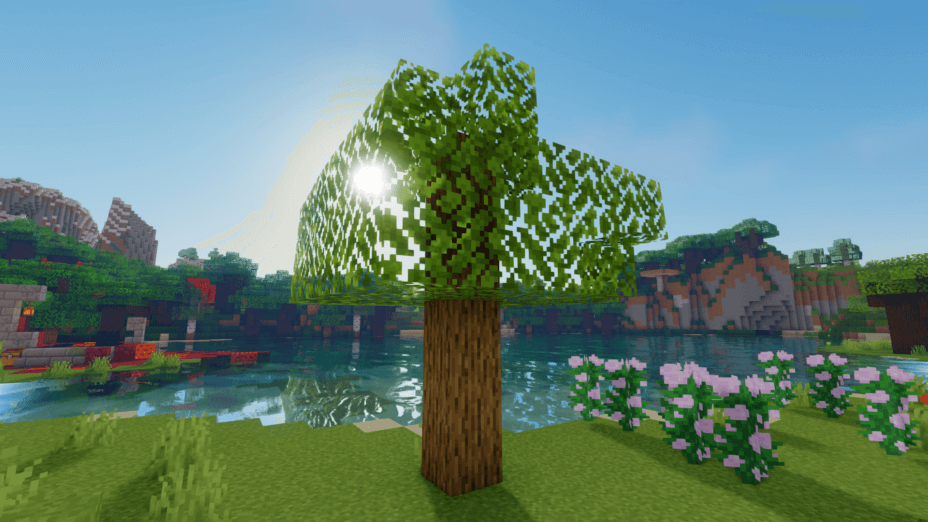
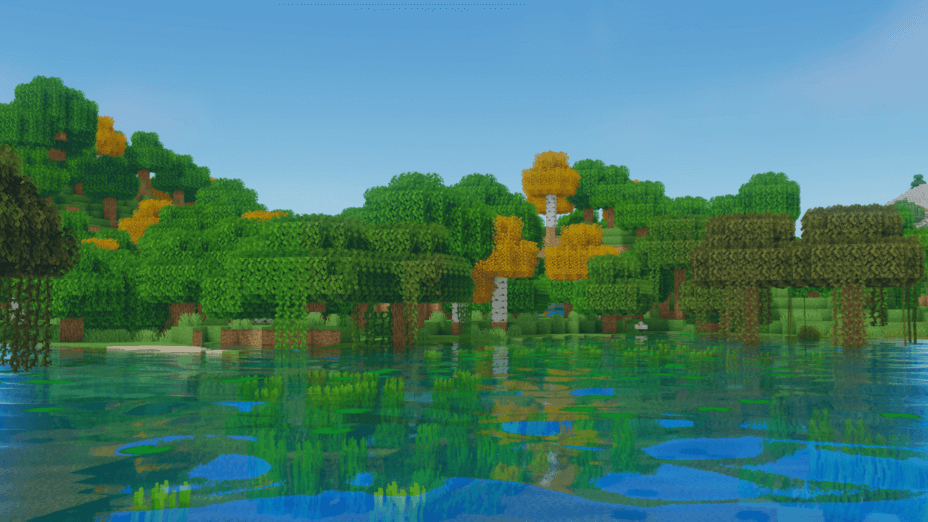
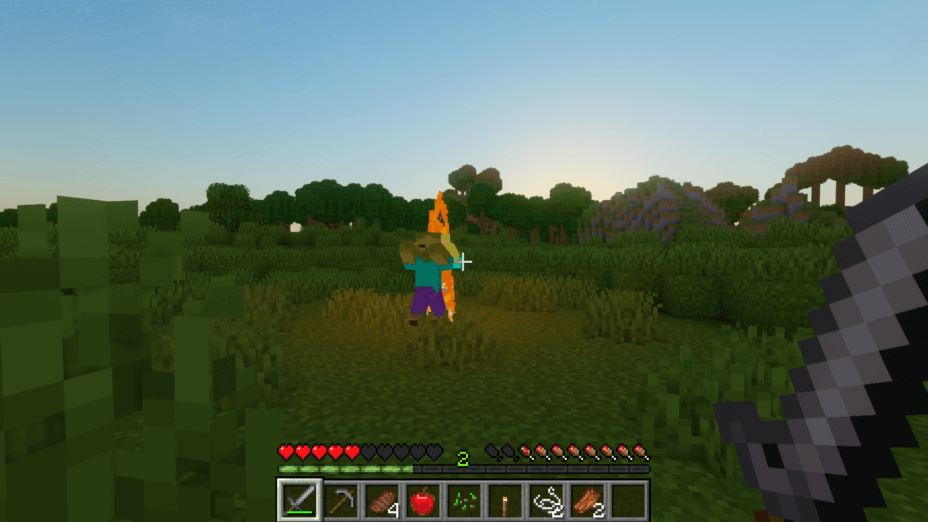
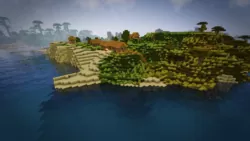
Overall, Oceano Shaders 3.0 is a beautiful shader pack that will give you a new feeling when in the Minecraft world. You can enjoy visuals that give off real feelings of warmth and comfort when walking around your Minecraft world on a summer afternoon.
- 1.20
- 1.19.4
- 1.19.3
- 1.19.2
- 1.19.1
- 1.19
- 1.18.2
- 1.18.1
- 1.18
- 1.17.1
- 1.17
- 1.16.5
- 1.16.4
- 1.16.3
- 1.16.2
- 1.16.1
- 1.16
- 1.15.2
- 1.15.1
- 1.15
- 1.14.4
- 1.14.3
- 1.14.2
- 1.14.1
- 1.14
- 1.13.2
- 1.13.1
- 1.13
- 1.12.2
- 1.12.1
- 1.12
- 1.11.2
- 1.11.1
- 1.11
- 1.10.2
- 1.10.1
- 1.10
- 1.9.4
- 1.9.3
- 1.9.2
- 1.9.1
- 1.9
- 1.8.9
- 1.8.8
- 1.8.7
- 1.8.6
- 1.8.5
- 1.8.4
- 1.8.3
- 1.8.2
- 1.8.1
- 1.8
- 1.7.10
- 1.7.9
- 1.7.8
- 1.7.7
- 1.7.6
- 1.7.5
- 1.7.4
- 1.7.2
- 1.7
- 1.6.4
- 1.6.2
Oceano Shaders – Versions
Features
Over 36 new features are available in Oceano Shaders 3.0 to enhance your gaming experience.
📊 Performance Impacts
Decrease in performance can vary from device to device, driver version, and many other factors, you should test yourself on your machine for the best result.
-
- None
- No performance decreases
-
- Small
- ~5%
-
- Medium
- ~10%
-
- High
- ~25%
-
- Extreme
- +50%
-
- Ambient OcclusionMedium
- Simulating how light interacts with objects and surfaces.
-
- Atmospheric SkySmall
- Simulates realistic atmospheric scattering.
-
- BloomSmall
- Enhance the game's lighting and create a more realistic and immersive visual experience
-
- BlurSmall
- Simulate how fast-moving objects appear to blur in a photograph or video.
-
- CausticHigh
- Simulating the way light is refracted and reflected by the water's surface
-
- Cel ShadingSmall
- Technique used to give the game a more stylized, cartoon-like appearance.
-
- CinematicExtreme
- Create more cinematic and visually-stunning scenes in the game.
-
- CustomizationNone
- Customize various aspects of the game's visual effects.
-
- Depth of FieldMedium
- Making objects closer to the camera appear sharp and in focus, while objects farther away appear out of focus and blurry.
-
- HDRMedium
- Enhance the lighting and color in the game.
-
- LightMedium
- Enhance the game's overall visual quality.
-
- Motion BlurHigh
- Simulates the way that fast-moving objects appear to blur in the real world.
-
- Moving CloudsMedium
- Simulates the movement of clouds across the sky and can be used to create the appearance of a dynamic and ever-changing sky
-
- Normal MapSmall
- Add depth and detail to surfaces without increasing the number of polygons.
-
- Ocean WavesHigh
- Simulating the movement of waves on the surface of the ocean.
-
- Parallax WaterMedium
- Enhances the realism of water by simulating the parallax effect.
-
- Photorealistic SkyboxesMedium
- Replacing the in-game sky with high-resolution, realistic images of the sky.
-
- POMHigh
- Realism of textures by simulating the way light interacts with surfaces.
-
- Realistic NightskyMedium
- More realistic and immersive night sky.
-
- Realistic SkyMedium
- More realistic and immersive sky experience.
-
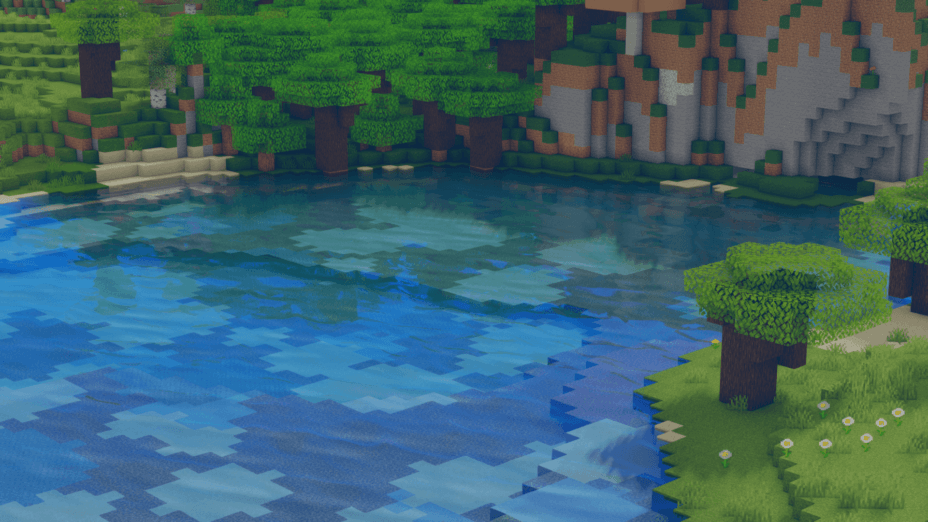
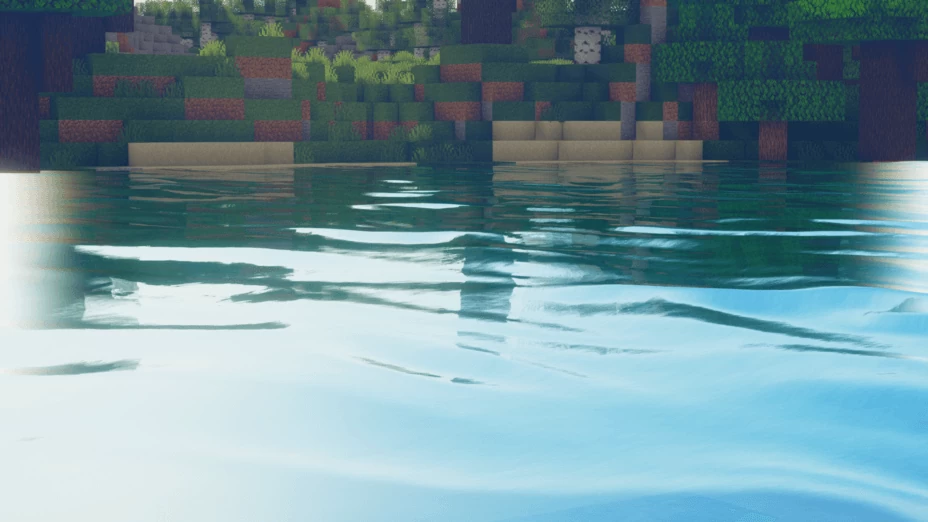
- Realistic WaterHigh
- More realistic and immersive water experience.
-
- ShadowsSmall
- Simulate how light is blocked and scattered by objects in the environment.
-
- SunriseSmall
- More realistic and immersive sunrise experience.
-
- SunsetSmall
- More realistic and immersive sunset experience.
-
- Tone MappingSmall
- Adjusting the brightness, contrast, and saturation levels.
-
- Underwater ReflectionsMedium
- Simulate the appearance of light reflecting off of the water's surface.
-
- VibrantSmall
- More saturated colors and realistic lighting.
-
- VignetteNone
- Darkening effect around the edges of the screen
-
- Volumetric CloudsHigh
- Simulate the way that clouds appear to have volume and depth in the real world rather than just flat textures.
-
- Volumetric FogHigh
- Create the appearance of fog that is lit from within, casting shadows and creating a sense of depth.
-
- Volumetric LightHigh
- Simulating the scattering of light in the atmosphere and in the environment.
-
- Water ReflectionsMedium
- Simulating reflections on the surface of the water.
-
- Water WavesMedium
- Movement of waves on the surface of the water.
-
- Waving GrassSmall
- Simulating the way it moves and sways in the wind.
-
- Waving PlantsSmall
- Simulating the way they move and sway in the wind.
-
- Waving TreesSmall
- Adds movement to the leaves and branches of trees, making them look more alive and realistic.
There are 4 profiles pre-built into Oceano Shaders 3.0 to adjust the level of intensity of these effects.
| Profiles |
Paper |
Low |
Default |
High |
|---|---|---|---|---|
Ambient Occlusion | ||||
2D Clouds | ||||
Parallax Water | ||||
Shadow Render Distance | ||||
Shadow Resolution | ||||
Volumetric Light | ||||
Water Caustics |
Oceano Shaders 3.0 allow you to change more than 243 settings to suit your needs.
| Settings |
Description |
Options |
|---|---|---|
| Profile | ||
| Lighting | ||
| Shadows | ||
| Shadow Resolution | Resolution of shadows |
|
| Shadow Render Distance | Render distance of shadows |
|
| Shadow Bias | Controls the curve of shadow quality, higher values mean closer shadows are higher quality while further shadows are of lesser quality and vise versa |
|
| Sun Path Rotation |
| |
| Disable Shadows | ||
| Disable Shadows | Completely disables shadow map |
|
| Light Strength | Light strength when Disable Shadows is enabled |
|
| Colored Shadows | Coloured shadows for tinted glass |
|
| Shadow Filter | Smooths shadows |
|
| Shadow Filter Strength | Strength of the shadow filter |
|
| Lightmaps | ||
| Block Lighting | ||
| Held Item Lighting |
| |
| Block Light Strength | Intensity of emissive lights |
|
| Block Light Spread | How far emissive lights emitt |
|
| Color | ||
| Red | Red Emissive Lights |
|
| Green | Green Emissive Lights |
|
| Blue | Blue Emissive Lights |
|
| Sky Lighting | ||
| Sky Light Spread | How far the sky light emitts |
|
| Indoor Brightness | Minimum light there is on a given surface, increase for brighter caves etc. |
|
| Volumetric Light | ||
| Volumetric Light | ||
| Volumetric Light | Volumetric light shafts, otherwise described as 3D/physical light shafts |
|
| Quality | Quality of the Volumetric Light. |
|
| Distance | The draw distance of Volumetric Light |
|
| Strength | ||
| Total Strength |
| |
| Sunrise Strength |
| |
| Noon Strength |
| |
| Sunset Strength |
| |
| Night Strength |
| |
| Color | ||
| Ambient Occlusion | ||
| Ambient Occlusion | Darkens corners between blocks/entities, simulates real-life light behaviour |
|
| Quality | Increases the quality of Ambient Occlusion from 0 to 2, 0 is default |
|
| Radius | Changes the radius of Ambient Occlusion to be larger or smaller, 1.0 is default |
|
| Strength | Strength of Ambient Occlusion |
|
| AO in Sunlight | Toggles if Ambient Occlusion is applied in sunlit areas |
|
| Light Color | ||
| SunriseLight | ||
| Red |
| |
| Green |
| |
| Blue |
| |
| Total |
| |
| SunsetLight | ||
| Red |
| |
| Green |
| |
| Blue |
| |
| Total |
| |
| NoonLight | ||
| Red |
| |
| Green |
| |
| Blue |
| |
| Total |
| |
| NightLight | ||
| Red |
| |
| Green |
| |
| Blue |
| |
| Total |
| |
| Global Illumination | ||
| Global Illumination | Simulates light bouncing off objects |
|
| Quality |
| |
| Radius |
| |
| Strength |
| |
| Night Brightness |
| |
| Sunlight Strength |
| |
| Shadow Strength |
| |
| Effects | ||
| Reflection | ||
| Reflections | All the reflections. including water, rain and specular. |
|
| Reflection Strength |
| |
| Reflection Border Smoothness | Strength of transition between reflection and sky |
|
| Water | ||
| Reflection |
| |
| Specular | ||
| Rain | ||
| Puddles |
| |
| Fade In |
| |
| Fade Out |
| |
| Caustics | ||
| Water Caustics | Light patterns on underwater surfaces |
|
| Strength |
| |
| Refraction | ||
| Refract |
| |
| Water Refract Strength |
| |
| Dispersion | Makes the primary wavelength split up (RGB) |
|
| Screen Refraction | Refracts the sceen underwater and when rain is hitting the camera. |
|
| Screen Refract Strength |
| |
| Water Fog | ||
| Water Fog |
| |
| Density |
| |
| Underwater Fog |
| |
| Density |
| |
| ProjectedCaustics | Makes caustics accurate with the shadow its casting from, aslo projects realistic light shafts. Makes your game run alot slower! |
|
| Strength |
| |
| Water Waves/Color | ||
| Parallax Water Options | ||
| Parallax Water | Makes waves on water look 3D |
|
| Height | Depth of water |
|
| Accuracy | Slight quality increase, insignificant |
|
| Water Color | ||
| Water Surface Alpha | Controls the strength of water alpha |
|
| Red |
| |
| Green |
| |
| Blue |
| |
| Total |
| |
| Water Pattern | ||
| Wave Speed | Speed of the water animation |
|
| Big Waves | ||
| Edit Axis | ||
| Coord0 X-axis |
| |
| Coord0 Y-axis |
| |
| Coord1 X-axis |
| |
| Coord1 Y-axis |
| |
| Coord2 X-axis |
| |
| Coord2 Y-axis |
| |
| Strength of Axis | ||
| Coord0 |
| |
| Coord1 |
| |
| Coord2 |
| |
| Rain Coord |
| |
| Small Waves | ||
| Edit Axis | ||
| Coord0 X-axis |
| |
| Coord0 Y-axis |
| |
| Coord1 X-axis |
| |
| Coord1 Y-axis |
| |
| Coord2 X-axis |
| |
| Coord2 Y-axis |
| |
| Strength of Axis | ||
| Coord0 |
| |
| Coord1 |
| |
| Coord2 |
| |
| Rain Coord |
| |
| Waving Blocks | ||
| Water Waves |
| |
| Waving Foliage |
| |
| Waving Foliage Strength | ||
| Sunrise |
| |
| Sunset |
| |
| Noon |
| |
| Night |
| |
| Rain |
| |
| Total |
| |
| Atmosphere | ||
| Sky | ||
| 2D Clouds |
| |
| Stars |
| |
| Sky Brightness | Brightness of sky |
|
| Sun/Moon Size | ||
| Sun Size | Size of the Sun, you may have to edit the sunbloom when changing this for satisfactory results |
|
| Moon Size | Size of the Moon |
|
| Sun/Moon Bloom | ||
| Sun Bloom | Bloom from Sun |
|
| Moon Bloom | Bloom from Moon |
|
| Sky Color | ||
| Red |
| |
| Green |
| |
| Blue |
| |
| Total |
| |
| Sun Reflection Strength | Strength of bloom from the sun in reflections |
|
| Fog | ||
| Fog |
| |
| Noon Strength |
| |
| Night Strength |
| |
| Rain Strength |
| |
| Remove Indoor Fog |
| |
| Galaxy | ||
| Galaxy | Curve the fragposition so that the stars and the galaxy doesnt look weird |
|
| Post Processing | ||
| Tone Map | ||
| Tone Map |
| |
| Lift |
| |
| Brightness |
| |
| Inverse Lift |
| |
| Gamma |
| |
| Film Grain Strength |
| |
| Contrast |
| |
| Night Desaturation |
| |
| Saturation |
| |
| Curve |
| |
| Main Curve |
| |
| Decay |
| |
| Depth of Field | ||
| Depth of Field | Intended for cinematic purposes |
|
| Focal |
| |
| Motion Blur | ||
| Motion Blur | MotionBlur derived from BSL |
|
| Strength |
| |
| Red Green Blue | ||
| Red |
| |
| Green |
| |
| Blue |
| |
| Bloom | ||
| Bloom | Makes bright objects glow |
|
| Strength | Basic Multiplier |
|
| Max Color Range | Controls the bloom output curve, otherwise known as the threshold for applying bloom, higher options are a lower threshold |
|
| Vignette | ||
| Vignette | Dark tint around the screen |
|
| Strength | Basic Multiplier |
|
| Textures | ||
| Parallax Occlusion Mapping | ||
| Parallax Occlusion Mapping | Textures that support this make textures 3D |
|
| Texture Resolution | Change this to be the same as the texture pack in use |
|
| Depth | Change this if POM bends |
|
| Quality |
| |
| Texture Tint | ||
| Red |
| |
| Green |
| |
| Blue |
| |
| TextureBrightness | Adjusts the brigtness of textures, recommend if a resource pack is too bright/dark |
|
| Unique Biomes | ||
| Unique Biomes | Controls intensity of different effects according to the biome the player is in |
|
| Cloud Coverage | ||
| Default |
| |
| Snow |
| |
| Desert |
| |
| Mesa |
| |
| Swamp |
| |
| Beach |
| |
| Jungle |
| |
| Rain Cloud Coverage | ||
| Default |
| |
| Snow |
| |
| Desert |
| |
| Mesa |
| |
| Swamp |
| |
| Beach |
| |
| Jungle |
| |
| Cloud Height | ||
| Default |
| |
| Snow |
| |
| Desert |
| |
| Mesa |
| |
| Swamp |
| |
| Beach |
| |
| Jungle |
| |
| Foliage Waving | ||
| Default |
| |
| Snow |
| |
| Desert |
| |
| Mesa |
| |
| Swamp |
| |
| Beach |
| |
| Jungle |
| |
| Shadow Filter | ||
| Default |
| |
| Snow |
| |
| Desert |
| |
| Mesa |
| |
| Swamp |
| |
| Beach |
| |
| Jungle |
| |
| Volumetric Light | ||
| Sunrise/Sunset | ||
| Default |
| |
| Snow |
| |
| Desert |
| |
| Mesa |
| |
| Swamp |
| |
| Beach |
| |
| Jungle |
| |
| Noon | ||
| Default |
| |
| Snow |
| |
| Desert |
| |
| Mesa |
| |
| Swamp |
| |
| Beach |
| |
| Jungle |
| |
| Night | ||
| Default |
| |
| Snow |
| |
| Desert |
| |
| Mesa |
| |
| Swamp |
| |
| Beach |
| |
| Jungle |
| |
| Fog | ||
| Default |
| |
| Snow |
| |
| Desert |
| |
| Mesa |
| |
| Swamp |
| |
| Beach |
| |
| Jungle |
| |
| Dimensions | ||
| Nether Color | ||
| Red | ||
| Green | ||
| Blue | ||
| Total | ||
| End Color | ||
| Red | ||
| Green | ||
| Blue | ||
| Total | ||
| Misc Options | ||
| Cel Shading | Black outline around objects |
|
| Mob Hit Color | ||
| Red |
| |
| Green |
| |
| Blue |
| |
| Total |
| |
| Block Breaking Colour | ||
| Red |
| |
| Green |
| |
| Blue |
| |
| Total |
| |
| White World |
|
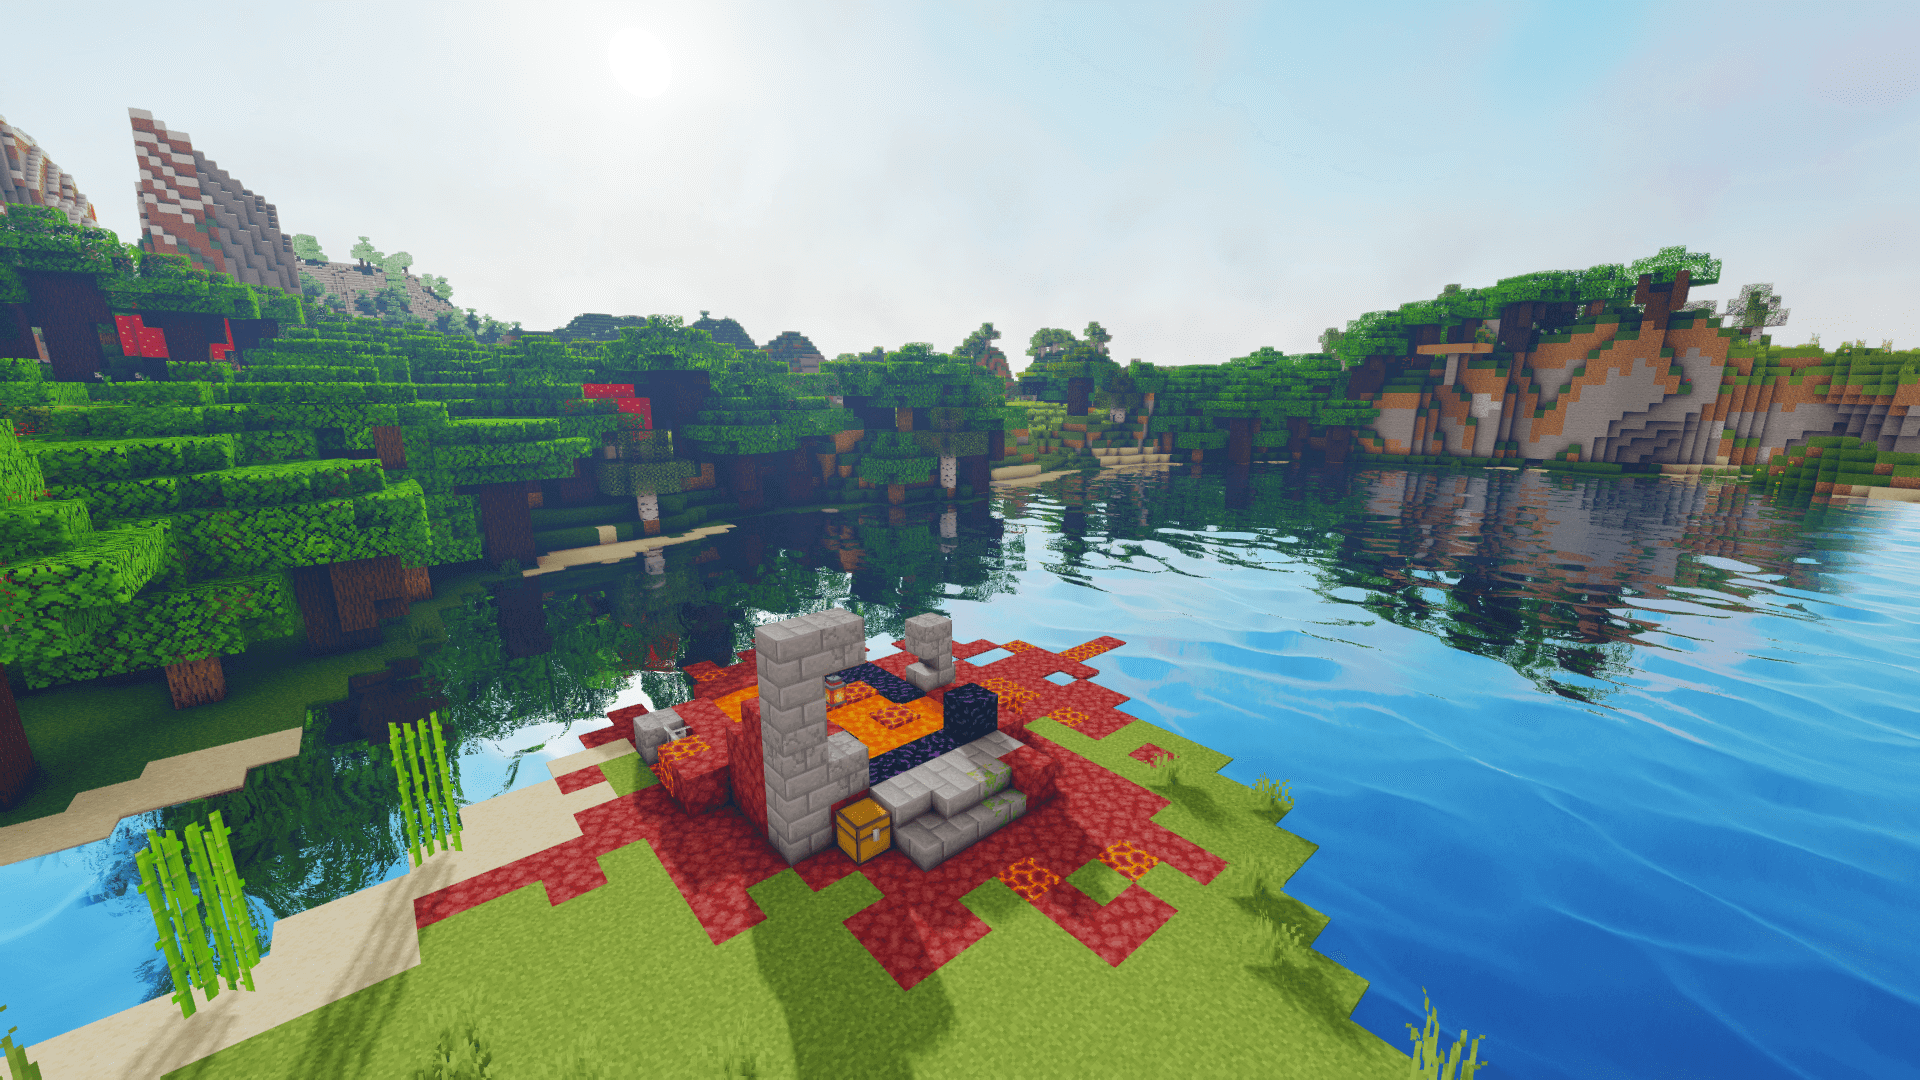
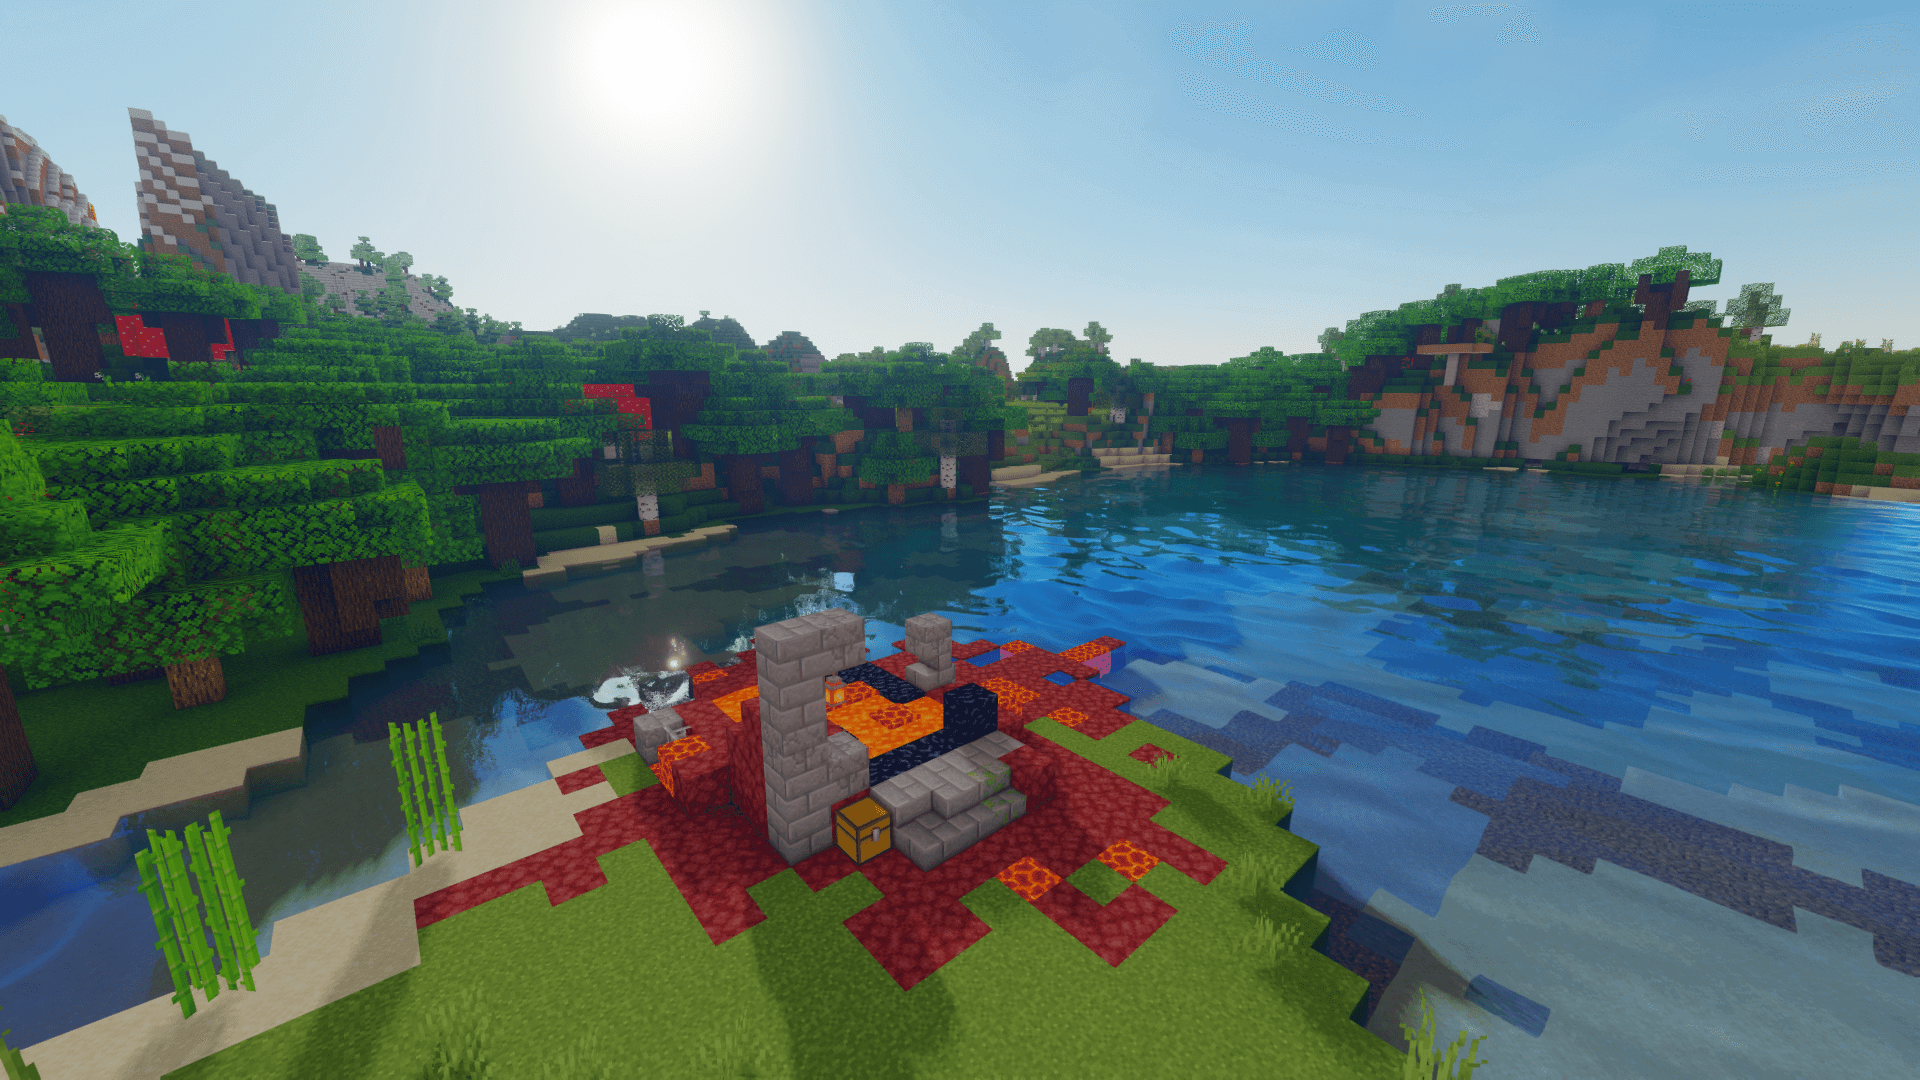
Comparison
Our comparison tool makes it easy to compare Oceano Shaders 3.0 with Minecraft vanilla and other shader packs.


How To Install Oceano Shaders 3.0
- Support Forge / Vanilla
- Extra features
- Good performance
- Support Fabric / Quilt
- Better performance, depend on your hardware
Optifine Installation Guide
Note
Your device must have Java installed to run the Forge and Optifine installers.
Quick Java Installation Guide
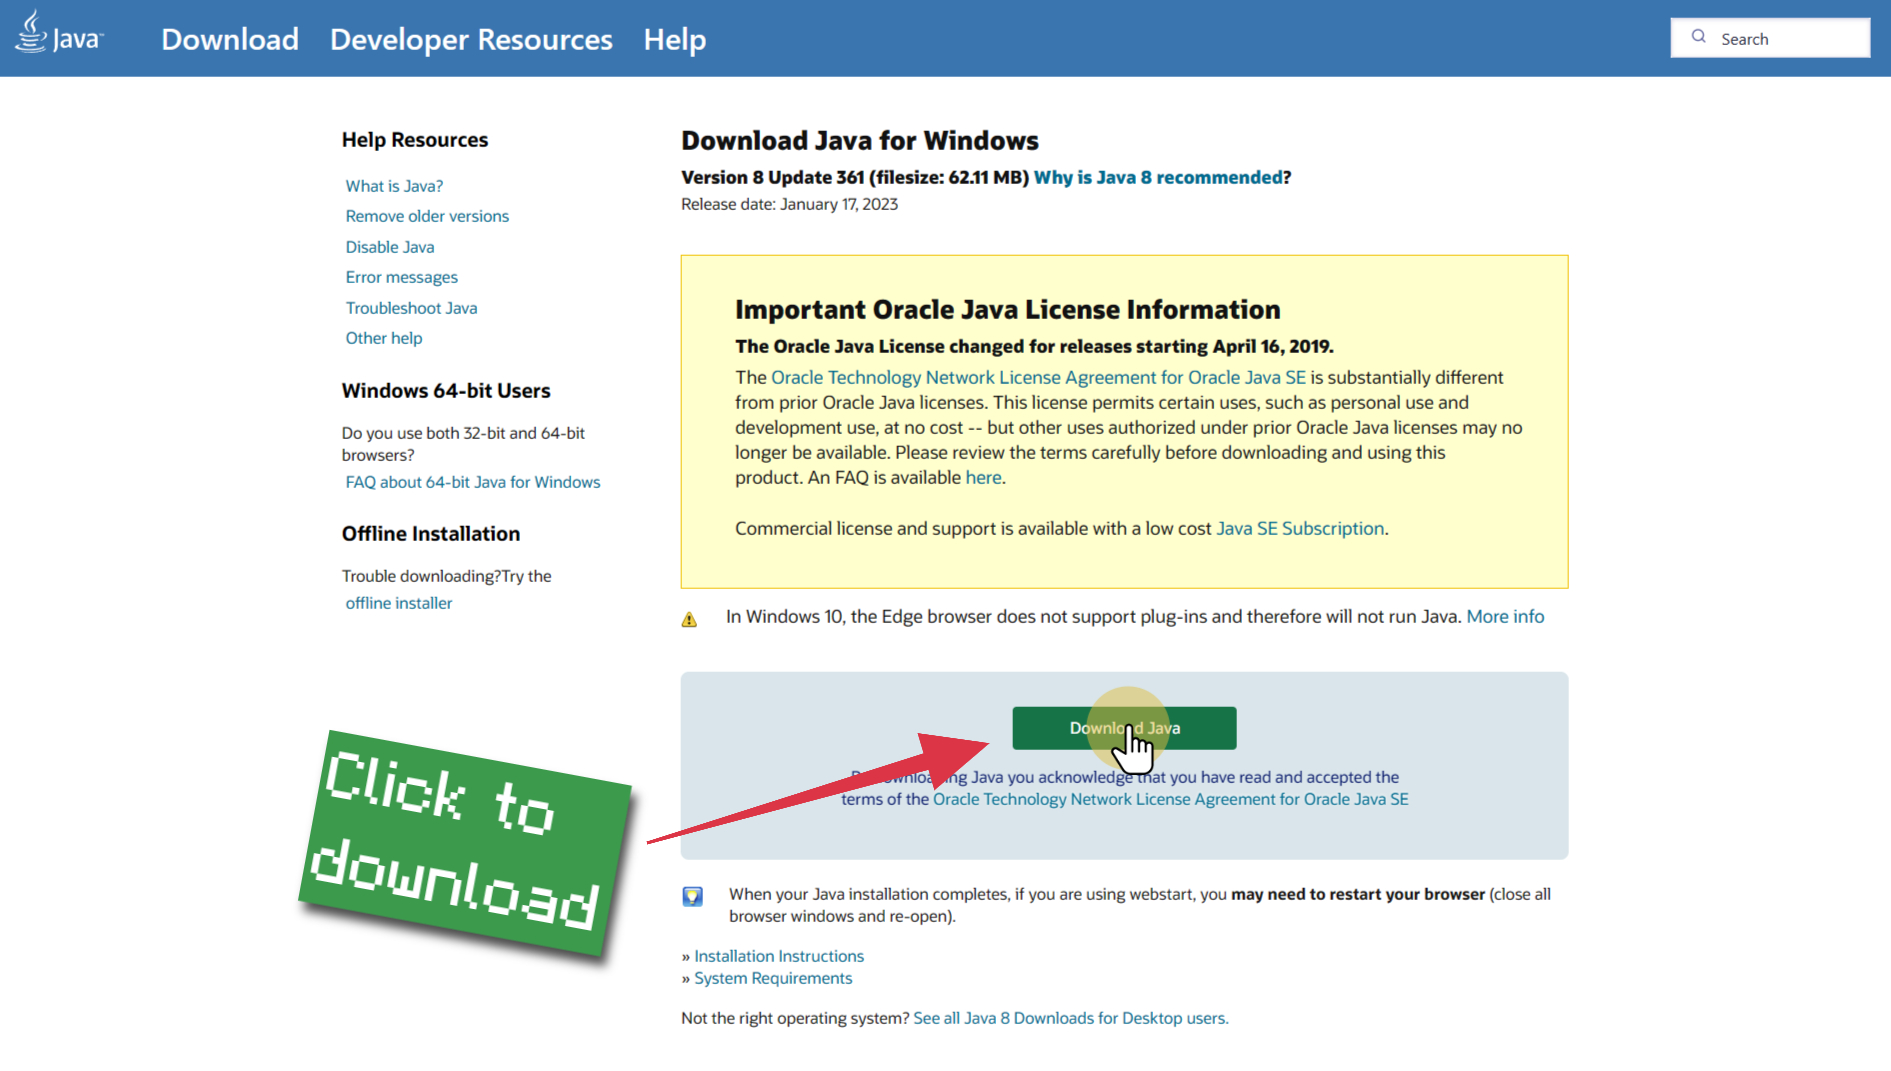
-
Download Java
Download the Java installer from the official website here.
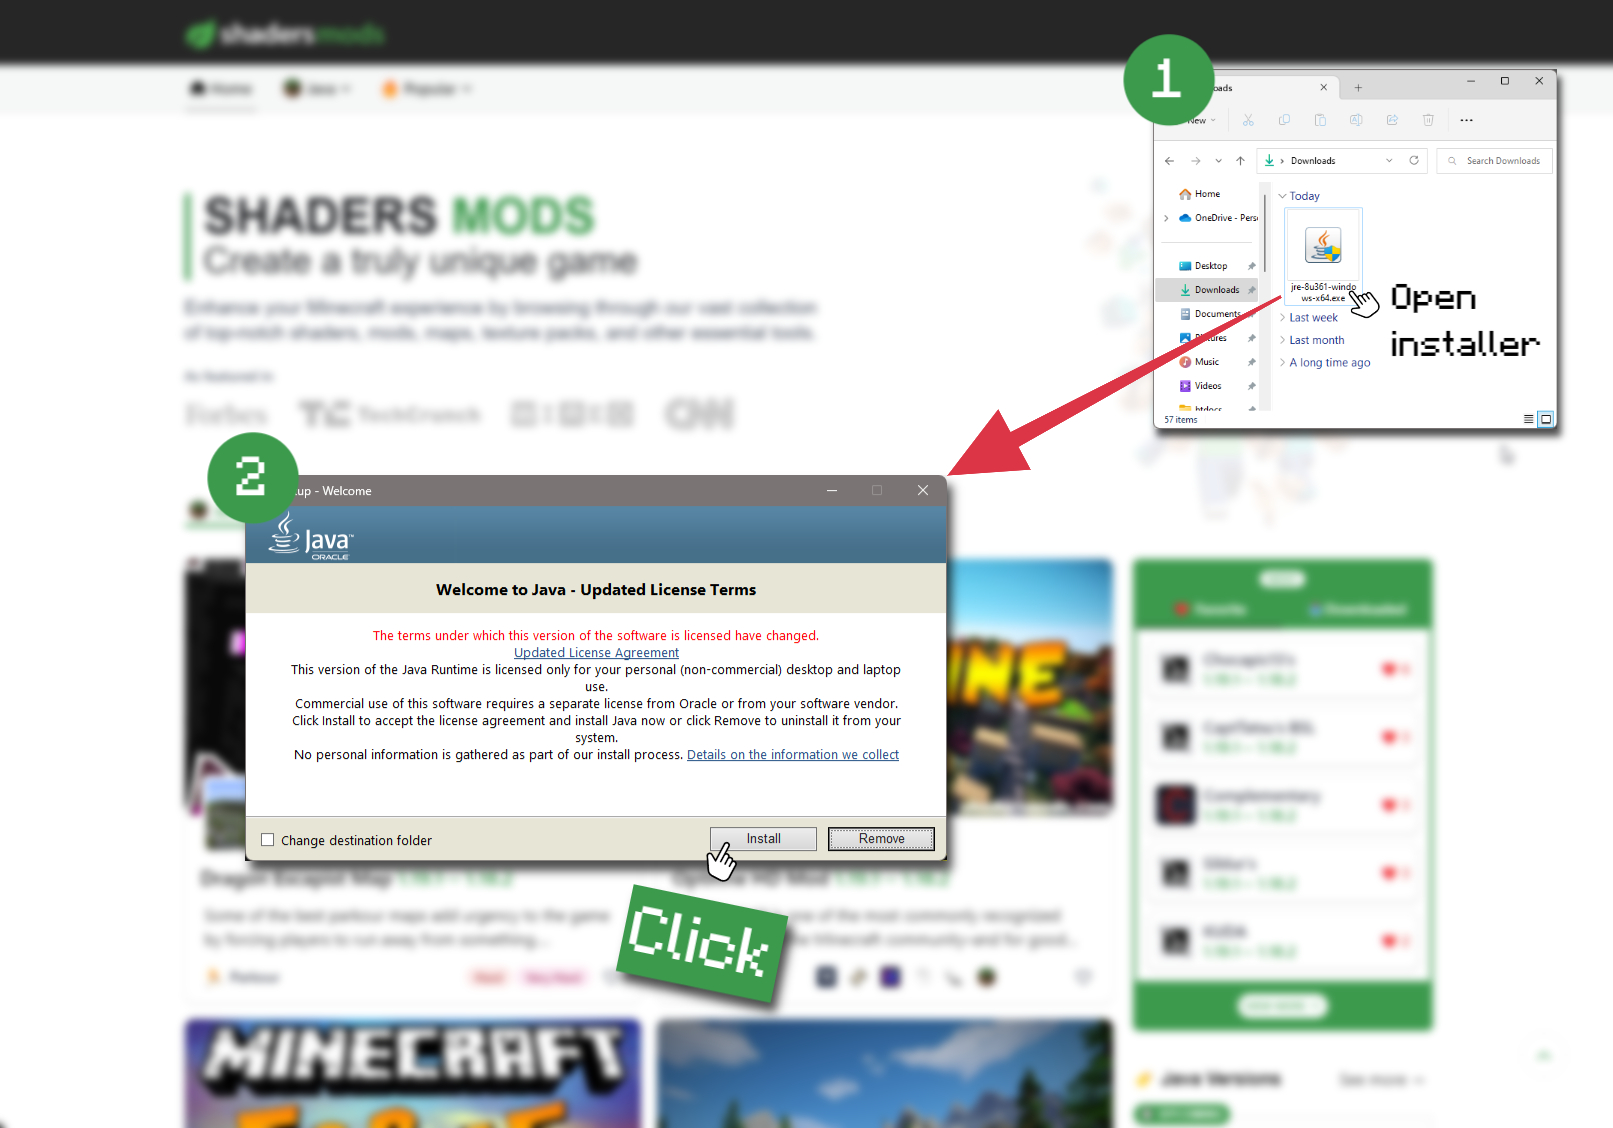
-
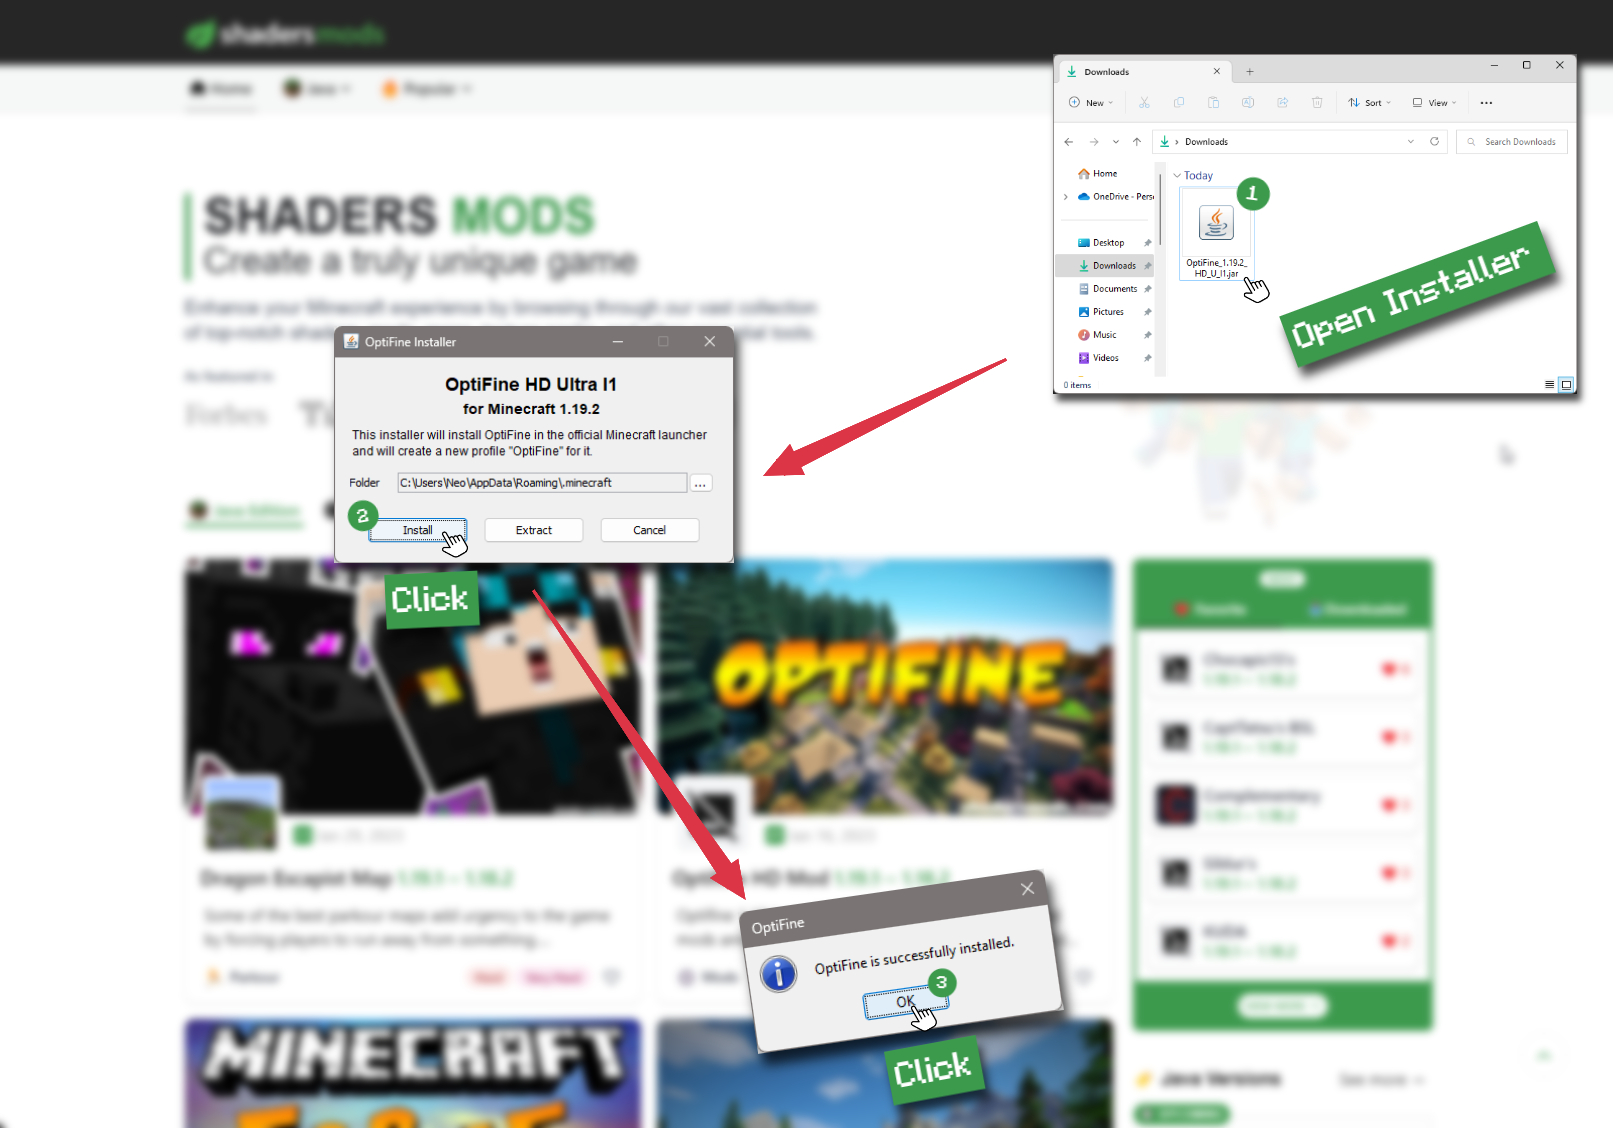
Open Installer
Once you have downloaded the file, run it and click the Install button.
How to install Oceano Shaders 3.0 with Optifine?
-
Download Optifine
Get the latest version of Optifine for your Minecraft version.
Download Optifine -
Install Optifine
Run the Optifine installer and follow the on-screen instructions to complete the installation.
-
Download Oceano Shaders 3.0
Go to the download section and get shaders zip file. Unzip the file if necessary, as some shader developers may bundle multiple shader versions in one zip file.
-
Launch Minecraft
Start the Minecraft launcher and make sure you have the Optifine profile selected.

-
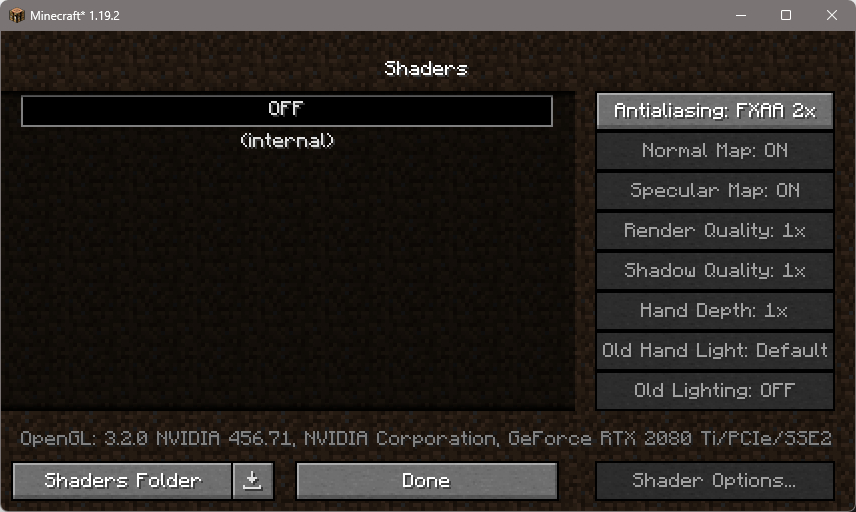
In-game Shaders menu
Go to Options > Video Settings > Shaders to access the shaders menu.
-
Open shaderpacks folder
Click on the "Shaders Folder" button to open the folder where shaders are stored, so you can add or remove shaders as desired.

-
Install Oceano Shaders 3.0
Copy or move the downloaded Oceano Shaders 3.0 shaders zip file into the shaderpacks folder.

-
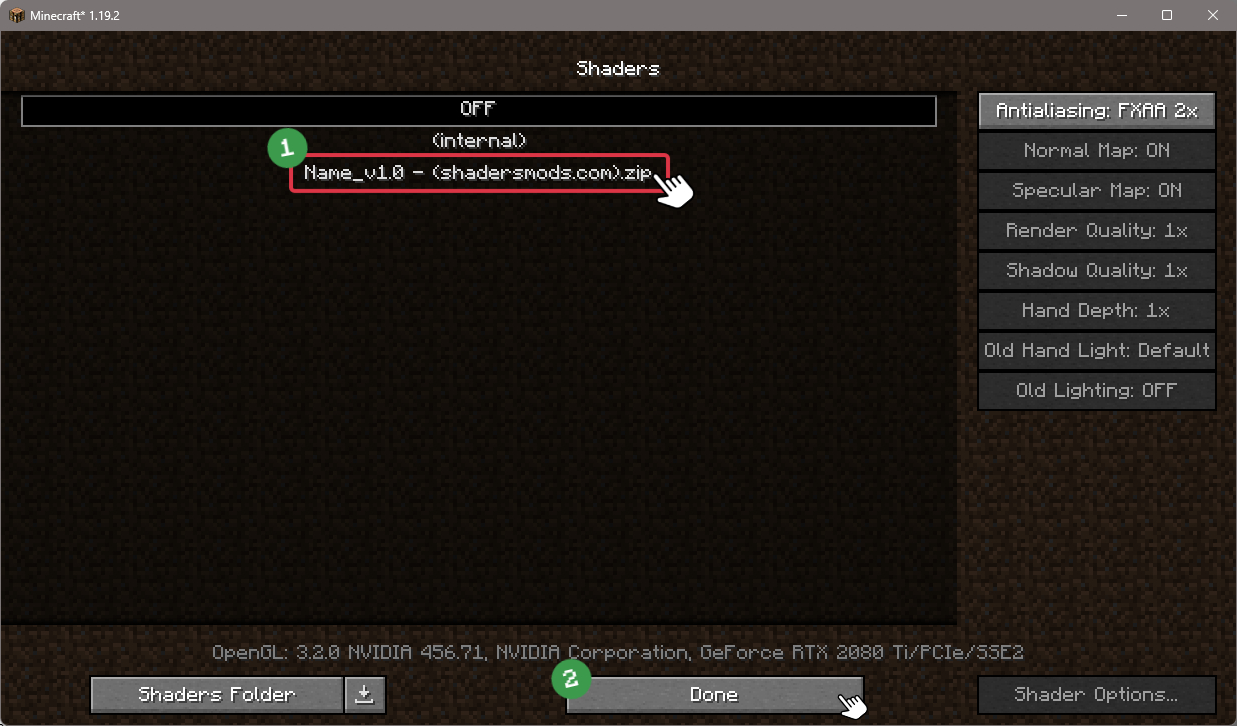
Select Oceano Shaders 3.0
Choose Oceano Shaders 3.0 shader pack from the list of available shaders in the options menu.
How to install Oceano Shaders 3.0 with Forge and Optifine?
Quick Installation Guide
-
Install Forge
Obtain the latest version of Forge that is compatible with your Minecraft version.
Download Minecraft Forge -
Launch Minecraft
Start the Minecraft launcher and select the version of Minecraft you want to install Forge on. Run the game once by clicking on the "Play" button to create necessary files for Forge.

-
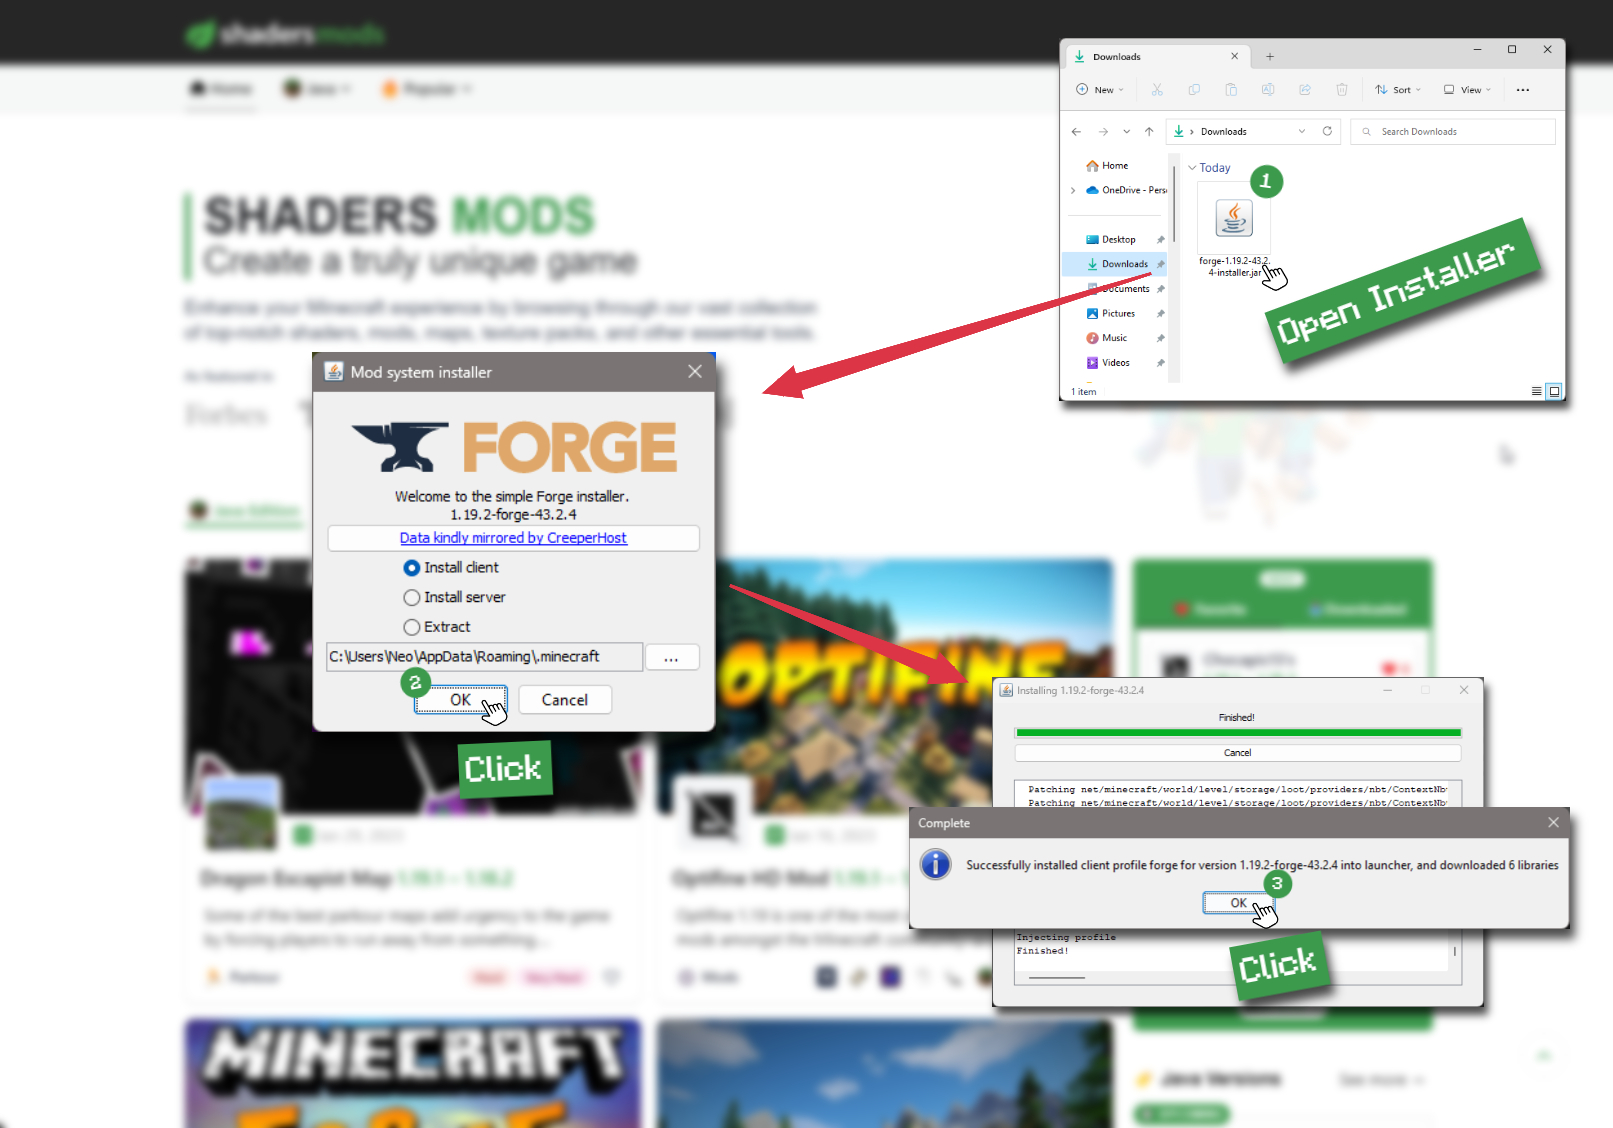
Install Forge Client
Double-click on the Forge installer jar file and choose "Install Client" in the window that appears.
-
Install Optifine
Download the Optifine jar file after Forge is installed. Move the Optifine jar file to the mods folder in the .minecraft directory.
Download Optifine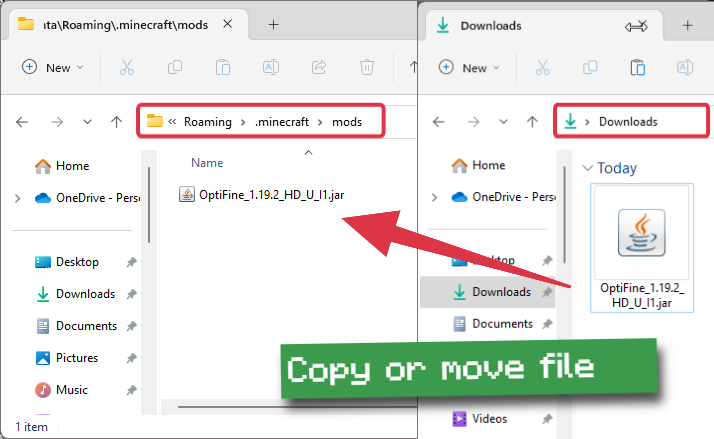
-
Launch Forge Profile
Launch Minecraft using the "Forge" profile, Optifine will be automatically loaded along with Forge.

-
Install Chocapic13's Shaders
Now the installation is the same as from the above Optifine instructions, just follow the steps starting from step 5.
Iris Installation Guide
Note
Your device must have Java installed to run the Iris installer.
Quick Java Installation Guide
-
Download Java
Download the Java installer from the official website here.
-
Open Installer
Once you have downloaded the file, run it and click the Install button.
How to install Oceano Shaders 3.0 with Iris?
-
Download Iris Shaders
Find the latest version of the Iris Shaders installer and download it.
Download Iris Installer -
Install Iris Shaders
Open the downloaded jar file, and choose the preferred game version and installation type.
⯈ Iris Install:
If you don't plan on using any other mods with Iris, choose this option.⯈ Fabric Install:
Choose this option if you want to use Iris with Fabric and other mods. The Iris jar files will be copied to the mods folder within the .minecraft directory.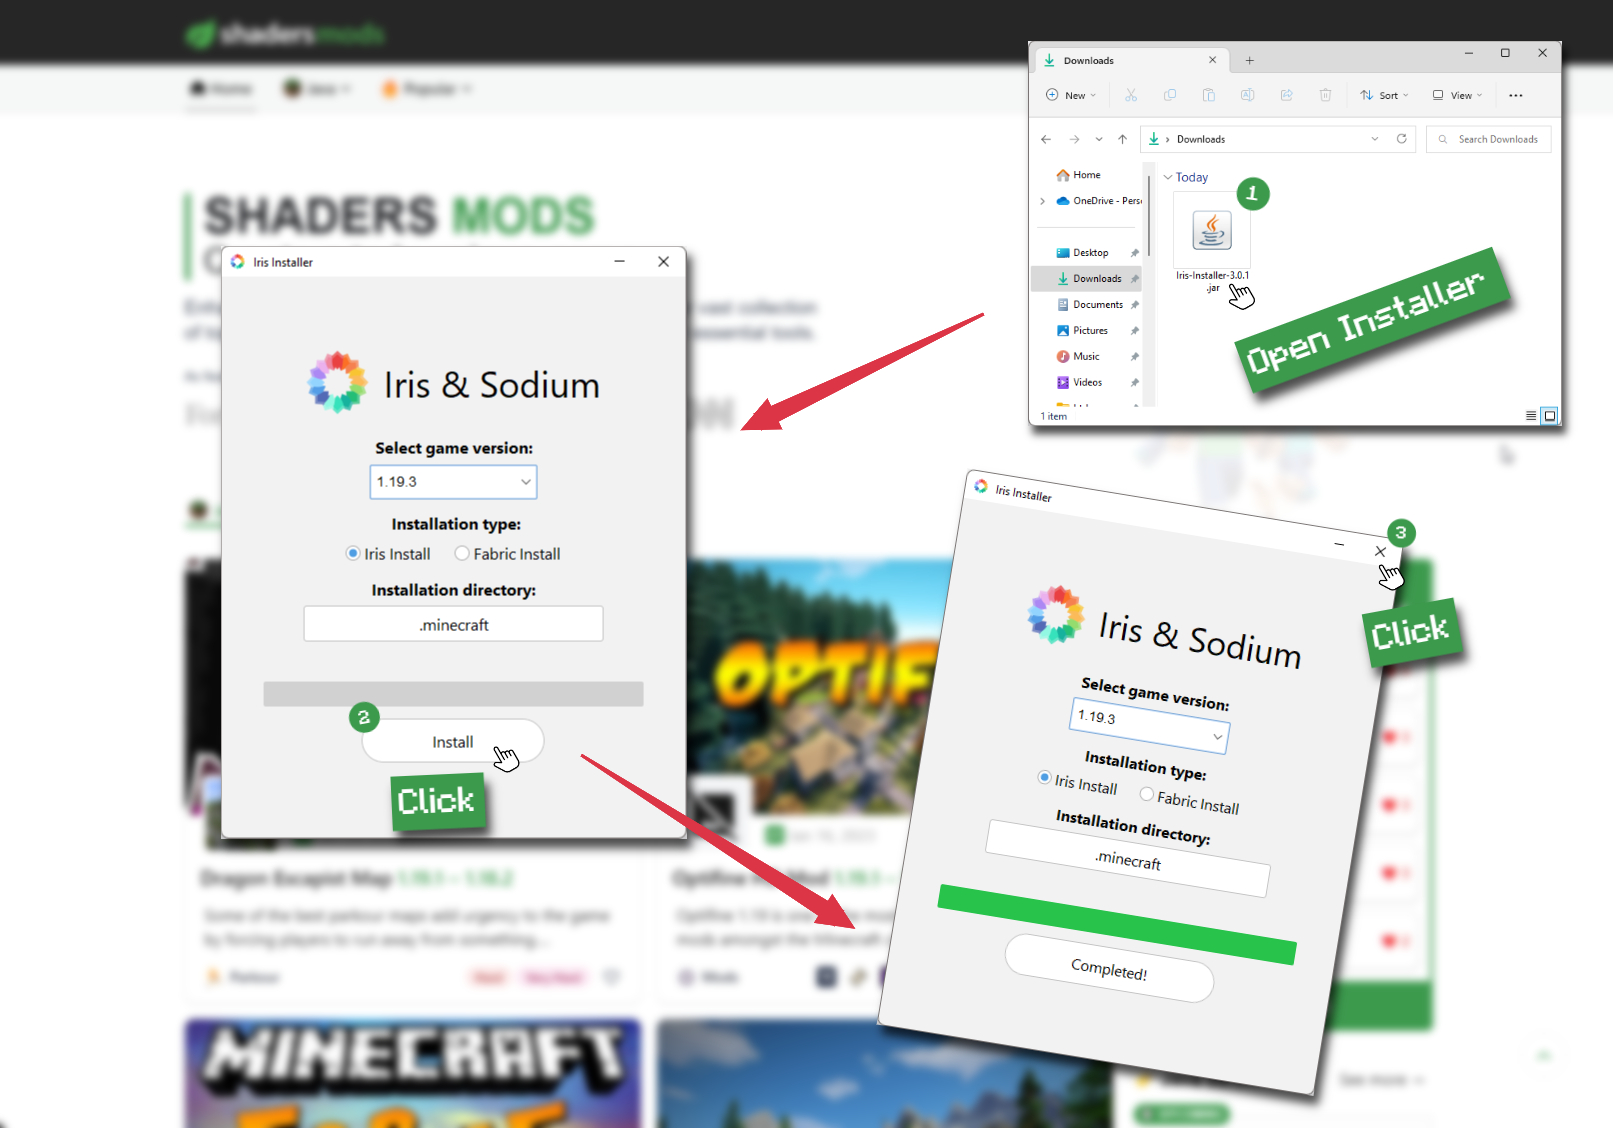
-
Start Installation
After selecting the game version and installation type, click the "Install" button to start the installation process.
-
Launch Minecraft
Start the Minecraft launcher and make sure you have the Iris profile selected.
Note
Select the Fabric profile if you opt for the Fabric installation type.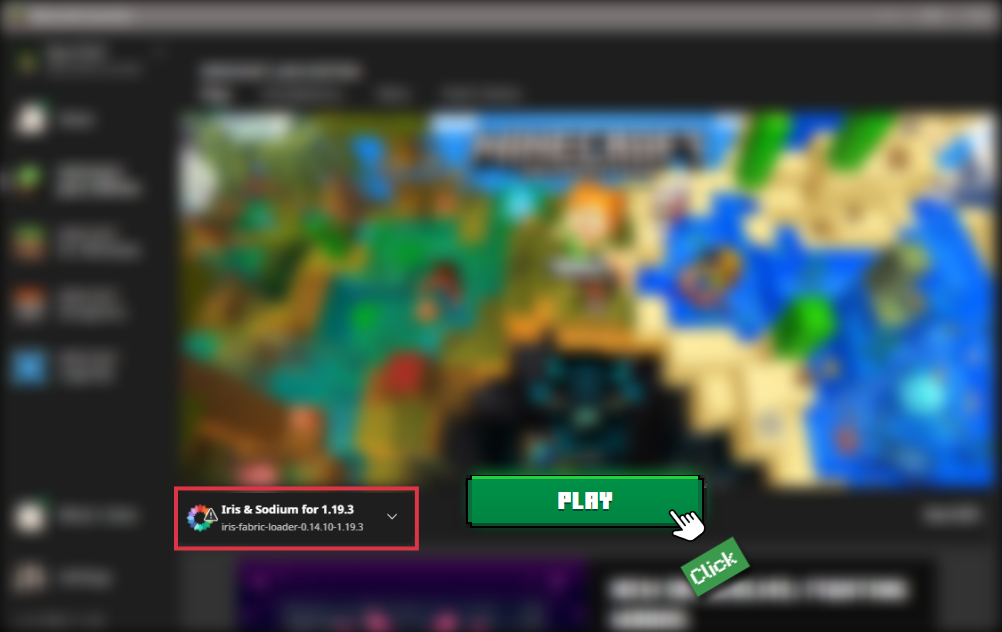
-
In-game Shader Menu
Open the Minecraft game and go to Options > Video Settings > Shader Packs to access the shaders menu.
Tip
To simplify the process, simply drag and drop the shader ZIP file directly into the Minecraft window, bypassing the next two steps.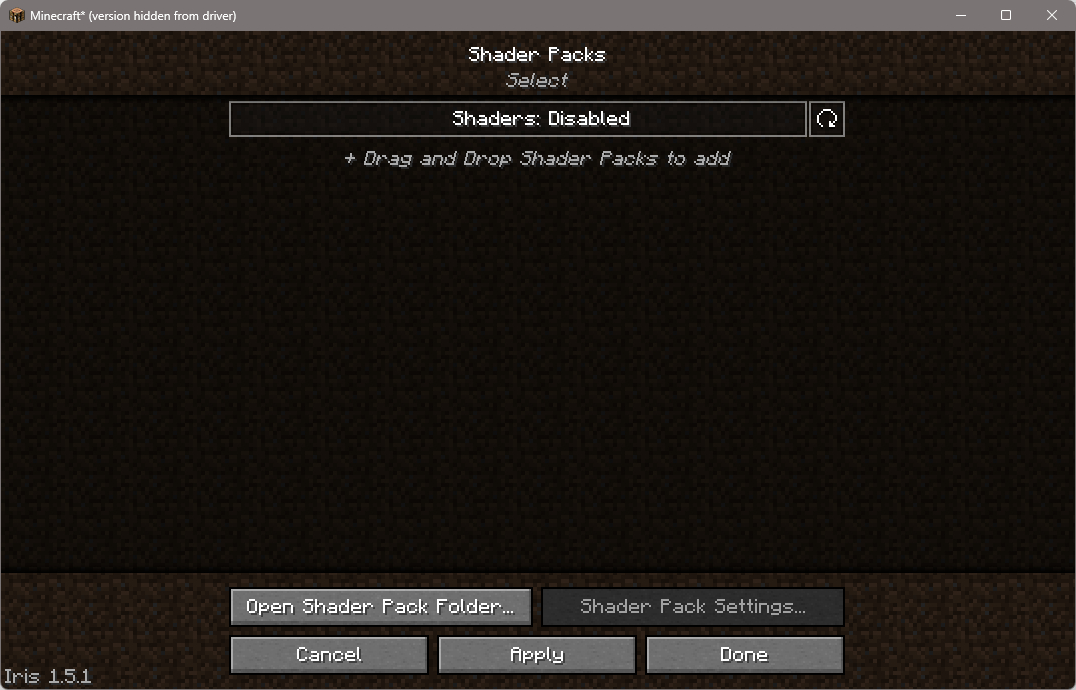
-
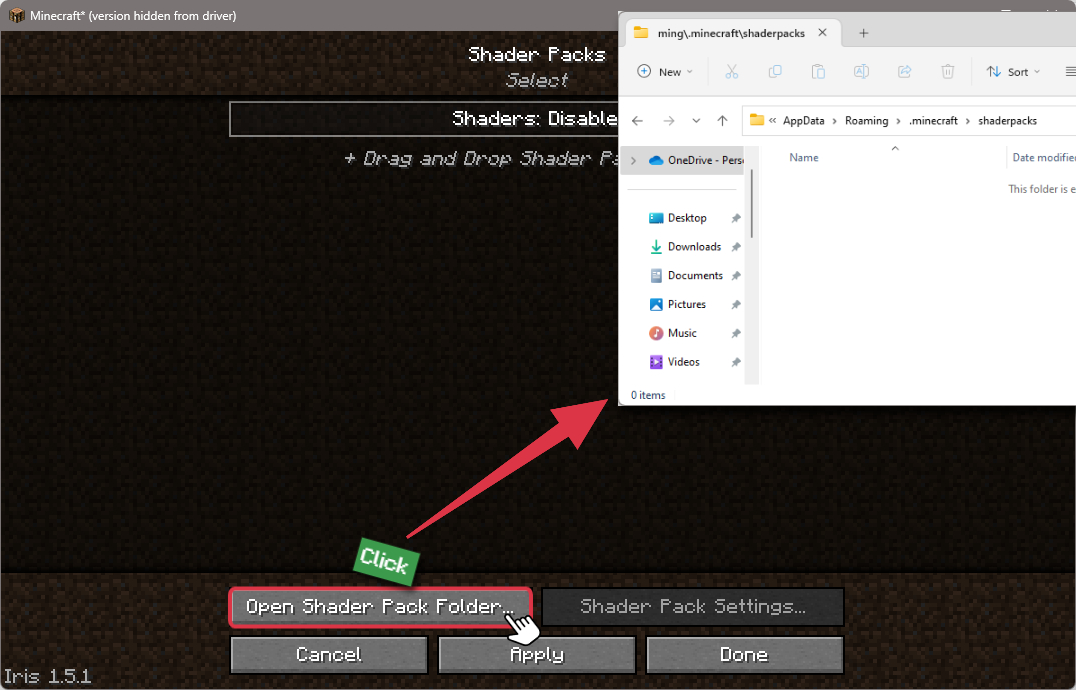
Open shaderpacks folder
Click on the "Open Shader Pack Folder" button to access the folder where shaders are stored.
-
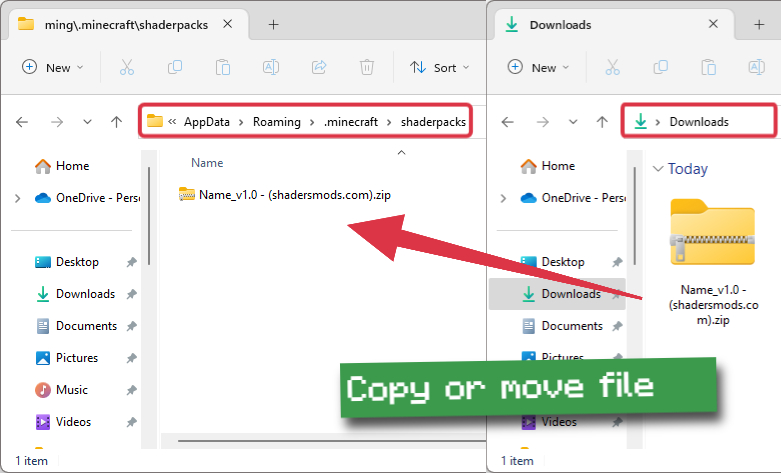
Install Oceano Shaders 3.0
Copy or move the shaders zip file into the shaderpacks folder.
-
Select Oceano Shaders 3.0
Choose installed shader pack from the list of available shaders in the options menu and click the "Apply" or "Done" button to select it.
Tip
When the shader pack is selected, its name will be changed to yellow.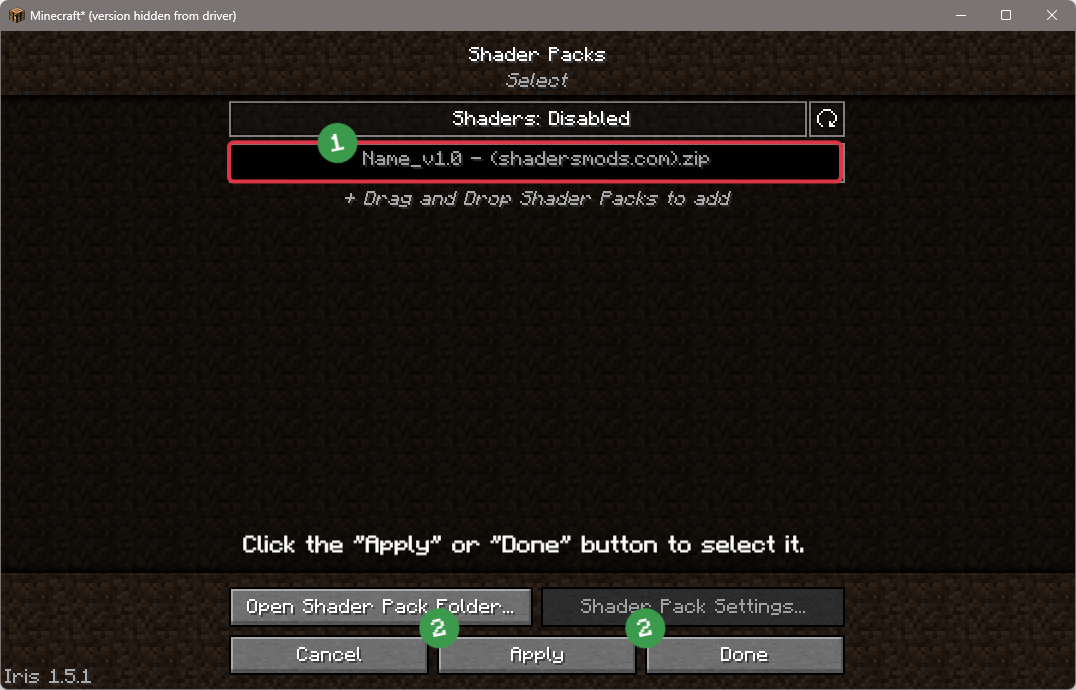
📥 Oceano Shaders 3.0 — Download
Something You Should Know
- Our links are only from the official developer, so you can be sure they are secure.
- No modifications or edits are made to the files.
🔄 Update Logs
v3.0.1
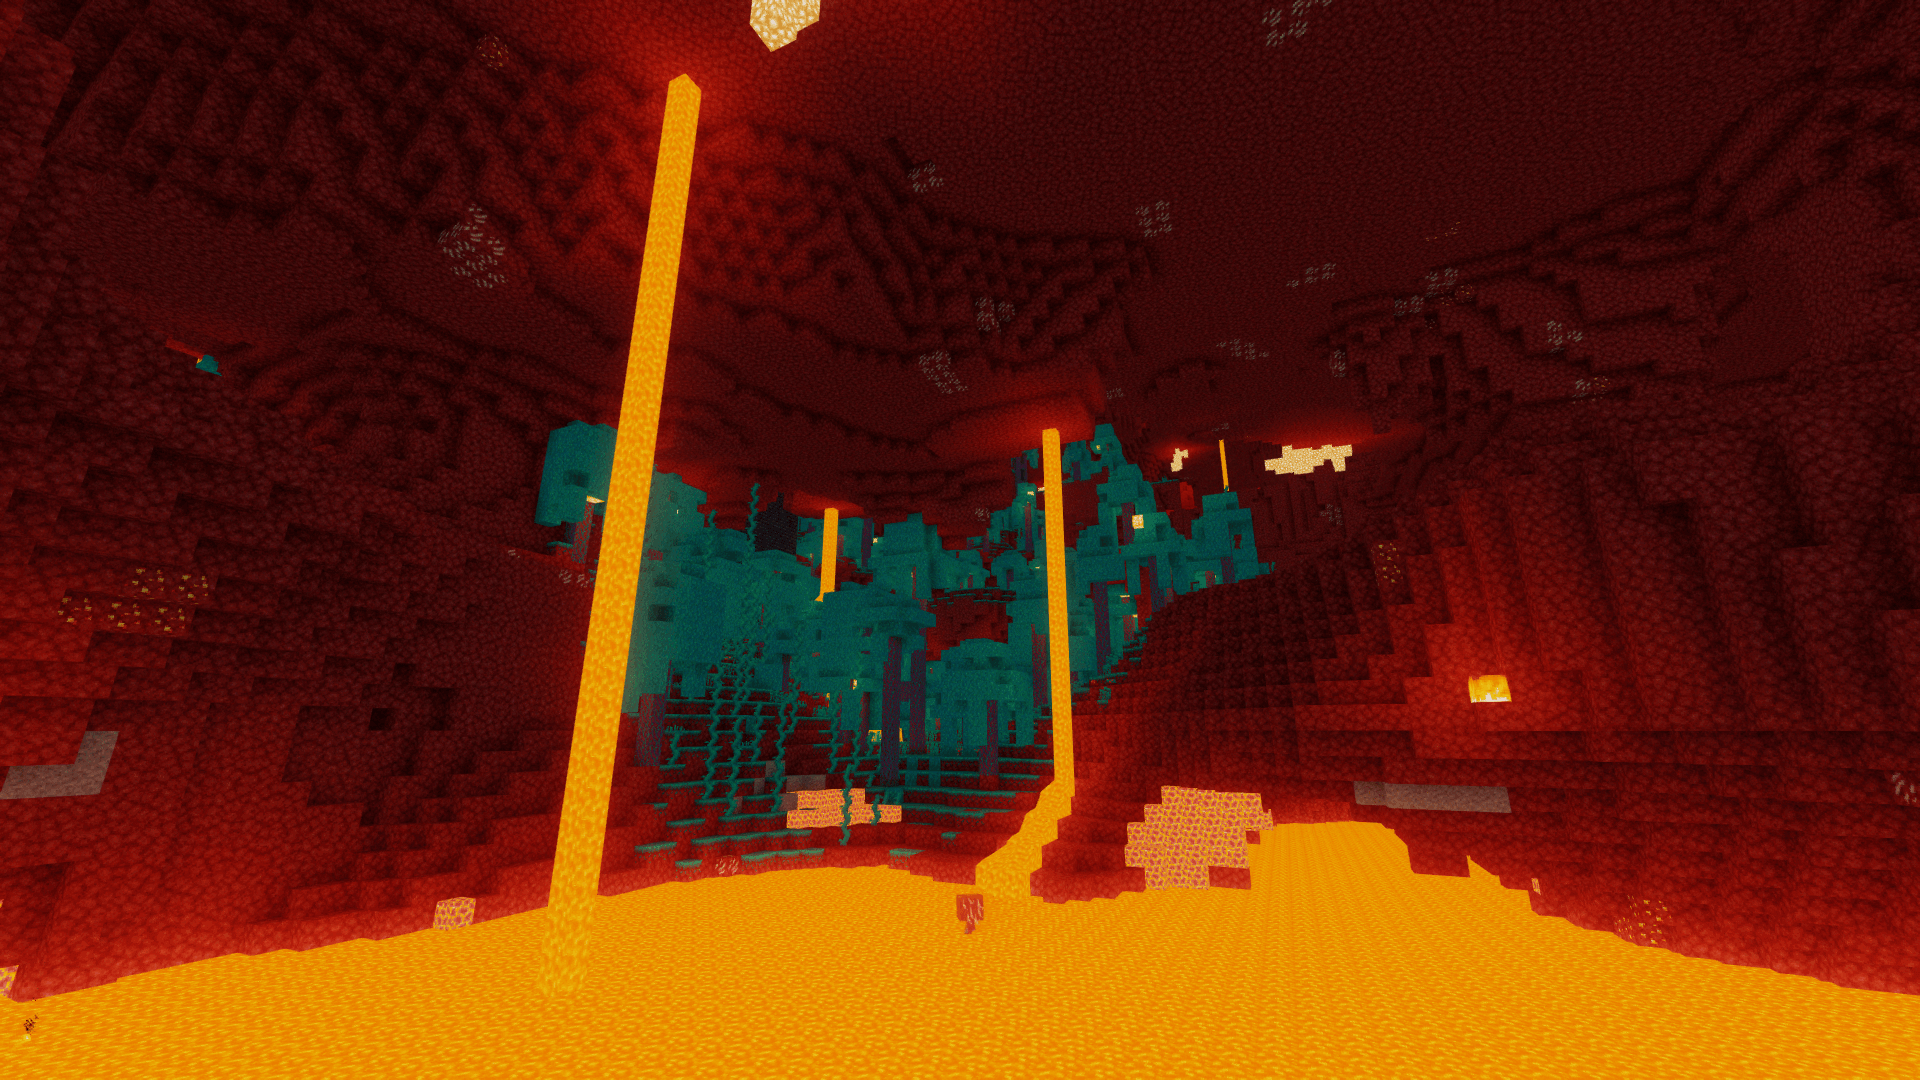
- Fixed Nether and End tone map, the curve level was off, resulting in a huge loss of color information.
- Potentially fixed the line in clouds bug.
- Need feedback as I was not experiencing the issue personally.
v3.0
- I completely rewrote and overhauled parts of the shader.
- Many, many changes, too many to list.
v2.0
- Latest Official Release of Oceano.
Comments (16)
My screen is white with the shader does anyone know how can i fix that?
there was a white screen when i used
Actually its just blurry when i move my camera
Is it normal that the edges of the screen are kinda blurred? It makes me feel kind of weird
This is butifull shaders