

Chocapic13’s Shaders 1.20, 1.19.4 → 1.18.2
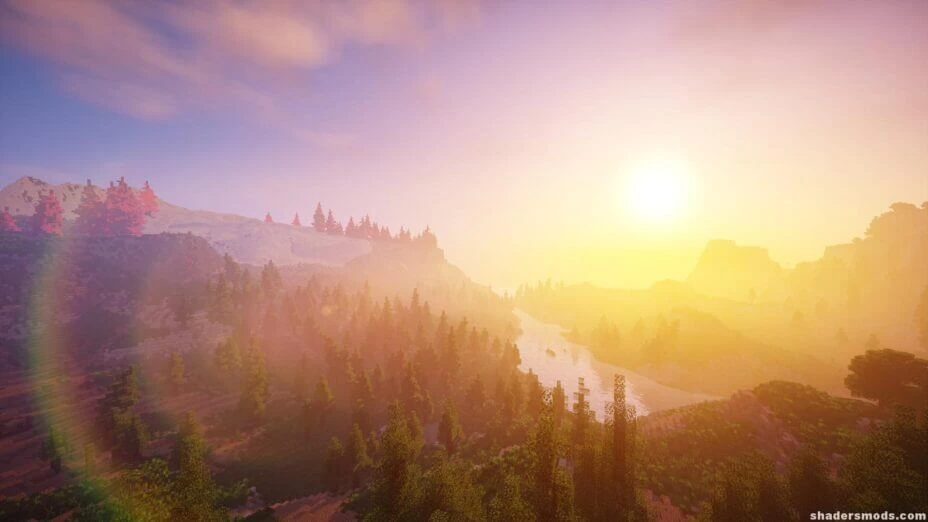
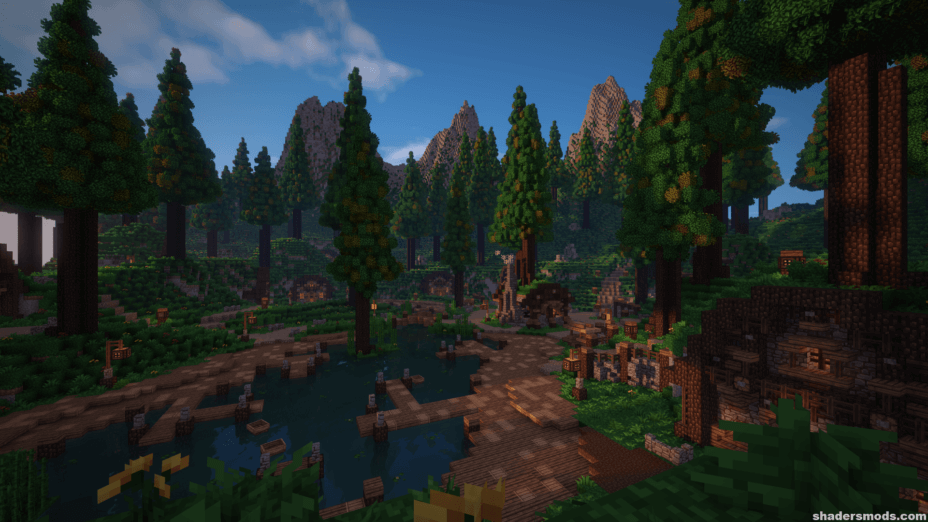
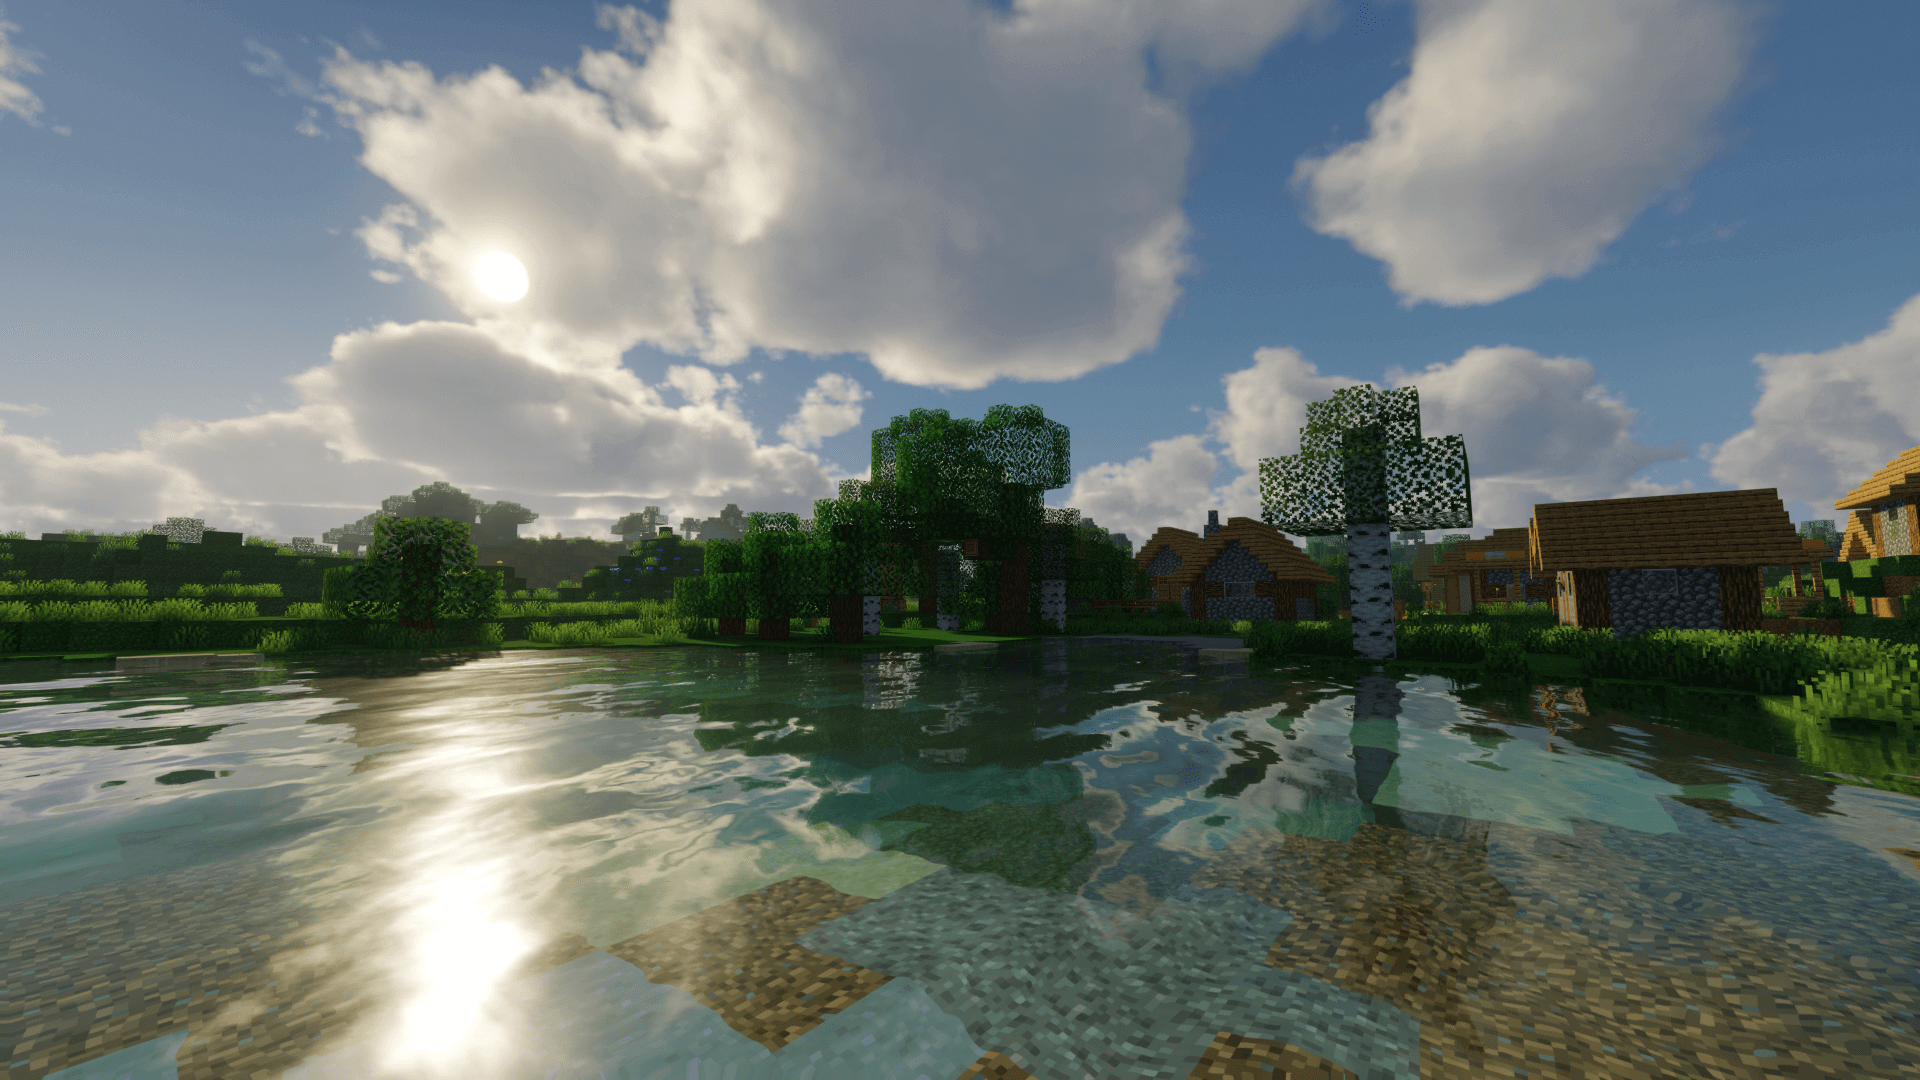
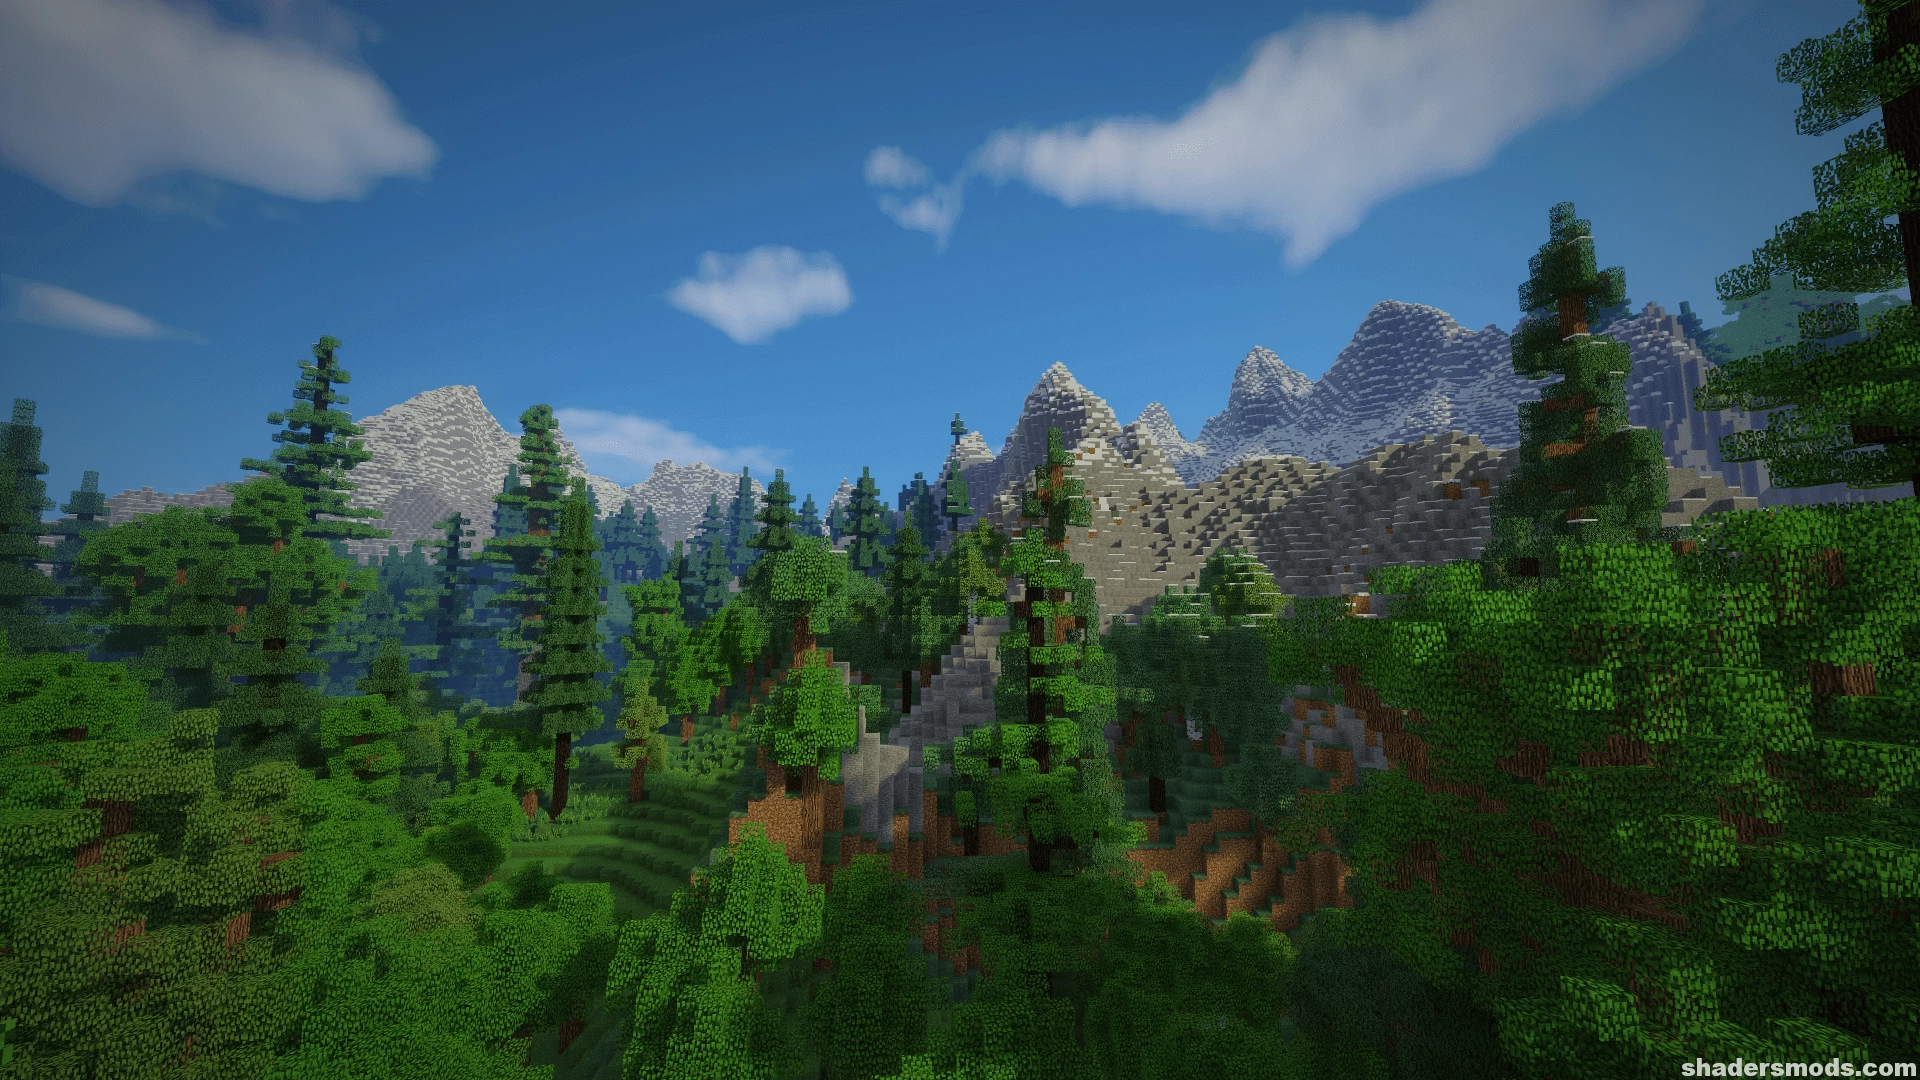
Chocapic13's Shaders offer exceptional quality and performance for a diverse range of hardware setups.
| Developer | 👤Choca_13 |
|---|---|
| Style | 🔅Semi-Realistic |
| Support GPUs | |
| Loaders | |
| Performance Impact | Low |
| Settings | 149 |
| Features | Water Waves+38 |
| Created | Mar 14, 2020 |
| Updated | Feb 28, 2021 |
| Stats |
|
Chocapic13’s Shaders mod is the baseline for many other shader packs out there, as you can learn just from checking a number of shader pack pages in places like Minecraft Forum. It is highly popular among shader pack developers because it is easy to work with, and many of the simplest things have already been taken care of, which leaves those developers time to work on the large changes and modifications they want to make. Thanks to updates as recent as February of 2021, Chocapic13’s Shaders work great with Minecraft 1.19.x and old versions.
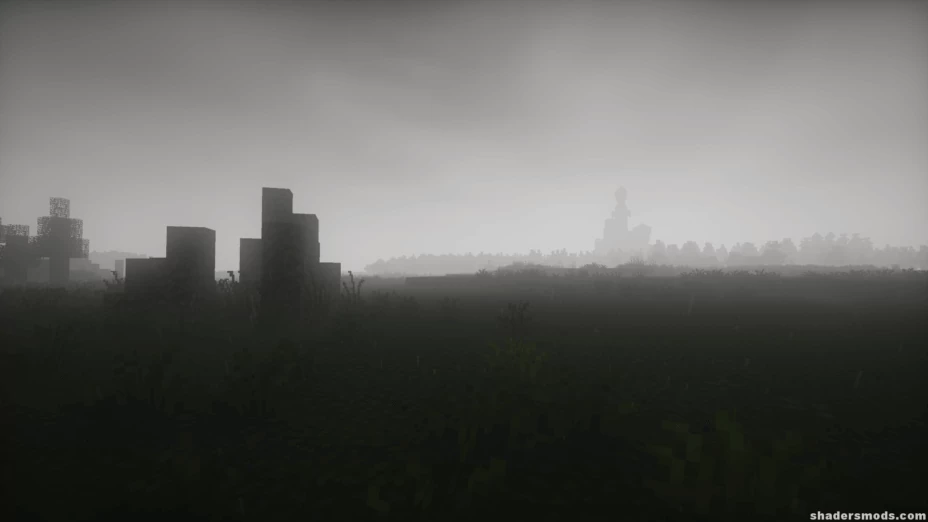
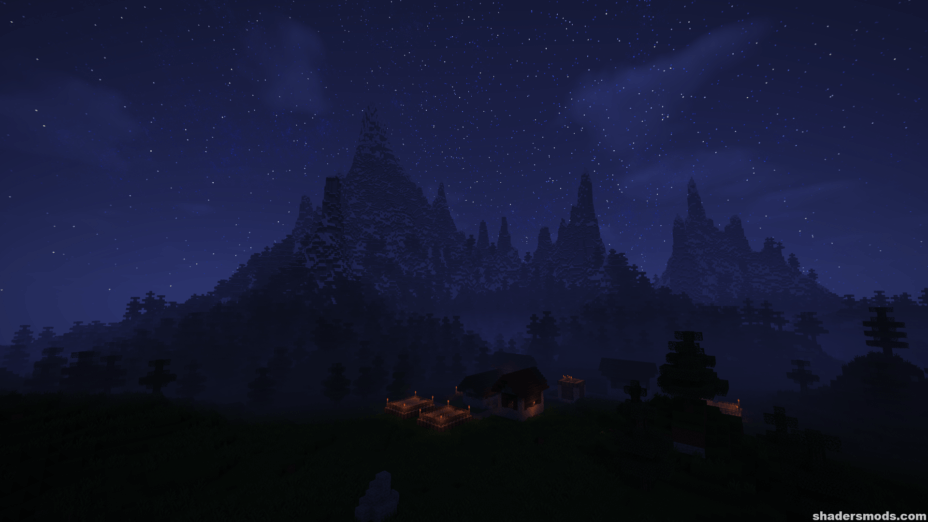
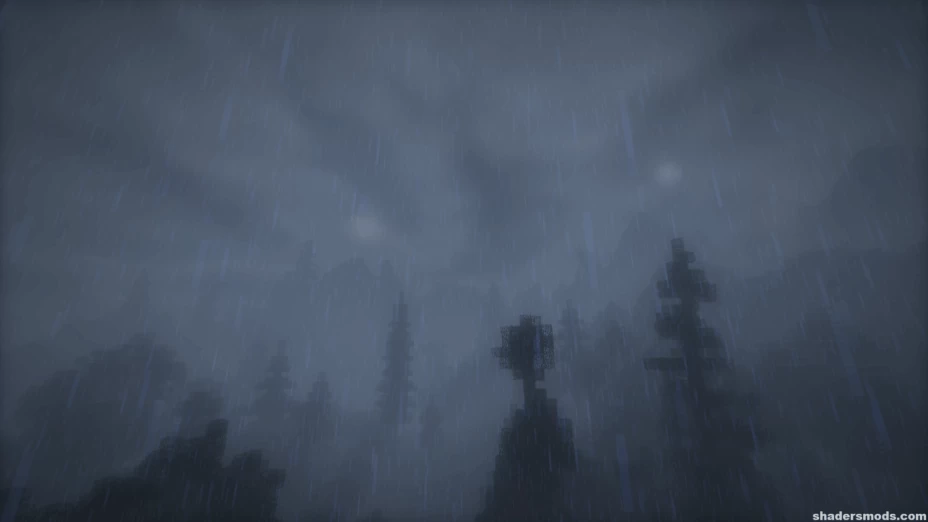
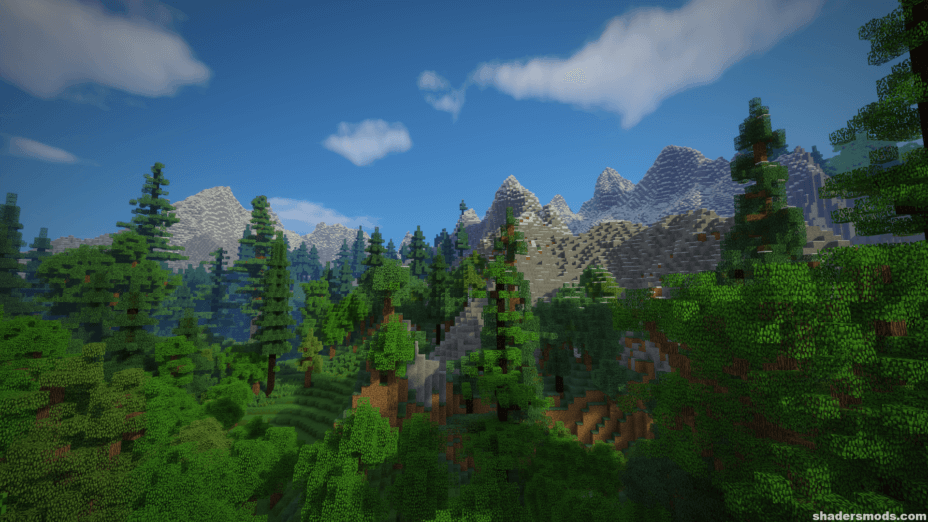
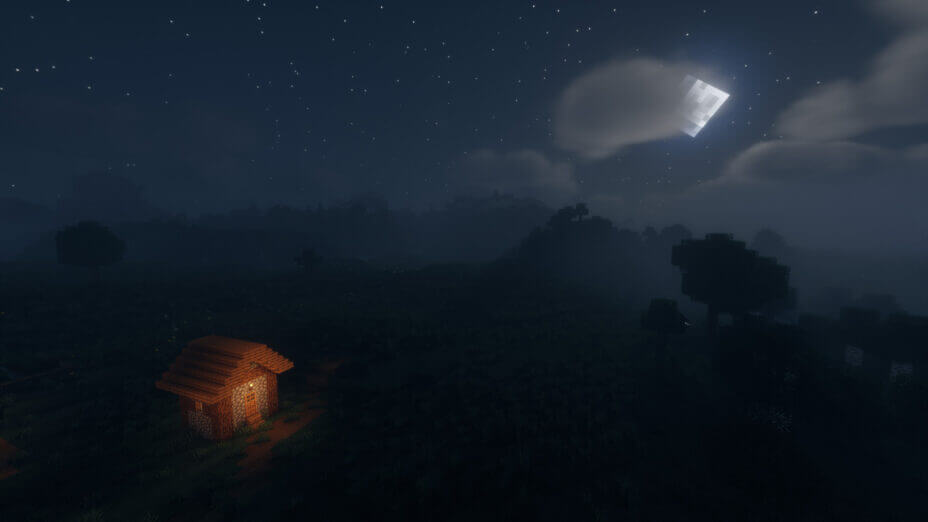
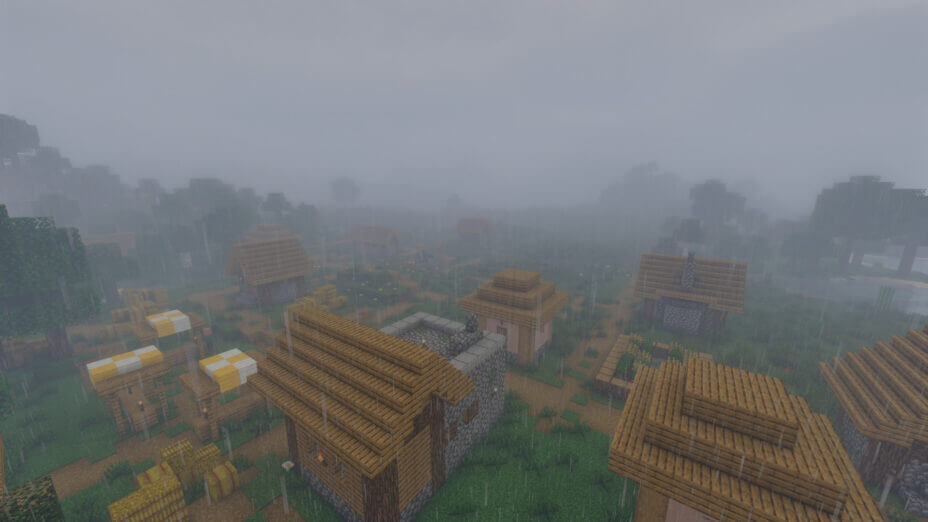
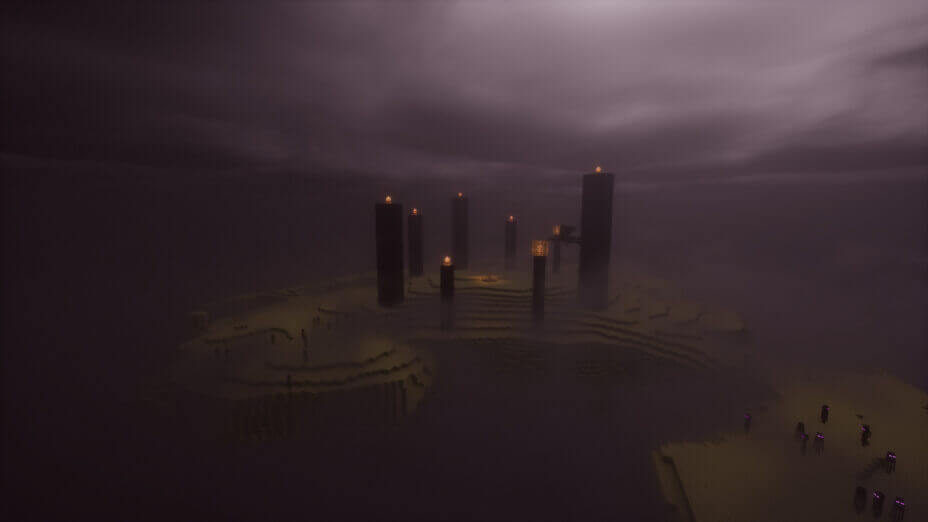
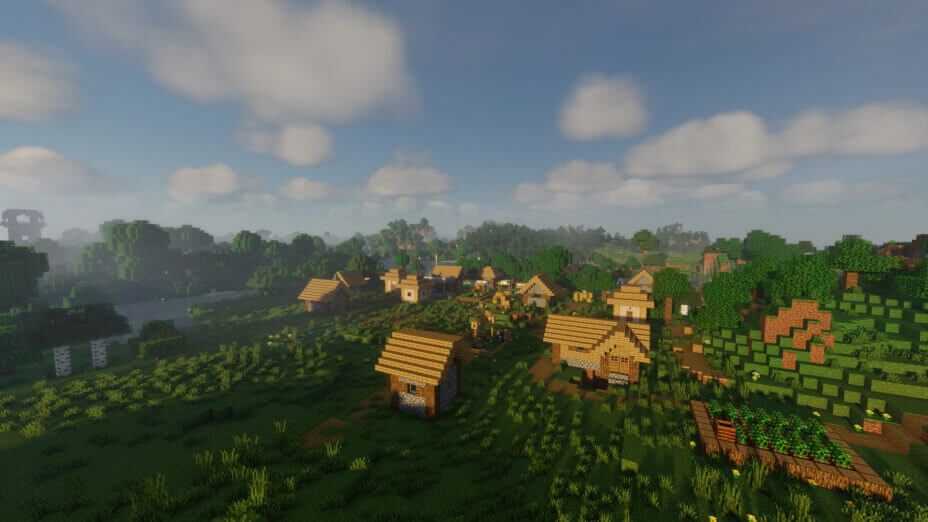
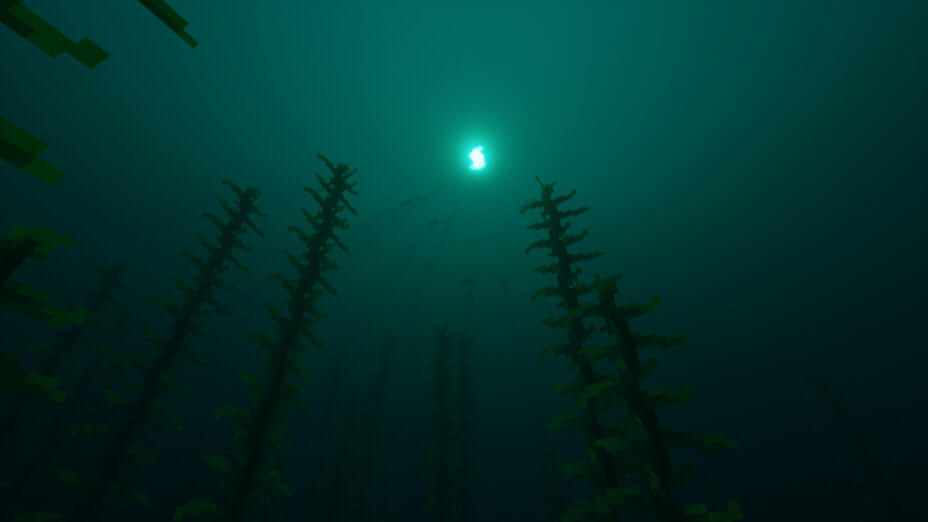
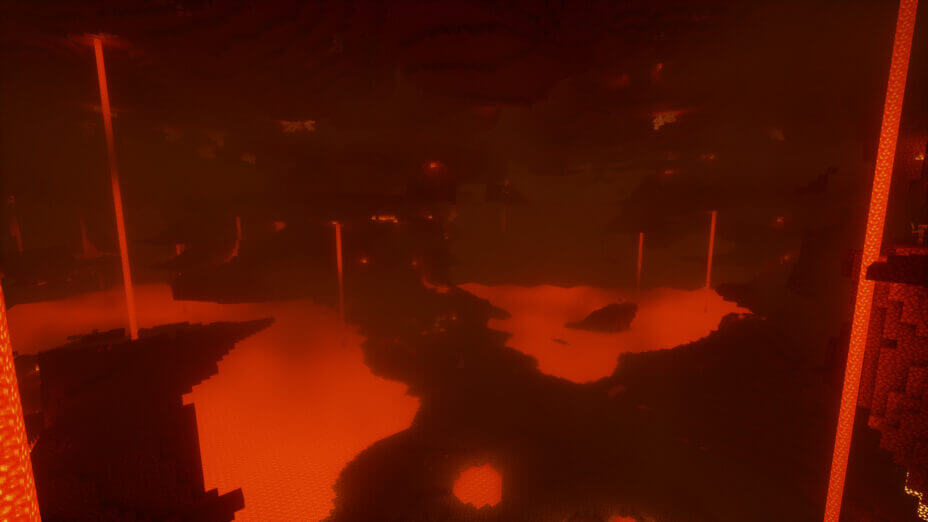
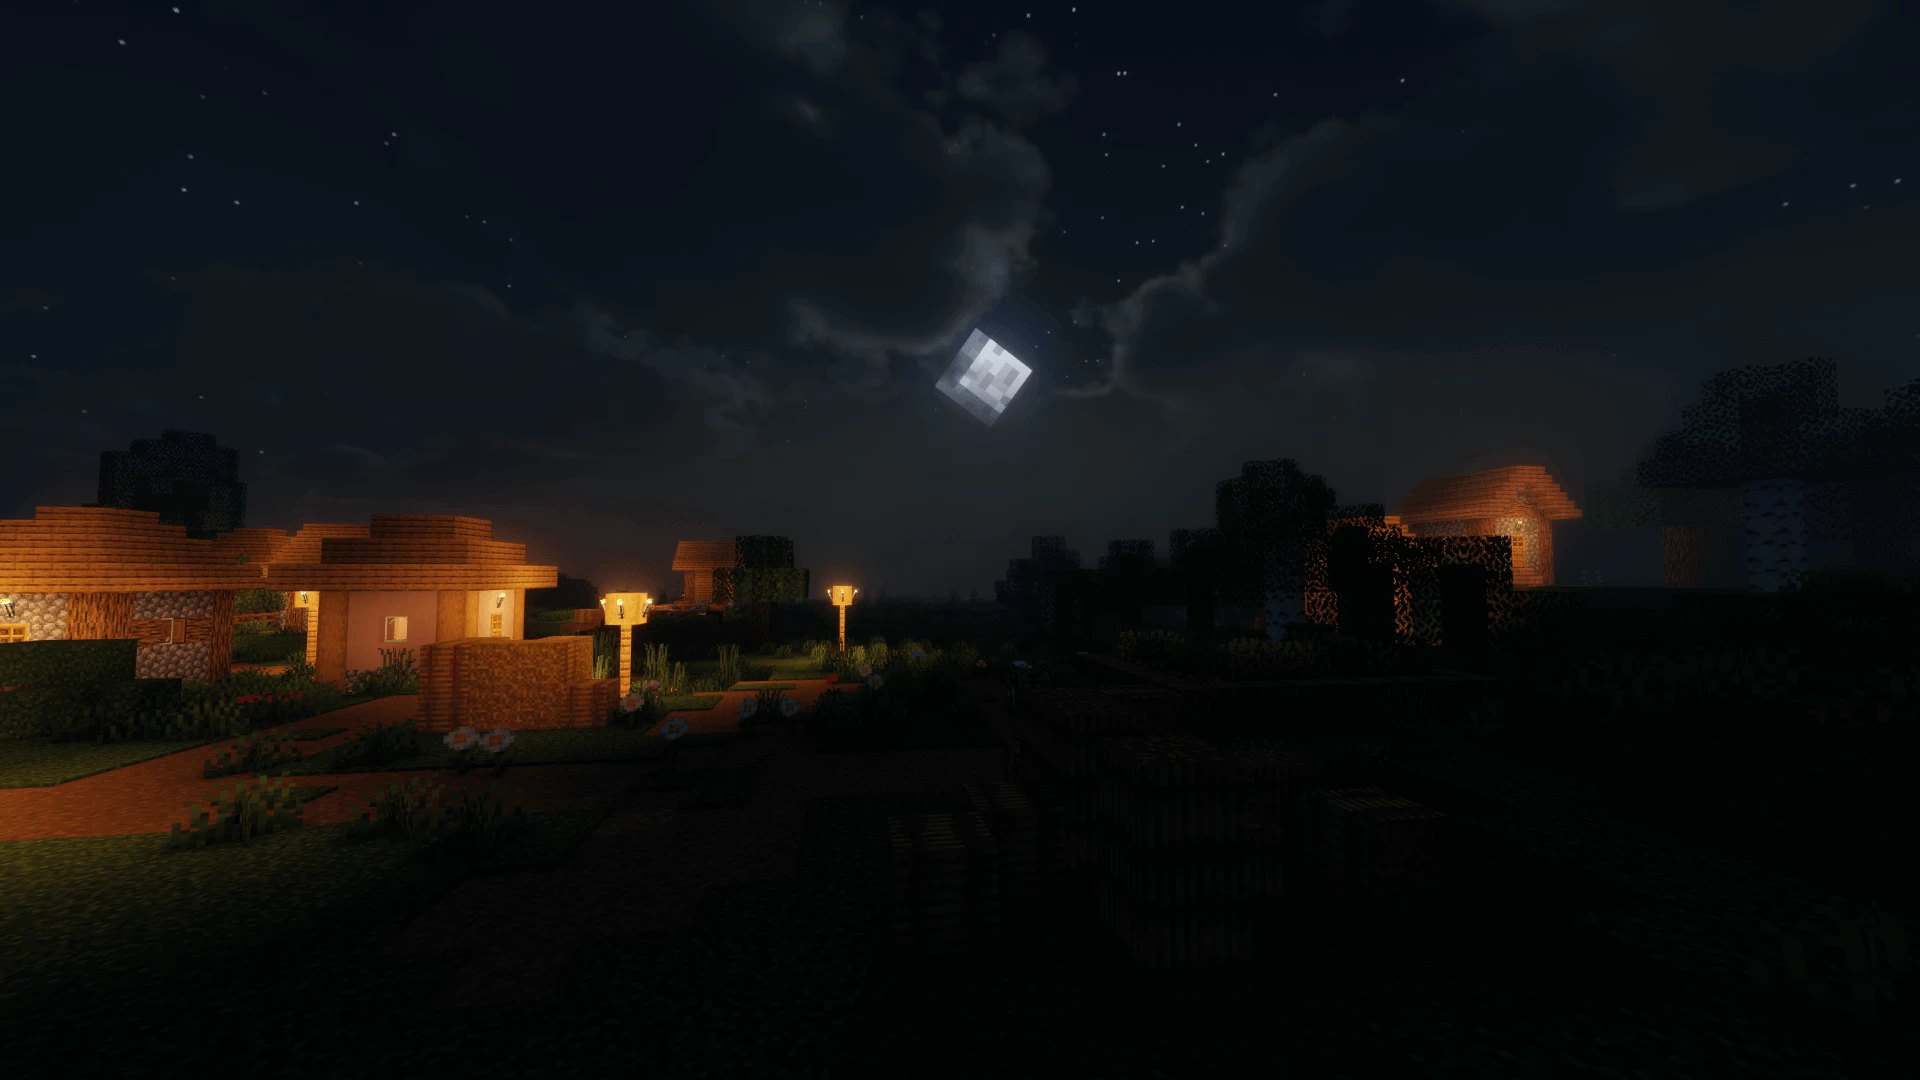
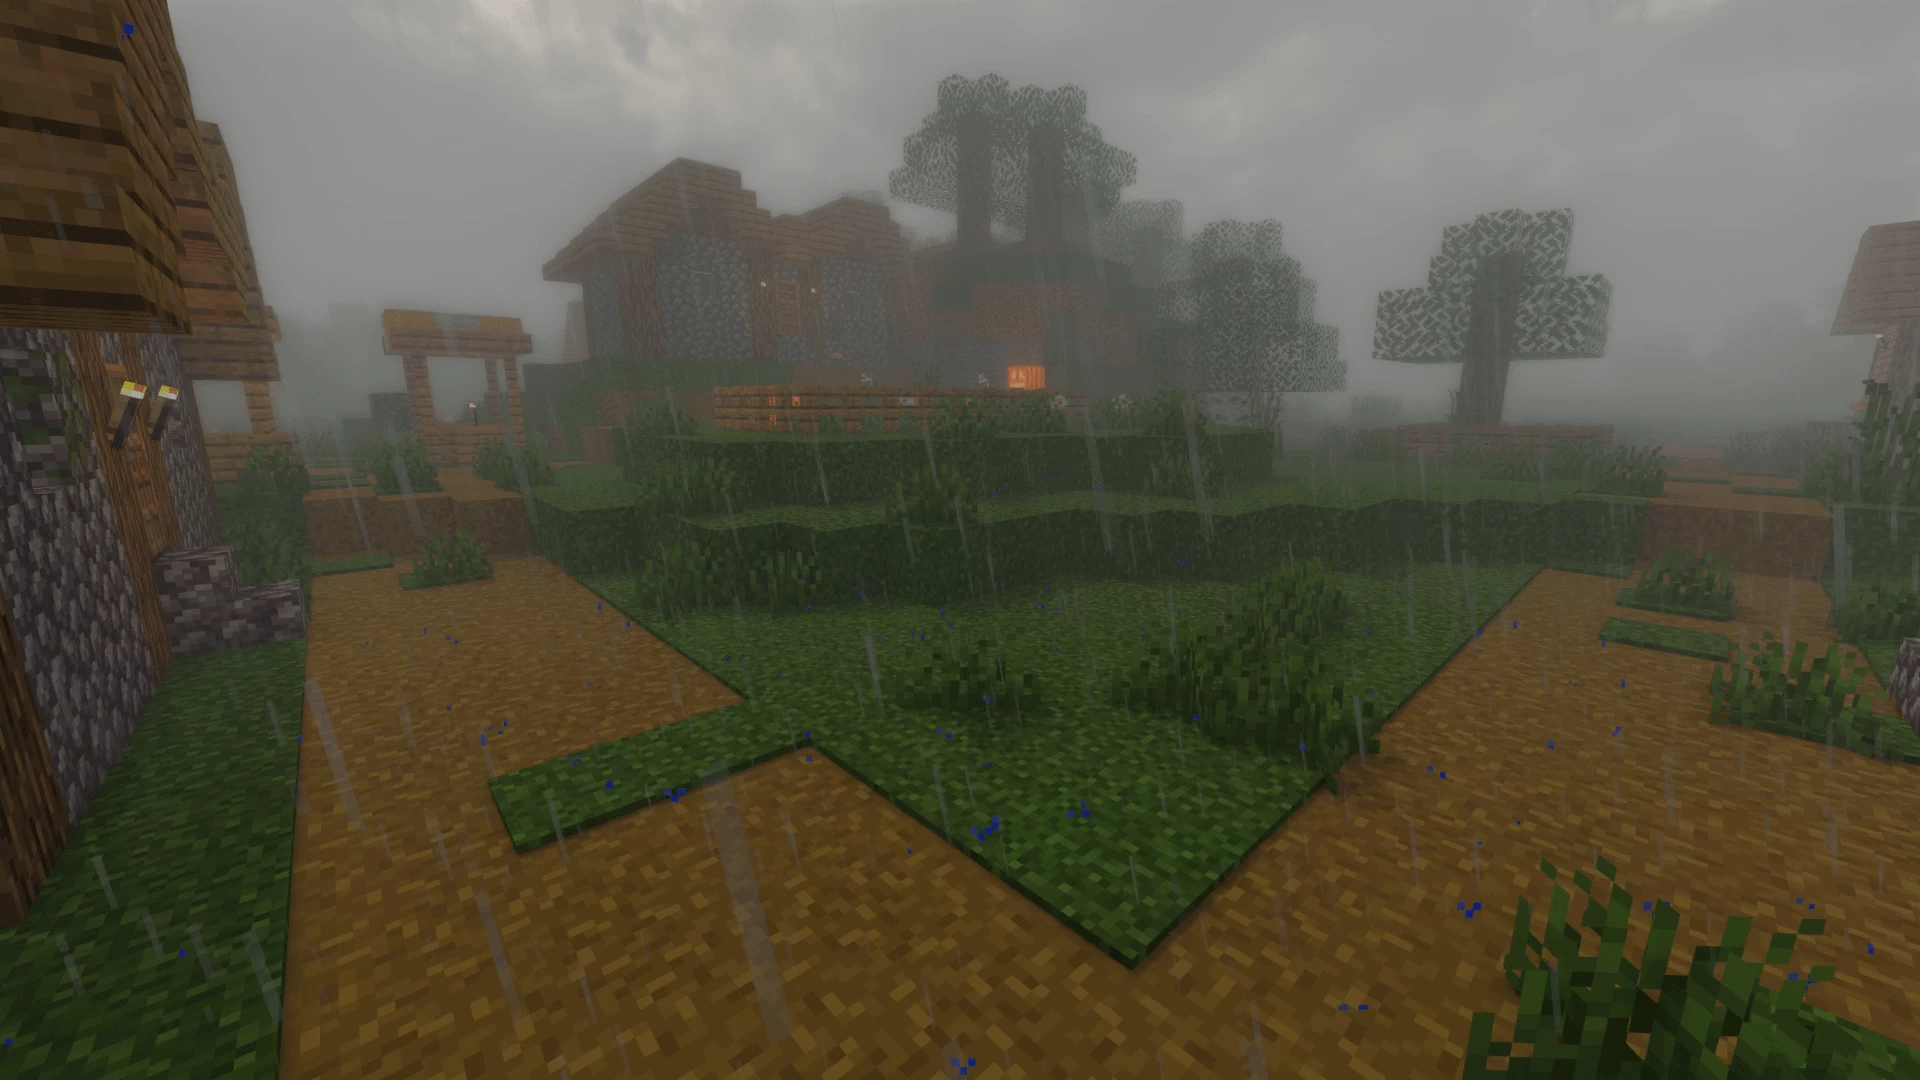
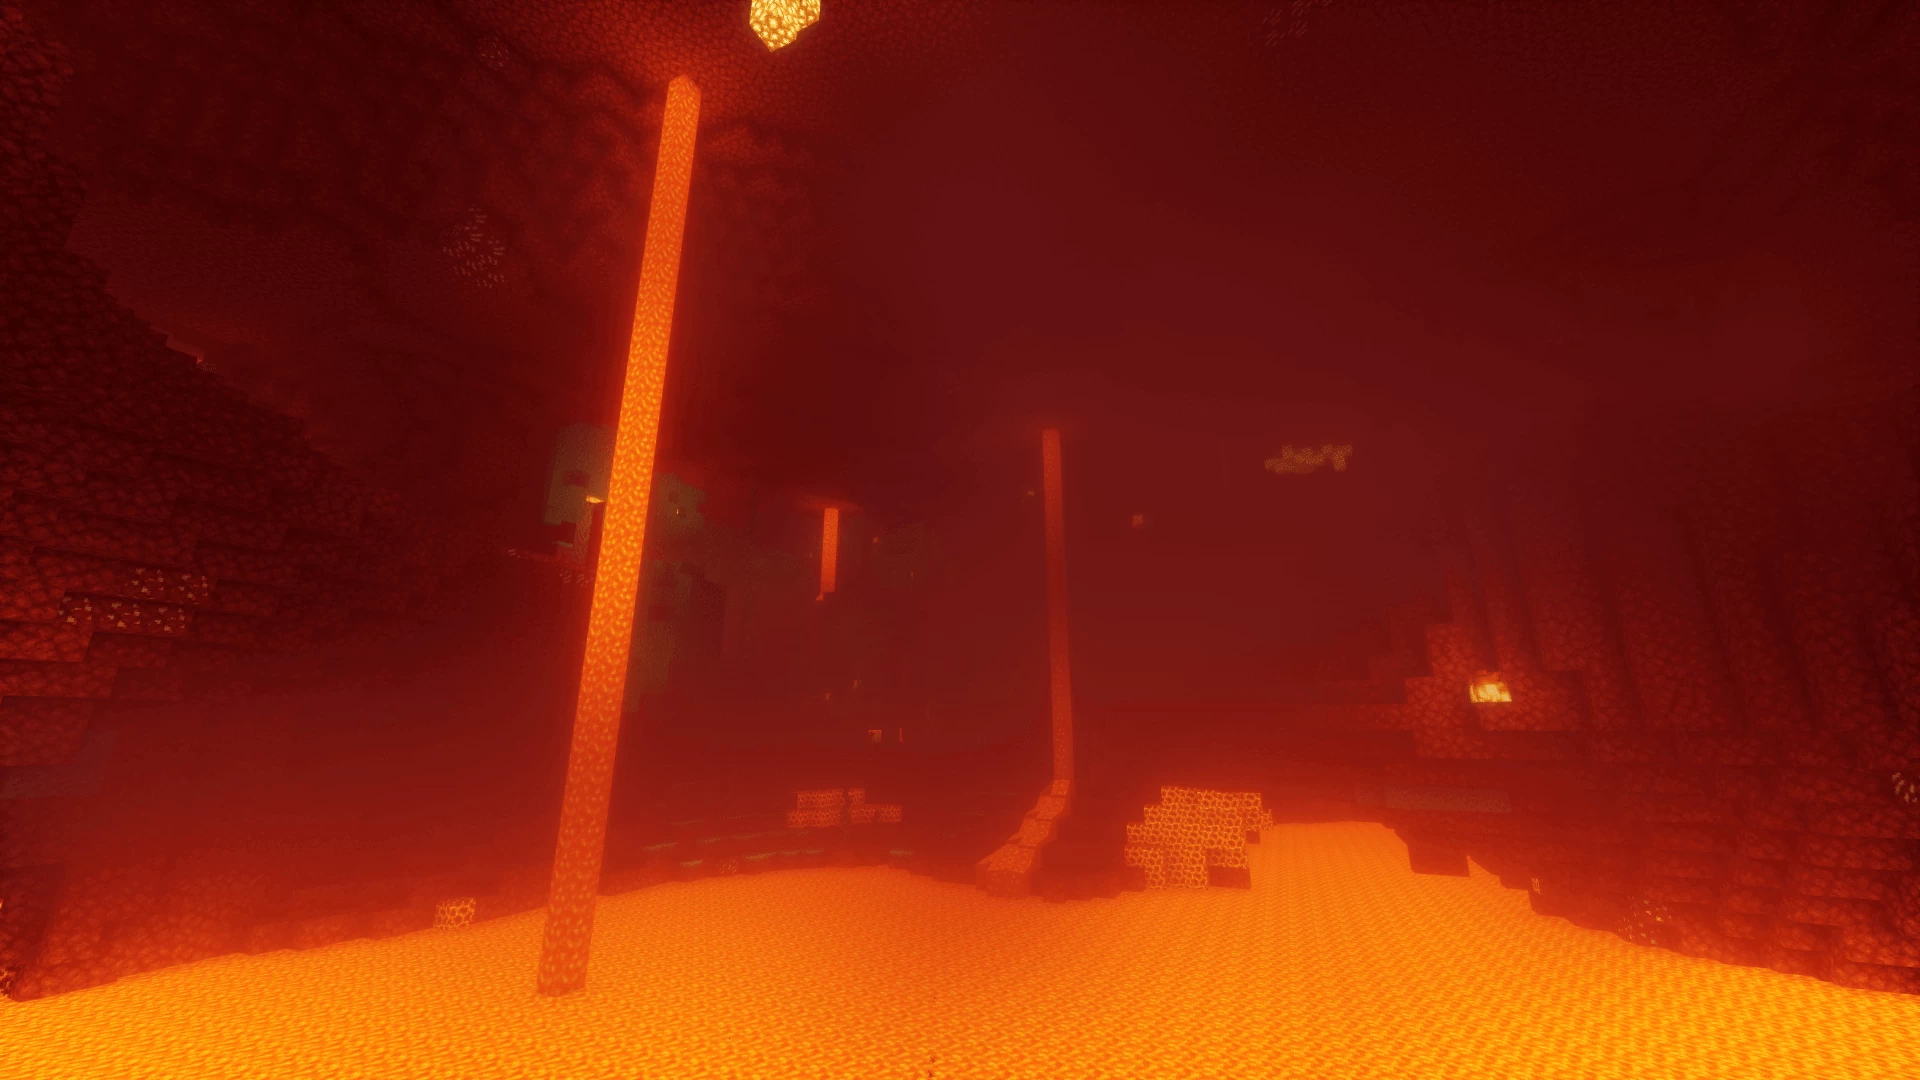
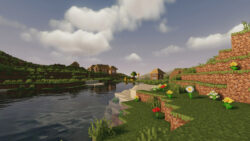
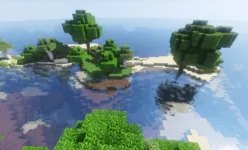
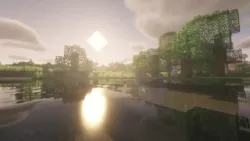
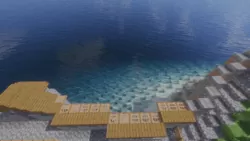
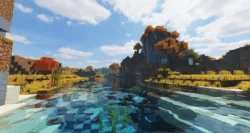
There are few shader packs with lighting effects as good as those you will see in Chocapic13’s Shaders, including the other packs that were created using this one as a foundation. One of the best effects is actually the fog, which couples very well with dark and rainy nights to create a moody atmosphere that would be perfect for a horror map if you just played with some settings to keep the world constantly dark and stormy. The light and shadow effects aren’t limited to just a few biomes either – everywhere you go in Minecraft, you can see this mod at work.
Unlike many shader packs, you can make adjustments to the inner workings of Chocapic13’s Shaders, increasing quality at the cost of performance and vice versa. Just look for the .fsh and .vsh files, open them with a text editing program like Notepad and find the line for render resolution. This should be set to x1.42 by default, but you could jack it up as high as x2 or even x4, though you should expect a drop in frames for doing this unless you’re using a high-end PC. Most players should be able to use Chocapic13’s Shaders fresh after downloading.
Because of the high degree of control players get over the visuals in Chocapic13’s Shaders, this is one pack recommended for just about everyone. Low-end PC users will struggle to use this shader pack even in its default state, so there’s not much to look at here for players using weak GPUs or no GPU at all, as in the case of relying on integrated motherboard graphics. The only real issue seems to be that interior spaces, like the insides of houses, look dark even with proper lighting. This is no game-breaking bug, though.
- 1.20
- 1.19.4
- 1.19.3
- 1.19.2
- 1.19.1
- 1.19
- 1.18.2
- 1.18.1
- 1.18
- 1.17.1
- 1.17
- 1.16.5
- 1.16.4
- 1.16.3
- 1.16.2
- 1.16.1
- 1.16
- 1.15.2
- 1.15.1
- 1.15
- 1.14.4
- 1.14.3
- 1.14.2
- 1.14.1
- 1.14
- 1.13.2
- 1.13.1
- 1.13
- 1.12.2
- 1.12.1
- 1.12
- 1.11.2
- 1.11.1
- 1.11
- 1.10.2
- 1.10.1
- 1.10
- 1.9.4
- 1.9.3
- 1.9.2
- 1.9.1
- 1.9
- 1.8.9
- 1.8.8
- 1.8.7
- 1.8.6
- 1.8.5
- 1.8.4
- 1.8.3
- 1.8.2
- 1.8.1
- 1.8
- 1.7.10
- 1.7.9
- 1.7.8
- 1.7.7
- 1.7.6
- 1.7.5
- 1.7.4
- 1.7.2
- 1.7
- 1.6.4
- 1.6.2
Features
Over 38 new features are available in Chocapic13’s Shaders to enhance your gaming experience.
📊 Performance Impacts
Decrease in performance can vary from device to device, driver version, and many other factors, you should test yourself on your machine for the best result.
-
- None
- No performance decreases
-
- Small
- ~5%
-
- Medium
- ~10%
-
- High
- ~25%
-
- Extreme
- +50%
-
- Ambient OcclusionMedium
- Simulating how light interacts with objects and surfaces.
-
- Atmospheric SkySmall
- Simulates realistic atmospheric scattering.
-
- BloomSmall
- Enhance the game's lighting and create a more realistic and immersive visual experience
-
- BlurSmall
- Simulate how fast-moving objects appear to blur in a photograph or video.
-
- CausticHigh
- Simulating the way light is refracted and reflected by the water's surface
-
- CinematicExtreme
- Create more cinematic and visually-stunning scenes in the game.
-
- CustomizationNone
- Customize various aspects of the game's visual effects.
-
- Depth of FieldMedium
- Making objects closer to the camera appear sharp and in focus, while objects farther away appear out of focus and blurry.
-
- HDRMedium
- Enhance the lighting and color in the game.
-
- Lens FlareSmall
- Simulating the way light scatters and reflects inside a camera lens.
-
- LightMedium
- Enhance the game's overall visual quality.
-
- Motion BlurHigh
- Simulates the way that fast-moving objects appear to blur in the real world.
-
- Moving CloudsMedium
- Simulates the movement of clouds across the sky and can be used to create the appearance of a dynamic and ever-changing sky
-
- Parallax WaterMedium
- Enhances the realism of water by simulating the parallax effect.
-
- Photorealistic SkyboxesMedium
- Replacing the in-game sky with high-resolution, realistic images of the sky.
-
- POMHigh
- Realism of textures by simulating the way light interacts with surfaces.
-
- Ray-Traced ReflectionsExtreme
- Simulating how light behaves in the real world.
-
- Realistic NightskyMedium
- More realistic and immersive night sky.
-
- Realistic RainMedium
- More natural and immersive rain experience.
-
- Realistic SkyMedium
- More realistic and immersive sky experience.
-
- Realistic WaterHigh
- More realistic and immersive water experience.
-
- ShadowsSmall
- Simulate how light is blocked and scattered by objects in the environment.
-
- Sun RaysMedium
- Simulate the appearance of sunlight streaming through trees leaves, objects, clouds, or other atmospheric conditions.
-
- SunriseSmall
- More realistic and immersive sunrise experience.
-
- SunsetSmall
- More realistic and immersive sunset experience.
-
- TAAMedium
- Smooth out jagged edges and reduce the "stair-stepping" effect that can occur when rendering graphics.
-
- Tone MappingSmall
- Adjusting the brightness, contrast, and saturation levels.
-
- Underwater ReflectionsMedium
- Simulate the appearance of light reflecting off of the water's surface.
-
- Volumetric CloudsHigh
- Simulate the way that clouds appear to have volume and depth in the real world rather than just flat textures.
-
- Volumetric FogHigh
- Create the appearance of fog that is lit from within, casting shadows and creating a sense of depth.
-
- Volumetric LightHigh
- Simulating the scattering of light in the atmosphere and in the environment.
-
- Volumetric NetherHigh
-
- Volumetric The EndHigh
-
- Water ReflectionsMedium
- Simulating reflections on the surface of the water.
-
- Water WavesMedium
- Movement of waves on the surface of the water.
-
- Waving GrassSmall
- Simulating the way it moves and sways in the wind.
-
- Waving PlantsSmall
- Simulating the way they move and sway in the wind.
-
- Waving TreesSmall
- Adds movement to the leaves and branches of trees, making them look more alive and realistic.
Chocapic13’s Shaders allow you to change more than 149 settings to suit your needs.
| Settings |
Description |
Options |
|---|---|---|
| Atmospherics | ||
| SEA_LEVEL | Enables waving effects even on compatibility mode. [-] Can cause issues on big mod packs. |
|
| VL_SAMPLES |
| |
| Clouds | ||
| VOLUMETRIC_CLOUDS |
| |
| CLOUDS_QUALITY |
| |
| cloud_LevelOfDetail | Number of fbm noise iterations for on-screen clouds (-1 is no fbm) |
|
| cloud_ShadowLevelOfDetail | Number of fbm noise iterations for the shadowing of on-screen clouds |
|
| cloud_LevelOfDetailLQ | Number of fbm noise iterations for reflected clouds (-1 is no fbm) |
|
| cloud_ShadowLevelOfDetailLQ | Number of fbm noise iterations for the shadowing of reflected clouds (-1 is no fbm) |
|
| minRayMarchSteps | Number of ray march steps towards zenith for on-screen clouds |
|
| maxRayMarchSteps | Number of ray march steps towards horizon for on-screen clouds |
|
| minRayMarchStepsLQ | Number of ray march steps towards zenith for reflected clouds |
|
| maxRayMarchStepsLQ | Number of ray march steps towards horizon for reflected clouds |
|
| cloudDensity | Cloud Density, 0.04-0.06 is around irl values |
|
| cloudCoverage | Cloud coverage |
|
| fbmAmount | Amount of noise added to the cloud shape |
|
| fbmPower1 | Higher values increases high frequency details of the cloud shape |
|
| fbmPower2 | Lower values increases high frequency details of the cloud shape |
|
| cloudMieG | Values close to 1 will create a strong peak of luminance around the sun and weak elsewhere, values close to 0 means uniform fog. |
|
| cloudMieG2 | Multiple scattering approximation. Values close to 1 will create a strong peak of luminance around the sun and weak elsewhere, values close to 0 means uniform fog. |
|
| cloudMie2Multiplier | Multiplier for multiple scattering approximation |
|
| Fog Color | ||
| fog_mieg1 |
| |
| fog_mieg2 |
| |
| fog_coefficientRayleighR |
| |
| fog_coefficientRayleighG |
| |
| fog_coefficientRayleighB |
| |
| fog_coefficientMieR |
| |
| fog_coefficientMieG |
| |
| fog_coefficientMieB |
| |
| Fog Densities | ||
| FOG_RAIN_MULTIPLIER | Influence of rain on fog amount |
|
| FOG_TOD_MULTIPLIER | Influence of time of day on fog amount |
|
| CLOUDY_FOG_AMOUNT |
| |
| BASE_FOG_AMOUNT | Base fog amount amount (does not change the "cloudy" fog) |
|
| ATMOSPHERIC_DENSITY |
| |
| Underwater_Fog_Density |
| |
| BLOOMY_FOG |
| |
| VL_RENDER_RESOLUTION | Reduces the resolution at which volumetric fog is computed. (0.5 - half of default resolution) |
|
| VL_Clouds_Shadows | Casts shadows from clouds on VL (slow) |
|
| TAA Options | ||
| TAA | Temporal anti-aliasing |
|
| BLEND_FACTOR | Higher values > more flickering but sharper image, lower values > less flickering but the image will be blurrier |
|
| CLOSEST_VELOCITY | Improves edge quality in motion at the cost of performance |
|
| NO_CLIP | /Removes all anti-ghosting techniques used and creates a sharp image (good for still screenshots) |
|
| TAA_UPSCALING | Lowers render resolution and uses TAA to combine several lower resolution images (greatly improves performance). USE THIS INSTEAD OF SHADER RENDER QUALITY OPTION IF YOU WANT TO INCREASE FPS (Leave it to 1). IF YOU WANT TO INCREASE QUALITY DISABLE THIS AND INCREASE SHADER RENDER QUALITY |
|
| RENDER_SCALE_X | X axis render resolution multiplier |
|
| RENDER_SCALE_Y | Y axis render resolution multiplier |
|
| Lighting | ||
| Torch | ||
| TORCH_R |
| |
| TORCH_G |
| |
| TORCH_B |
| |
| TORCH_AMOUNT |
| |
| Emissive_Strength |
| |
| Sky | ||
| Sky Coefficients | ||
| Sky_Brightness |
| |
| sky_mieg |
| |
| sky_coefficientRayleighR |
| |
| sky_coefficientRayleighG |
| |
| sky_coefficientRayleighB |
| |
| sky_coefficientMieR |
| |
| sky_coefficientMieG |
| |
| sky_coefficientMieB |
| |
| Sun and Moon Colors | ||
| sunColorR |
| |
| sunColorG |
| |
| sunColorB |
| |
| sun_illuminance |
| |
| moonColorR |
| |
| moonColorG |
| |
| moonColorB |
| |
| moon_illuminance |
| |
| sunPathRotation |
| |
| Ambient | ||
| MIN_LIGHT_AMOUNT |
| |
| SEPARATE_AO |
| |
| ambientOcclusionLevel |
| |
| Ambient_Mult |
| |
| Camera | ||
| EXPOSURE_MULTIPLIER |
| |
| Exposure_Speed |
| |
| AUTO_EXPOSURE | Highly recommended to keep it on unless you want to take screenshots |
|
| Manual_exposure_value |
| |
| BLOOM_STRENGTH |
| |
| BLOOM_QUALITY | Reduces the resolution at which bloom is computed. (0.5 - half of default resolution) |
|
| FinalR |
| |
| FinalG |
| |
| FinalB |
| |
| Tonemapping | ||
| TONEMAP | Tonemapping operator |
|
| USE_ACES_COLORSPACE_APPROXIMATION | Do the tonemap in another colorspace |
|
| SATURATION | Negative values desaturates colors, Positive values saturates color, 0 is no change |
|
| CROSSTALK | Desaturates bright colors and preserves saturation in darker areas (inverted if negative). Helps avoiding almsost fluorescent colors |
|
| Depth Of Field | ||
| DOF | Enable depth of field (blur on non-focused objects) |
|
| HQ_DOF | Slow! Forces circular bokeh! Uses 4 times more samples with noise in order to remove sampling artifacts at great blur sizes. |
|
| HEXAGONAL_BOKEH | Disabled: circular blur shape. Enabled: hexagonal blur shape |
|
| AUTOFOCUS |
| |
| focal | Centimeters |
|
| aperture | Centimeters |
|
| MANUAL_FOCUS | If autofocus is turned off, sets the focus point (meters) |
|
| FAR_BLUR_ONLY | Removes DoF on objects closer to the camera than the focus point |
|
| DoF_Adaptation_Speed |
| |
| Purkinje Effect | ||
| Purkinje_strength | Simulates how the eye is unable to see colors at low light intensities. 0 - No purkinje effect at low exposures |
|
| Purkinje_R |
| |
| Purkinje_G |
| |
| Purkinje_B |
| |
| Purkinje_Multiplier | How much the purkinje effect increases brightness |
|
| Shading | ||
| Texture_MipMap_Bias | Uses a another mip level for textures. When reduced will increase texture detail but may induce a lot of shimmering. |
|
| DISABLE_ALPHA_MIPMAPS | Disables mipmaps on the transparency of alpha-tested things like foliage, may cost a few fps in some cases |
|
| Shadows | ||
| Filtering | ||
| Variable_Penumbra_Shadows | Makes the shadows more blurry the more distant they are to objects (costs fps) |
|
| VPS_Search_Samples | The number of samples used to find occluders |
|
| Min_Shadow_Filter_Radius | If Variable_Penumbra_Shadows are not used, will be used as shadow filter size. |
|
| Max_Shadow_Filter_Radius | Not used if Variable_Penumbra_Shadows are not used. Will cause issues at too high values |
|
| Max_Filter_Depth | Distance to the occluder at which the shadow filter size reaches its maximum. |
|
| SHADOW_FILTER_SAMPLE_COUNT | Number of samples used to filter the actual shadows |
|
| SSGI Parameters | ||
| SSGI |
| |
| RAY_COUNT |
| |
| STEPS |
| |
| STEP_LENGTH |
| |
| SCREENSPACE_CONTACT_SHADOWS | Raymarch towards the sun in screen-space, in order to cast shadows outside of the shadow map or at the contact of objects. Can get really expensive at high resolutions. |
|
| shadowMapResolution | Will probably crash at 16384 |
|
| CLOUDS_SHADOWS |
| |
| CLOUDS_SHADOWS_STRENGTH |
| |
| shadowDistanceRenderMul | Can help to increase shadow draw distance when set to -1.0, at the cost of performance |
|
| shadowDistance | Not linear at all when shadowDistanceRenderMul is set to -1.0, 175.0 is enough for 40 render distance |
|
| SHADOW_FRUSTRUM_CULLING | If enabled, removes most of the blocks during shadow rendering that would not cast shadows on the player field of view. Improves performance but can be sometimes incorrect and causes flickering shadows on distant occluders |
|
| CAVE_LIGHT_LEAK_FIX | Hackish way to remove sunlight incorrectly leaking into the caves. Can inacurrately create shadows in some places |
|
| SHADOW_DISABLE_ALPHA_MIPMAPS | Disables mipmaps on the transparency of alpha-tested things like foliage, may cost a few fps in some cases |
|
| Stochastic_Transparent_Shadows | Highly recommanded to enable SHADOW_DISABLE_ALPHA_MIPMAPS with it. Uses noise to simulate transparent objects' shadows (not colored). It is also recommended to increase Min_Shadow_Filter_Radius with this. |
|
| POM | ||
| POM |
| |
| Depth_Write_POM | POM adjusts the actual position, so screen space shadows can cast shadows on POM |
|
| POM_DEPTH | Increase to increase POM strength |
|
| MAX_ITERATIONS | Improves quality at grazing angles (reduces performance) |
|
| MAX_DIST | Increases distance at which POM is calculated |
|
| AutoGeneratePOMTextures | Can generate POM on any texturepack (may look weird in some cases) |
|
| BICUBIC_UPSCALING | Provides a better interpolation when using a render quality different of 1.0, slower |
|
| CONTRAST_ADAPTATIVE_SHARPENING |
| |
| SHARPENING |
| |
| Wavy Stuff | ||
| WAVY_STRENGTH |
| |
| WAVY_SPEED |
| |
| WAVY_PLANTS |
| |
| Water and Transparencies | ||
| Dirt_Amount | How much dirt there is in water |
|
| Dirt_Mie_Phase | Values close to 1 will create a strong peak around the sun and weak elsewhere, values close to 0 means uniform fog. |
|
| rayMarchSampleCount | Number of samples used for the volumetric underwater fog |
|
| SCREENSPACE_REFLECTIONS | It can be really expensive at high resolutions/render quality, especially on ice |
|
| SSR_STEPS |
| |
| USE_QUARTER_RES_DEPTH | Uses a quarter resolution depth buffer to raymarch screen space reflections, improves performance but may introduce artifacts |
|
| SUN_MICROFACET_SPECULAR | If enabled will use realistic rough microfacet model, else will just reflect the sun. No performance impact. |
|
| Water_Top_Layer | When under water and when lightMapDepthEstimate is turned off. Assumes the top layer of the water is at this height (minecraft y position) for underwater lighting calculations. If not set correctly, underwater will look incorrect. |
|
| lightMapDepthEstimation | If turned off, will use the player eye position and the Water_Top_Layer option to determine how deep the player is in water. It can look wrong in a lot of cases, and using minecraft light levels instead improves this but will look worse in oceans, lakes and rivers. |
|
| Advanced | ||
| Dirt_Scatter_R | How much dirt diffuses red |
|
| Dirt_Scatter_G | How much dirt diffuses green |
|
| Dirt_Scatter_B | How much dirt diffuses blue |
|
| Dirt_Absorb_R | How much dirt absorbs red |
|
| Dirt_Absorb_G | How much dirt absorbs green |
|
| Dirt_Absorb_B | How much dirt absorbs blue |
|
| Water_Absorb_R | How much water absorbs red |
|
| Water_Absorb_G | How much water absorbs green |
|
| Water_Absorb_B | How much water absorbs blue |
|
Comparison
Our comparison tool makes it easy to compare Chocapic13’s Shaders with Minecraft vanilla and other shader packs.


How To Install Chocapic13’s Shaders
- Support Forge / Vanilla
- Extra features
- Good performance
- Support Fabric / Quilt
- Better performance, depend on your hardware
Optifine Installation Guide
Note
Your device must have Java installed to run the Forge and Optifine installers.
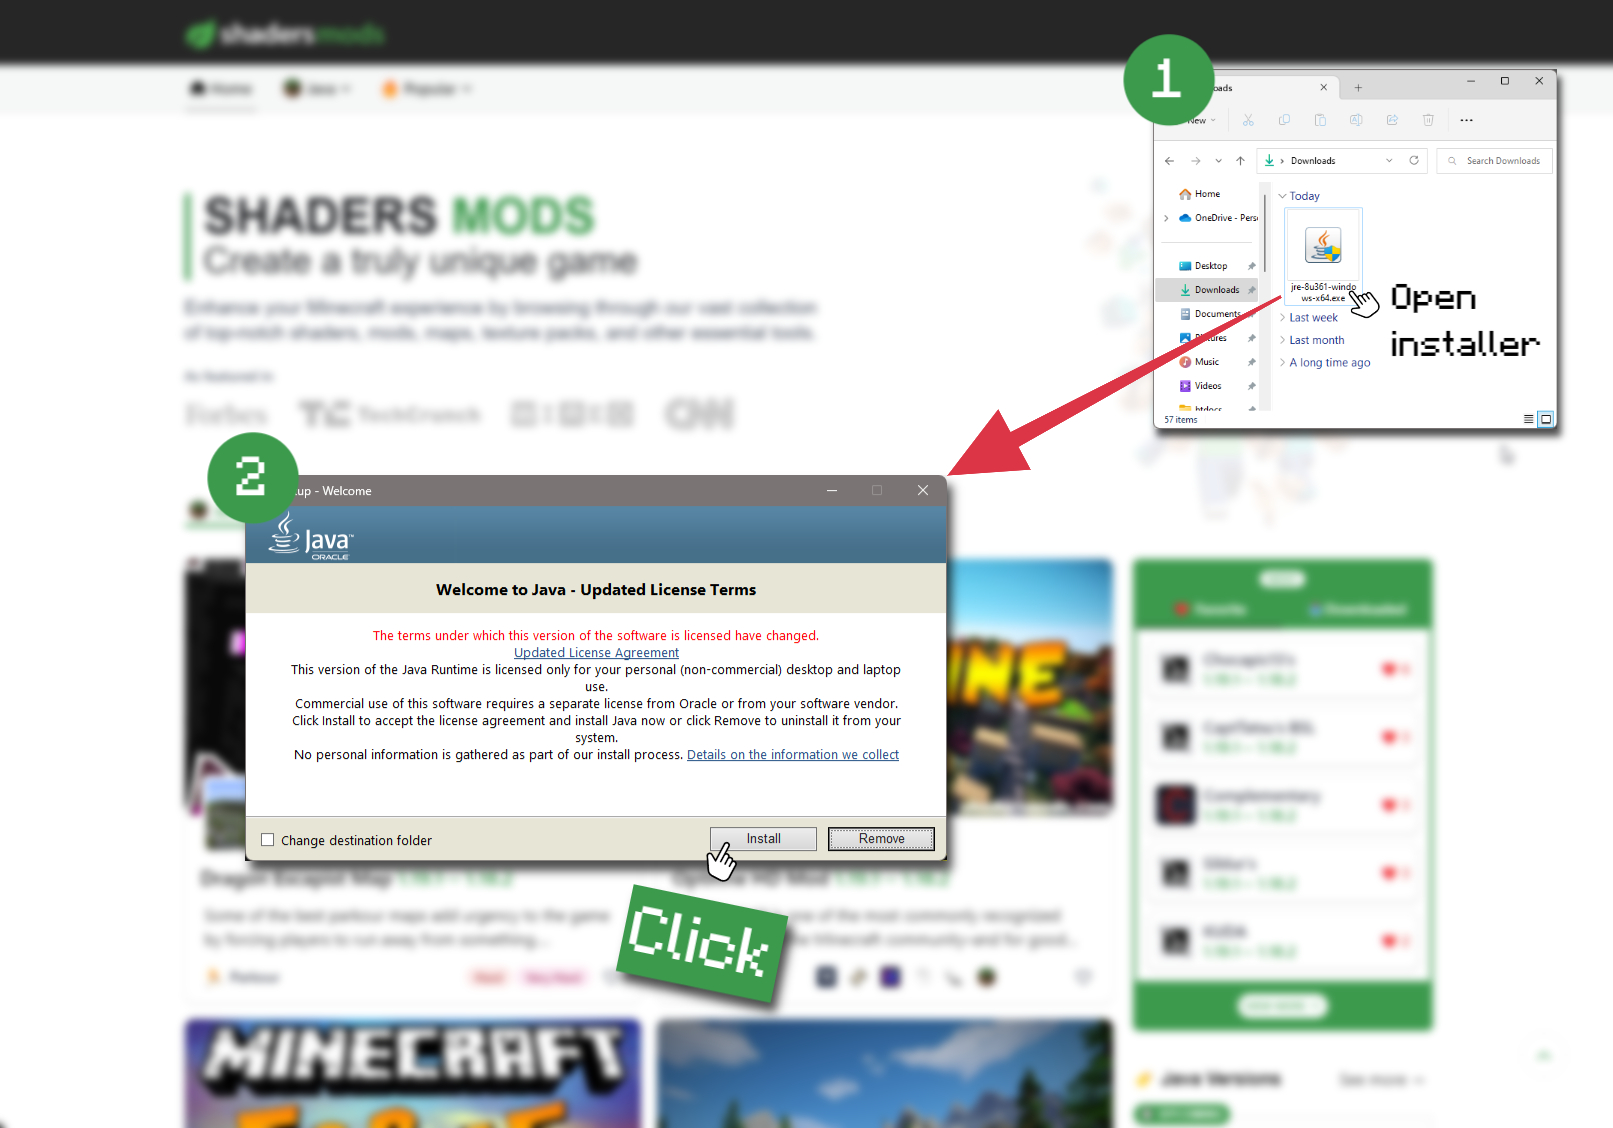
Quick Java Installation Guide
-
Download Java
Download the Java installer from the official website here.

-
Open Installer
Once you have downloaded the file, run it and click the Install button.
How to install Chocapic13’s Shaders with Optifine?
-
Download Optifine
Get the latest version of Optifine for your Minecraft version.
Download Optifine -
Install Optifine
Run the Optifine installer and follow the on-screen instructions to complete the installation.

-
Download Chocapic13’s Shaders
Go to the download section and get shaders zip file. Unzip the file if necessary, as some shader developers may bundle multiple shader versions in one zip file.
-
Launch Minecraft
Start the Minecraft launcher and make sure you have the Optifine profile selected.

-
In-game Shaders menu
Go to Options > Video Settings > Shaders to access the shaders menu.
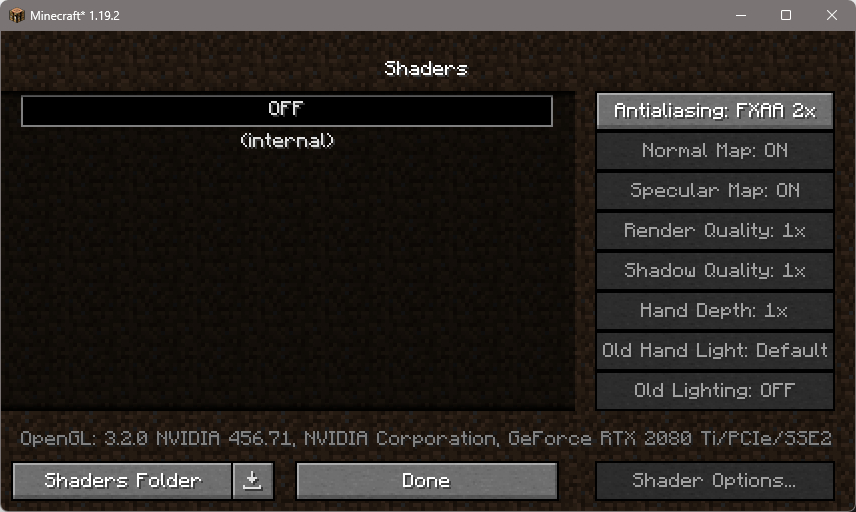
-
Open shaderpacks folder
Click on the "Shaders Folder" button to open the folder where shaders are stored, so you can add or remove shaders as desired.

-
Install Chocapic13’s Shaders
Copy or move the downloaded Chocapic13’s shaders zip file into the shaderpacks folder.

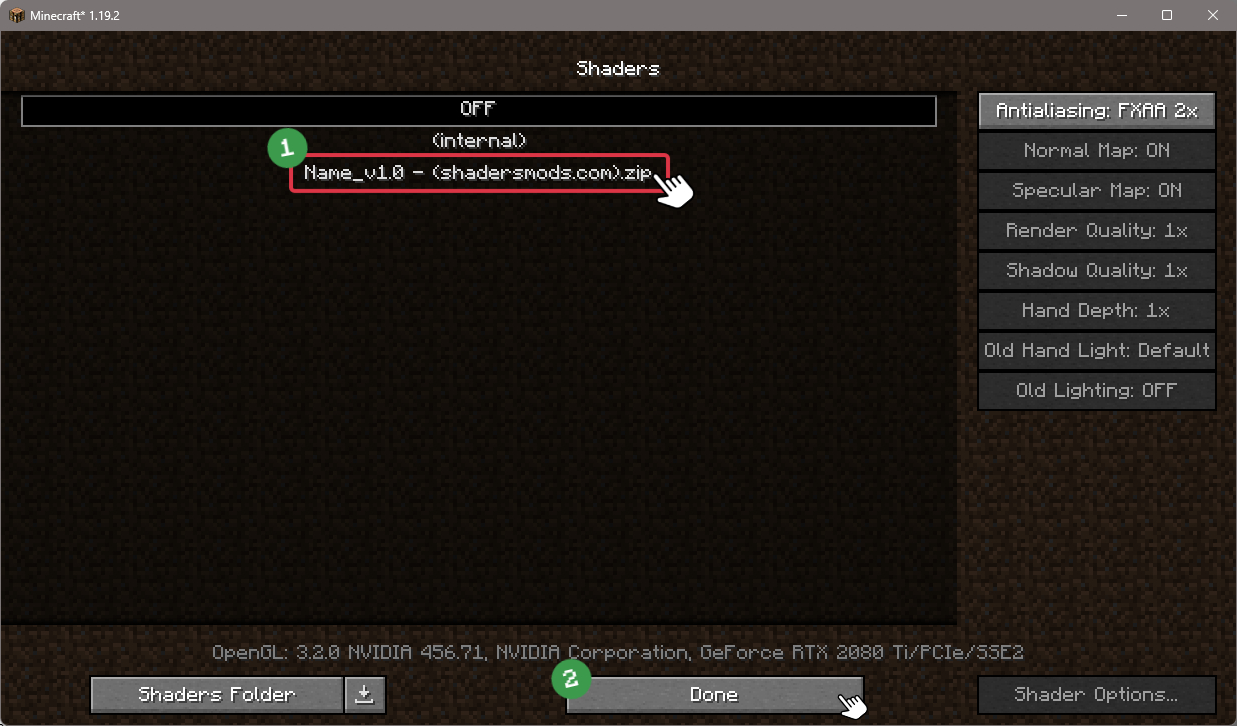
-
Select Chocapic13’s Shaders
Choose Chocapic13’s shader pack from the list of available shaders in the options menu.
How to install Chocapic13’s Shaders with Forge and Optifine?
Quick Installation Guide
-
Install Forge
Obtain the latest version of Forge that is compatible with your Minecraft version.
Download Minecraft Forge -
Launch Minecraft
Start the Minecraft launcher and select the version of Minecraft you want to install Forge on. Run the game once by clicking on the "Play" button to create necessary files for Forge.

-
Install Forge Client
Double-click on the Forge installer jar file and choose "Install Client" in the window that appears.

-
Install Optifine
Download the Optifine jar file after Forge is installed. Move the Optifine jar file to the mods folder in the .minecraft directory.
Download Optifine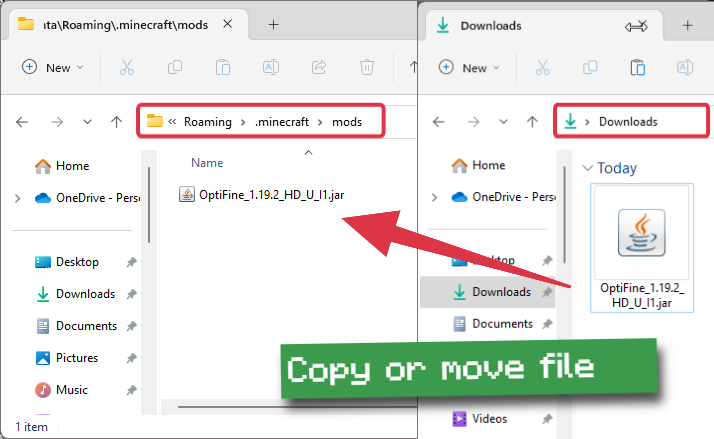
-
Launch Forge Profile
Launch Minecraft using the "Forge" profile, Optifine will be automatically loaded along with Forge.

-
Install Chocapic13's Shaders
Now the installation is the same as from the above Optifine instructions, just follow the steps starting from step 5.
Iris Installation Guide
Note
Your device must have Java installed to run the Iris installer.
Quick Java Installation Guide
-
Download Java
Download the Java installer from the official website here.
-
Open Installer
Once you have downloaded the file, run it and click the Install button.
How to install Chocapic13’s Shaders with Iris?
-
Download Iris Shaders
Find the latest version of the Iris Shaders installer and download it.
Download Iris Installer -
Install Iris Shaders
Open the downloaded jar file, and choose the preferred game version and installation type.
⯈ Iris Install:
If you don't plan on using any other mods with Iris, choose this option.⯈ Fabric Install:
Choose this option if you want to use Iris with Fabric and other mods. The Iris jar files will be copied to the mods folder within the .minecraft directory.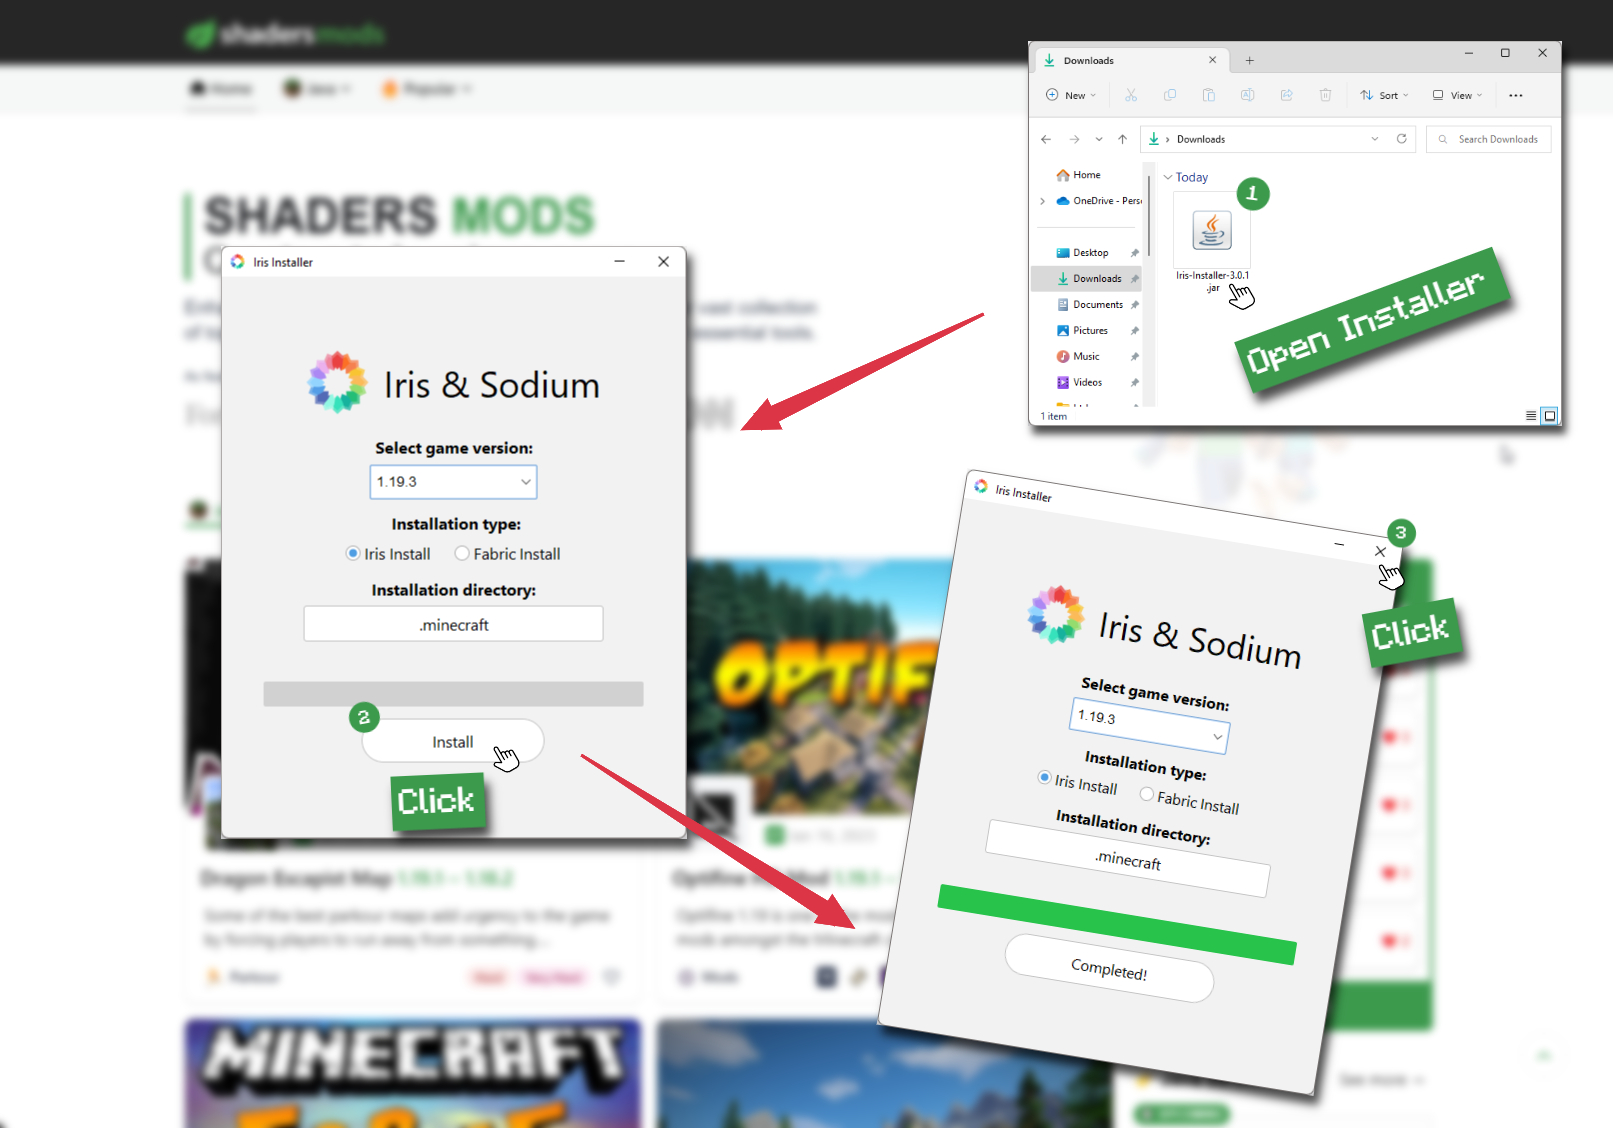
-
Start Installation
After selecting the game version and installation type, click the "Install" button to start the installation process.
-
Launch Minecraft
Start the Minecraft launcher and make sure you have the Iris profile selected.
Note
Select the Fabric profile if you opt for the Fabric installation type.
-
In-game Shader Menu
Open the Minecraft game and go to Options > Video Settings > Shader Packs to access the shaders menu.
Tip
To simplify the process, simply drag and drop the shader ZIP file directly into the Minecraft window, bypassing the next two steps.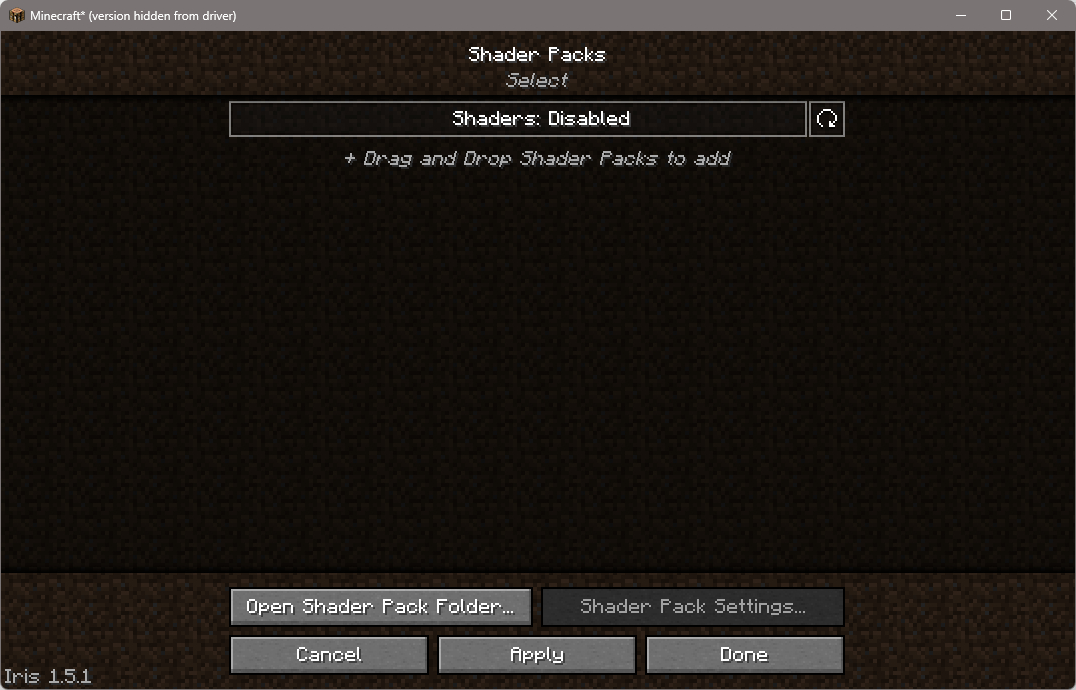
-
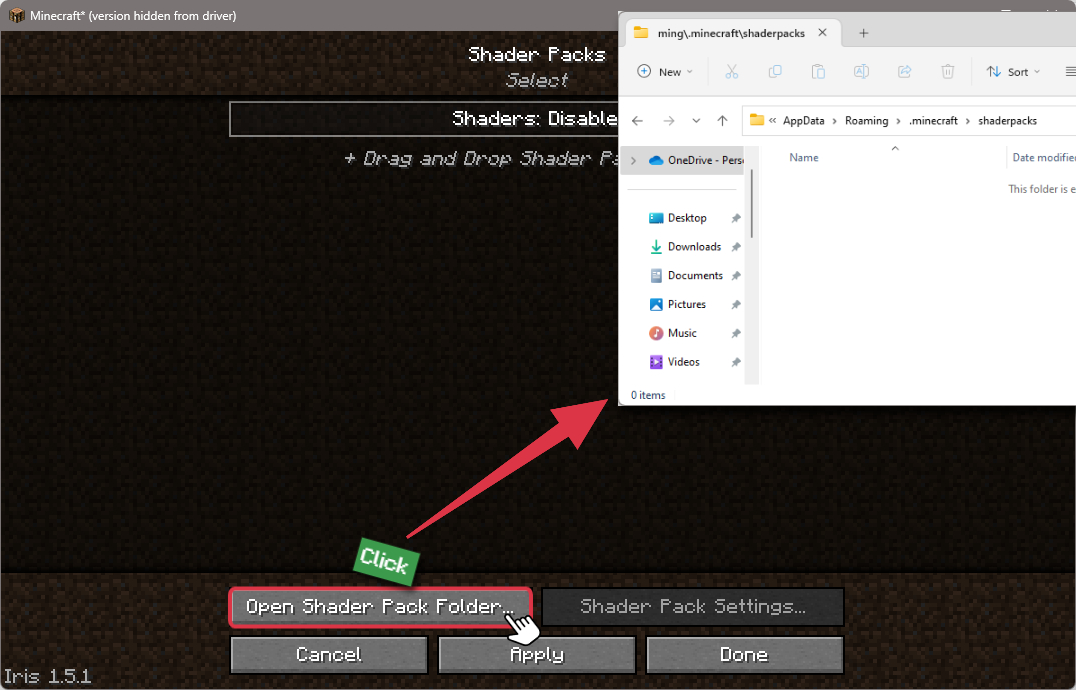
Open shaderpacks folder
Click on the "Open Shader Pack Folder" button to access the folder where shaders are stored.
-
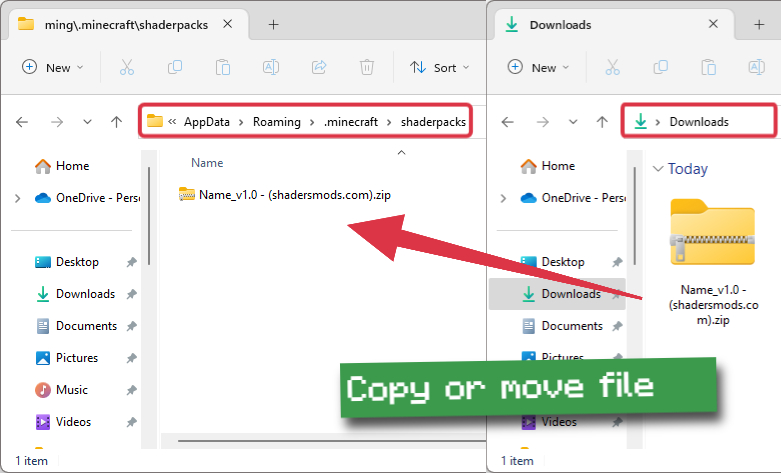
Install Chocapic13’s Shaders
Copy or move the shaders zip file into the shaderpacks folder.
-
Select Chocapic13’s Shaders
Choose installed shader pack from the list of available shaders in the options menu and click the "Apply" or "Done" button to select it.
Tip
When the shader pack is selected, its name will be changed to yellow.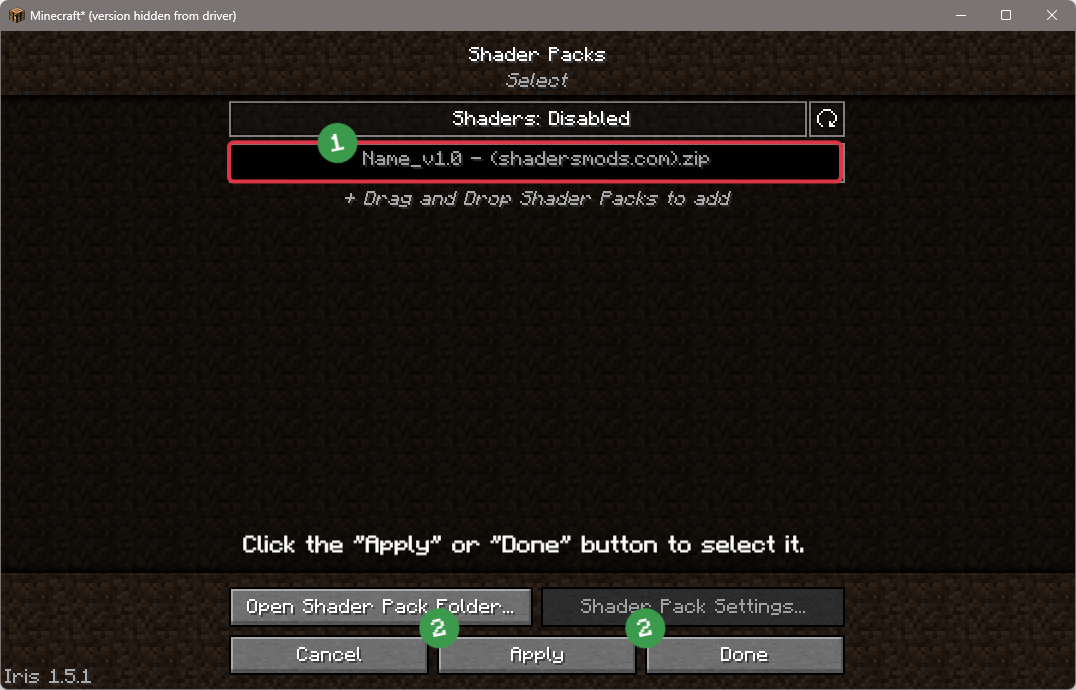
Important Notes
- Ensure you have the latest graphics driver installed.
- A minimum resolution of 500 pixels is required for optimal performance.
- Use the shader options to adjust shadow resolution and leave shadow quality at 1.00x in the Optifine menu.
- Enable the sky in Optifine settings.
- Set “Old lighting” to Off or Default.
- Custom resource pack skies are typically not supported. Compatibility with mods cannot be guaranteed.
- Overlay textures may display incorrectly while underwater.
- Chocapic13’s V6 is compatible with all Minecraft versions. However, the V7, V8, and V9 versions require Optifine for Minecraft 1.12 or higher.
- Chocapic13’s v9 and v9.1 have been tested and work smoothly with the latest version of the Iris Shaders mod.
Screenshot Mode
The purpose of Chocapic13 V9 Screenshot mode is solely for capturing screenshots.
When the camera remains still, the image will gradually build up samples over multiple frames to result in a sharp, anti-aliased, and noise-free picture. This process may take a few minutes in some cases.
It utilizes Full-Screen Space Path Tracing for capturing sky, bounced sunlight, torchlight, and other emissive sources. Although the results are visually stunning, anything not on the screen or obscured by another object will not be considered.
Please note that some elements, such as transparency, are not fully functional.
The quality options have been set to the highest level to ensure the best possible outcome.
Additionally, it offers the following unique features:
- Depth Write Parallax Occlusion allows the Screen Space Tracing to consider the depth of an object.
- Improved Emissive Color for a more vivid representation of emissive sources.
📥 Chocapic13’s Shaders — Download
Something You Should Know
- Our links are only from the official developer, so you can be sure they are secure.
- No modifications or edits are made to the files.
Chocapic13' V9.1:
Only an Extreme version is available.
Chocapic13' V9:
Various versions are available, including Extreme, Ultra, High, Medium, and Low.
Chocapic13' Old versions:
Various versions are available, including Extreme, Ultra, High, Medium, Low, Lite, and Toaster.
Comments (184)
I have an Intel MacBook Pro. Does it support it!?
Specs:
8GB Ram
Intel Iris Plus Graphics 645 1536 MB
i5 Processor
2019 Model
blinding light in sky, help
enchanted items becomes dark in V6 fix the bug
why when my back is to the sun, there are twinkling shadows in front of me?
to make the blinding clouds away turn off the default clouds in the settings under details
i had the same cloud issue but i found a fix. go to options > video settings > details then turn clouds off
Yo guys. I have an question for you. How you can fix abnormally bright sky? I just cant see a thing cuz it is really bright.
Good
I CANT SEE ANyTHING THE CLOUDS ARE BLINDING MY EYES