


UShader Shaders 1.19.4 → 1.18.2
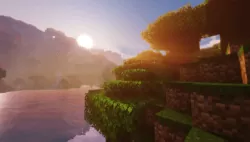
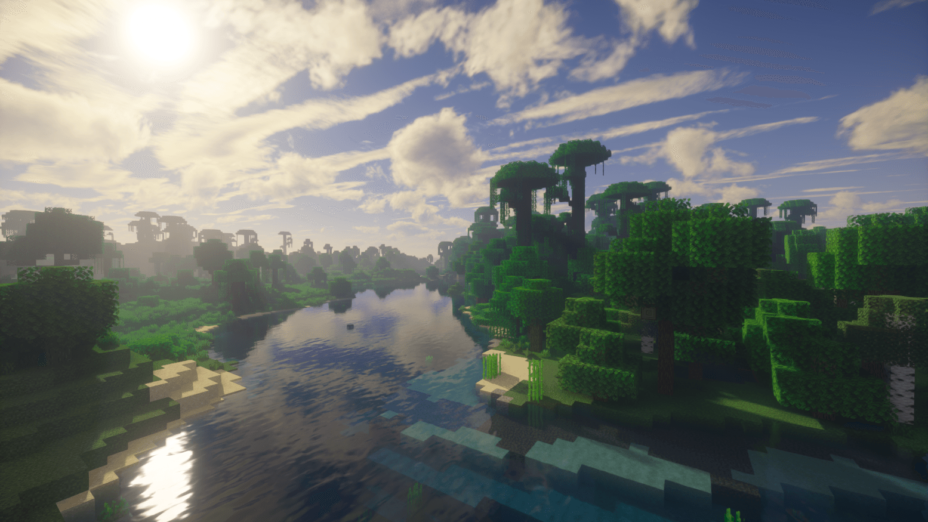
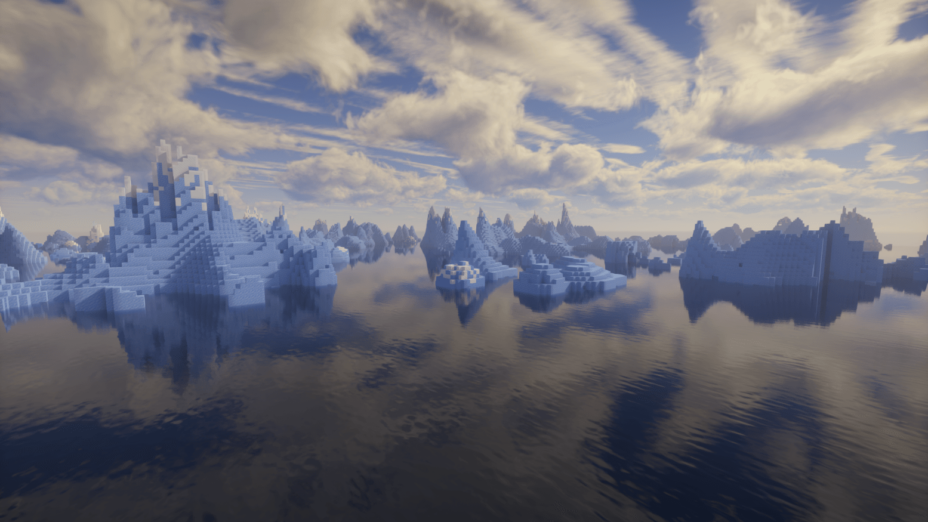
UShader is a stunning shaderpack inspired by SEUS v10.1, offering impressive visuals and unique effects.
| Developer | 👤RRe36 |
|---|---|
| Style | 🔅Semi-Realistic |
| Support GPUs | |
| Loaders | |
| Performance Impact | High |
| Settings | 206 |
| Presets | 🛠️ Performance+2 |
| Features | Realistic Sky+40 |
| Created | Feb 21, 2020 |
| Updated | Jan 2, 2023 |
| Stats |
|
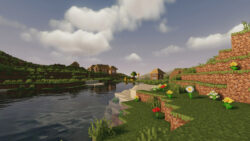
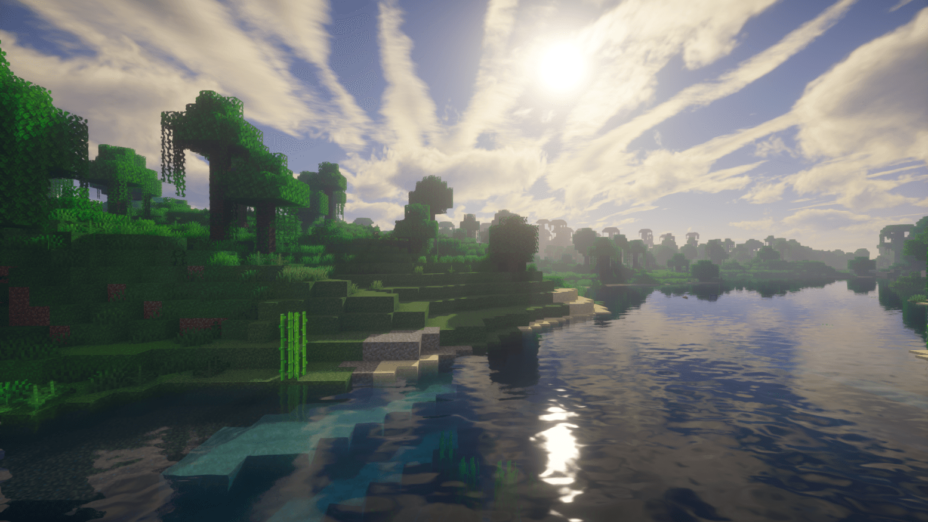
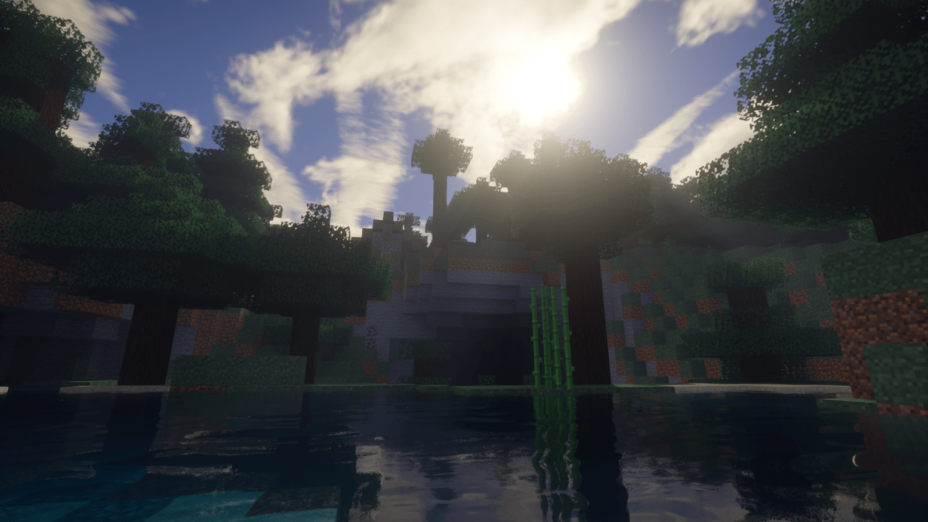
The UShader pack was a private project for a long time. Based on SEUS v10, UShader is like a special set of updates to the original shader pack, a few optimizations, boosts, and other extra additions. The feature list, like dynamic shadows, wind, and blur effects, is standard for many shader packs. They’re the same features that are in SEUS, too, though they are sharper, brighter, and bolder in UShader. This updated pack runs better than the original, giving better performance along with better visuals. It’s a direct upgrade really. The only issue is since the last update was back in 2020, there will be compatibility issues for this shader pack.
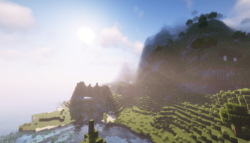
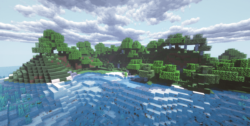
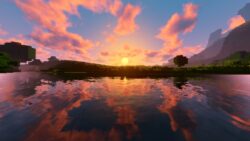
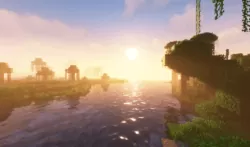
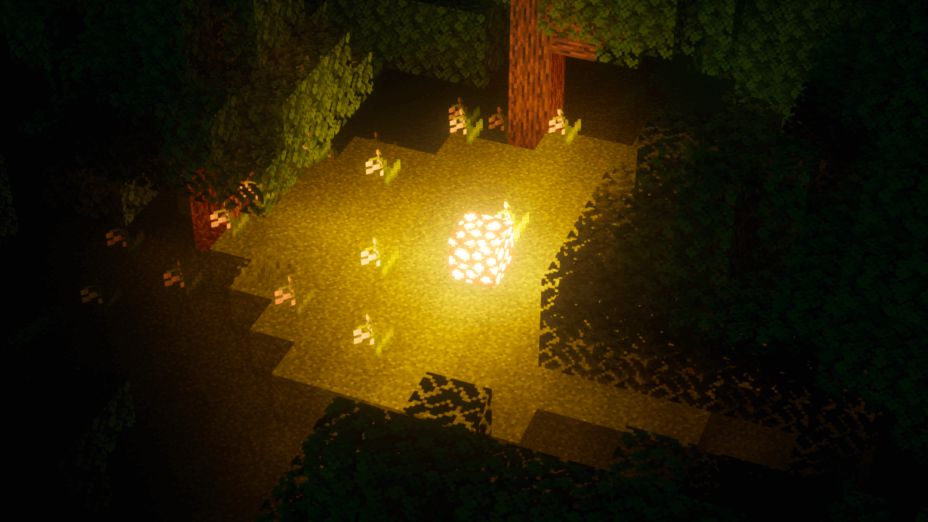
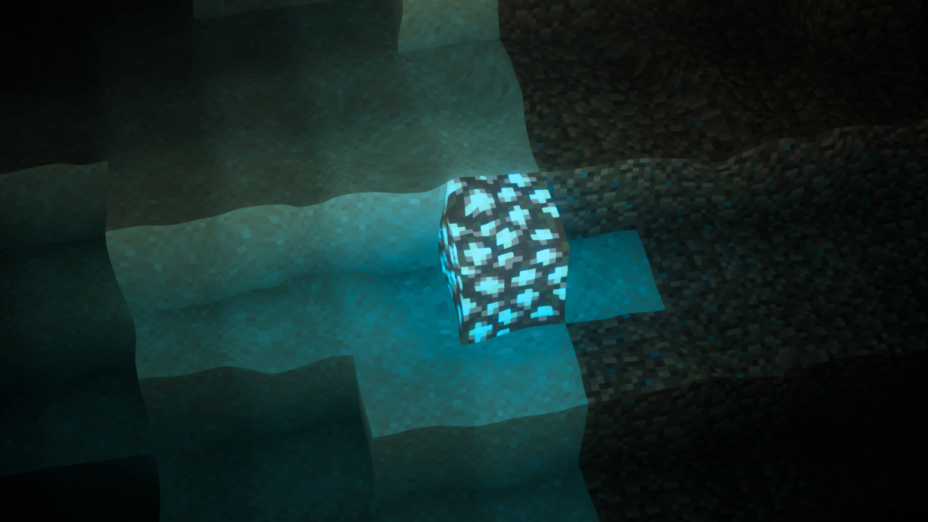
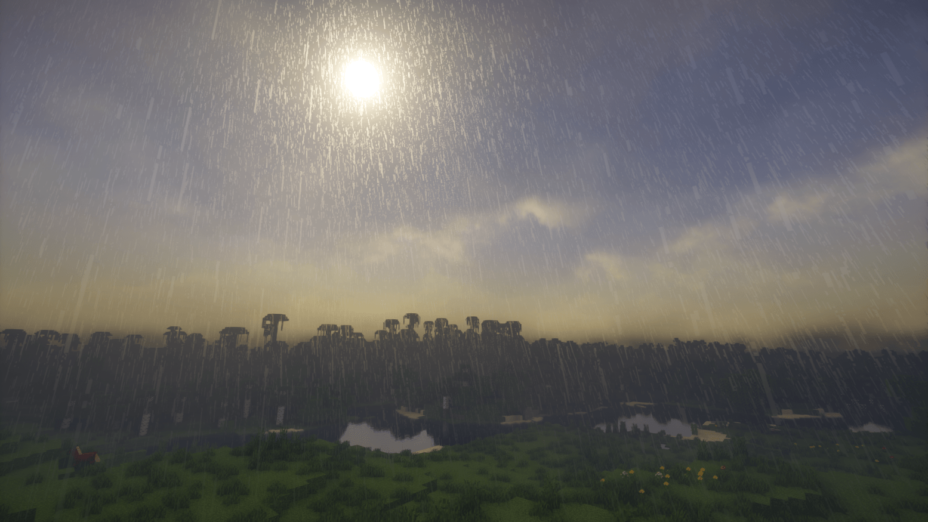
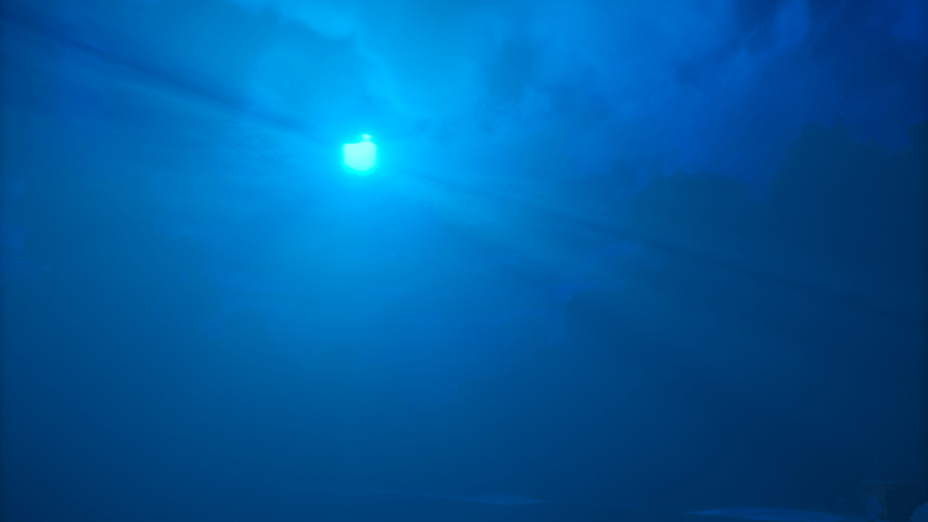
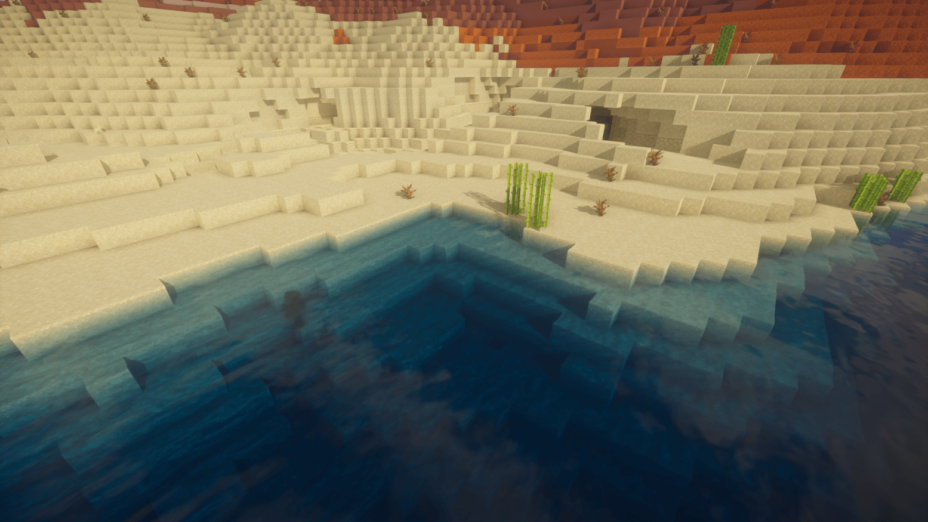
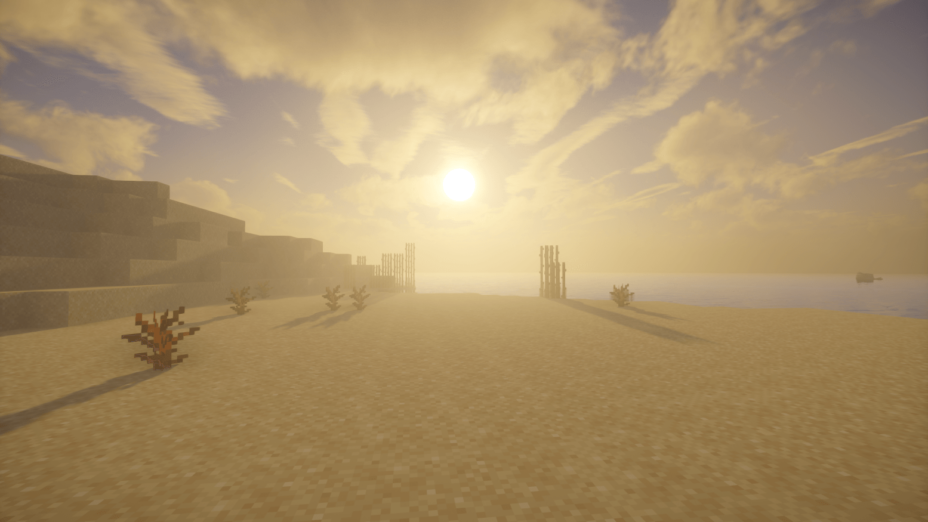
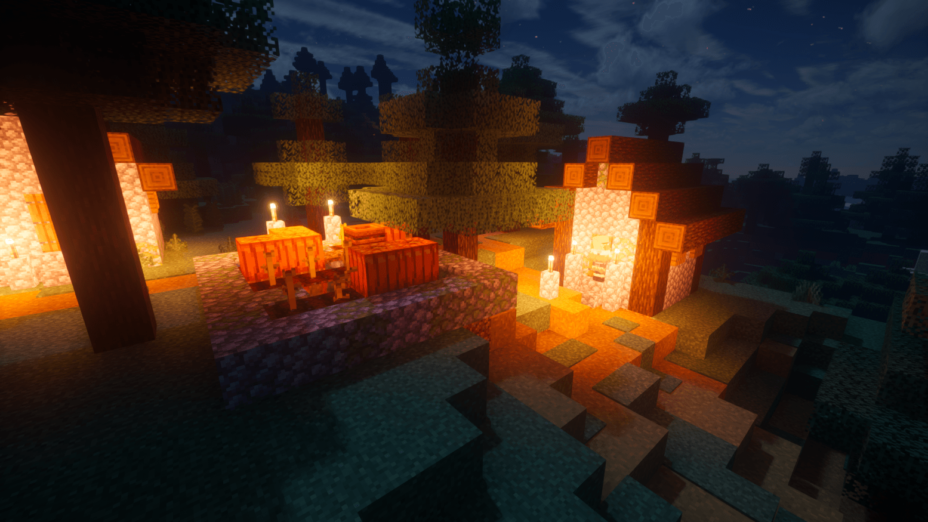
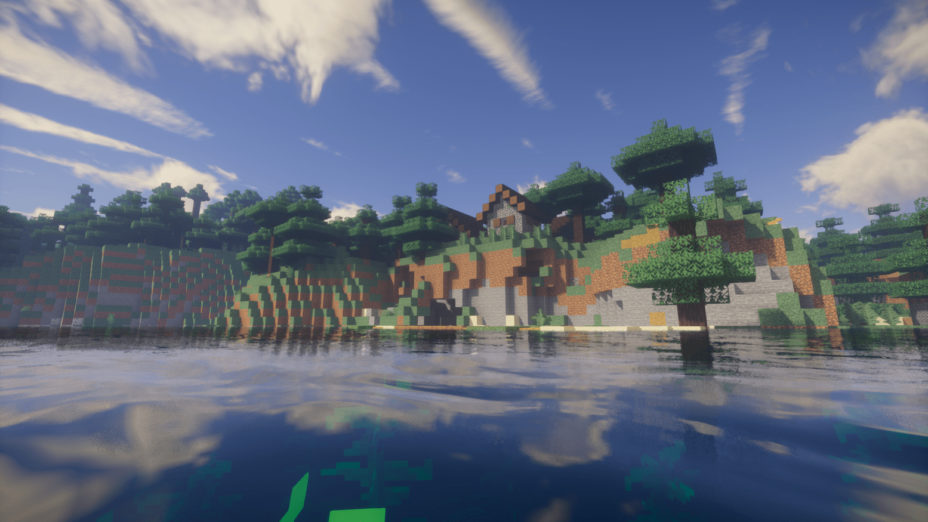
UShader Shaders has some of the best-looking twilight backdrops in a Minecraft shader pack. There are vibrant purples that would never appear in the base game, shades of grey rather than just bright or dark black, and improved liquids like water and lava. The flow for both looks more natural, and lava, already used as a light source, really pops with the lighting upgrades. It’s brighter than ever. Besides the age of the shader pack, those fog effects won’t be for everyone. SEUS v10 never contained volumetric fog or clouds, so they look a little out of place for anyone used to the base pack. On very foggy days, it’s almost impossible to see more than a chunk or two away, even at great heights where fog should settle and allow better sight.
- 1.19.4
- 1.19.3
- 1.19.2
- 1.19.1
- 1.19
- 1.18.2
- 1.18.1
- 1.18
- 1.17.1
- 1.17
- 1.16.5
- 1.16.4
- 1.16.3
- 1.16.2
- 1.16.1
- 1.16
- 1.15.2
- 1.15.1
- 1.15
- 1.14.4
- 1.14.3
- 1.14.2
- 1.14.1
- 1.14
- 1.13.2
- 1.13.1
- 1.13
- 1.12.2
- 1.12.1
- 1.12
Features
Over 40 new features are available in UShader Shaders to enhance your gaming experience.
📊 Performance Impacts
Decrease in performance can vary from device to device, driver version, and many other factors, you should test yourself on your machine for the best result.
-
- None
- No performance decreases
-
- Small
- ~5%
-
- Medium
- ~10%
-
- High
- ~25%
-
- Extreme
- +50%
-
- Ambient OcclusionMedium
- Simulating how light interacts with objects and surfaces.
-
- Atmospheric SkySmall
- Simulates realistic atmospheric scattering.
-
- BloomSmall
- Enhance the game's lighting and create a more realistic and immersive visual experience
-
- BlurSmall
- Simulate how fast-moving objects appear to blur in a photograph or video.
-
- CausticHigh
- Simulating the way light is refracted and reflected by the water's surface
-
- CustomizationNone
- Customize various aspects of the game's visual effects.
-
- DarkNone
- Enjoy exploring dark and mysterious environments, such as caves or ruins.
-
- Depth of FieldMedium
- Making objects closer to the camera appear sharp and in focus, while objects farther away appear out of focus and blurry.
-
- Dirty LensSmall
- Simulates the effect of a dirty or scratched camera lens.
-
- LightMedium
- Enhance the game's overall visual quality.
-
- Motion BlurHigh
- Simulates the way that fast-moving objects appear to blur in the real world.
-
- Moving CloudsMedium
- Simulates the movement of clouds across the sky and can be used to create the appearance of a dynamic and ever-changing sky
-
- Normal MapSmall
- Add depth and detail to surfaces without increasing the number of polygons.
-
- Ocean WavesHigh
- Simulating the movement of waves on the surface of the ocean.
-
- Parallax WaterMedium
- Enhances the realism of water by simulating the parallax effect.
-
- PBRHigh
- Enhances the realism of textures and materials by simulating the way light interacts with surfaces in a more physically accurate way.
-
- Photorealistic SkyboxesMedium
- Replacing the in-game sky with high-resolution, realistic images of the sky.
-
- Rain ReflectionsMedium
- Reflections during rainy weather by simulating the way light reflects off of wet surfaces.
-
- Realistic NightskyMedium
- More realistic and immersive night sky.
-
- Realistic RainMedium
- More natural and immersive rain experience.
-
- Realistic SkyMedium
- More realistic and immersive sky experience.
-
- Realistic WaterHigh
- More realistic and immersive water experience.
-
- ShadowsSmall
- Simulate how light is blocked and scattered by objects in the environment.
-
- Sun RaysMedium
- Simulate the appearance of sunlight streaming through trees leaves, objects, clouds, or other atmospheric conditions.
-
- SunriseSmall
- More realistic and immersive sunrise experience.
-
- SunsetSmall
- More realistic and immersive sunset experience.
-
- TAAMedium
- Smooth out jagged edges and reduce the "stair-stepping" effect that can occur when rendering graphics.
-
- Tone MappingSmall
- Adjusting the brightness, contrast, and saturation levels.
-
- Underwater ReflectionsMedium
- Simulate the appearance of light reflecting off of the water's surface.
-
- VignetteNone
- Darkening effect around the edges of the screen
-
- Volumetric CloudsHigh
- Simulate the way that clouds appear to have volume and depth in the real world rather than just flat textures.
-
- Volumetric FogHigh
- Create the appearance of fog that is lit from within, casting shadows and creating a sense of depth.
-
- Volumetric LightHigh
- Simulating the scattering of light in the atmosphere and in the environment.
-
- Volumetric NetherHigh
-
- Volumetric The EndHigh
-
- Water ReflectionsMedium
- Simulating reflections on the surface of the water.
-
- Water WavesMedium
- Movement of waves on the surface of the water.
-
- Waving GrassSmall
- Simulating the way it moves and sways in the wind.
-
- Waving PlantsSmall
- Simulating the way they move and sway in the wind.
-
- Waving TreesSmall
- Adds movement to the leaves and branches of trees, making them look more alive and realistic.
There are 3 profiles pre-built into UShader Shaders to adjust the level of intensity of these effects.
| Profiles |
Performance |
Default |
Quality |
|---|---|---|---|
Target Resolution | |||
Cloud Shadows | |||
Enabled | |||
Volumetric Smoke | |||
Volumetric Fog | |||
TAAU Ratio | |||
RTAO | |||
Shadowmap Resolution | |||
Variable Penumbra Shadows | |||
Water Volume |
UShader Shaders allow you to change more than 206 settings to suit your needs.
| Settings |
Description |
Options |
|---|---|---|
| UShader by RRe36 |
| |
| Atmosphere | ||
| Sun Path Angle |
| |
| World Time Animation | Animates atmosphere volumetrics like clouds based on the world time. |
|
| Air Coefficients | ||
| Rayleigh Density |
| |
| Mie Density |
| |
| Rayleigh Red |
| |
| Mie Red |
| |
| Rayleigh Green |
| |
| Mie Green |
| |
| Rayleigh Blue |
| |
| Mie Blue |
| |
| Ozone Density |
| |
| Mist Density |
| |
| Ozone Red |
| |
| Mist Red |
| |
| Ozone Green |
| |
| Mist Green |
| |
| Ozone Blue |
| |
| Mist Blue |
| |
| Clouds | ||
| Target Resolution |
| |
| Temporal Upscaling |
| |
| Cloud Reflections |
| |
| Cloud Shadows |
| |
| Volumetric Clouds | ||
| Enabled |
| |
| Samples |
| |
| Dithered Sunlight | Applies dither noise to the sampling of the sunlight occlusion, vastly improves lighting quality at a small performance cost and some added noise. |
|
| Dithered Skylight | Applies dither noise to the sampling of the skylight occlusion, vastly improves lighting quality at a small performance cost and some added noise. |
|
| Altitude |
| |
| Depth |
| |
| Scale |
| |
| Coverage Bias |
| |
| Localised Coverage |
| |
| Planar Clouds | ||
| Cirrus Clouds |
| |
| Altitude |
| |
| Depth |
| |
| Coverage Bias |
| |
| Fog | ||
| Volumetric Fog |
| |
| Advanced Mist Shading | Calculates high quality lighting for the volumetric mist, big performance impact and only really worth it with high mist densities. |
|
| Adaptive Steps |
| |
| Maximum Distance |
| |
| Density |
| |
| Sea Level |
| |
| Mist Altitude |
| |
| Mist Falloff |
| |
| Mist Mie Anisotropy |
| |
| Mist Lighting Steps |
| |
| Fog Smoothing | Use gaussian sampling to smooth the fog, reduces visible noise. |
|
| Double Pass Smoothing | Applies a second pass of gaussian filtering to reduce visible noise. Minor performance impact. |
|
| Sky | ||
| Scattering Iterations |
| |
| Airmass Iterations |
| |
| Illuminance Strength |
| |
| Multiscattering Strength |
| |
| Accurate Transmittance |
| |
| Alternative Ozone Curve |
| |
| Render below Horizon |
| |
| Planet Surface Proxy |
| |
| Approximate Bounced Light | Approximates sunlight bouncing off the planet surface back into the atmosphere |
|
| Water | ||
| Water Volume |
| |
| Density |
| |
| Adaptive Steps |
| |
| Maximum Distance |
| |
| Red Coefficient |
| |
| Green Coefficient |
| |
| Blue Coefficient |
| |
| Scattering Coefficient |
| |
| Wave Octaves |
| |
| The End | ||
| Volumetric Smoke |
| |
| Volumetric Glow |
| |
| Lighting | ||
| Directional Lightmaps |
| |
| Colors | ||
| Sunlight Strength |
| |
| Moonlight Strength |
| |
| Sunlight Red |
| |
| Moonlight Red |
| |
| Sunlight Green |
| |
| Moonlight Green |
| |
| Sunlight Blue |
| |
| Moonlight Blue |
| |
| Skylight Strength |
| |
| Blocklight Strength |
| |
| Skylight Red |
| |
| Blocklight Red |
| |
| Skylight Green |
| |
| Blocklight Green |
| |
| Skylight Blue |
| |
| Blocklight Blue |
| |
| Direct Light | ||
| Shadowmap Resolution |
| |
| Variable Penumbra Shadows | Shadows get softer the further away they are from their source. |
|
| Penumbra Scale | Scales the radius of the blur caused by Varible Penumbra Shadows. |
|
| Filter Iterations |
| |
| Contact Shadows |
| |
| subsurfaceScatteringEnabled |
| |
| Indirect Light | ||
| RTAO | Use screenspace ray-traced ambient occlusion to calculate indirect shadowing as well as directional skylight. Also creates subtile bounced sunlight and blocklight. |
|
| RTAO Samples |
| |
| SSAO | Use normal screenspace ambient occlusion to add some extra small-scale detail to the RTAO after being denoised. |
|
| Texture AO | Use ambient occlusion thats baked into labPBR data provided by a supported resourcepack. |
|
| Filtering | SVGF filtering that is used to denoise the SSPT lighting as well as smoothen the vanilla lightmap if used. Big performance impact. |
|
| Filter Tap Radius |
| |
| Color Strictness |
| |
| Normal Strictness |
| |
| Terrain | ||
| Normalmaps |
| |
| Format |
| |
| Vertex Attribute Fix | Workaround for broken normalmaps on entities on 1.15+ |
|
| Wetness Mode |
| |
| Wind Effects |
| |
| Intensity |
| |
| Parallax Occlusion Mapping | ||
| Enabled |
| |
| Samples |
| |
| Self Shadow Samples |
| |
| Depth |
| |
| Reflections | ||
| Resourcepack Reflections |
| |
| Rough Reflections |
| |
| Samples |
| |
| Screenspace Reflections |
| |
| Roughness Threshold |
| |
| Sky Occlusion Threshold |
| |
| Camera | ||
| Sensor Width (mm) |
| |
| F-Stops |
| |
| Anamorph Stretch |
| |
| Bloom | ||
| Enabled |
| |
| Strength |
| |
| Depth of Field | ||
| Depth of Field |
| |
| Quality |
| |
| Chromatic Dispersion |
| |
| Chromatic Offset Scale |
| |
| Focus Mode |
| |
| Focus Distance |
| |
| Show Focus Plane |
| |
| Exposure | ||
| Decay |
| |
| Bias |
| |
| Dark Limit |
| |
| Bright Limit |
| |
| Advanced Exposure |
| |
| Bright Percentage |
| |
| Dark Percentage |
| |
| Manual Exposure Override |
| |
| Exposure Value |
| |
| Lens Flare | ||
| Flare |
| |
| Halo |
| |
| Flare Intensity |
| |
| Threshold |
| |
| Flare Count |
| |
| Flare Spacing |
| |
| Halo Radius |
| |
| Halo Depth |
| |
| Motionblur | ||
| Enabled |
| |
| Samples |
| |
| Scale |
| |
| Vignette | ||
| Enabled |
| |
| Start |
| |
| End |
| |
| Intensity |
| |
| Exponent |
| |
| Post Processing | ||
| Image Sharpen Strength | Controls the strength of the Contrast-Adaptive Sharpening applied ontop. |
|
| TAAU Ratio | Applies per axis, so 50% means 25% pixel count (or whats sometimes called halfres, despite technically being a quarter) |
|
| Output Bitdepth | Setting this to 6 Bit can help with artifacts caused by the dither pattern of non-native 8 Bit displays. Output above 8 Bit is not supported by Minecraft/OptiFine/the used OpenGL version. Values below 6 just exist because they also double as a retro-esque image filter. |
|
| Display Gamut | This setting allows you to select the colour space that matches your display to ensure the intended look. Correct gamma response for the selected colour space is assumed. |
|
| Anti-Aliasing | ||
| Resampling Confidence | Controls the sharpness of the Lanczos resampling used for the TAA(U). |
|
| FXAA Pass | Applies an extra pass of FXAA after the TAA(U) to smooth out any remaining aliasing. |
|
| Minimum Sample Weight | Controls the minimum weight of the current frame in the temporal accumulation. Raising this effectively leads to less anti-aliasing and may reduce upscaling sharpness. |
|
| Anti-Flicker |
| |
| Luminance Rejection |
| |
| Color-Grading | ||
| Color-Grading |
| |
| Vibrance |
| |
| Saturation |
| |
| Gamma Curve |
| |
| Brightness |
| |
| Contrast |
| |
| Red Gain |
| |
| Green Gain |
| |
| Blue Gain |
| |
| Framing Tool | ||
| Enabled |
| |
| Thirds Guidelines |
| |
| Aspect Ratio Guide |
| |
| Horizonal Ratio |
| |
| Vertical Ratio |
| |
| Center |
| |
| Misc | ||
| INTERNAL | ||
| cloudPass |
| |
| ditherPass |
| |
| FULLRES_PASS |
| |
| FUTIL_D3X3 |
| |
| FUTIL_LIGHTMAP |
| |
| FUTIL_LINDEPTH |
| |
| FUTIL_MAT16 |
| |
| FUTIL_ROT2 |
| |
| FUTIL_TBLEND |
| |
| gENTITY |
| |
| gNODIFF |
| |
| gSPIDEREYES |
| |
| gTERRAIN |
| |
| gTEXTURED |
| |
| incCONDUCTOR_ETA |
| |
| moonIllumMult |
| |
| roughnessFade |
| |
| shadowcompCaustics |
| |
| shadowmapTextureMipBias |
| |
| skipBlocklight |
| |
| Sunlight Blue |
| |
| Anti-Ghosting |
| |
| Temporal AA |
| |
| Hue Rejection |
| |
| Motion Rejection |
| |
| valNoiseInc |
| |
| VERTEX_STAGE |
| |
| DEBUG_VIEW |
| |
| Freeze Animations |
| |
| Animation Offset |
|
How To Install UShader Shaders
- Support Forge / Vanilla
- Extra features
- Good performance
- Support Fabric / Quilt
- Better performance, depend on your hardware
Optifine Installation Guide
Note
Your device must have Java installed to run the Forge and Optifine installers.
Quick Java Installation Guide
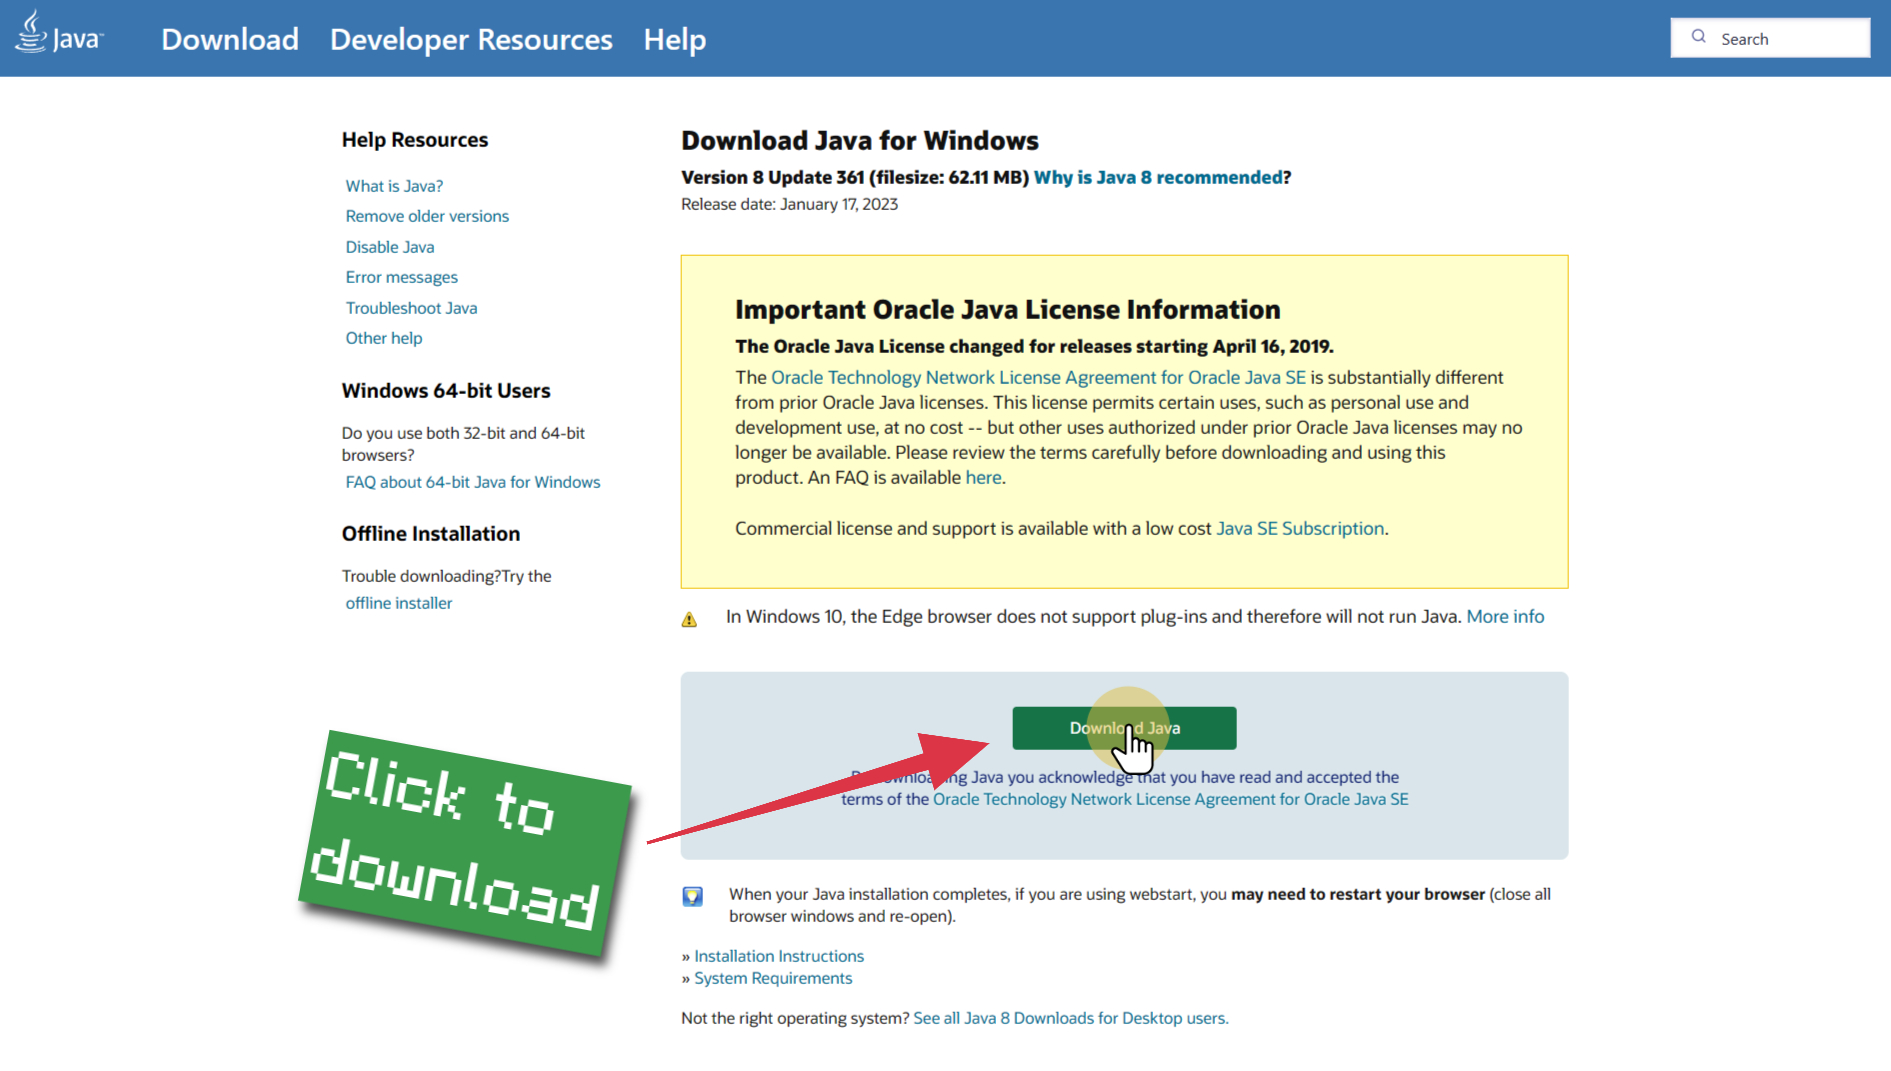
-
Download Java
Download the Java installer from the official website here.
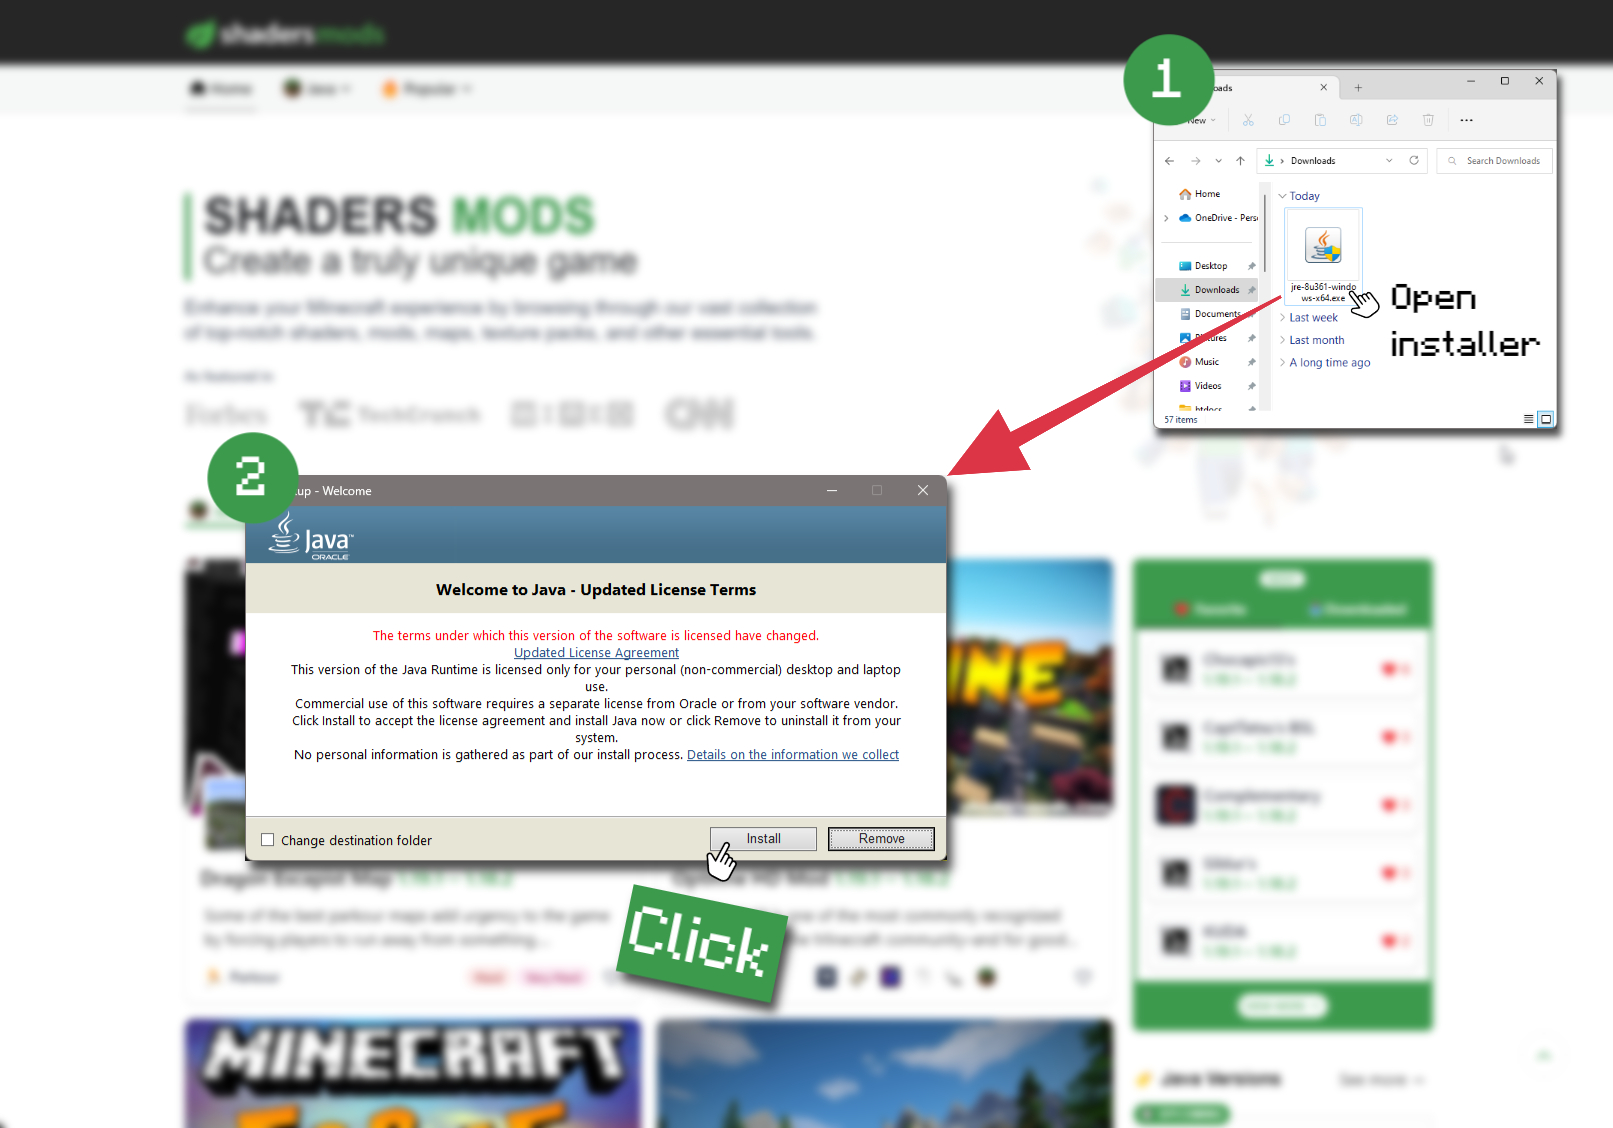
-
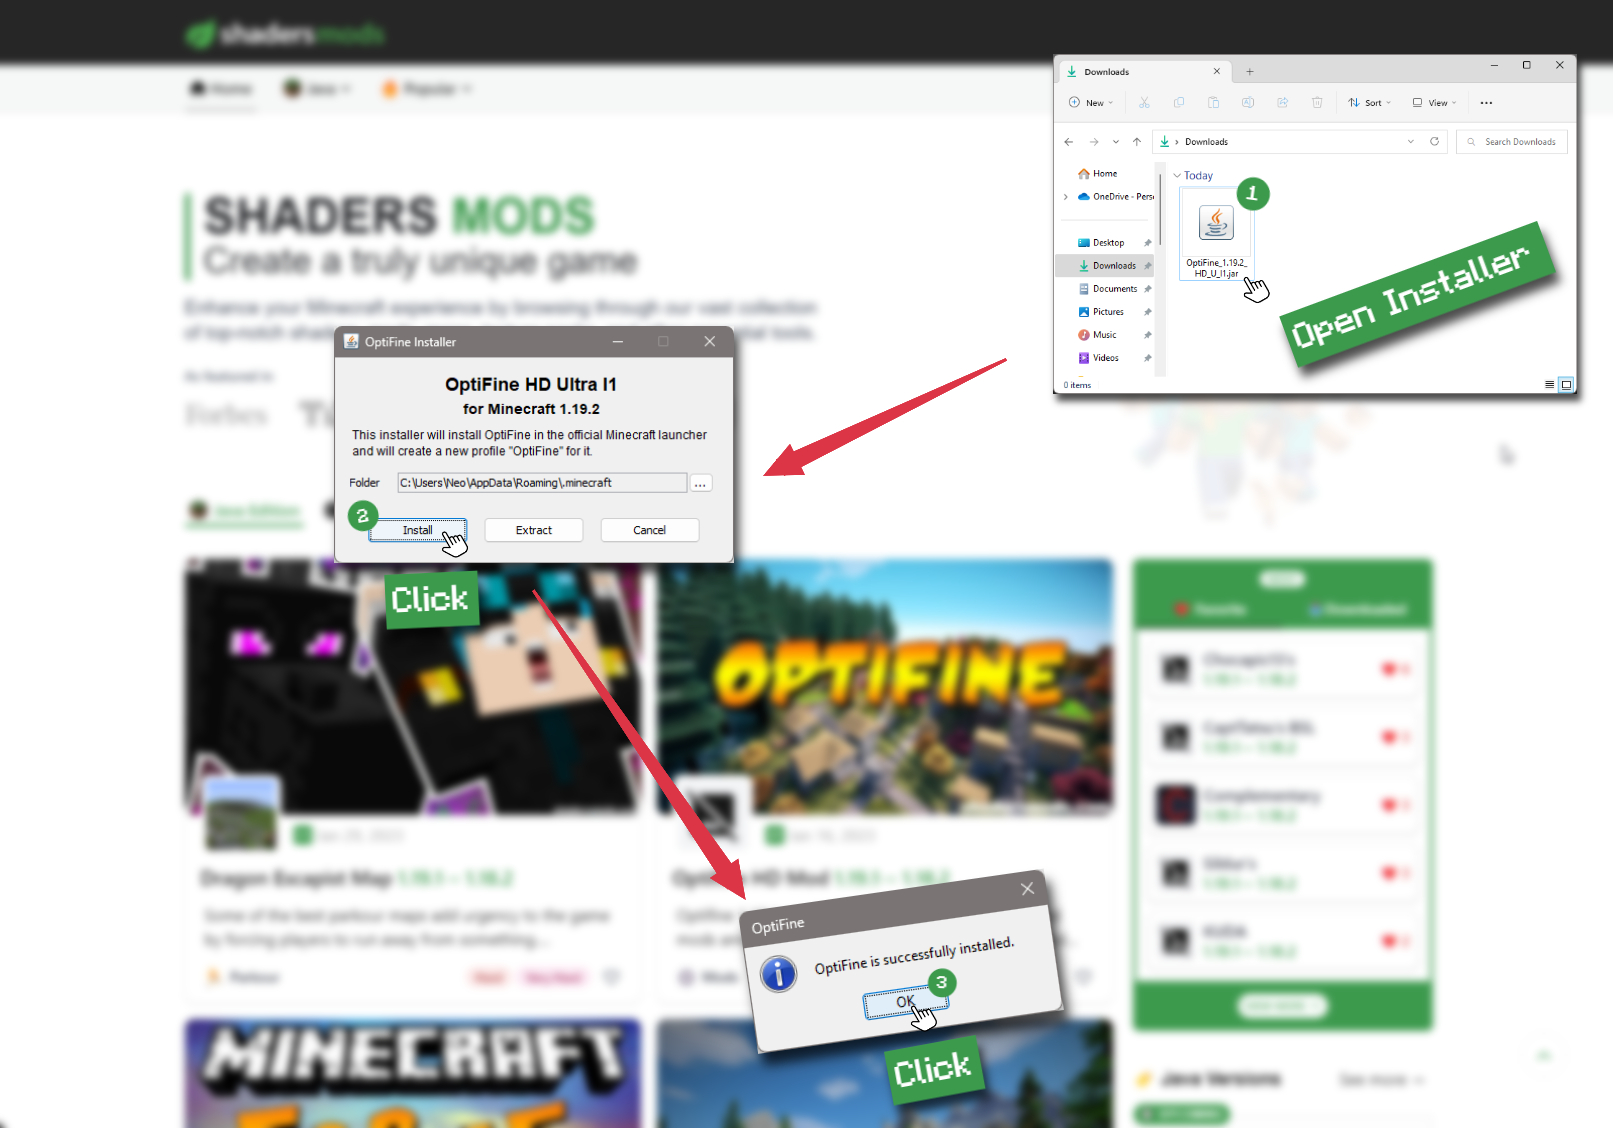
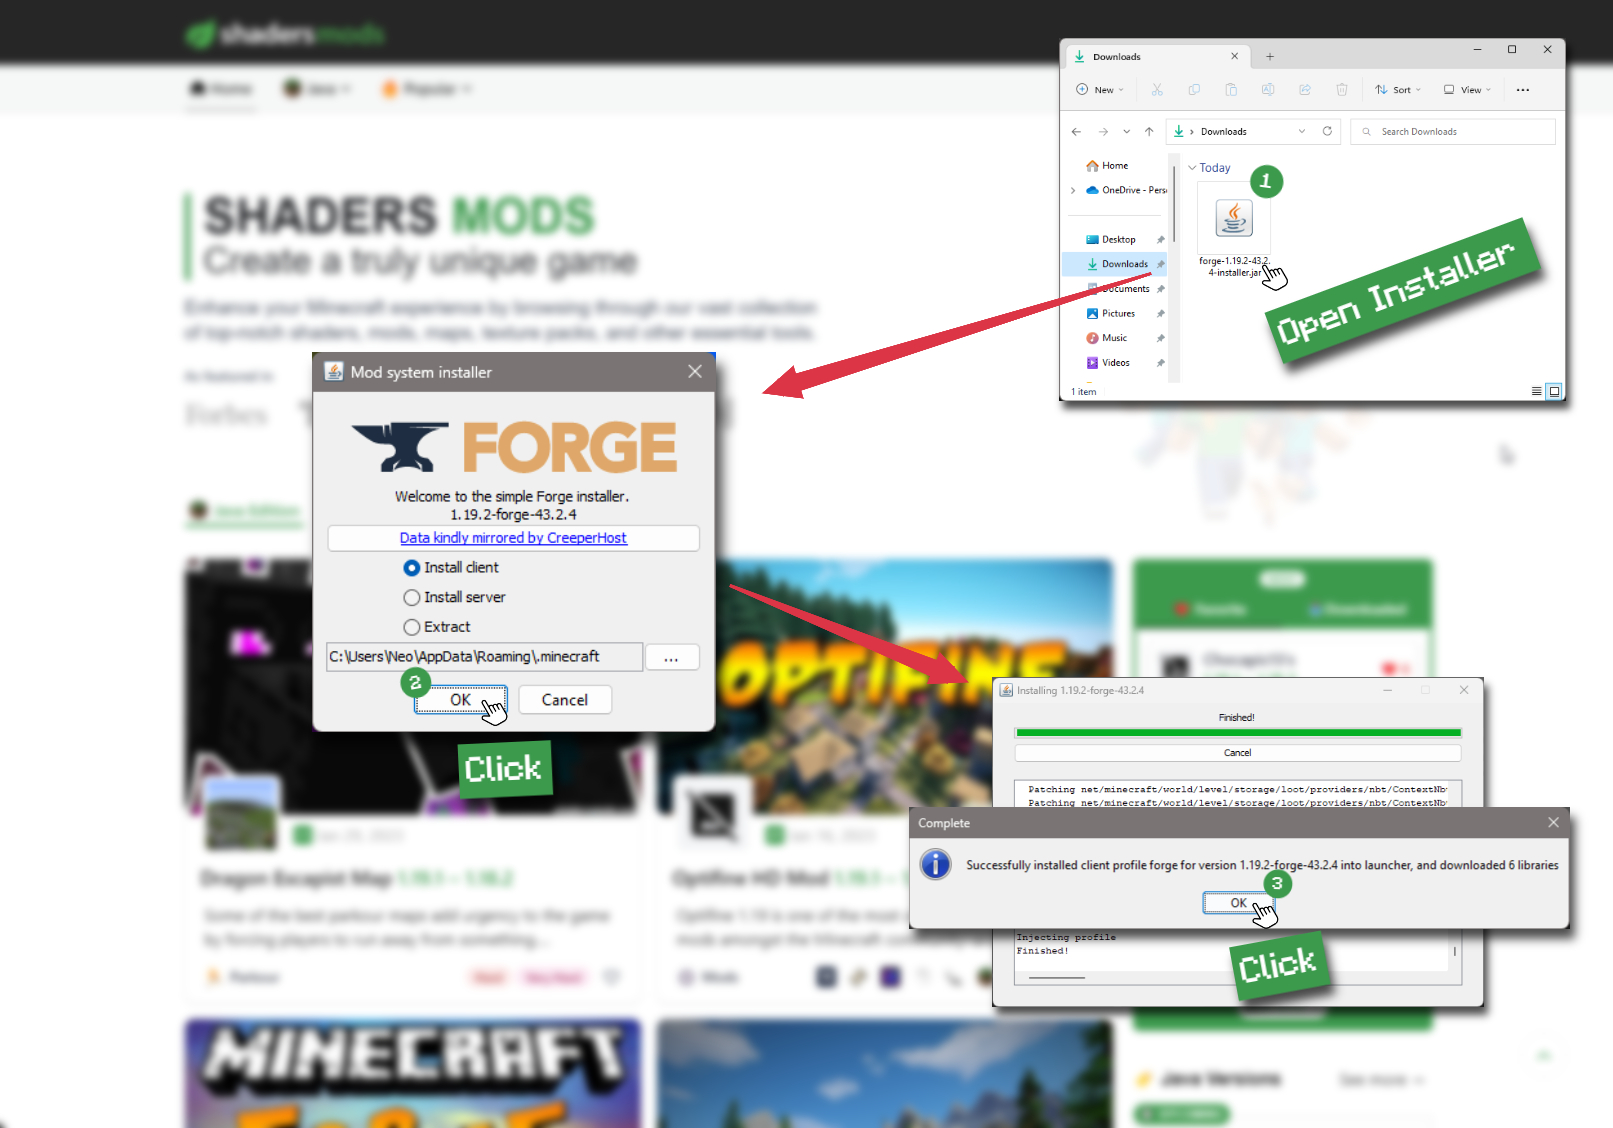
Open Installer
Once you have downloaded the file, run it and click the Install button.
How to install UShader Shaders with Optifine?
-
Download Optifine
Get the latest version of Optifine for your Minecraft version.
Download Optifine -
Install Optifine
Run the Optifine installer and follow the on-screen instructions to complete the installation.
-
Download UShader Shaders
Go to the download section and get shaders zip file. Unzip the file if necessary, as some shader developers may bundle multiple shader versions in one zip file.
-
Launch Minecraft
Start the Minecraft launcher and make sure you have the Optifine profile selected.

-
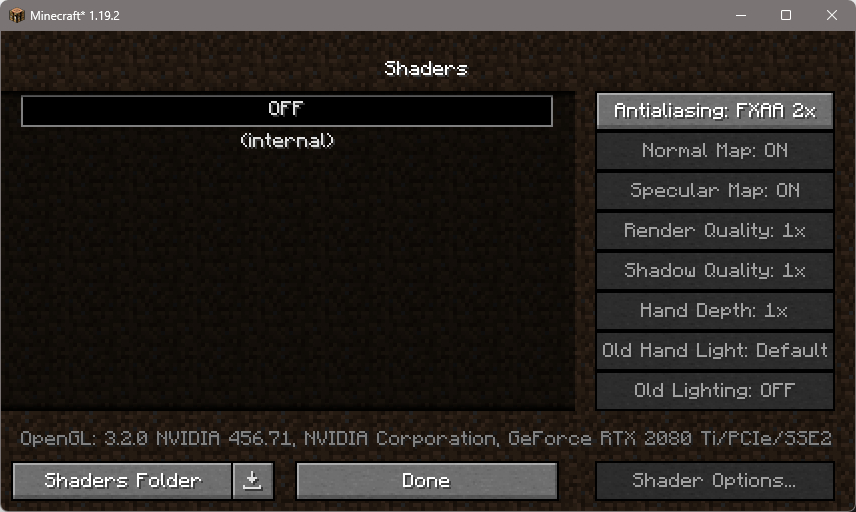
In-game Shaders menu
Go to Options > Video Settings > Shaders to access the shaders menu.
-
Open shaderpacks folder
Click on the "Shaders Folder" button to open the folder where shaders are stored, so you can add or remove shaders as desired.

-
Install UShader Shaders
Copy or move the downloaded UShader shaders zip file into the shaderpacks folder.

-
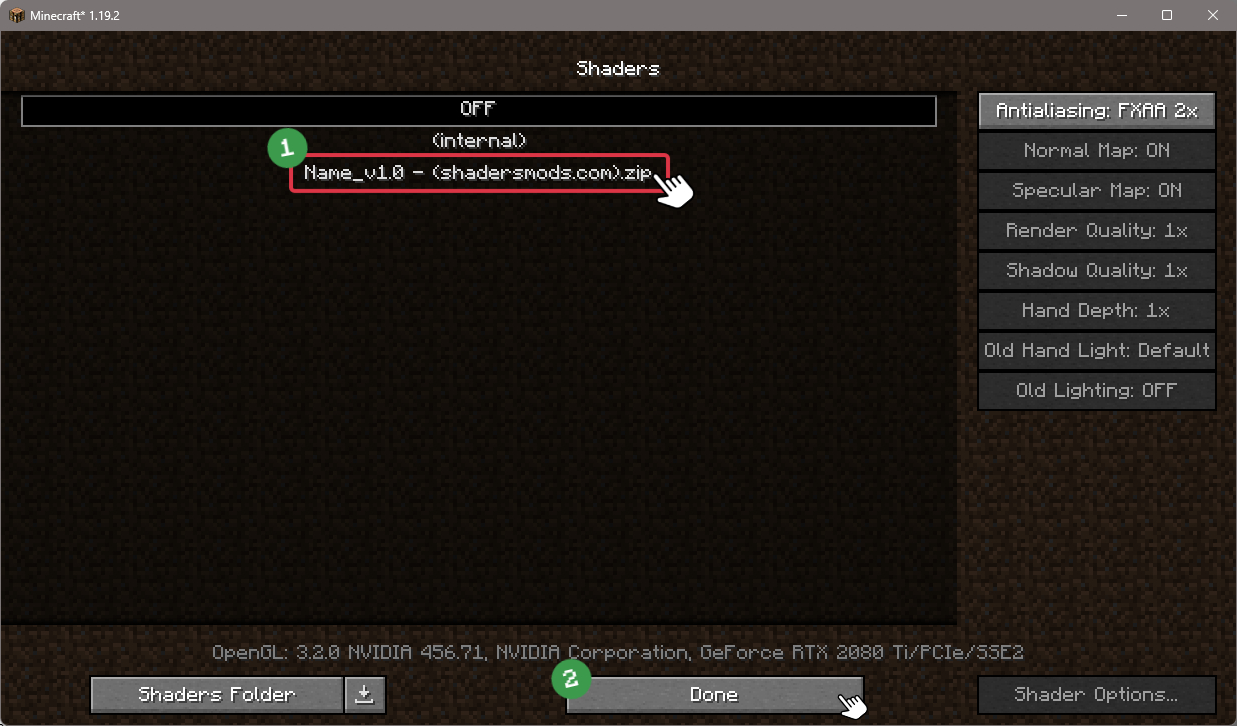
Select UShader Shaders
Choose UShader shader pack from the list of available shaders in the options menu.
How to install UShader Shaders with Forge and Optifine?
Quick Installation Guide
-
Install Forge
Obtain the latest version of Forge that is compatible with your Minecraft version.
Download Minecraft Forge -
Launch Minecraft
Start the Minecraft launcher and select the version of Minecraft you want to install Forge on. Run the game once by clicking on the "Play" button to create necessary files for Forge.

-
Install Forge Client
Double-click on the Forge installer jar file and choose "Install Client" in the window that appears.
-
Install Optifine
Download the Optifine jar file after Forge is installed. Move the Optifine jar file to the mods folder in the .minecraft directory.
Download Optifine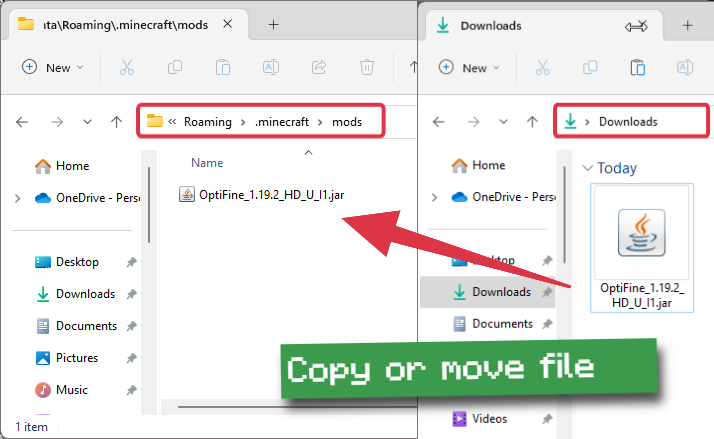
-
Launch Forge Profile
Launch Minecraft using the "Forge" profile, Optifine will be automatically loaded along with Forge.

-
Install Chocapic13's Shaders
Now the installation is the same as from the above Optifine instructions, just follow the steps starting from step 5.
Iris Installation Guide
Note
Your device must have Java installed to run the Iris installer.
Quick Java Installation Guide
-
Download Java
Download the Java installer from the official website here.
-
Open Installer
Once you have downloaded the file, run it and click the Install button.
How to install UShader Shaders with Iris?
-
Download Iris Shaders
Find the latest version of the Iris Shaders installer and download it.
Download Iris Installer -
Install Iris Shaders
Open the downloaded jar file, and choose the preferred game version and installation type.
⯈ Iris Install:
If you don't plan on using any other mods with Iris, choose this option.⯈ Fabric Install:
Choose this option if you want to use Iris with Fabric and other mods. The Iris jar files will be copied to the mods folder within the .minecraft directory.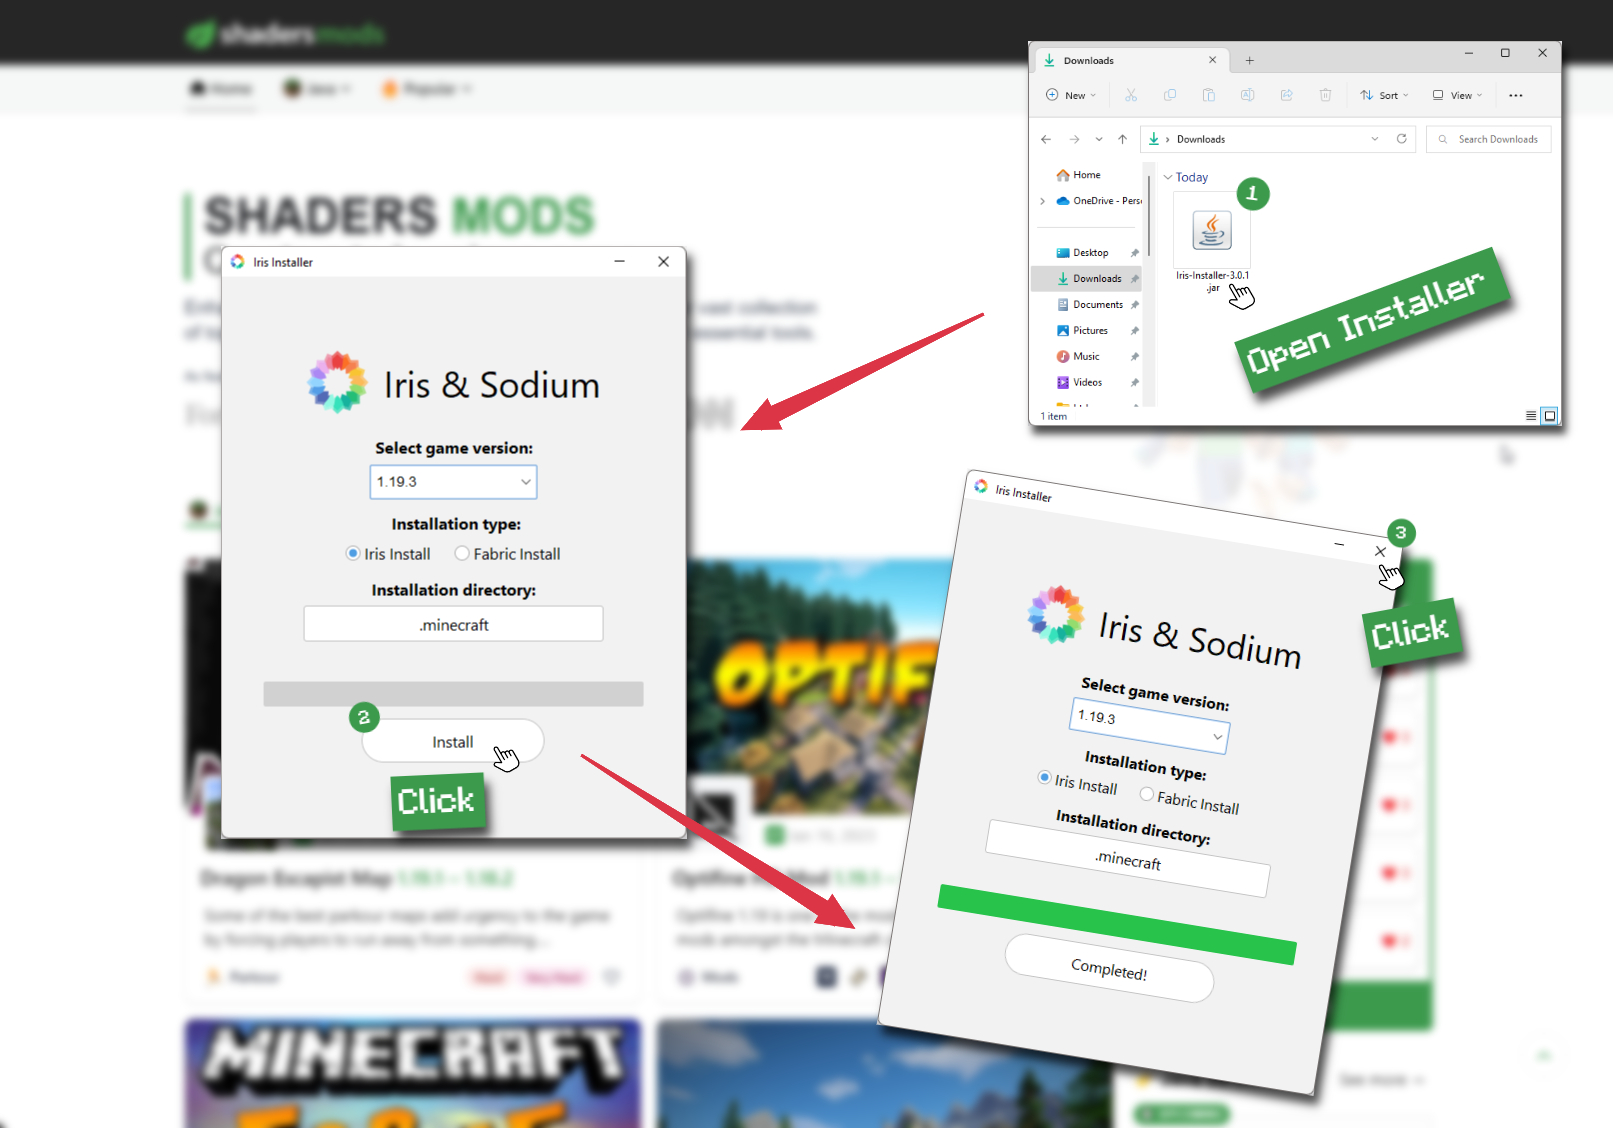
-
Start Installation
After selecting the game version and installation type, click the "Install" button to start the installation process.
-
Launch Minecraft
Start the Minecraft launcher and make sure you have the Iris profile selected.
Note
Select the Fabric profile if you opt for the Fabric installation type.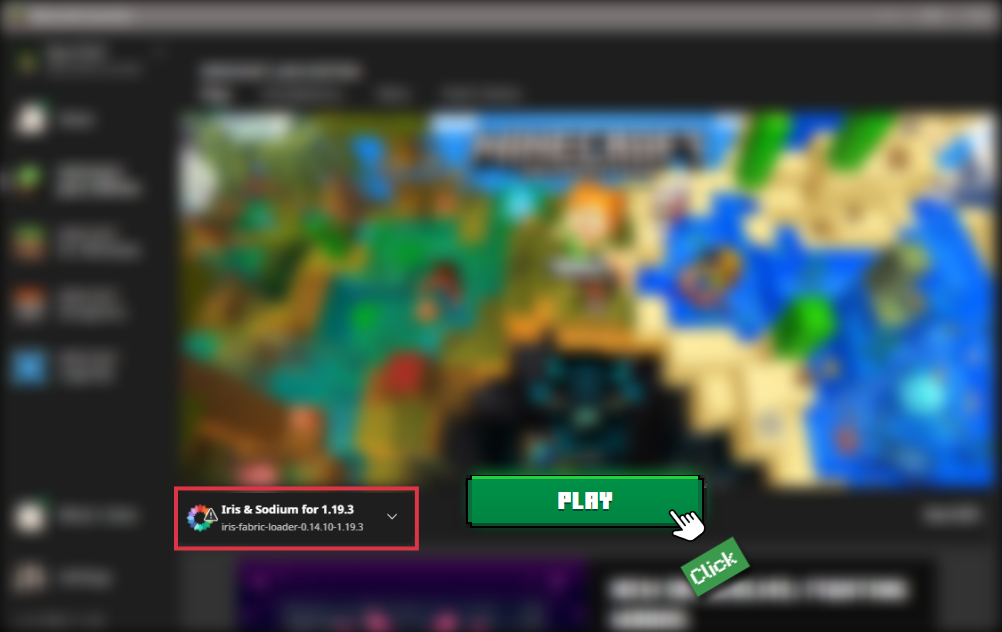
-
In-game Shader Menu
Open the Minecraft game and go to Options > Video Settings > Shader Packs to access the shaders menu.
Tip
To simplify the process, simply drag and drop the shader ZIP file directly into the Minecraft window, bypassing the next two steps.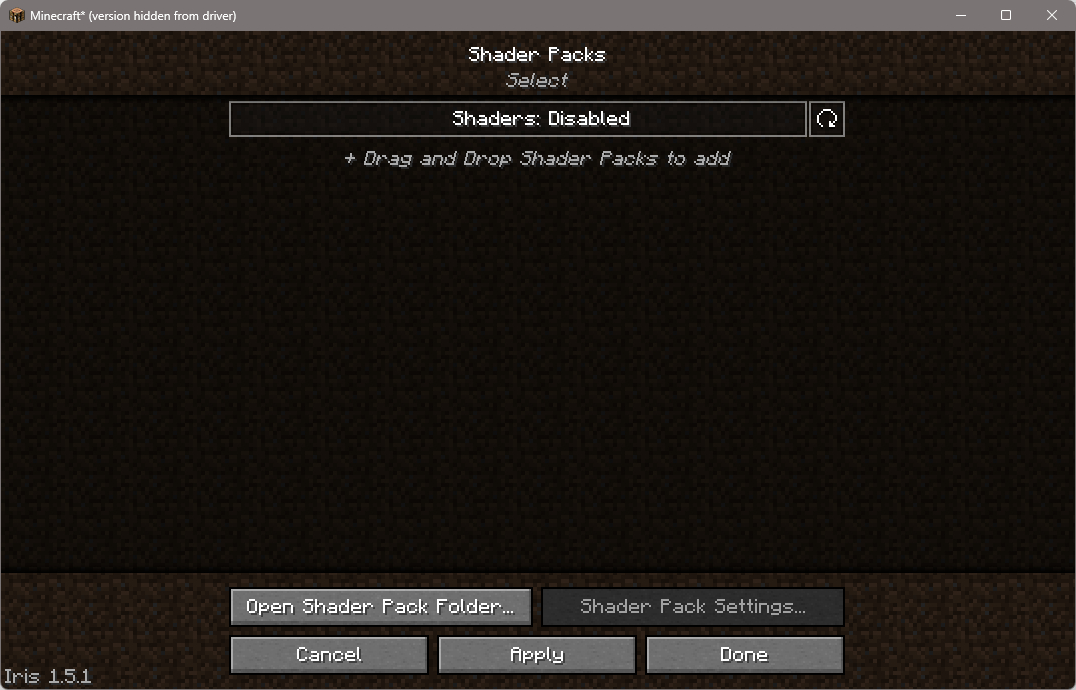
-
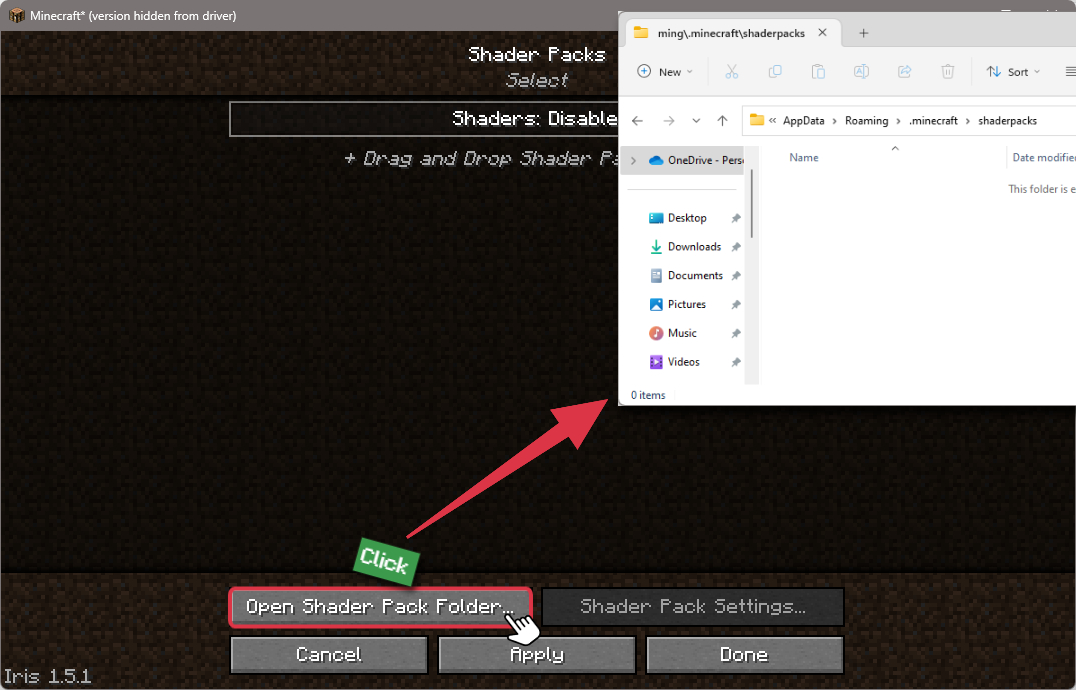
Open shaderpacks folder
Click on the "Open Shader Pack Folder" button to access the folder where shaders are stored.
-
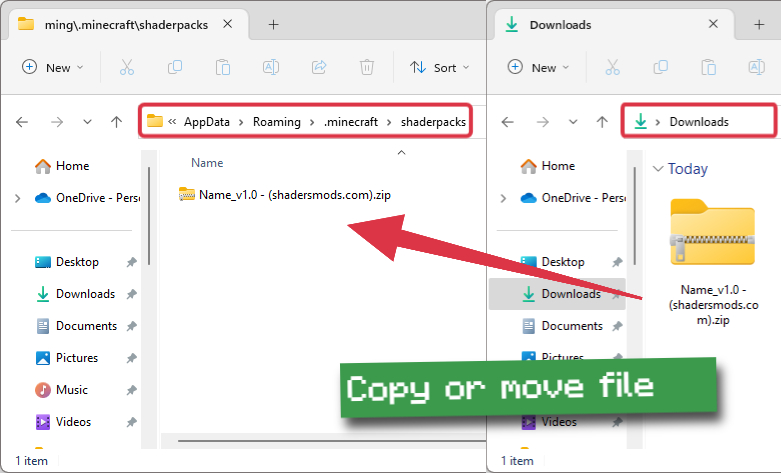
Install UShader Shaders
Copy or move the shaders zip file into the shaderpacks folder.
-
Select UShader Shaders
Choose installed shader pack from the list of available shaders in the options menu and click the "Apply" or "Done" button to select it.
Tip
When the shader pack is selected, its name will be changed to yellow.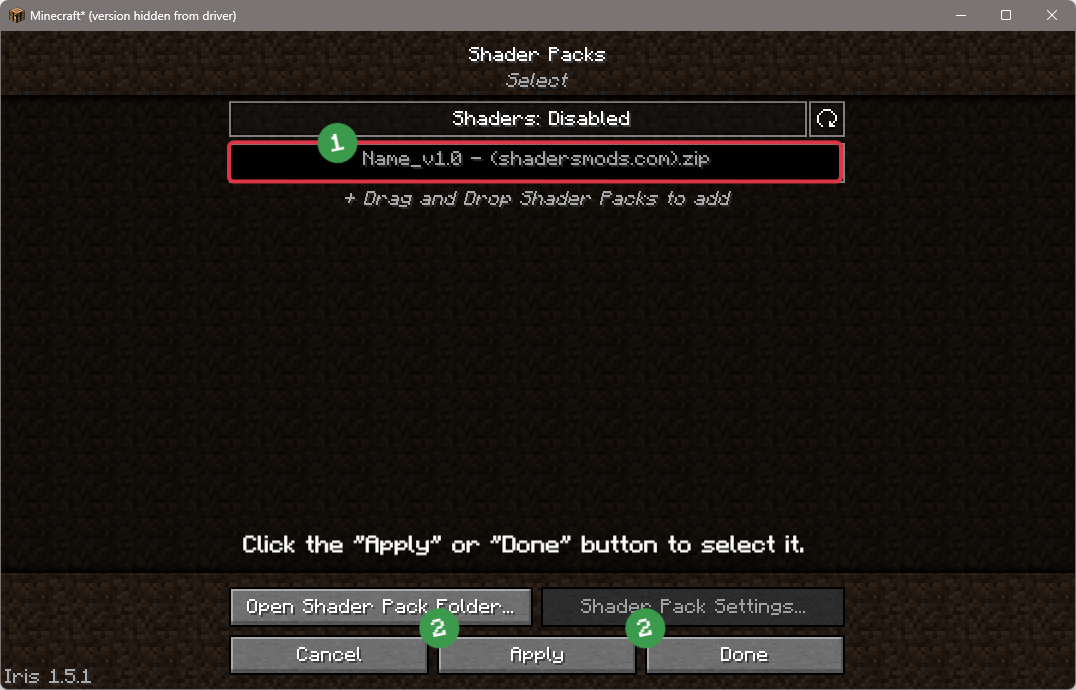
Requirements
- Optifine for 1.16 or newer
- Alternatively, Iris 1.5.0 or newer
- GTX 1050/RX 560 or similar/better (has to support OpenGL 4.0); something faster is generally recommended though.
- Windows/Linux
- Intel HD 5000 Graphics and older are NOT supported!
📥 UShader Shaders — Download
Something You Should Know
- Our links are only from the official developer, so you can be sure they are secure.
- No modifications or edits are made to the files.
🔄 Update Logs
v2.0
- Overhauled general color palette and visual style
- Overhauled skybox rendering
- Updated atmosphere simulation
- Adjusted various atmosphere parameters
- Updated skybox horizon rendering (similar to Kappa v5.0’s approach)
- Updated cloud lighting
- Overhauled cirrus clouds
- Adjusted volumetric clouds
- Added temporal upscaling for clouds (at 33% target resolution by default)
- Various internal skybox rendering and calculation improvements
- Overhauled water rendering
- Volumetric water is now disabled by default
- Vastly improved reflections and rough reflections support
- Improved rain wetness puddles
- No longer appear in dry biomes
- Switched to Rec2020 color space for internal rendering
- Added screen-space ray-traced ambient occlusion (RTAO)
- Includes subtle bounced lighting from sunlight and emitters
- Includes directional skylight based on the current skybox (including clouds)
- Includes temporal accumulation and denoising
- Added temporal upscaling (TAAU)
- At 50% by default
- 25% and 75% may lead to visual issues with certain nVidia drivers and graphics cards
- Overhauled post-processing
- Updated tone mapper to accommodate the new visual style and wider colour space
- Vastly improved lens effects (bloom, depth of field, lens flares etc.)
- Overhauled dimension visuals
- The End now features completely new visuals
- Overhauled temporal anti-aliasing
- Exposed various new settings to accommodate for new and/or changed features
- Full internal overhaul, including various bug fixes and performance optimizations
v1.1
- Added setting for output dither bit-depth
- Added caustics
- Improved fog upscaling
- Improved normals precision (helps a lot with water)
- Added support for normal maps
- Settings for blocklight colors
- Fixed potential motion blur visual glitches
- Adjusted exposure behavior
v1.0
- Initial public release.