Stracciatella Shaders 1.19.4 → 1.18.2
Stracciatella is a lightweight shader with colored lights and configurable features for a personalized vanilla experience.
| Developer | 👤DrDesten |
|---|---|
| Style | 🧱Vanilla |
| Support GPUs | |
| Loaders | |
| Performance Impact | Potato |
| Settings | 184 |
| Presets | 🛠️ Vanilla+2 |
| Features | Light+16 |
| Created | Jan 18, 2022 |
| Updated | Mar 29, 2023 |
| Stats |
|
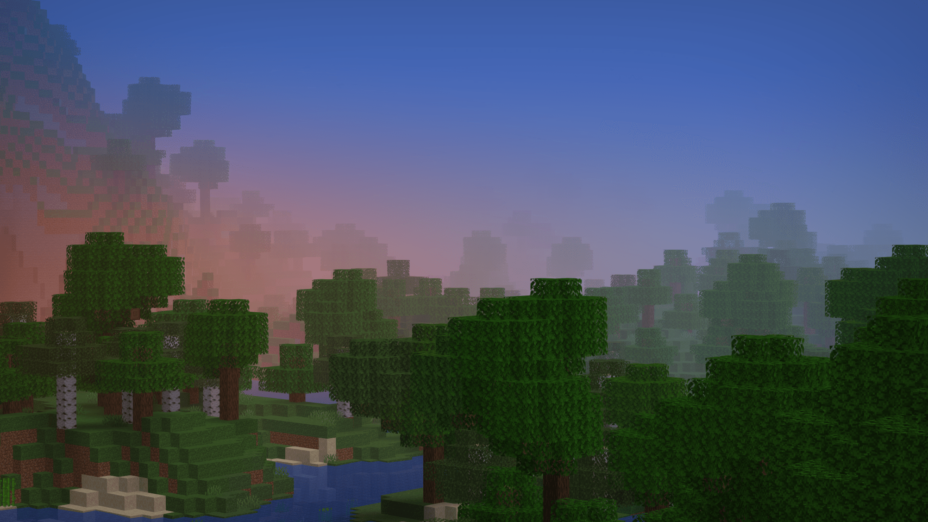
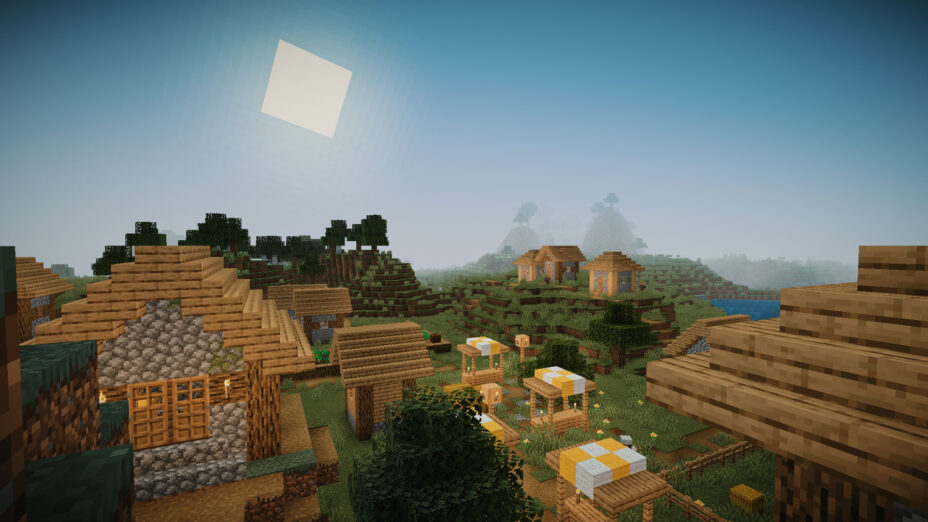
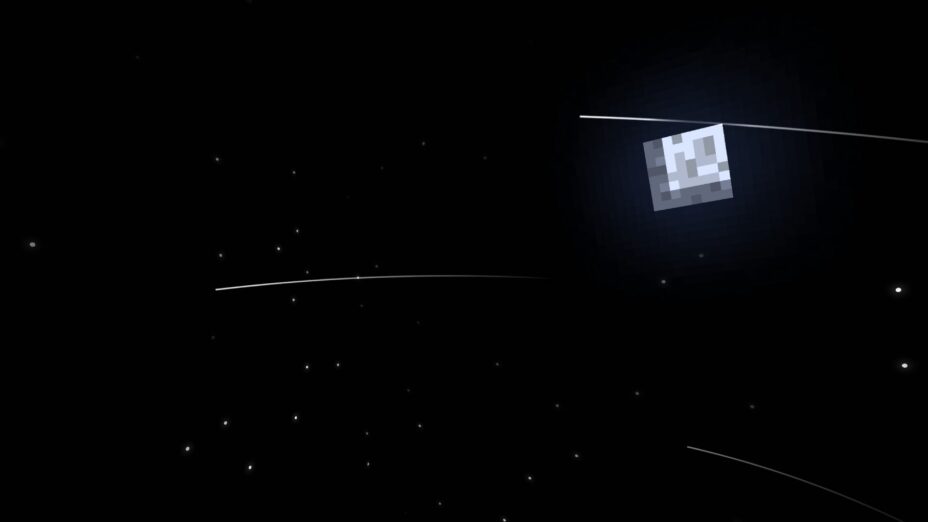
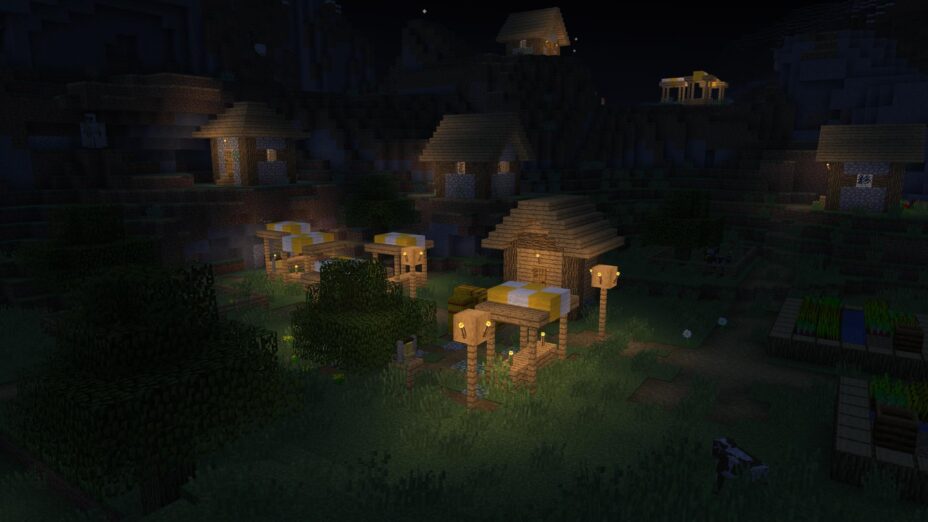
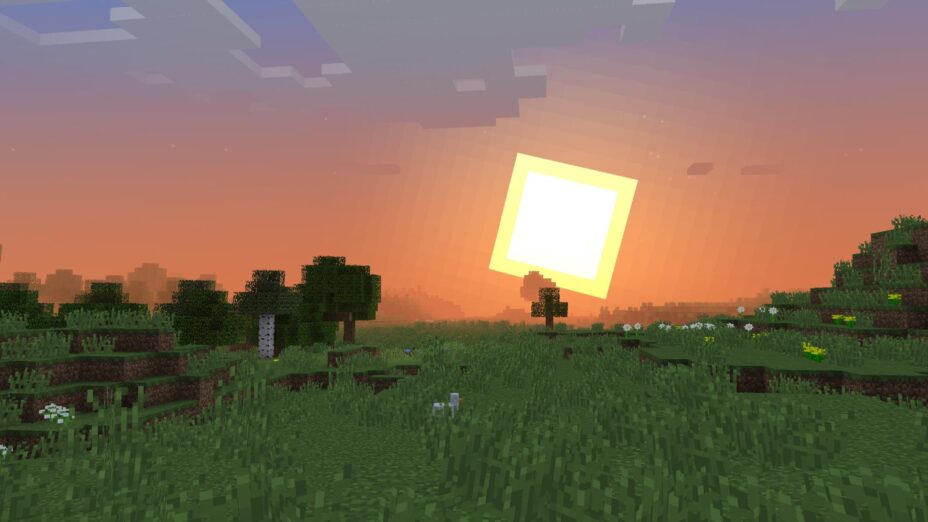
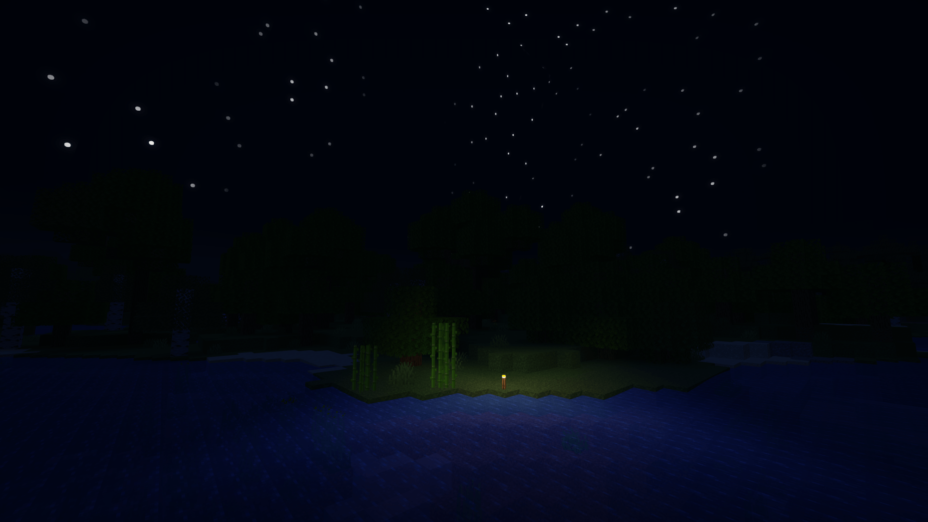
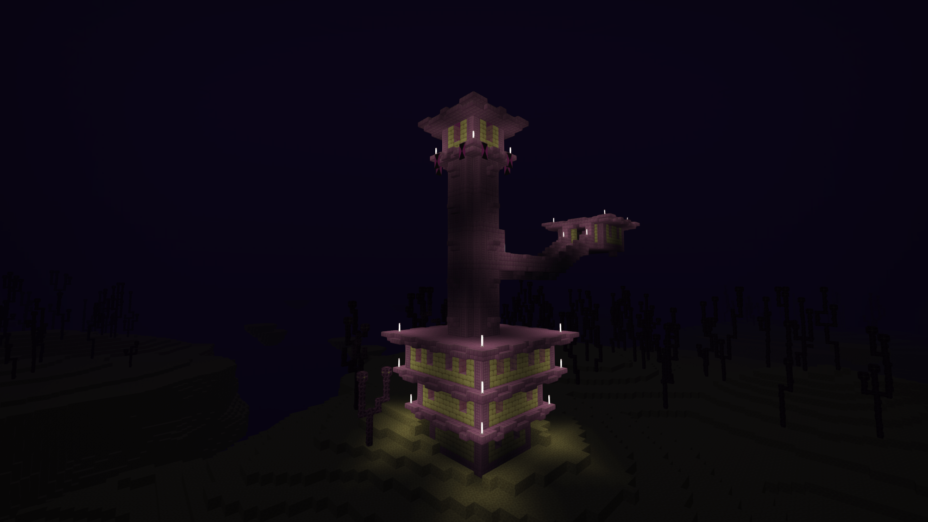
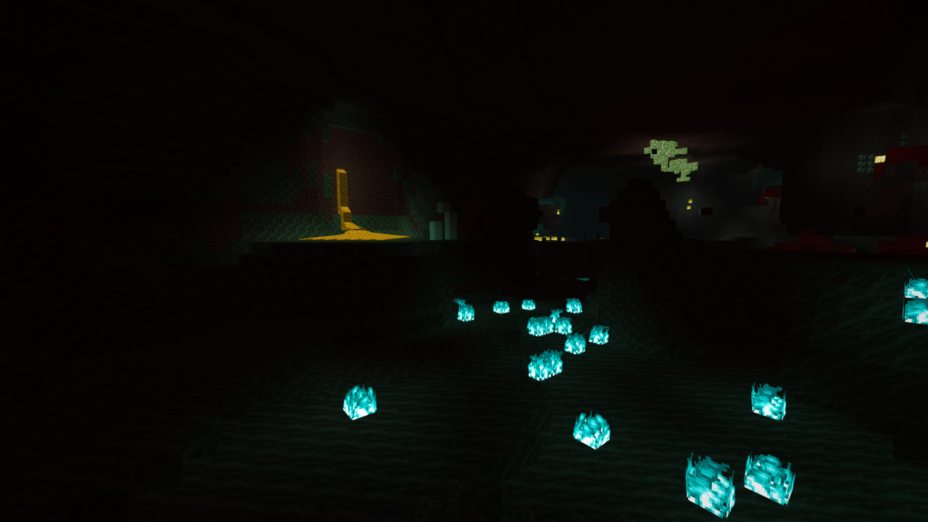
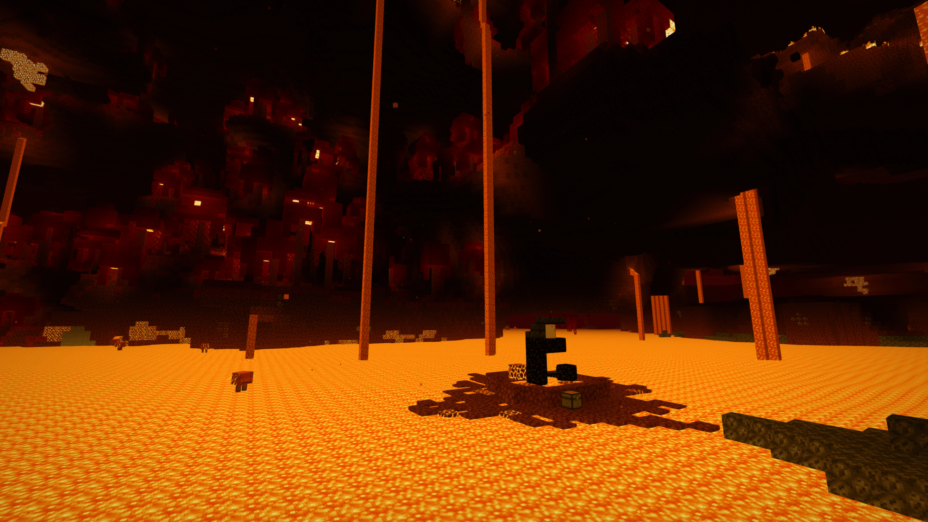
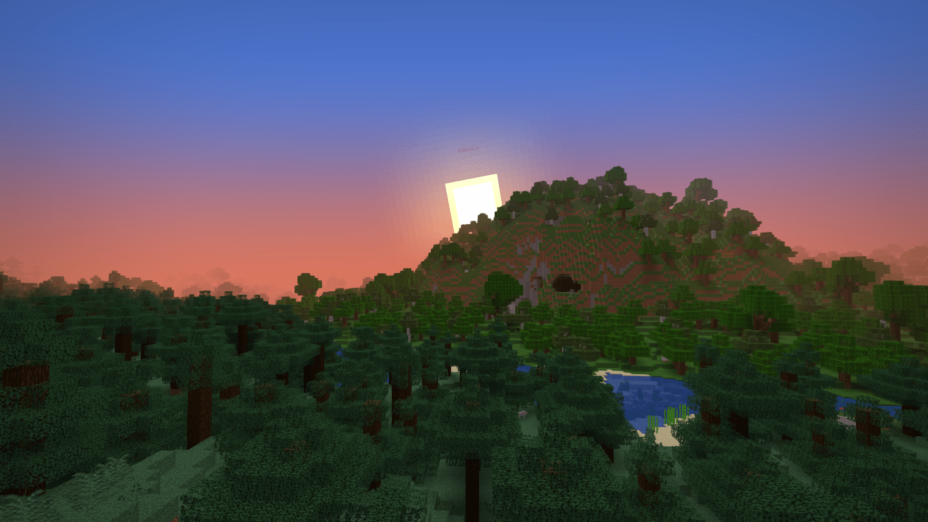
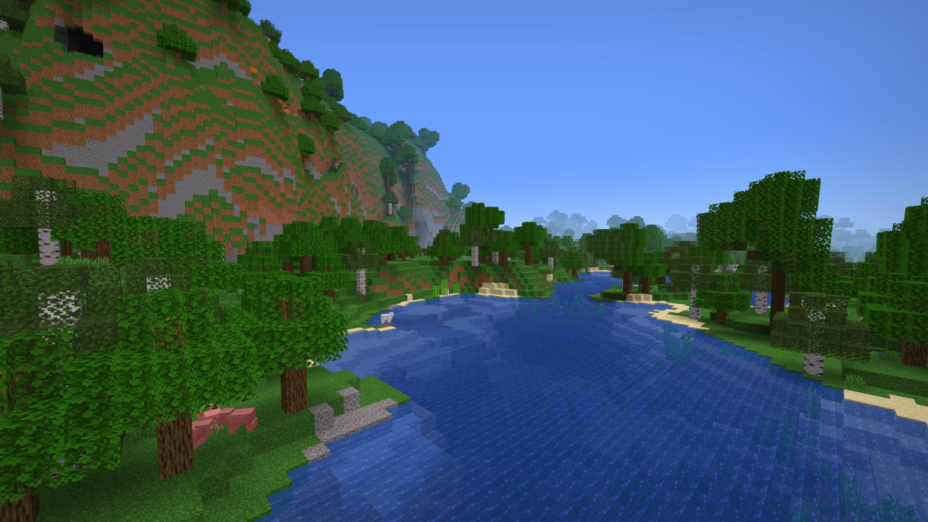
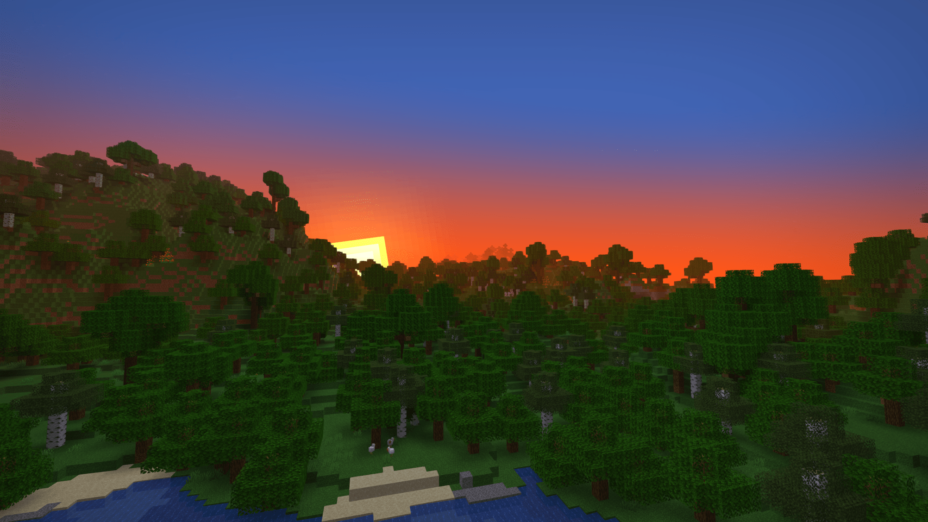
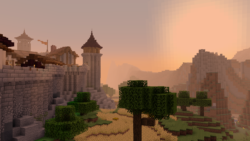
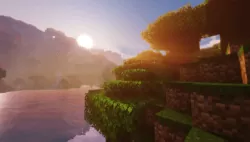
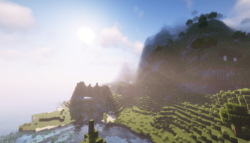
The Stracciatella Shaders tries to keep to vanilla Minecraft style, making only minor improvements. It is means to improve visuals without harming performance. So, better sunrises and sunsets are included. These are both coming from the updated sun and moon textures, which are closer to circular. Evenings allow for stars to be seen in the sky, and the light from them will give limited visibility when outdoors at night. It’s still safer to stay inside, though, since enemies will still spawn like normal. The sky backdrop can be customized, adding more stars and making them brighter or darker, as wanted. For every effect listed so far, the colors can be changed, too, allowing for crazy green sunrises or burning red stars. Stracciatella is perfect for making alien worlds and maps.
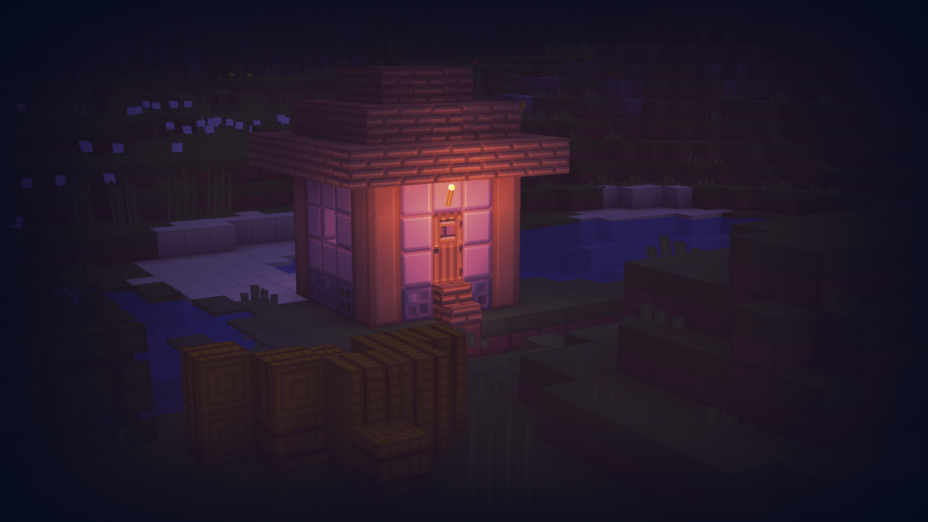
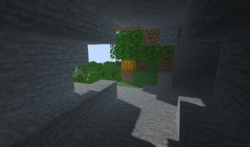
Stracciatella has a big focus on the sky and lighting effects related to the sky. But it doesn’t slack in other areas. The camera, or the player’s view, can be adjusted in many extra ways. The contrast, saturation, and brightness are normal, but the vibrance and vignette can also be raised and lowered. It’s a good tool for players who want to record video inside Minecraft – maybe on an alien world they created with Stracciatella shaders in mind. Water effects, like refraction in rain and reflection on water bodies like ponds and lakes, are of decent quality. Fog, including the color of the fog, can be turned on or off and adjusted for thickness. You get a lot of control over the weather with Stracciatella, but even without using that, it’s still a pretty set of shaders.
Installing Stracciatella shaders is easy. If you have Iris or Optifine already, just grab the pack. Otherwise, get version 1.12 or higher and put it in the roaming/Minecraft/shaderpacks folder. Look in AppData to find it. Minecraft 1.19 is recommended, as these shaders are getting regular updates, and new features are being tested or added.
- 1.19.4
- 1.19.3
- 1.19.2
- 1.19.1
- 1.19
- 1.18.2
- 1.18.1
- 1.18
- 1.17.1
- 1.17
- 1.16.5
- 1.16.4
- 1.16.3
- 1.16.2
- 1.16.1
- 1.16
- 1.15.2
- 1.15.1
- 1.15
- 1.14.4
- 1.14.3
- 1.14.2
- 1.14.1
- 1.14
- 1.13.2
- 1.13.1
- 1.13
- 1.12.2
- 1.12.1
- 1.12
- 1.11.2
- 1.11.1
- 1.11
- 1.10.2
- 1.10.1
- 1.10
- 1.9.4
- 1.9.3
- 1.9.2
- 1.9.1
- 1.9
- 1.8.9
Features
Over 16 new features are available in Stracciatella Shaders to enhance your gaming experience.
📊 Performance Impacts
Decrease in performance can vary from device to device, driver version, and many other factors, you should test yourself on your machine for the best result.
- None
- No performance decreases
- Small
- ~5%
- Medium
- ~10%
- High
- ~25%
- Extreme
- +50%
-
- Ambient OcclusionMedium
- Simulating how light interacts with objects and surfaces.
-
- Atmospheric SkySmall
- Simulates realistic atmospheric scattering.
-
- CustomizationNone
- Customize various aspects of the game's visual effects.
-
- DarkNone
- Enjoy exploring dark and mysterious environments, such as caves or ruins.
-
- LightMedium
- Enhance the game's overall visual quality.
-
- Realistic NightskyMedium
- More realistic and immersive night sky.
-
- Realistic SkyMedium
- More realistic and immersive sky experience.
-
- ShadowsSmall
- Simulate how light is blocked and scattered by objects in the environment.
-
- SunriseSmall
- More realistic and immersive sunrise experience.
-
- SunsetSmall
- More realistic and immersive sunset experience.
-
- VignetteNone
- Darkening effect around the edges of the screen
-
- Volumetric FogHigh
- Create the appearance of fog that is lit from within, casting shadows and creating a sense of depth.
-
- Waving GrassSmall
- Simulating the way it moves and sways in the wind.
-
- Waving LavaSmall
-
- Waving PlantsSmall
- Simulating the way they move and sway in the wind.
-
- Waving TreesSmall
- Adds movement to the leaves and branches of trees, making them look more alive and realistic.
There are 3 profiles pre-built into Stracciatella Shaders to adjust the level of intensity of these effects.
| Profiles | Vanilla | Default | Stracciatella |
|---|---|---|---|
Angled Rain Amount | |||
Block Outline Style | |||
Contrast | |||
Custom Stars | |||
Damage Effect Displacement | |||
Damage Effect Cell Size | |||
Damage Effect Redness | |||
Directional Lightmaps | |||
Directional Lightmap Strength | |||
Custom Fog Color | |||
Fog Start | |||
Underwater Fog Density | |||
Depth Influence | |||
Blocklight AO | |||
Blocklight Gamma | |||
Complex Blocklight Bright B
| |||
Complex Blocklight Bright G
| |||
Complex Blocklight Dark B
| |||
Complex Blocklight Dark G
| |||
Complex Blocklight Dark R
| |||
Blend Curve | |||
Skylight Night B
| |||
Skylight Night G
| |||
Skylight Night R
| |||
Skylight AO | |||
Skylight Gamma | |||
Rain Refraction | |||
Custom Sky Color | |||
Vibrance | |||
Vignette | |||
Vignette Strength | |||
Waving Blocks Amount |
Stracciatella Shaders allow you to change more than 184 settings to suit your needs.
| Settings | Description | Options |
|---|---|---|
| Stracciatella Shaders |
| |
| Iris Mode | Enable this when you are playing using Iris. |
|
| Agressive Optimisation | Activates Optimisations that can break the visuals or might break in future versions of Minecraft. |
|
| by |
| |
| Fog and Sky | ||
| Fog |
| |
| Cave Fog and Sky | ||
| Cave Fog | Fog changes to a different color when you are underground |
|
| Cave Sky | Sky changes to a different color when you are underground |
|
| Cave Sky Height Threshold | Controls which world height is necessary for the sky color to change |
|
| Cave Fog R | Color of fog inside of caves. |
|
| Cave Fog G | Color of fog inside of caves. |
|
| Cave Fog B | Color of fog inside of caves. |
|
| Fog Start | Sets where the fog starts appearing. Relative to render distance. |
|
| Fog End | Sets where the fog reaches its maximum. Relative to render distance. |
|
| Sun and Moon | ||
| Change Sun and Moon Size |
| |
| Sun and Moon Size | Changes the size of sun and moon |
|
| Sun Angle | Tilts the rotation axis of sun and moon. Vanilla is 0. |
|
| Hide under Horizon | Sun and moon start disappearing under the horizon |
|
| Transition Height | Lower: sun and moon appear lower. Higher: sun and moon appear higher. |
|
| Transition | Lower: Longer transition. Higher: Shorter transition. |
|
| Stars | ||
| Vanilla Star Brightness |
| |
| Custom Stars |
| |
| Size |
| |
| Density |
| |
| Coverage |
| |
| Glow Radius |
| |
| Glow Amount |
| |
| Shooting Stars | Only works with "Custom Stars" enabled. |
|
| Direction |
| |
| Density |
| |
| Speed |
| |
| Trail Length |
| |
| Trail Thickness |
| |
| Custom Sunset Color |
| |
| Sunset Color Configuration | ||
| Sky Sunset R |
| |
| Sky Sunset G |
| |
| Sky Sunset B |
| |
| Custom Sky Color |
| |
| Sky Color Configuration | ||
| Sky Day R |
| |
| Sky Day G |
| |
| Sky Day B |
| |
| Sky Day Rain R |
| |
| Sky Day Rain G |
| |
| Sky Day Rain B |
| |
| Night Sky Brightness |
| |
| Sky Night R |
| |
| Sky Night G |
| |
| Sky Night B |
| |
| Sky Night Rain R |
| |
| Sky Night Rain G |
| |
| Sky Night Rain B |
| |
| Custom Fog Color |
| |
| Fog Color Configuration | ||
| Fog Day R |
| |
| Fog Day G |
| |
| Fog Day B |
| |
| Fog Day Rain R |
| |
| Fog Day Rain G |
| |
| Fog Day Rain B |
| |
| Night Fog Brightness |
| |
| Fog Night R |
| |
| Fog Night G |
| |
| Fog Night B |
| |
| Fog Night Rain R |
| |
| Fog Night Rain G |
| |
| Fog Night Rain B |
| |
| End Sky | ||
| End Sky Upper R |
| |
| End Sky Upper G |
| |
| End Sky Upper B |
| |
| End Sky Lower R |
| |
| End Sky Lower G |
| |
| End Sky Lower B |
| |
| Lighting | ||
| Lightmap | Default. All Features. Simple. Reduced features (only 'Adaptive Blocklight Reduction' and 'Minimum Light'). |
|
| Lightmap Settings | ||
| Skylight AO | Specifies the amount of ambient occlusion on skylight. |
|
| Blocklight AO | Specifies the amount of ambient occlusion on blocklight. |
|
| Skylight Gamma | Higher |
|
| Blocklight Gamma | Higher |
|
| Minimum Light | Restricts blocklight to never go below this value. Prevents caves from being pitch black (unless you set it to zero that is) |
|
| Lightmap Colors | ||
| Adaptive Blocklight Reduction | Reduces blocklight when the sky is bright to avoid clipping. If the blocklight is too bright during daytime, increase this slider. |
|
| End Skylight | ||
| End Skylight Brightness |
| |
| End Skylight Saturation |
| |
| Skylight Day R |
| |
| Skylight Day G |
| |
| Skylight Day B |
| |
| Skylight Night R |
| |
| Skylight Night G |
| |
| Skylight Night B |
| |
| Blocklight R | Select blocklight color (torches, glowstone, etc.). If "Complex Blocklight" is enabled, this color will NOT be used. |
|
| Blocklight G | Select blocklight color (torches, glowstone, etc.). If "Complex Blocklight" is enabled, this color will NOT be used. |
|
| Blocklight B | Select blocklight color (torches, glowstone, etc.). If "Complex Blocklight" is enabled, this color will NOT be used. |
|
| Complex Blocklight | Allows you to select two colors for blocklight. One for dark parts, one for bright parts |
|
| Blend Curve | Higher: Emphasize "Bright" color. Lower: Emphasize "Dark" color. 50 |
|
| Complex Blocklight Dark G |
| |
| Complex Blocklight Dark B |
| |
| Complex Blocklight Bright R |
| |
| Complex Blocklight Bright G |
| |
| Complex Blocklight Bright B |
| |
| Colored Lights | Enabled colored lighting on blocks |
|
| Colored Light Settings | ||
| Vibrance |
| |
| Accumulation Rejection | Sets how temporal history information is discarded. Higher corresponds to history being discarded more easily. |
|
| Acc. Blend Factor | Sets how temporal history information is merged with new information. A lower value places less emphasis on history and will cause colors to update faster at the cost of more flicker. |
|
| Flicker Reduction | Increase this slider if you experience frequent spots of color blinking into existence. Higher values will decrease the speed at which new color spreads and appears. |
|
| Acc. Regeneration Speed | Sets how fast empty regions (with no color information) are filled up. A high value will cause colors to appear faster initially, but may introduce flicker in disoccluded regions. |
|
| Sample LOD Bias | Controls the detail level at which colors are sampled. A higher value will make colors smoother but may cause small lights to be skipped. A lower value will sample at higher detail but will decrease smoothness and introduce flicker. The shader does its best to calculate the appropiate LOD itself. |
|
| Directional Lightmaps |
| |
| Directional Lightmap Strength |
| |
| Normals |
| |
| Normals Resolution Multiplier | Auto-Generated Normals may have a different resolution than your resource pack. This slider allows you to select a higher resolution for the normals. No performance impact. |
|
| HDR Emissives |
| |
| HDR Emissive Brightness |
| |
| Weather | ||
| Rain Detection | How the shader detects if rain is present. "Color" is generally the better option. Select "Temperature" if:. Rain does not receive rain effects. Things that are not rain receive rain effects. |
|
| Rain Opacity |
| |
| Rain Refraction |
| |
| Rain Refraction Strength |
| |
| Angled Rain |
| |
| Angled Rain Amount |
| |
| Angled Rain Rotation Speed |
| |
| Rain Puddles |
| |
| Rain Puddle Color | ||
| Rain Puddle Color R |
| |
| Rain Puddle Color G |
| |
| Rain Puddle Color B |
| |
| Rain Puddle Coverage |
| |
| Rain Puddle Size |
| |
| Rain Puddle Opacity |
| |
| Waving Blocks | ||
| Waving Blocks |
| |
| Waving Blocks Amount |
| |
| Waving Blocks Speed |
| |
| Waving Leaves |
| |
| Waving Lilypads | Controlled by "Waving Liquids Amount" and "Waving Liquids Speed". |
|
| Waving Lanterns |
| |
| Waving Fire |
| |
| Waving Liquids | Water and Lava |
|
| Waving Liquids Amount |
| |
| Waving Liquids Speed |
| |
| Camera and Color | ||
| FXAA | Enables Anti-Aliasing. Improves quality of edges. |
|
| High Quality Upscaling | Switches to bicubic sampling. Internally enables FXAA. Can be useful with lower render quality settings. |
|
| Contrast |
| |
| Vibrance |
| |
| Saturation |
| |
| Brightness |
| |
| Vignette | Darkens screen borders. |
|
| Vignette Strength |
| |
| LUT | Applies a custom color LUT to the image. /!\ Only works for Optifine G8 and higher!. How to add your luts:. Extract the .zip. Go to: shaders/lut. Put your LUT in this folder and name it "lut[number].png". You can then select the file using the slider. Up to 6 luts can be loaded this way. |
|
| Selected LUT | Default LUTs shipped with the shader are:. lut0.png: Neutral. lut1.png: Skyfall. lut2.png: A Summer Night's Adventure. lut3.png: Chrome. lut4.png: Admiral's Anime LUT. lut5.png: Green->Red Color swap (Infrared) |
|
| Use LOG Color |
| |
| LUT Cell Size | Amount of cells on one side. Count the squares on the lut image along one side to figure this out. |
|
| Water | ||
| Underwater Fog Density |
| |
| Depth Influence | Higher: Depth will have a strong influence on fog density. Lower: Depth will have a weak influence on fog density. Zero: Depth will have no influence on fog density. |
|
| Fog Brightness Influence | Higher: Underwater fog will be darker at night. |
|
| Fog Brightness Influence | Higher: Underwater fog will get darker faster when you dive deeper. |
|
| Utilities and Effects | ||
| Blinking Ores |
| |
| Blinking Ores Settings | ||
| Blink Brightness |
| |
| Diamond |
| |
| Ancient Debris |
| |
| Iron |
| |
| Gold |
| |
| Copper |
| |
| Redstone |
| |
| Lapis Lazuli |
| |
| Emerald |
| |
| Coal |
| |
| Nether Quartz |
| |
| Nether Gold |
| |
| Damage Effect |
| |
| Damage Effect Redness |
| |
| Damage Effect Displacement |
| |
| Damage Effect Cell Size |
| |
| Other | ||
| Dithering | Removes Banding. Smart: Enables dithering in select programs. Full: Enables dithering in all programs. |
|
| World Time Animation | Uses the ingame time instead of real time for animations, such as waving leaves or water. This can be useful for animation tools like replaymod, enable this when waving things seem jittery. |
|
| Solid Block Outline |
| |
| Line Thickness | Makes the block outline no longer transparent. |
|
| Block Outline Style |
| |
| Custom Color Configuration | ||
| Block Outline Color R |
| |
| Block Outline Color G |
| |
| Block Outline Color B |
| |
| DEBUGDon't mess with the stuff in here unless you know what you're doing. Debug options and Internal toggles get dumped here. | ||
| Colored Lights Debug |
| |
| CLOUD_HEIGHT |
| |
| CLOUD_SIZE |
| |
| CLOUDS |
| |
| CUSTOM_SKY |
| |
| END |
| |
| HAND_WATER |
| |
| LIGHTMAP_NETHER_SKY_BRIGHTNESS |
| |
| NETHER |
| |
| OVERWORLD |
| |
| THICC_CLOUDS |
|
How To Install Stracciatella Shaders
- Support Forge / Vanilla
- Extra features
- Good performance
- Support Fabric / Quilt
- Better performance, depend on your hardware
Optifine Installation Guide
Note
Your device must have Java installed to run the Forge and Optifine installers.
Quick Java Installation Guide
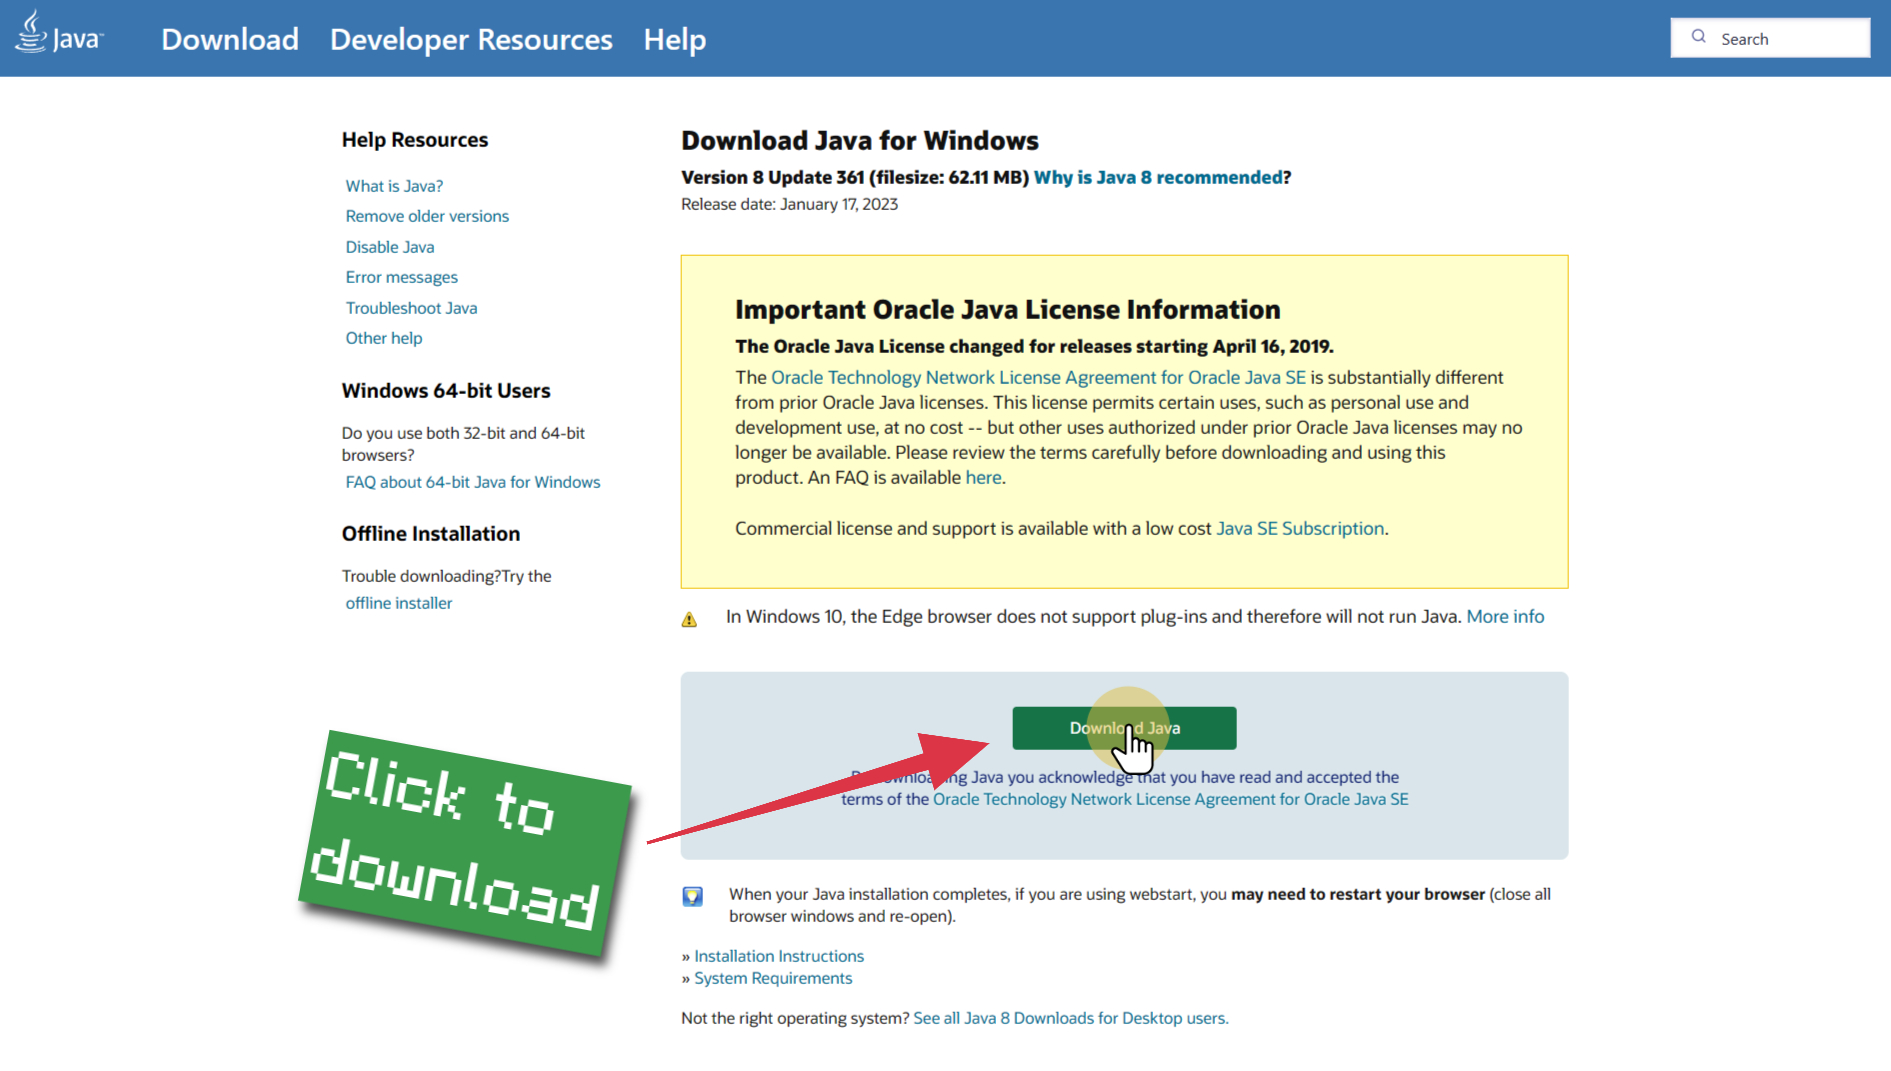
Download Java
Download the Java installer from the official website here.

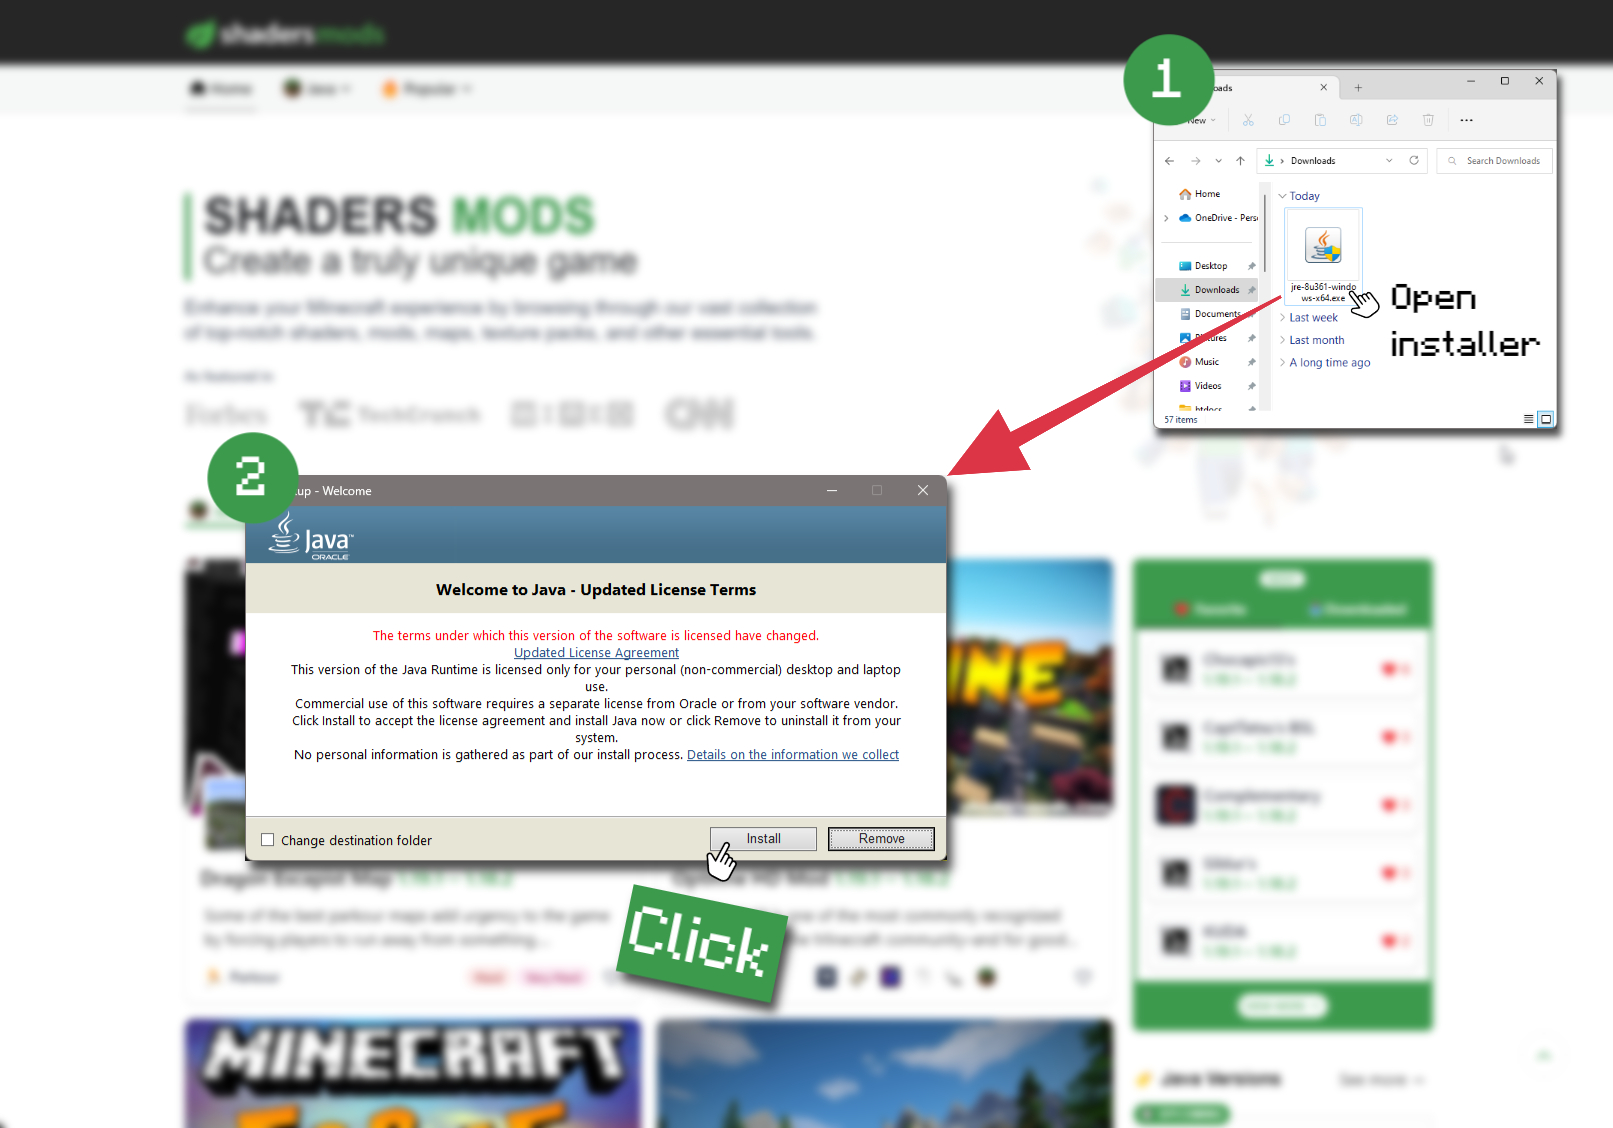
Open Installer
Once you have downloaded the file, run it and click the Install button.

How to install Stracciatella Shaders with Optifine?
Download Optifine
Get the latest version of Optifine for your Minecraft version.
Download OptifineInstall Optifine
Run the Optifine installer and follow the on-screen instructions to complete the installation.

Download Stracciatella Shaders
Go to the download section and get shaders zip file. Unzip the file if necessary, as some shader developers may bundle multiple shader versions in one zip file.
Launch Minecraft
Start the Minecraft launcher and make sure you have the Optifine profile selected.

In-game Shaders menu
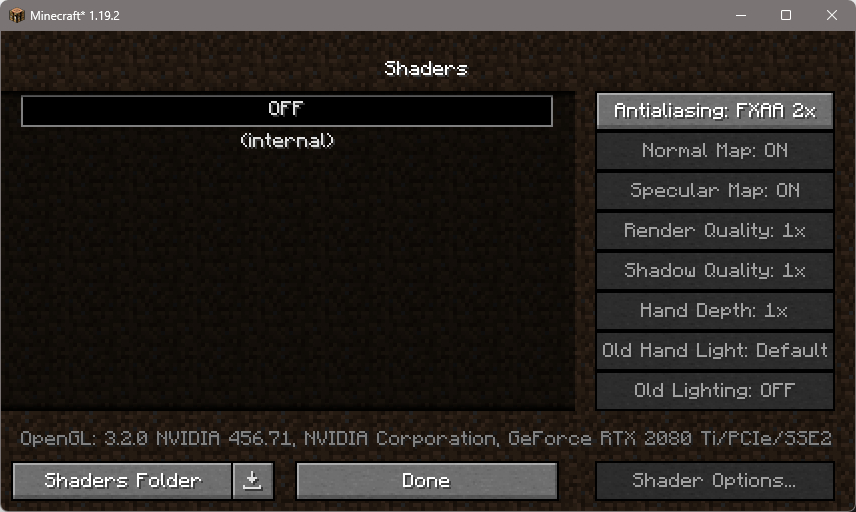
Go to Options > Video Settings > Shaders to access the shaders menu.

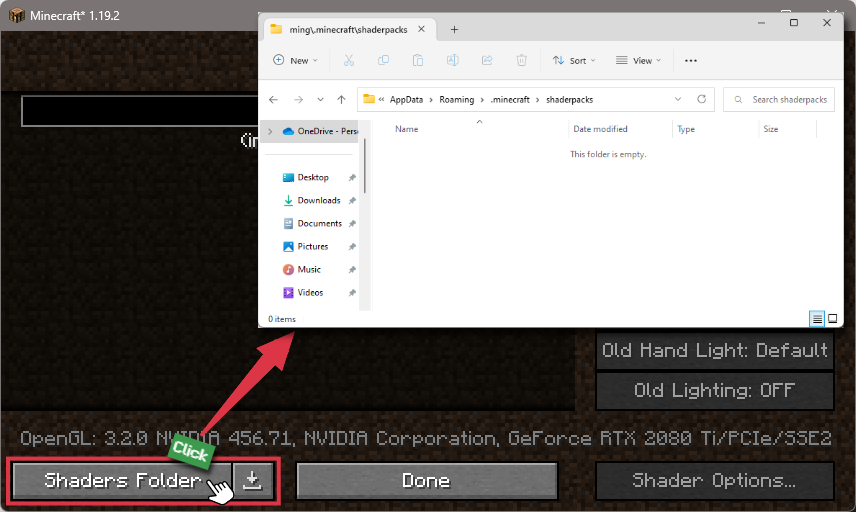
Open shaderpacks folder
Click on the "Shaders Folder" button to open the folder where shaders are stored, so you can add or remove shaders as desired.

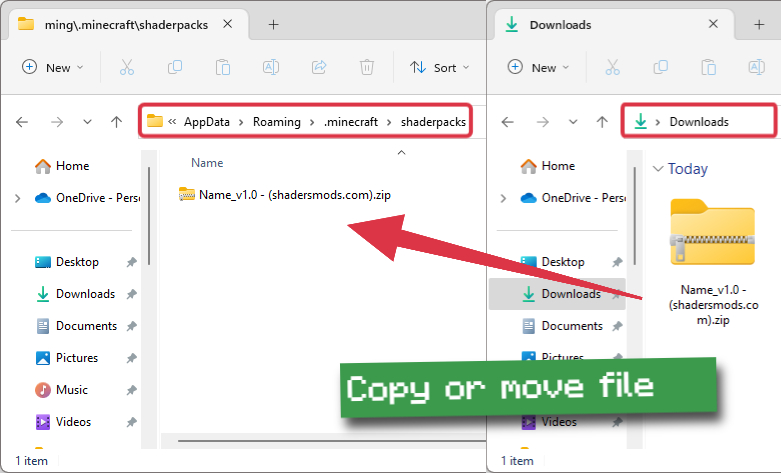
Install Stracciatella Shaders
Copy or move the downloaded Stracciatella shaders zip file into the shaderpacks folder.

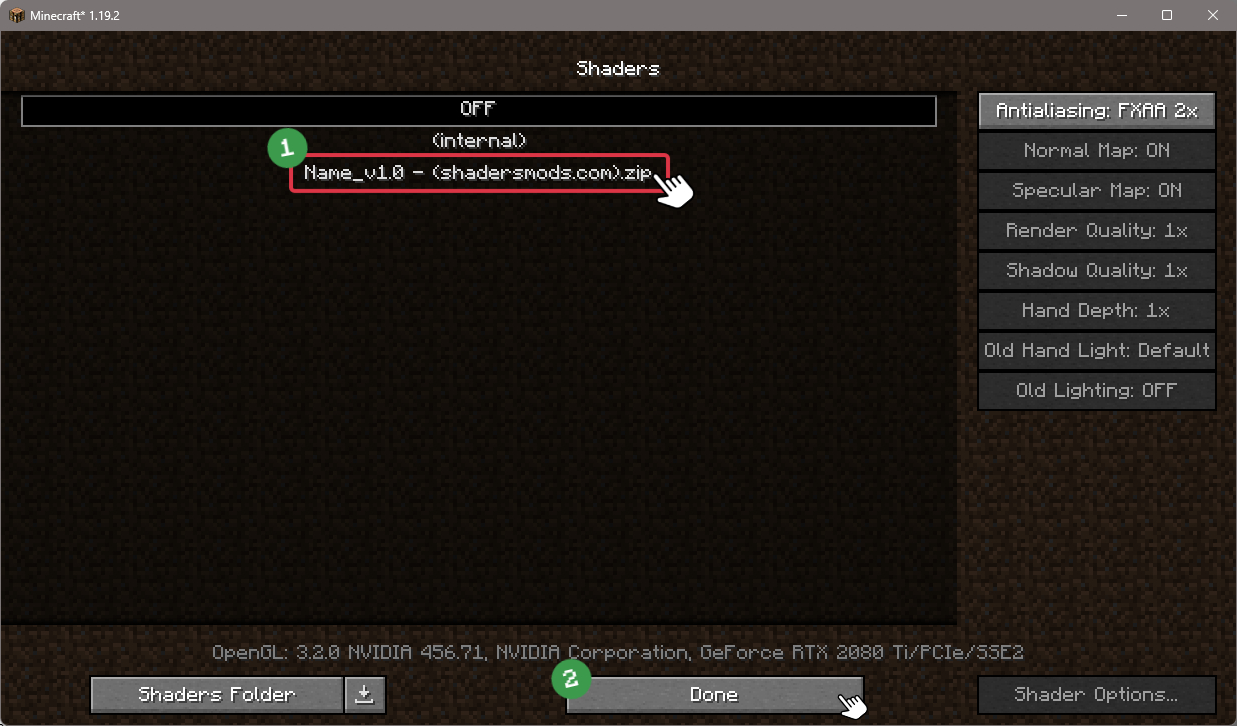
Select Stracciatella Shaders
Choose Stracciatella shader pack from the list of available shaders in the options menu.

How to install Stracciatella Shaders with Forge and Optifine?
Quick Installation Guide
Install Forge
Obtain the latest version of Forge that is compatible with your Minecraft version.
Download Minecraft ForgeLaunch Minecraft
Start the Minecraft launcher and select the version of Minecraft you want to install Forge on. Run the game once by clicking on the "Play" button to create necessary files for Forge.

Install Forge Client
Double-click on the Forge installer jar file and choose "Install Client" in the window that appears.

Install Optifine
Download the Optifine jar file after Forge is installed. Move the Optifine jar file to the mods folder in the .minecraft directory.
Download Optifine
Launch Forge Profile
Launch Minecraft using the "Forge" profile, Optifine will be automatically loaded along with Forge.

Install Chocapic13's Shaders
Now the installation is the same as from the above Optifine instructions, just follow the steps starting from step 5.
Iris Installation Guide
Note
Your device must have Java installed to run the Iris installer.
Quick Java Installation Guide
Download Java
Download the Java installer from the official website here.

Open Installer
Once you have downloaded the file, run it and click the Install button.

How to install Stracciatella Shaders with Iris?
Download Iris Shaders
Find the latest version of the Iris Shaders installer and download it.
Download Iris InstallerInstall Iris Shaders
Open the downloaded jar file, and choose the preferred game version and installation type.
⯈ Iris Install:
If you don't plan on using any other mods with Iris, choose this option.⯈ Fabric Install:
Choose this option if you want to use Iris with Fabric and other mods. The Iris jar files will be copied to the mods folder within the .minecraft directory.
Start Installation
After selecting the game version and installation type, click the "Install" button to start the installation process.
Launch Minecraft
Start the Minecraft launcher and make sure you have the Iris profile selected.
Note
Select the Fabric profile if you opt for the Fabric installation type.
In-game Shader Menu
Open the Minecraft game and go to Options > Video Settings > Shader Packs to access the shaders menu.
Tip
To simplify the process, simply drag and drop the shader ZIP file directly into the Minecraft window, bypassing the next two steps.
Open shaderpacks folder
Click on the "Open Shader Pack Folder" button to access the folder where shaders are stored.

Install Stracciatella Shaders
Copy or move the shaders zip file into the shaderpacks folder.

Select Stracciatella Shaders
Choose installed shader pack from the list of available shaders in the options menu and click the "Apply" or "Done" button to select it.
Tip
When the shader pack is selected, its name will be changed to yellow.
📥 Stracciatella Shaders — Download
Something You Should Know
- Our links are only from the official developer, so you can be sure they are secure.
- No modifications or edits are made to the files.
🔄 Update Logs
v1.5.0.1
- Fixed broken zip file
v1.5
New Features
- Added more sculk blocks to HDR Emissives
- Added Redstone components to HDR Emissives
- Added lit Redstone ores to HDR Emissives
- Added ‘Agressive Optimisation’ option, which can be used to disable optimizations that may break stuff
Improvements
- Improved Rain Refraction
- Improved Underwater Fog
- Fog brightness is affected by daytime
Fixes
- Include guards do not show up in the debug menu on OF anymore
- Fixed block outline not displaying correctly on Iris
