PlunderPixel's Shaders 1.12.2 → 1.11.2
Realistic and demanding shader pack with high-quality features and optimized coding.
| Developer | 👤PlunderPixels |
|---|---|
| Style | 🌅Realistic |
| Support GPUs | |
| Loaders | |
| Performance Impact | Medium |
| Settings | 29 |
| Features | Vignette+20 |
| Created | Apr 14, 2014 |
| Updated | Apr 16, 2014 |
| Stats |
|
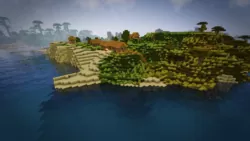
The PluderPixel’s Shaders is a light Shader pack designed for realism and provides many Shader features that will make your Minecraft a little more realistic. The Shader was fully overwritten and now features more optimized coding than ever before.
Advanced Shader effects
PlunderPixel’s Shader pack is not shy about providing wonderful effects and features and uses all the advanced Shader effects it could without sacrificing performance. Because of the quality of the pack, it is considered on par with many popular Shader Packs like SEUS.
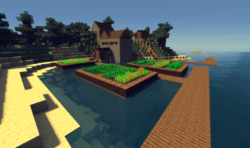
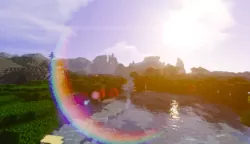
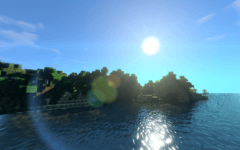
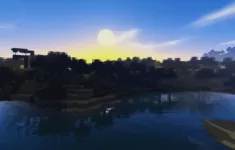
Realistic Sky
One of the most beautiful features of this Shader pack is its ultra-realistic skybox and textures. On top of that, it also features beautiful lighting and bloom effects that make the day and the night absolutely gorgeous.
Dynamic Lights
A key feature that makes the Shader pack beautiful is its wonderful dynamic lighting effect and Shadows.
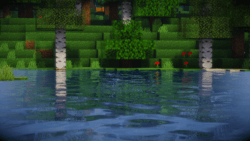
Jaw-Dropping Water
The physics-based water looks absolutely gorgeous with the addition of reflection and refraction effects. With this pack installed, water will reflect the sky and the landscape while refracting light sources. Shiny objects and blocks will also have similar effects on them!
Waving Foliage and Flora
As with most Shader packs, this wonderful pack also features waving grass, flowers, leaves, and more for a more dynamic and immersive world.
Realistic Vibe
The wonderful PlunderPixel’s Shader mod aims to provide quality realism in the game, and it is delivered greatly. By installing this pack, your Minecraft world will become much more realistic than you started, and it won’t look the same.
The PluderPixel’s Shader pack is absolutely beautiful. Graphics-wise, it makes the game a lot more realistic and immersive. The pack’s highlights are the excellent reflective and refractive water, gorgeous looking sky, and immersive Shadows and lighting effects. Although the pack requires a lot of resources and might drop your framerate, it is still worth using. If you have a high-end PC with beast specs, then it is more reason to use this beautiful pack.
- 1.12.2
- 1.12.1
- 1.12
- 1.11.2
- 1.11.1
- 1.11
- 1.10.2
- 1.10.1
- 1.10
- 1.9.4
- 1.9.3
- 1.9.2
- 1.9.1
- 1.9
- 1.8.9
- 1.8.8
- 1.8.7
- 1.8.6
- 1.8.5
- 1.8.4
- 1.8.3
- 1.8.2
- 1.8.1
- 1.8
- 1.7.10
- 1.7.9
- 1.7.8
- 1.7.7
- 1.7.6
- 1.7.5
- 1.7.4
- 1.7.2
- 1.7
- 1.6.4
- 1.6.2
Features
Over 20 new features are available in PlunderPixel's Shaders to enhance your gaming experience.
📊 Performance Impacts
Decrease in performance can vary from device to device, driver version, and many other factors, you should test yourself on your machine for the best result.
- None
- No performance decreases
- Small
- ~5%
- Medium
- ~10%
- High
- ~25%
- Extreme
- +50%
-
- Ambient OcclusionMedium
- Simulating how light interacts with objects and surfaces.
-
- BloomSmall
- Enhance the game's lighting and create a more realistic and immersive visual experience
-
- BlurSmall
- Simulate how fast-moving objects appear to blur in a photograph or video.
-
- CustomizationNone
- Customize various aspects of the game's visual effects.
-
- DarkNone
- Enjoy exploring dark and mysterious environments, such as caves or ruins.
-
- Depth of FieldMedium
- Making objects closer to the camera appear sharp and in focus, while objects farther away appear out of focus and blurry.
-
- Lens FlareSmall
- Simulating the way light scatters and reflects inside a camera lens.
-
- LightMedium
- Enhance the game's overall visual quality.
-
- Motion BlurHigh
- Simulates the way that fast-moving objects appear to blur in the real world.
-
- ShadowsSmall
- Simulate how light is blocked and scattered by objects in the environment.
-
- Sun RaysMedium
- Simulate the appearance of sunlight streaming through trees leaves, objects, clouds, or other atmospheric conditions.
-
- SunriseSmall
- More realistic and immersive sunrise experience.
-
- SunsetSmall
- More realistic and immersive sunset experience.
-
- Tone MappingSmall
- Adjusting the brightness, contrast, and saturation levels.
-
- VignetteNone
- Darkening effect around the edges of the screen
-
- Water ReflectionsMedium
- Simulating reflections on the surface of the water.
-
- Water WavesMedium
- Movement of waves on the surface of the water.
-
- Waving GrassSmall
- Simulating the way it moves and sways in the wind.
-
- Waving PlantsSmall
- Simulating the way they move and sway in the wind.
-
- Waving TreesSmall
- Adds movement to the leaves and branches of trees, making them look more alive and realistic.
PlunderPixel's Shaders allow you to change more than 29 settings to suit your needs.
| Settings | Description | Options |
|---|---|---|
| BLOOM |
| |
| CROSSPROCESS |
| |
| DOF | Broken |
|
| GODRAYS |
| |
| HIGHDESATURATE |
| |
| Ice_reflections |
| |
| LENS | Lens Effect |
|
| Portal_reflections |
| |
| SSAO |
| |
| SSAO_HQ | HQ is similar to nvidia's HBAO |
|
| SSAO_LQ | Enable LQ or HQ, but not both! |
|
| TONEMAP |
| |
| VIGNETTE |
| |
| WATER_REFLECTIONS |
| |
| WAVING_BROWN_MUSHROOM |
| |
| WAVING_CARROTS |
| |
| WAVING_FIRE |
| |
| WAVING_FLOWERS |
| |
| WAVING_GRASS |
| |
| WAVING_LAVA |
| |
| WAVING_LEAVES |
| |
| WAVING_LILYPAD |
| |
| WAVING_POTATOES |
| |
| WAVING_RED_MUSHROOM |
| |
| WAVING_SAPLINGS |
| |
| WAVING_SUGAR_CANES |
| |
| WAVING_VINES |
| |
| Waving_water |
| |
| WAVING_WHEAT |
|
How To Install PlunderPixel's Shaders
- Support Forge / Vanilla
- Extra features
- Good performance
- No modding required Support Forge
- No modding required Older versions of Minecraft are supported
Optifine Installation Guide
Note
Your device must have Java installed to run the Forge and Optifine installers.
Quick Java Installation Guide
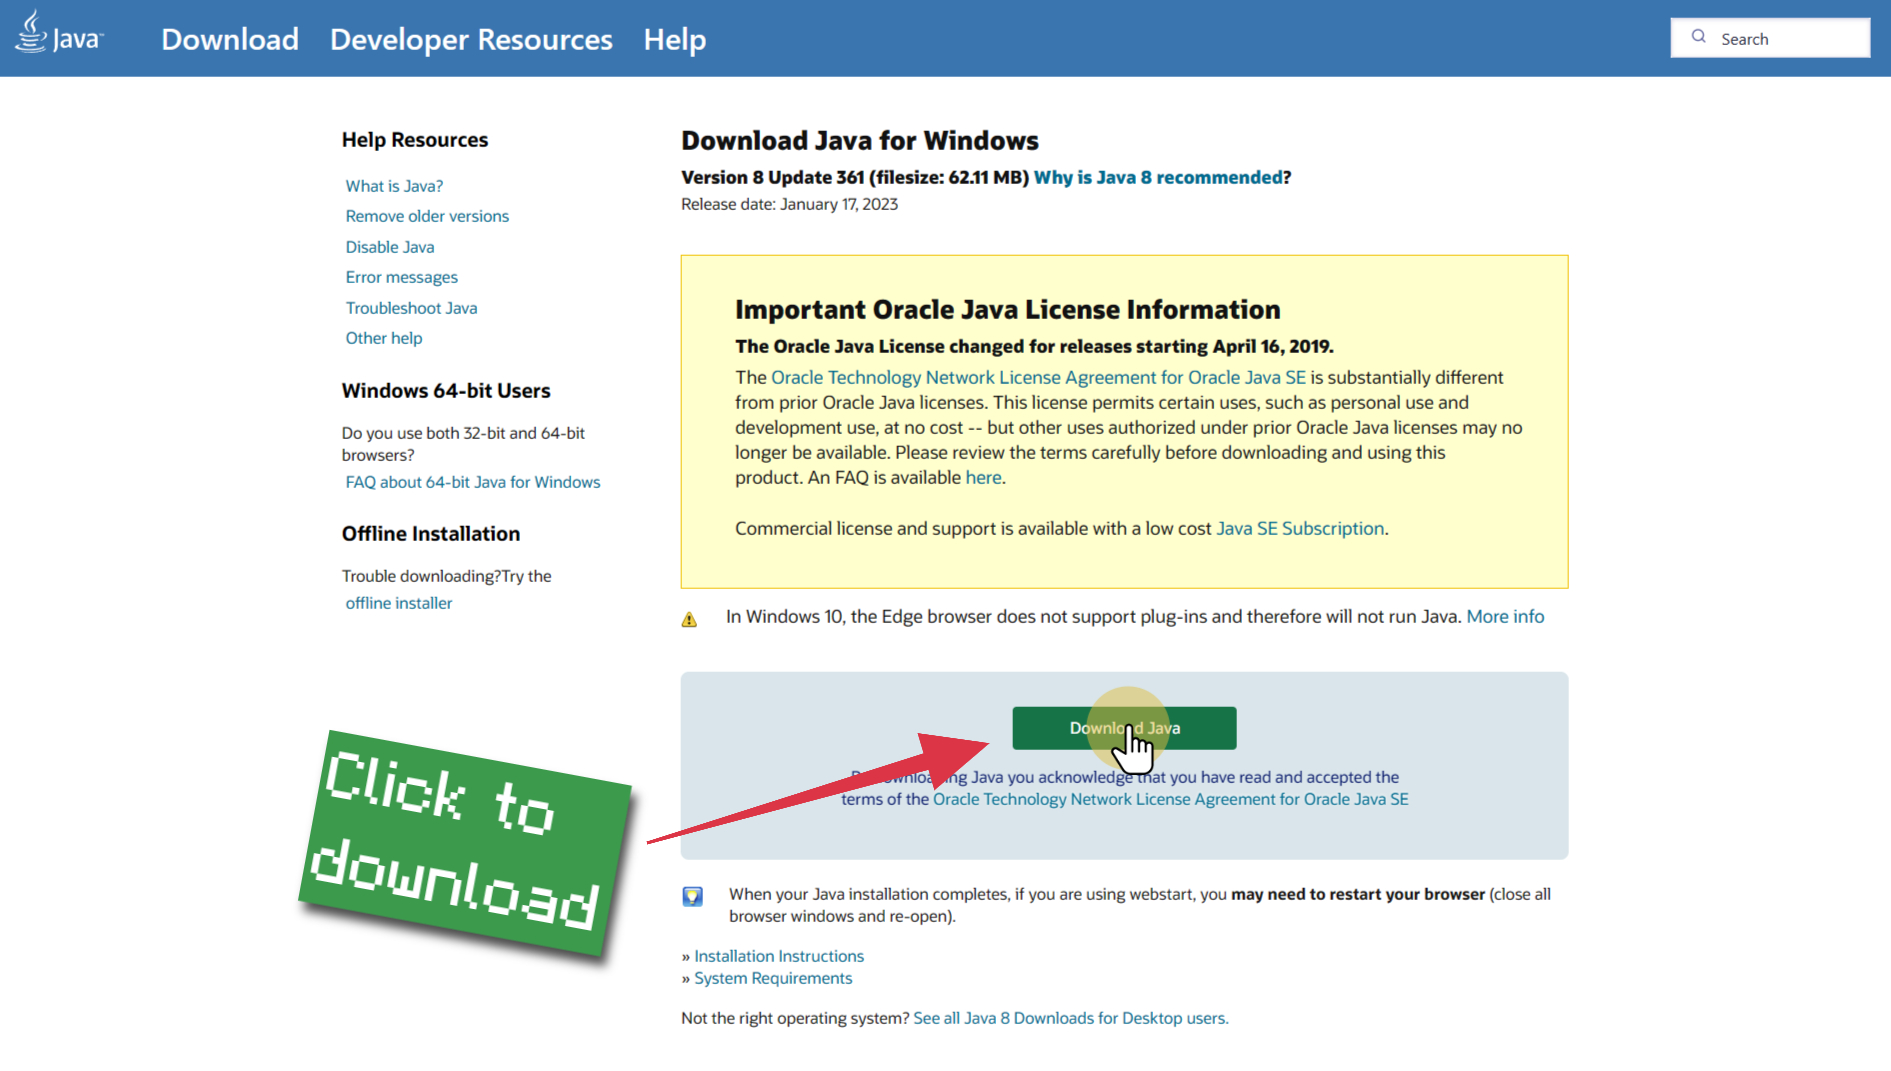
Download Java
Download the Java installer from the official website here.

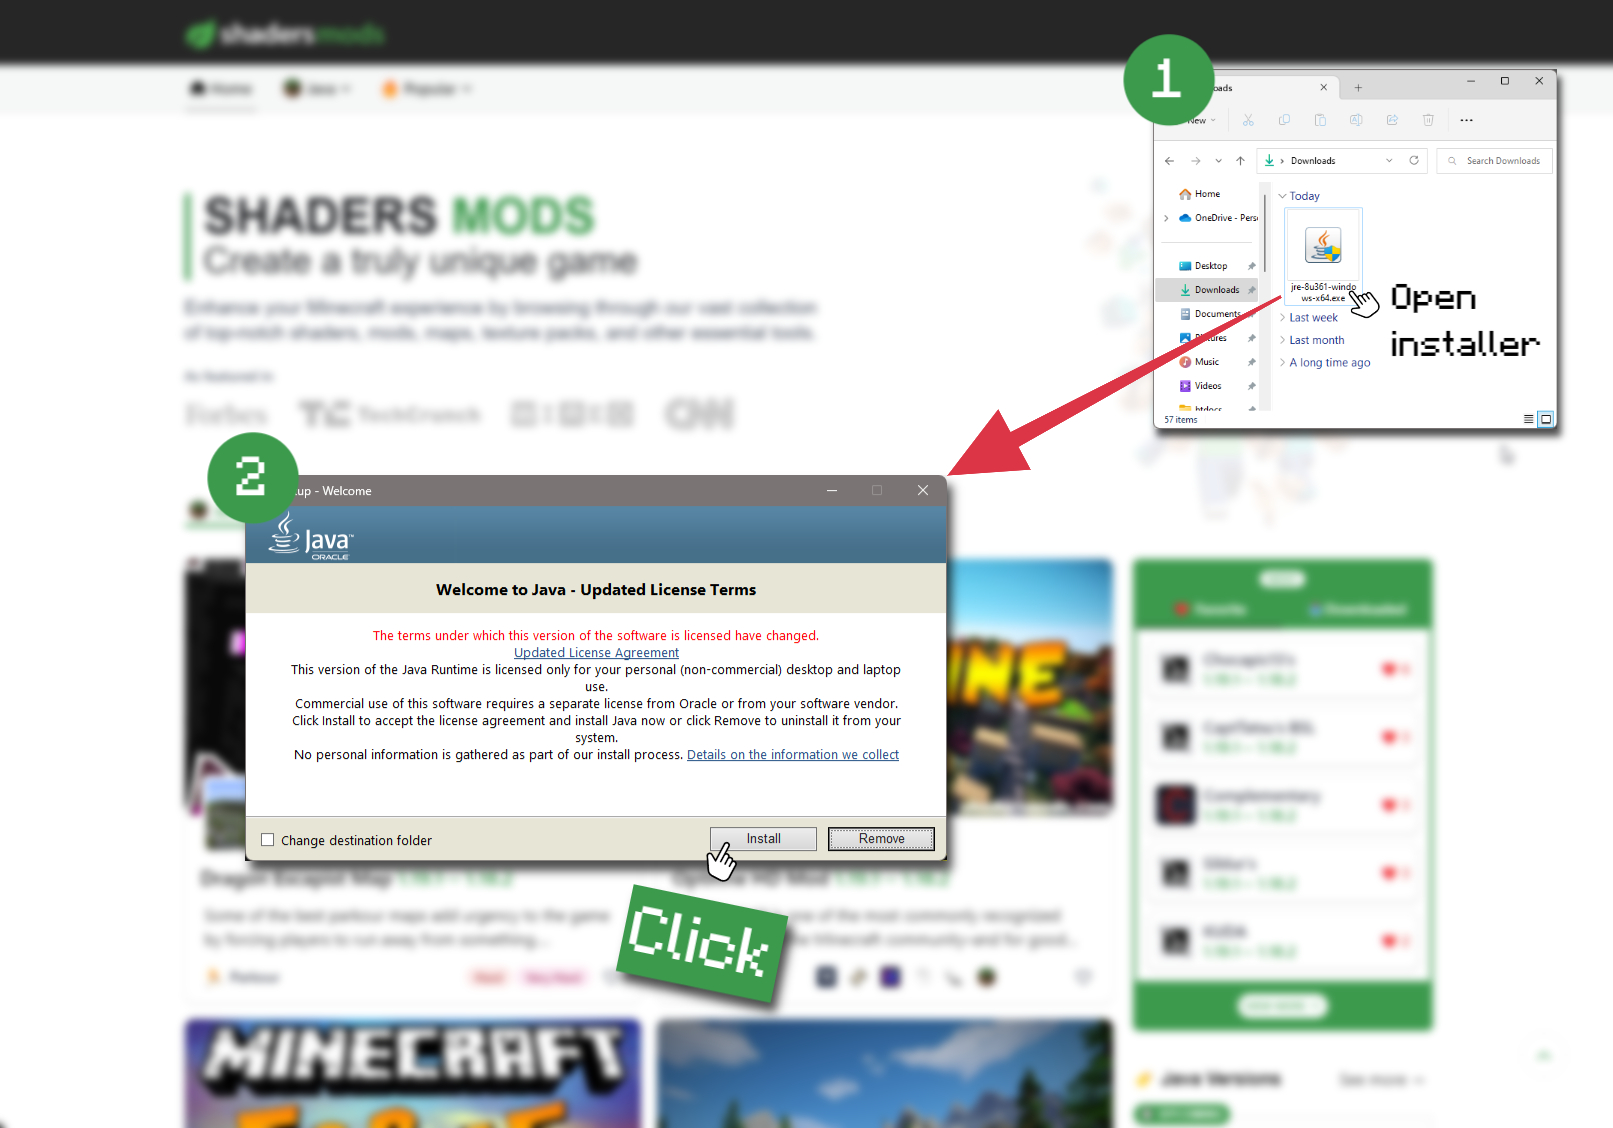
Open Installer
Once you have downloaded the file, run it and click the Install button.
How to install PlunderPixel's Shaders with Optifine?
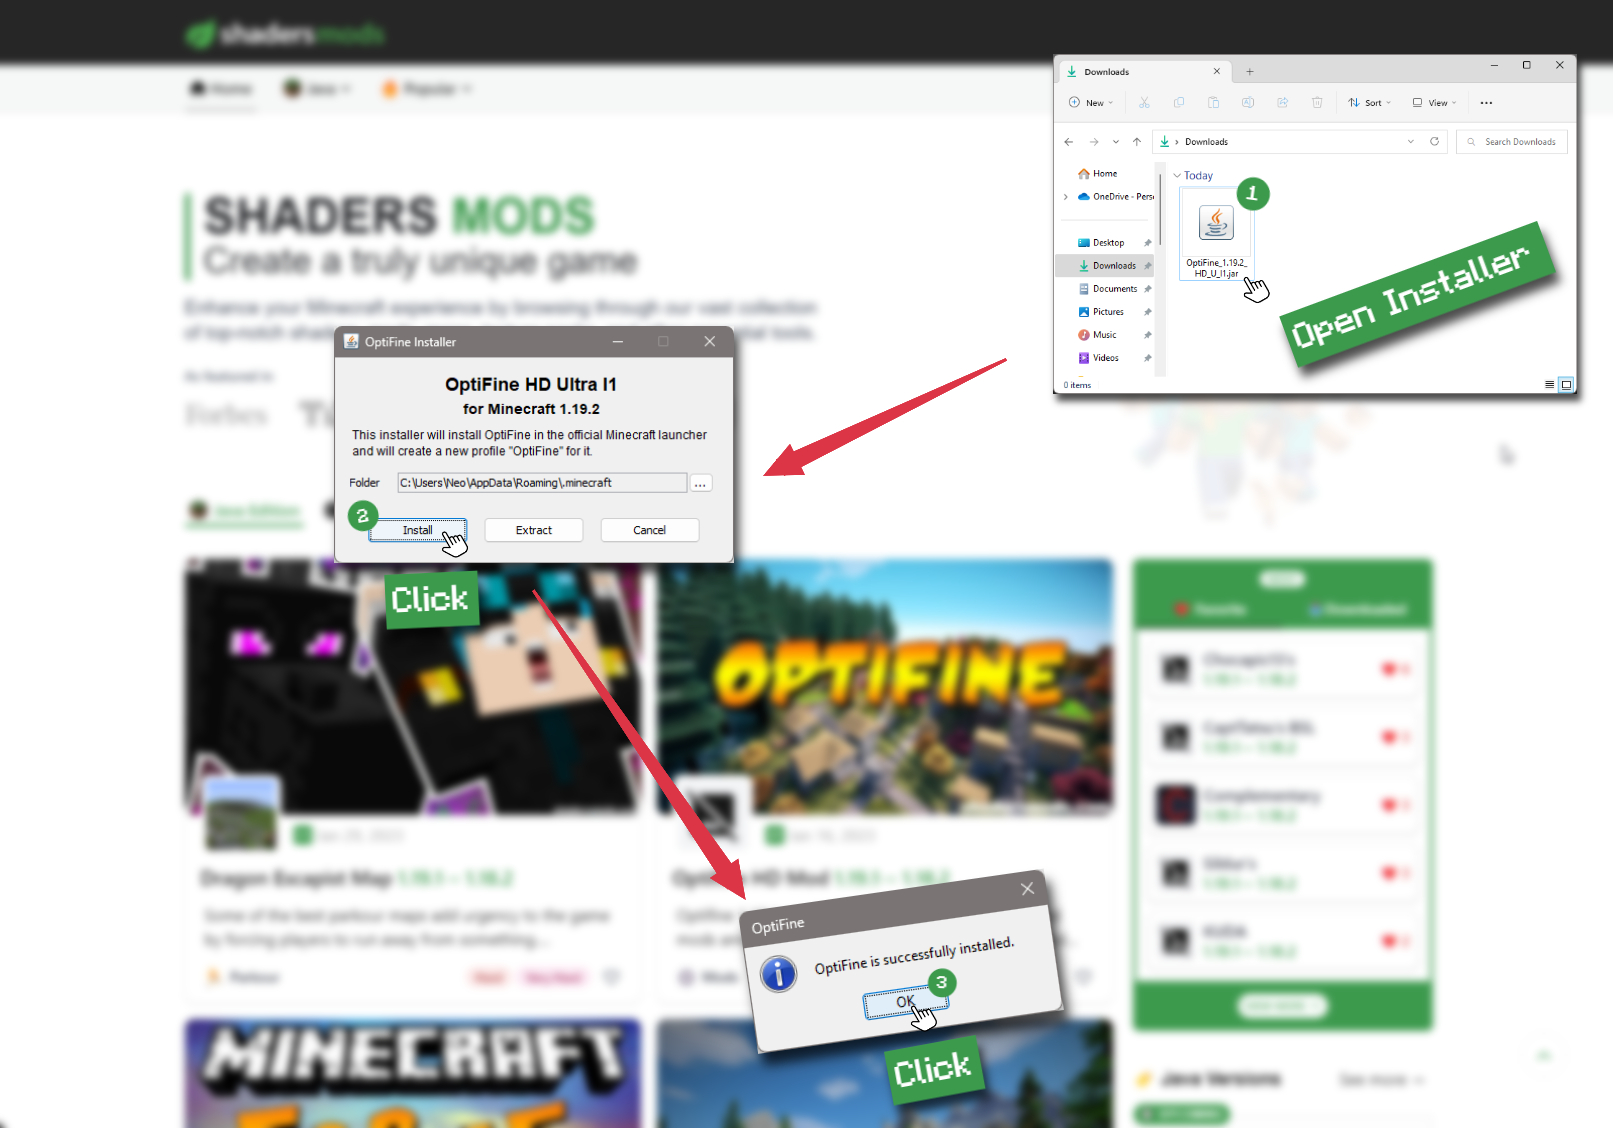
Download Optifine
Get the latest version of Optifine for your Minecraft version.
Download OptifineInstall Optifine
Run the Optifine installer and follow the on-screen instructions to complete the installation.
Download PlunderPixel's Shaders
Go to the download section and get shaders zip file. Unzip the file if necessary, as some shader developers may bundle multiple shader versions in one zip file.
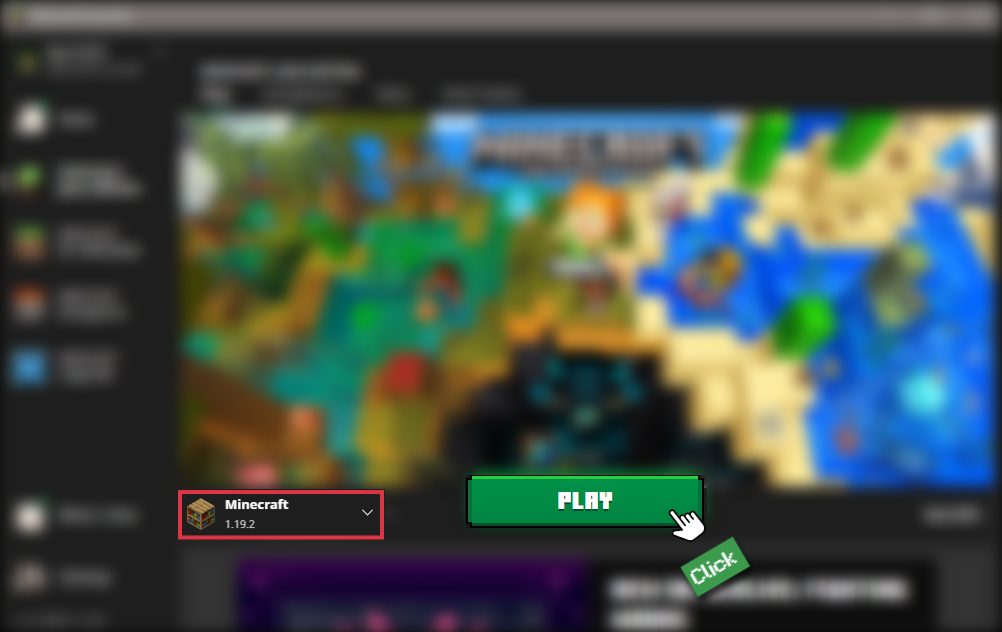
Launch Minecraft
Start the Minecraft launcher and make sure you have the Optifine profile selected.
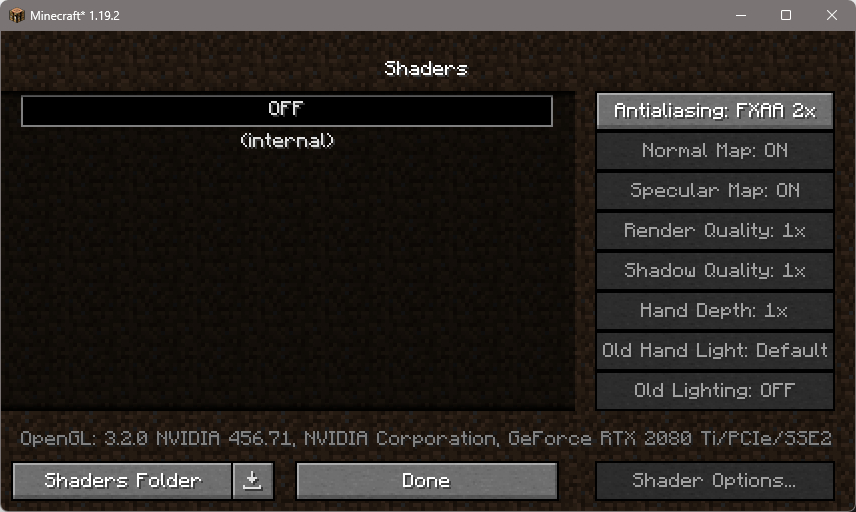
In-game Shaders menu
Go to Options > Video Settings > Shaders to access the shaders menu.
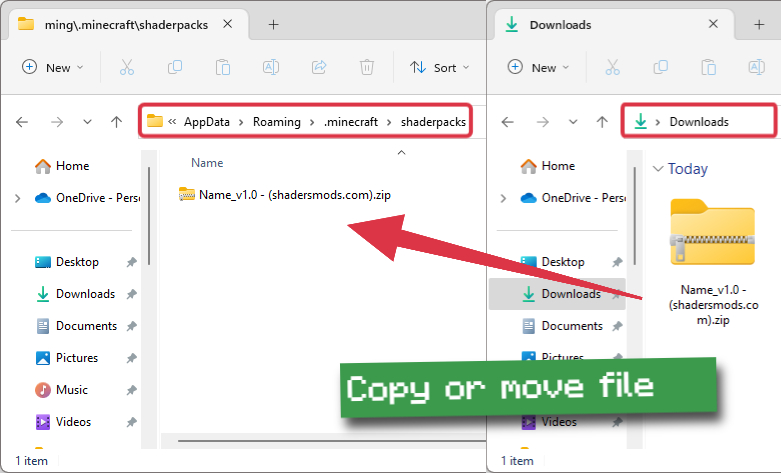
Open shaderpacks folder
Click on the "Shaders Folder" button to open the folder where shaders are stored, so you can add or remove shaders as desired.
Install PlunderPixel's Shaders
Copy or move the downloaded PlunderPixel's shaders zip file into the shaderpacks folder.
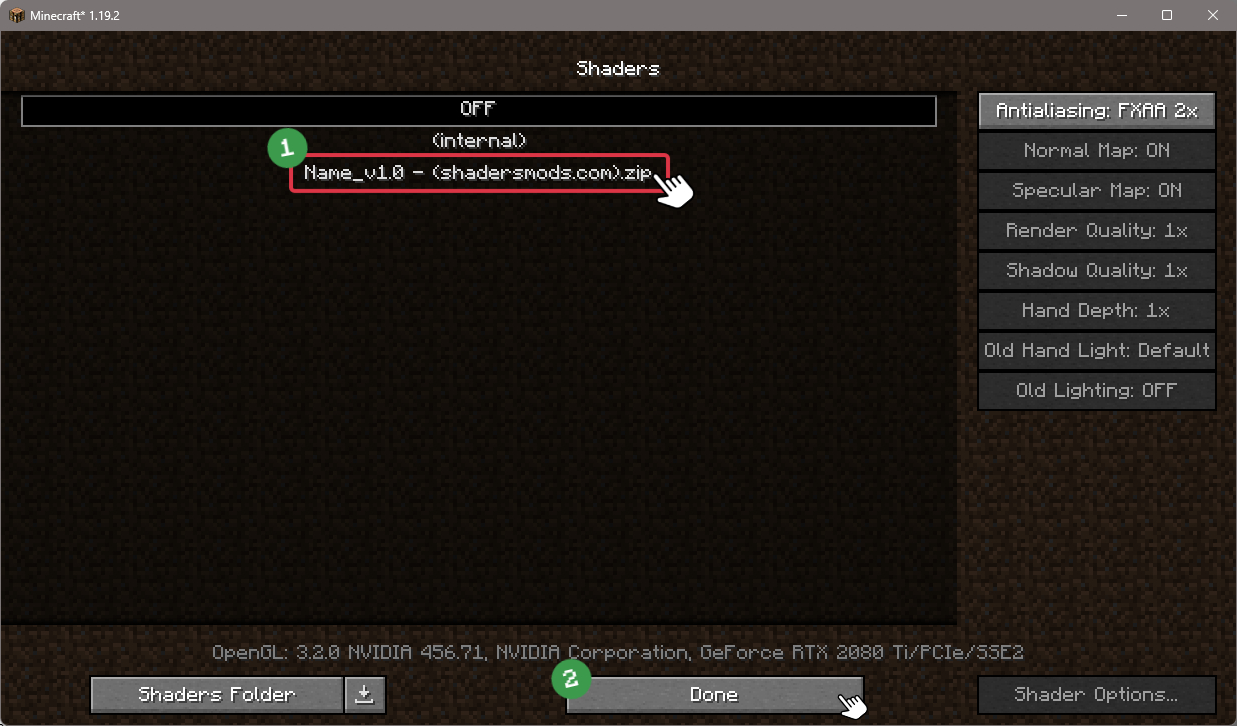
Select PlunderPixel's Shaders
Choose PlunderPixel's shader pack from the list of available shaders in the options menu.


How to install PlunderPixel's Shaders with Forge and Optifine?
Quick Installation Guide
Install Forge
Obtain the latest version of Forge that is compatible with your Minecraft version.
Download Minecraft ForgeLaunch Minecraft
Start the Minecraft launcher and select the version of Minecraft you want to install Forge on. Run the game once by clicking on the "Play" button to create necessary files for Forge.
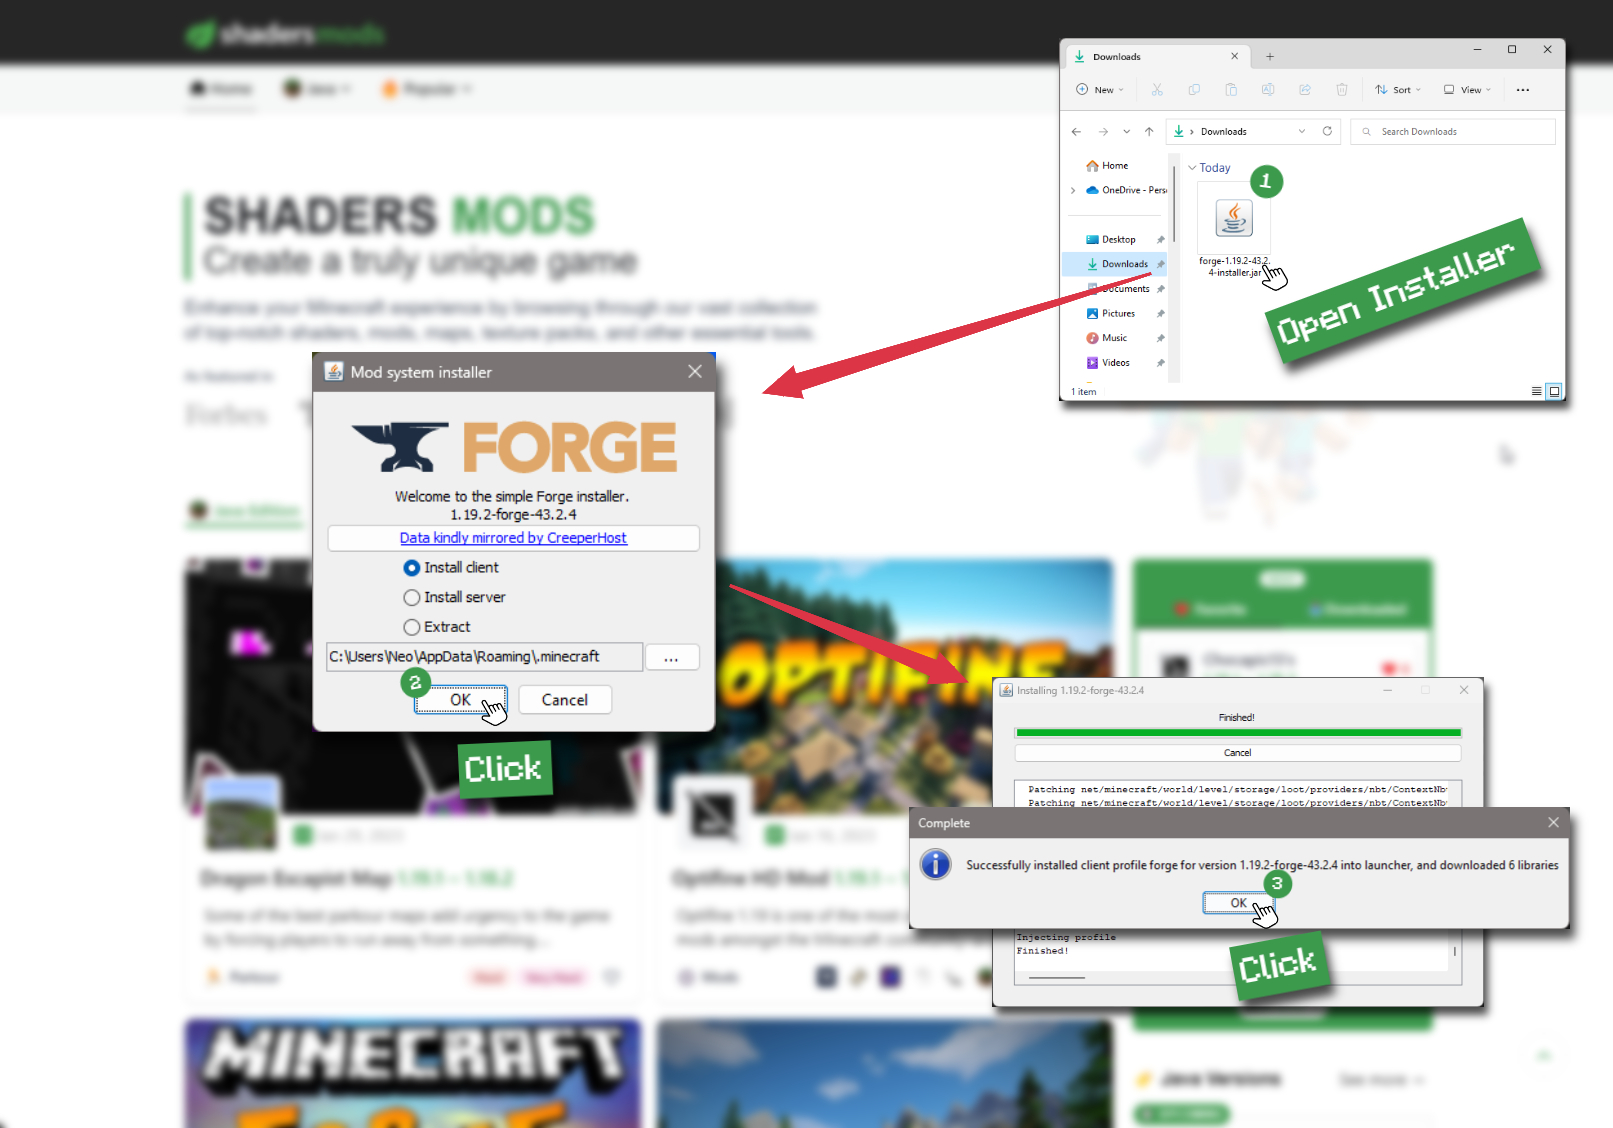
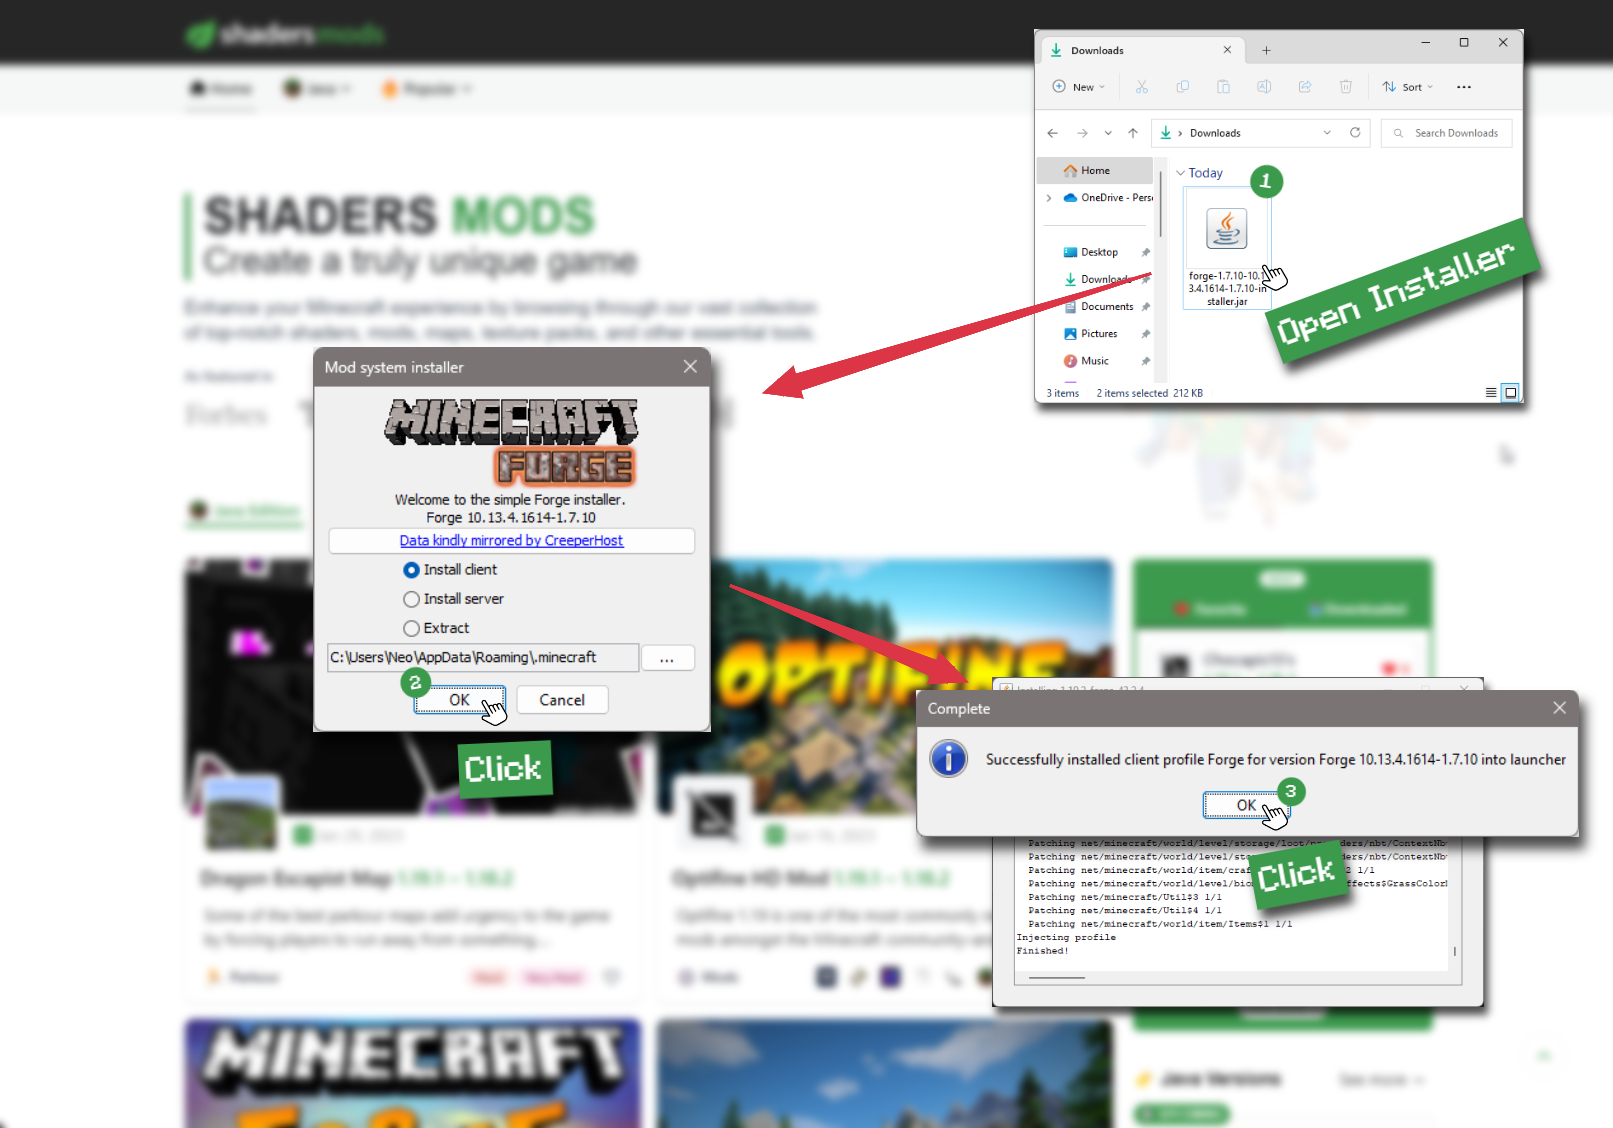
Install Forge Client
Double-click on the Forge installer jar file and choose "Install Client" in the window that appears.
Install Optifine
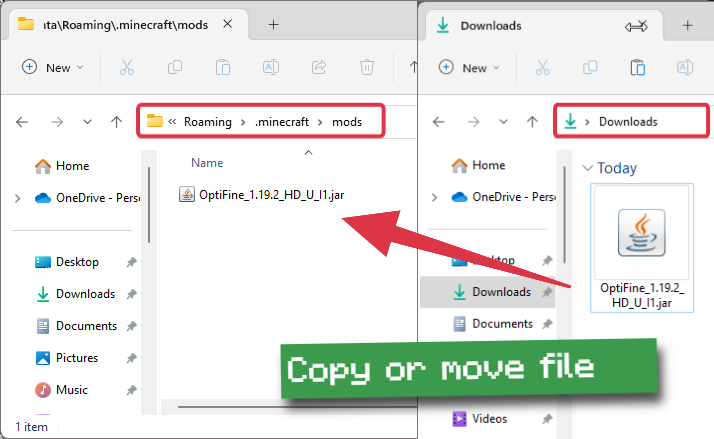
Download the Optifine jar file after Forge is installed. Move the Optifine jar file to the mods folder in the .minecraft directory.
Download Optifine
Launch Forge Profile
Launch Minecraft using the "Forge" profile, Optifine will be automatically loaded along with Forge.
Install Chocapic13's Shaders
Now the installation is the same as from the above Optifine instructions, just follow the steps starting from step 5.

GLSL Installation Guide
Warning
How to install PlunderPixel's Shaders with GLSL Shaders Mod?
Install Forge
Download the latest version of Forge that is compatible with your Minecraft version.
Download Minecraft ForgeLaunch Minecraft
Start the Minecraft launcher and select the version of Minecraft you want to install Forge on. Run the game once by clicking on the "Play" button to create the necessary files for Forge.
Install Forge Client
Double-click on the Forge installer jar file and choose "Install Client" in the window that appears.
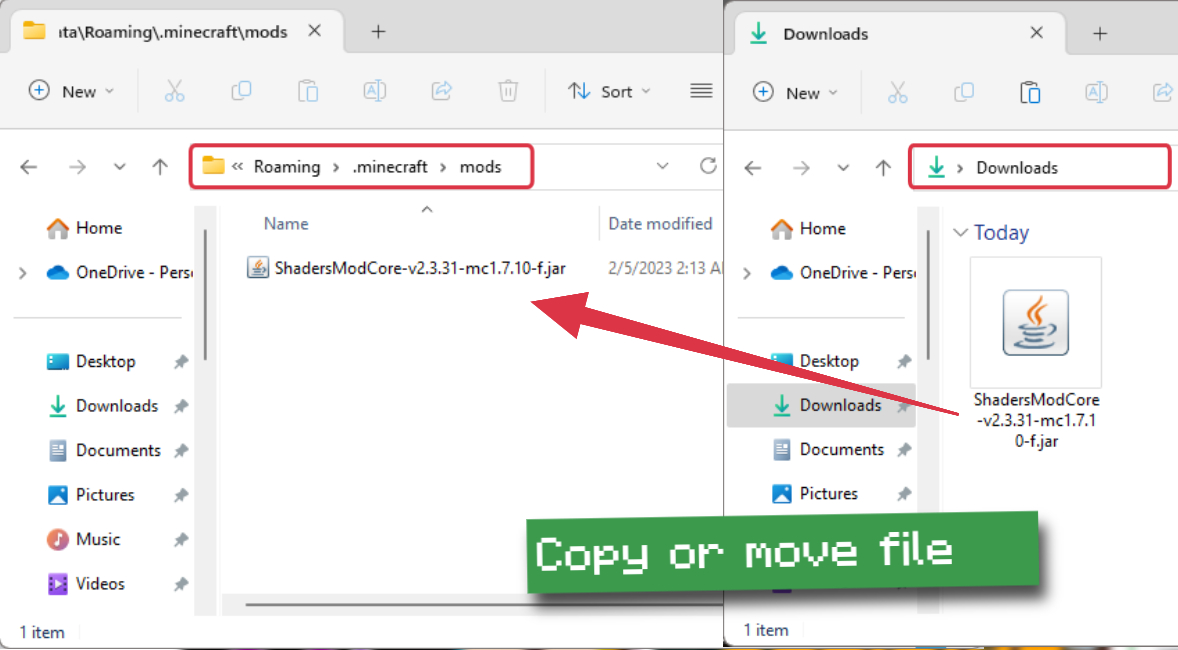
Install GLSL Shaders Mod
Download the GLSL jar file after Forge is installed. Move the GLSL jar file to the mods folder in the .minecraft directory.
Download GLSL Shaders
Launch Forge Profile
Launch Minecraft using the "Forge" profile, and GLSL Shaders will be automatically loaded along with Forge.
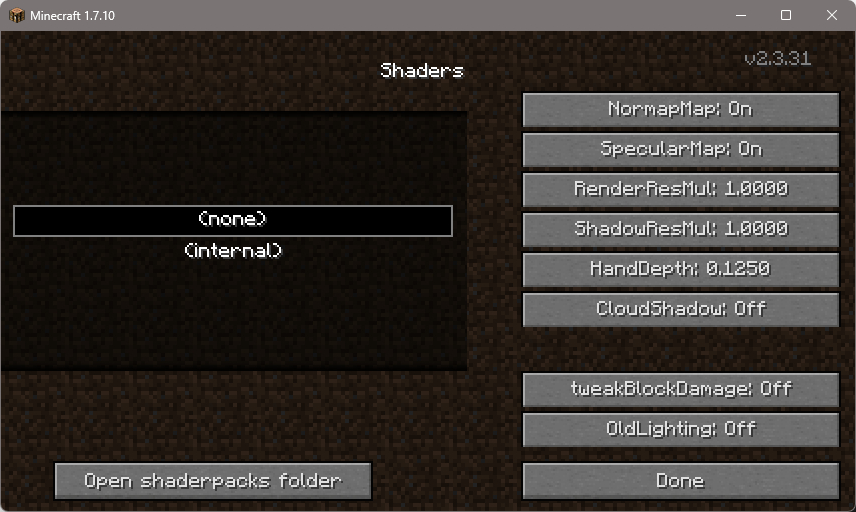
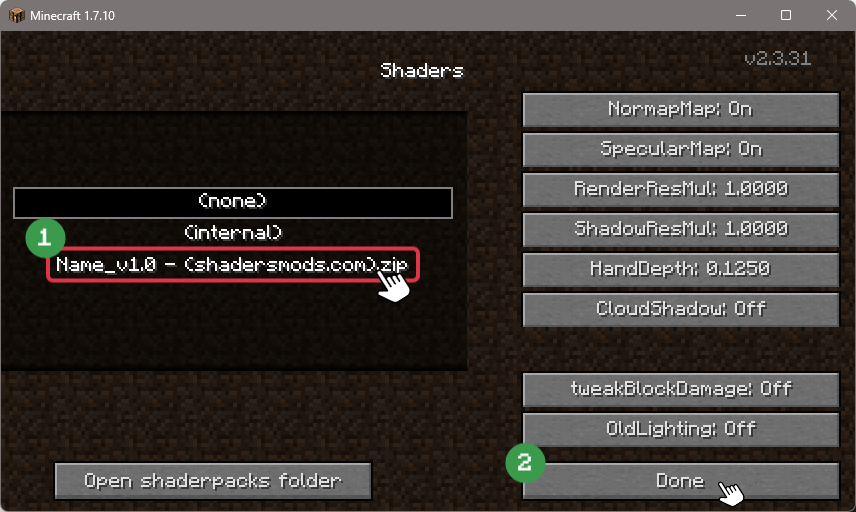
In-game Shaders menu
Go to Options > Shaders to access the shaders menu.
Open shaderpacks folder
Click on the "Open shaderpacks folder" button to open the folder where shaders are stored.
Install PlunderPixel's Shaders
Copy or move the downloaded shaders zip file into the shaderpacks folder.
Select PlunderPixel's Shaders
Choose PlunderPixel's shader pack from the list of available shaders in the options menu.


Warning
To ensure a bug-free visual experience with PlunderPixel’s Shaders, follow these performance tweaks:
- Run the game in a smaller resolution on full-screen.
- Lower your render distance to “Short + 16”.
- Toggle “Smooth FPS” to ON in “Options > Video Settings > Performance”.
- “ON” provides responsive input and steady FPS but may lower the maximum FPS.
📥 PlunderPixel's Shaders — Download
Something You Should Know
- Our links are only from the official developer, so you can be sure they are secure.
- No modifications or edits are made to the files.
Comments (44)
Hello
Very Cool! 07
and also, VERY GOOD SHADER!
i love this shader but every time i do it it crashes my game :(
coz you have low-end pc xD
Superr