
Simplicissimus Shaders 1.19.4 → 1.18.2
Simplicissimus Shaders is a lightweight shader with dynamic shadows, bloom, motion blur, and soft shadows.
| Developer | 👤RRe36 |
|---|---|
| Style | 🚀Lagless |
| Support GPUs | |
| Loaders | |
| Performance Impact | Potato |
| Settings | 32 |
| Features | PBR+9 |
| Created | Oct 7, 2019 |
| Updated | May 18, 2020 |
| Stats |
|
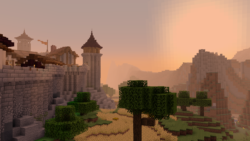
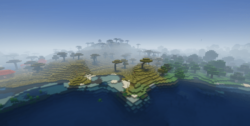
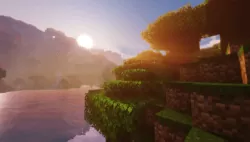
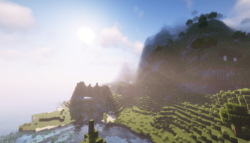
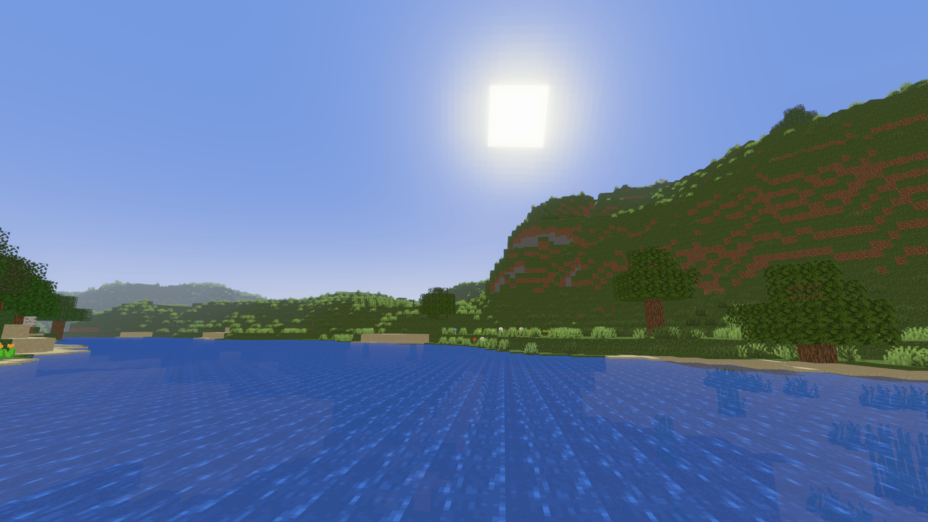
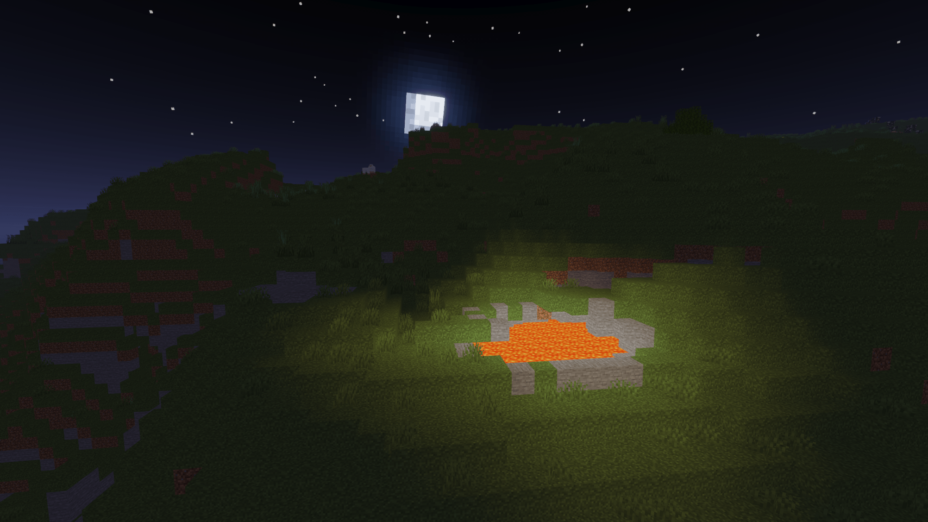
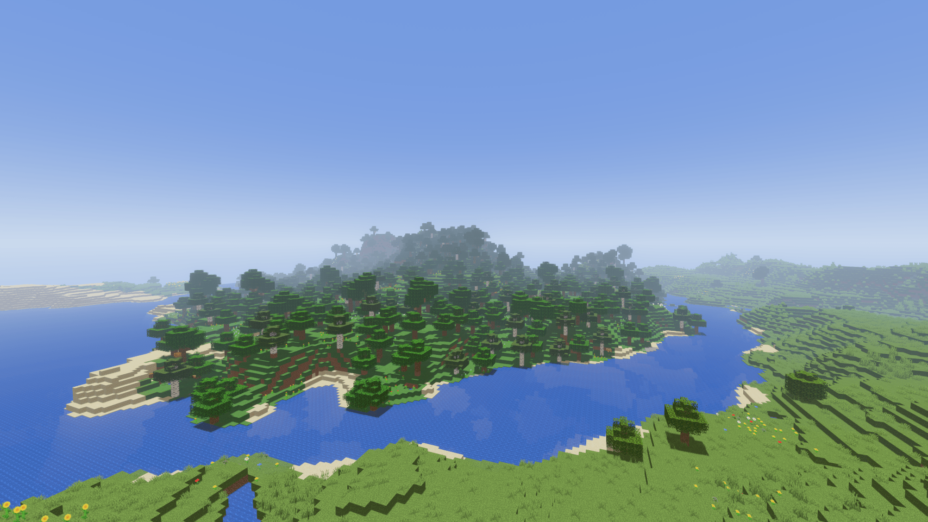
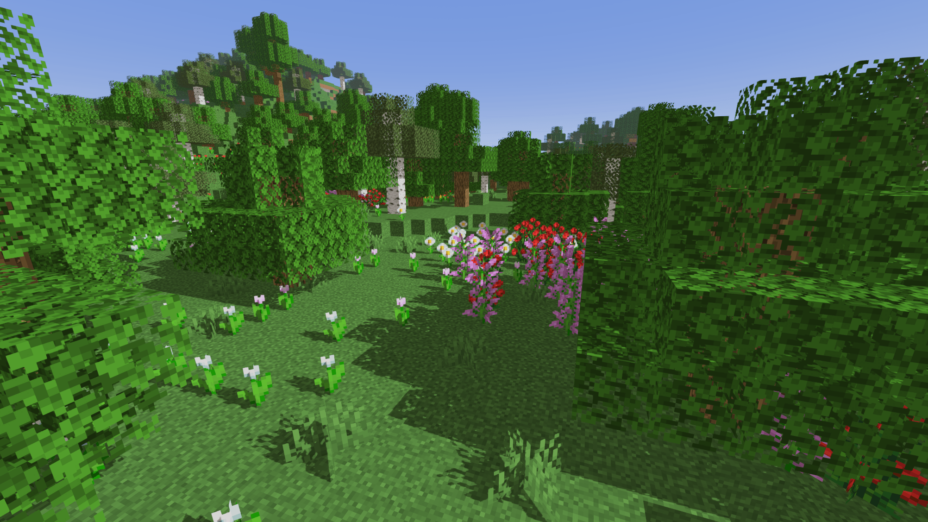
Not all shader packs make drastic changes to the visuals in Minecraft. Simplicissimus Shaders prides itself on making only minimal changes for visual quality boosts that don’t demand more resources. This is clear when basic features like vanilla lightmaps and clouds, ugly as they are, are left as is with this shader. This doesn’t allow for any great shadows, but lighting effects are somewhat improved, making brighter colors, like wool and some objects, really pop and stand out. Simplicissimus works on Windows, Linux, and Mac, which is rare since features tend to conflict with at least one of those operating systems most of the time.
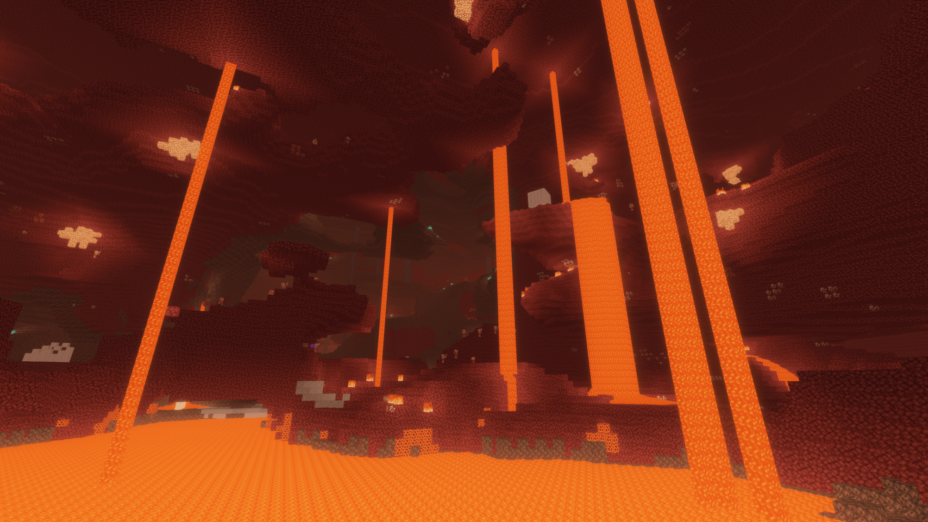
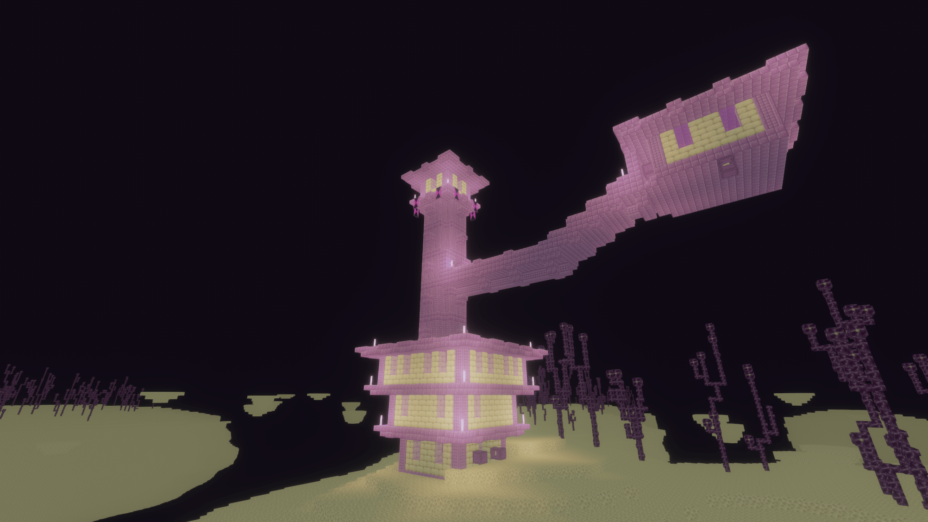
It’s not an issue with the Simpliccismus shader pack because the biggest changes are some wind and motion blur effects. There is a bit of bloom when standing right underneath very bright lights like the sun or right next to lava sources. This pack was last updated more than two years ago, so it’s not up to date, but all features are still working on the latest version of Minecraft. Iris or Optifine versions 1.12 and up should work fine, but there will probably be issues running the latest version of Minecraft, Try 1.19 or dial back to an earlier version of the game through the options. Some bugs, like a solid white sky, can be resolved by turning off the custom sky feature in Optifine. Because Simplicissimus doesn’t do much with sky effects, it’s not like you miss anything by doing this. The shader pack just works better.
- 1.19.4
- 1.19.3
- 1.19.2
- 1.19.1
- 1.19
- 1.18.2
- 1.18.1
- 1.18
- 1.17.1
- 1.17
- 1.16.5
- 1.16.4
- 1.16.3
- 1.16.2
- 1.16.1
- 1.16
- 1.15.2
- 1.15.1
- 1.15
- 1.14.4
- 1.14.3
- 1.14.2
- 1.14.1
- 1.14
- 1.13.2
- 1.13.1
- 1.13
- 1.12.2
- 1.12.1
- 1.12
Features
Over 9 new features are available in Simplicissimus Shaders to enhance your gaming experience.
📊 Performance Impacts
Decrease in performance can vary from device to device, driver version, and many other factors, you should test yourself on your machine for the best result.
-
- None
- No performance decreases
-
- Small
- ~5%
-
- Medium
- ~10%
-
- High
- ~25%
-
- Extreme
- +50%
-
- BloomSmall
- Enhance the game's lighting and create a more realistic and immersive visual experience
-
- BlurSmall
- Simulate how fast-moving objects appear to blur in a photograph or video.
-
- CustomizationNone
- Customize various aspects of the game's visual effects.
-
- LightMedium
- Enhance the game's overall visual quality.
-
- Motion BlurHigh
- Simulates the way that fast-moving objects appear to blur in the real world.
-
- PBRHigh
- Enhances the realism of textures and materials by simulating the way light interacts with surfaces in a more physically accurate way.
-
- ShadowsSmall
- Simulate how light is blocked and scattered by objects in the environment.
-
- TAAMedium
- Smooth out jagged edges and reduce the "stair-stepping" effect that can occur when rendering graphics.
-
- Volumetric FogHigh
- Create the appearance of fog that is lit from within, casting shadows and creating a sense of depth.
Simplicissimus Shaders allow you to change more than 32 settings to suit your needs.
| Settings |
Description |
Options |
|---|---|---|
| Simplicissimus by RRe36 |
| |
| Shadowmap Resolution |
| |
| Lighting | ||
| Soft Shadows |
| |
| Pixel Shadows (WIP) |
| |
| Pixel Size |
| |
| labPBR Support |
| |
| Normalmap Support | Auto-enabled when enabling "labPBR Support" |
|
| Sun Path Rotation |
| |
| Effects | ||
| Wind Effects |
| |
| Fog Intensity |
| |
| Fog Start |
| |
| Promo Outline | From CaptTatsu's BSL Shaders with permission |
|
| Post | ||
| Temporal Anti-Aliasing |
| |
| Motionblur |
| |
| Bloom |
| |
| Intensity |
| |
| Color Grading | ||
| Color Grading |
| |
| Vibrance |
| |
| Saturation |
| |
| Gamma Curve |
| |
| Brightness |
| |
| Contrast |
| |
| Red Gain |
| |
| Green Gain |
| |
| Blue Gain |
| |
| Vignette | ||
| Vignette |
| |
| Inner Radius |
| |
| Outer Radius |
| |
| Intensity |
| |
| Falloff |
| |
| Misc | ||
| Cloud Instance Layer | This causes some weirdness when being above the regular cloud layer but below the instanced one. |
|
| 2D Cloud Layer |
|
How To Install Simplicissimus Shaders
- Support Forge / Vanilla
- Extra features
- Good performance
- Support Fabric / Quilt
- Better performance, depend on your hardware
Optifine Installation Guide
Note
Your device must have Java installed to run the Forge and Optifine installers.
Quick Java Installation Guide
-
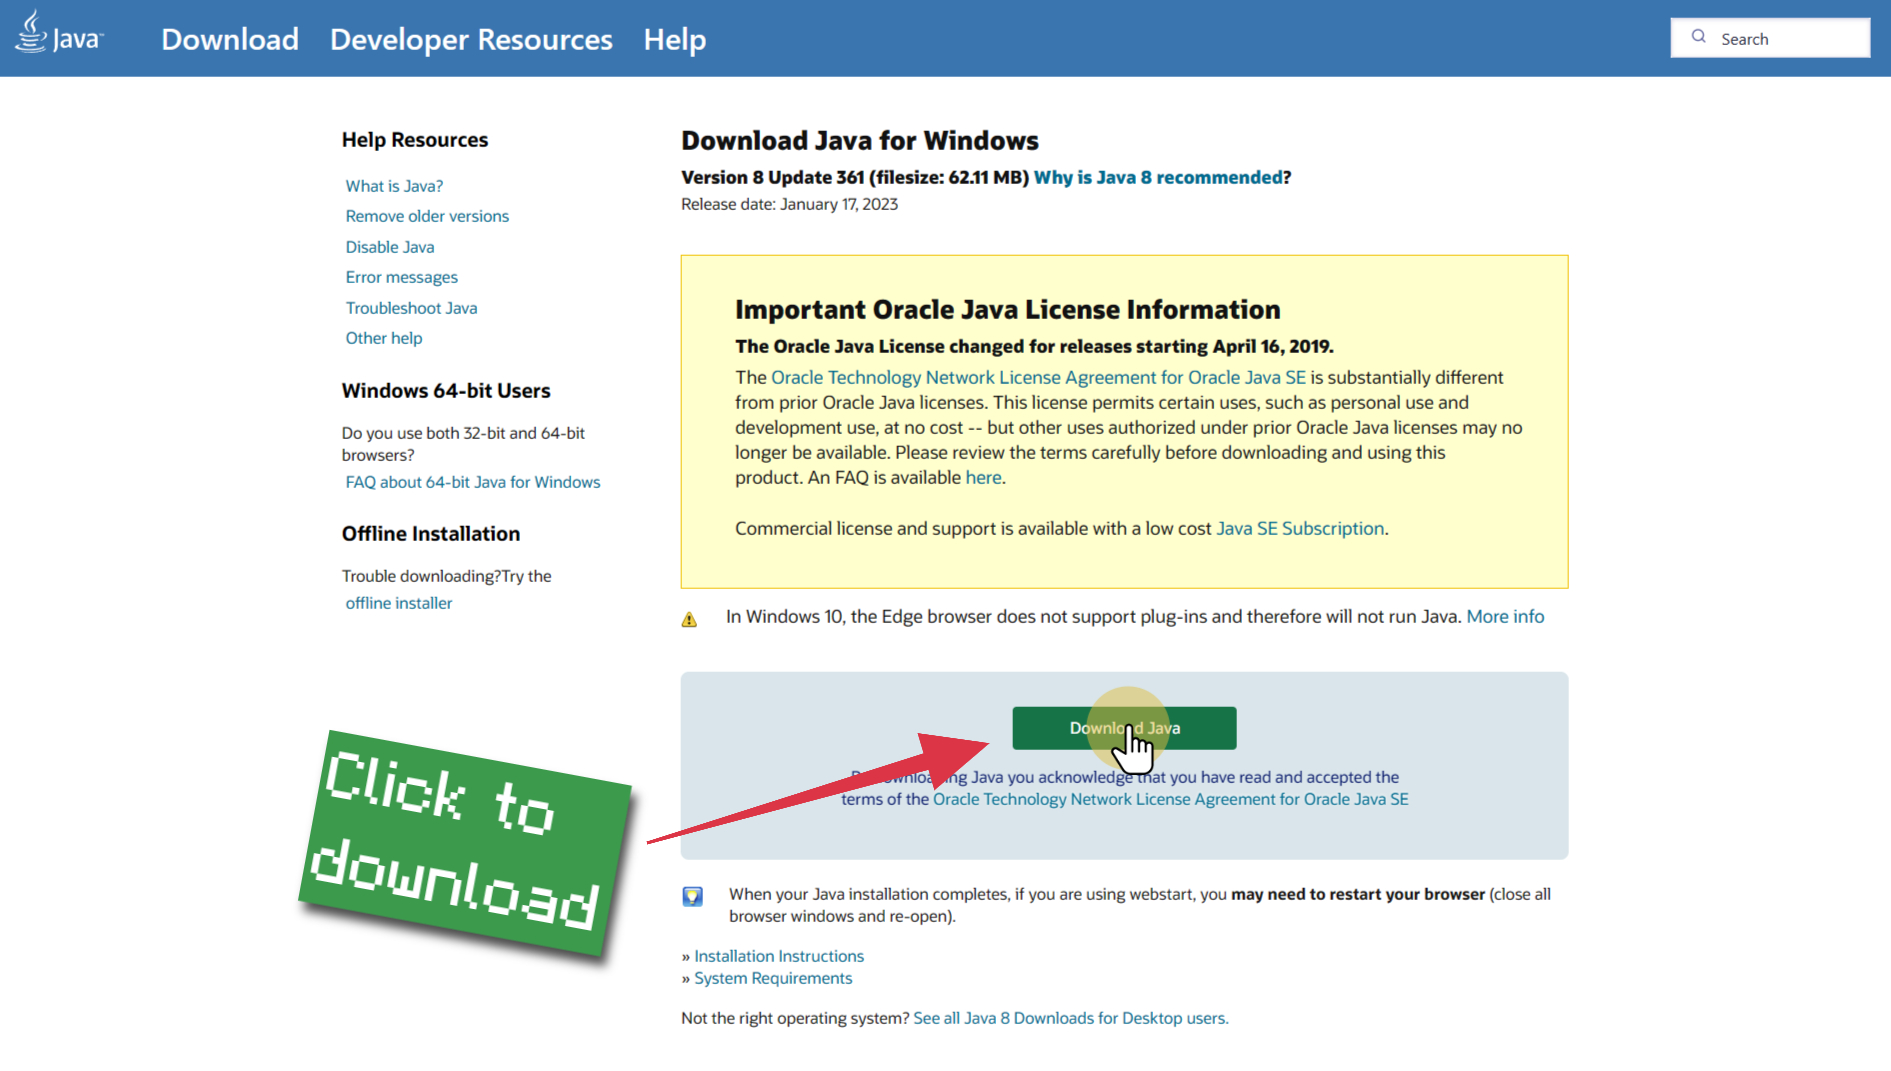
Download Java
Download the Java installer from the official website here.
-
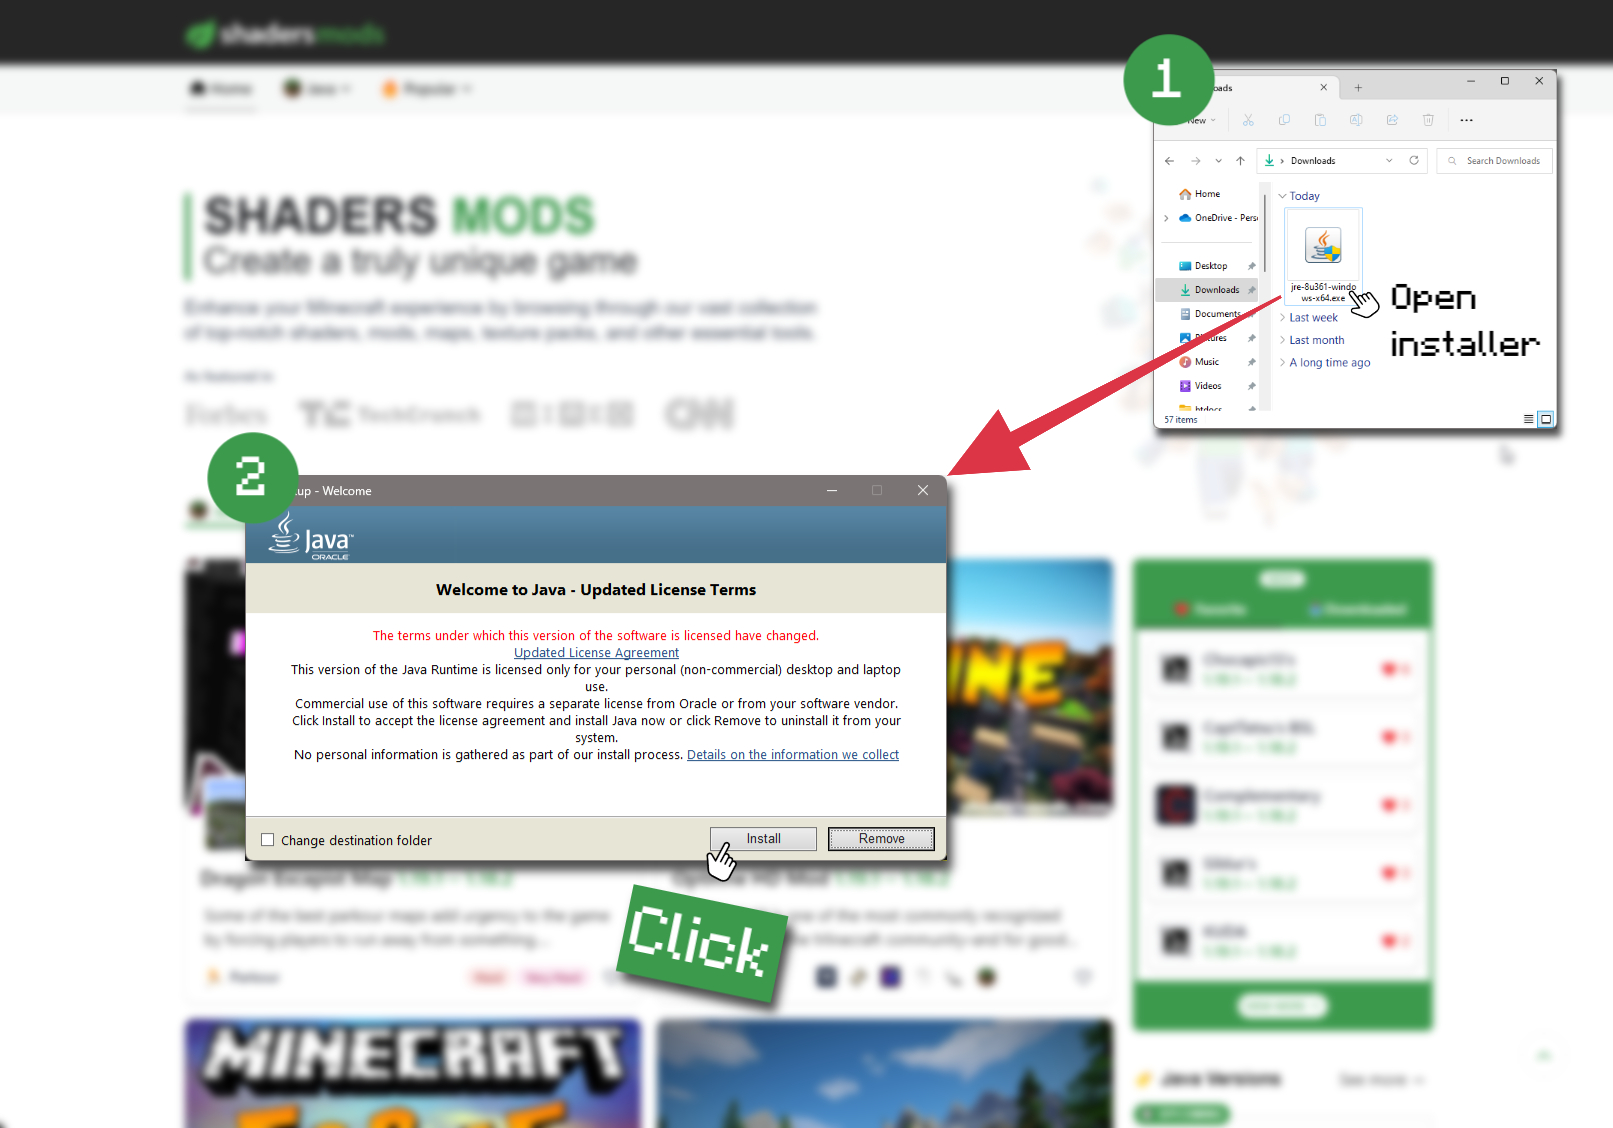
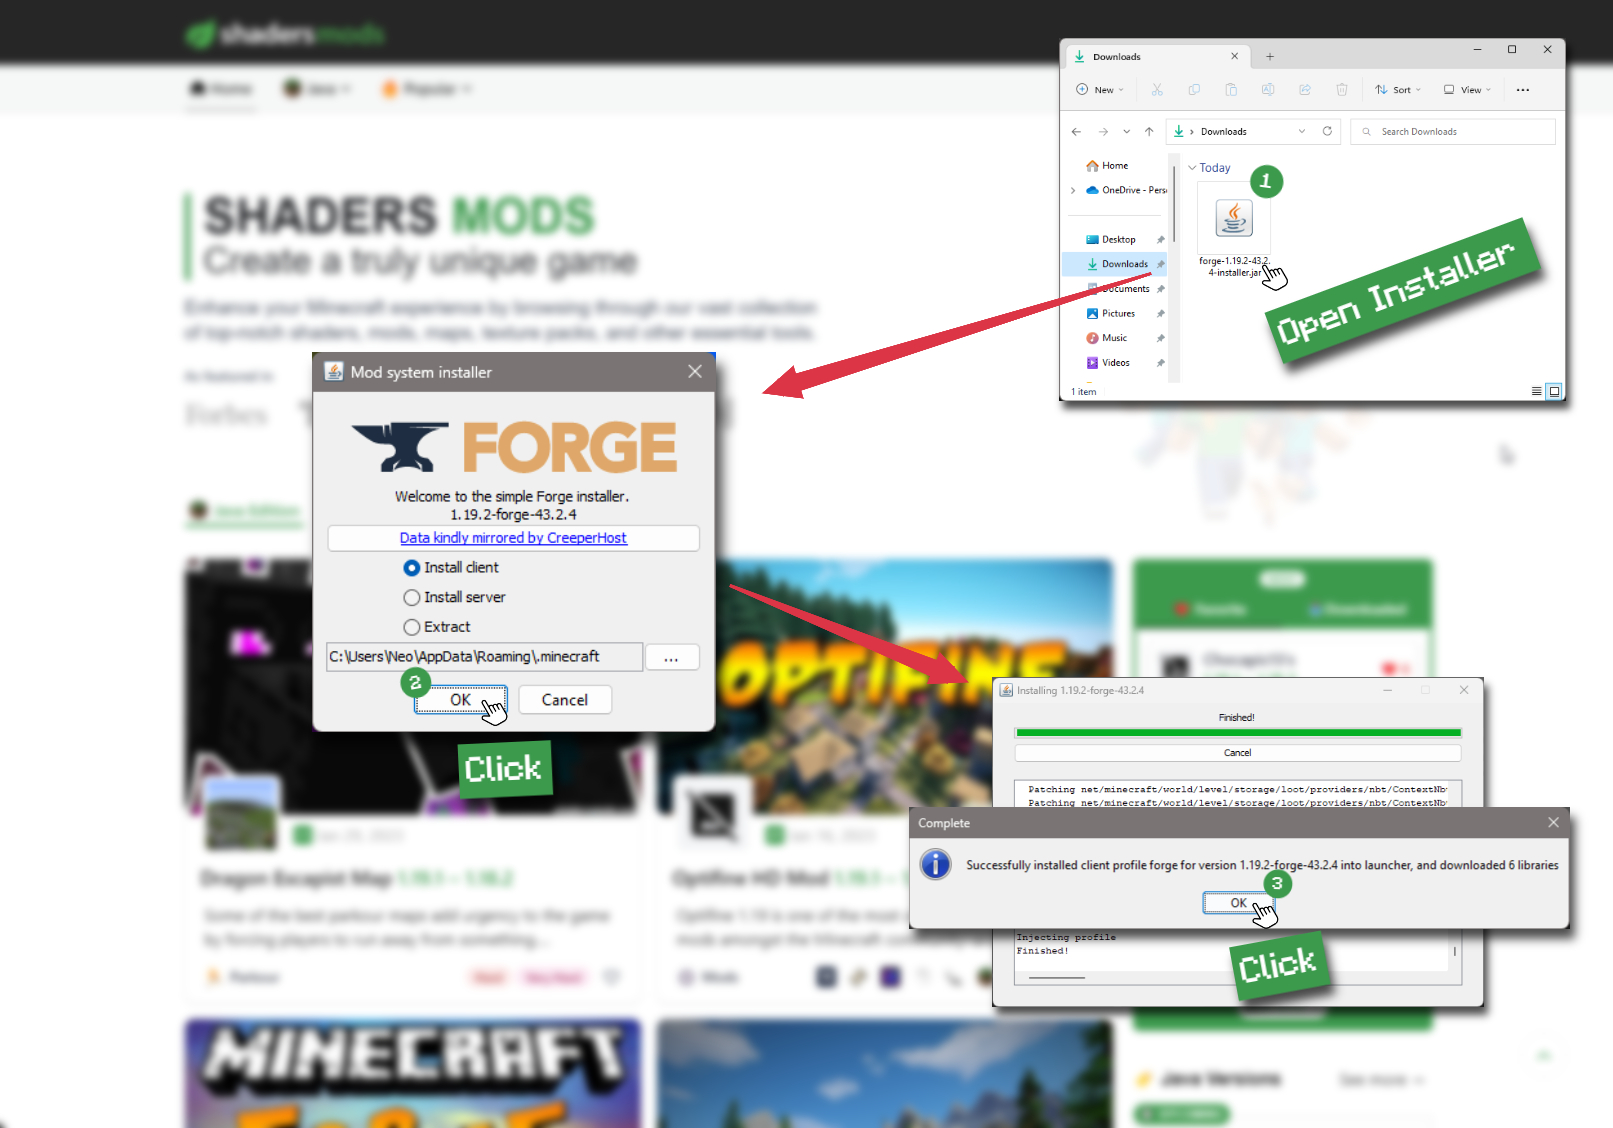
Open Installer
Once you have downloaded the file, run it and click the Install button.
How to install Simplicissimus Shaders with Optifine?
-
Download Optifine
Get the latest version of Optifine for your Minecraft version.
Download Optifine -
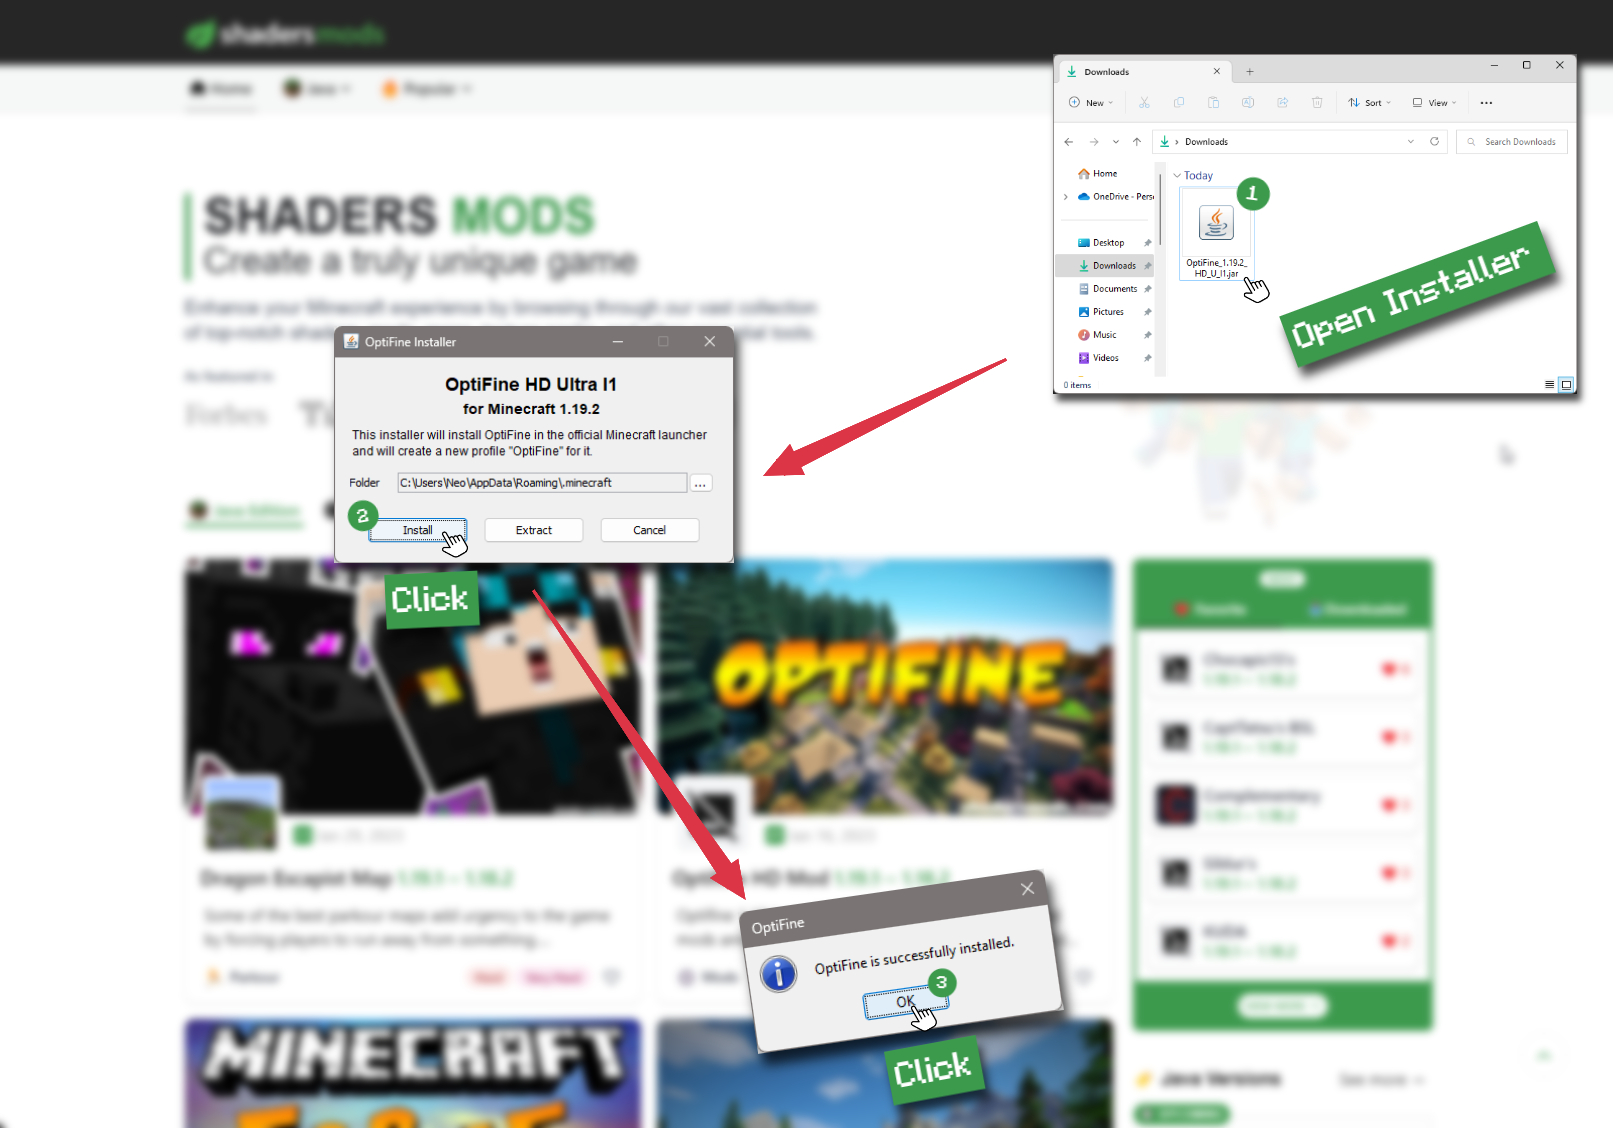
Install Optifine
Run the Optifine installer and follow the on-screen instructions to complete the installation.
-
Download Simplicissimus Shaders
Go to the download section and get shaders zip file. Unzip the file if necessary, as some shader developers may bundle multiple shader versions in one zip file.
-
Launch Minecraft
Start the Minecraft launcher and make sure you have the Optifine profile selected.

-
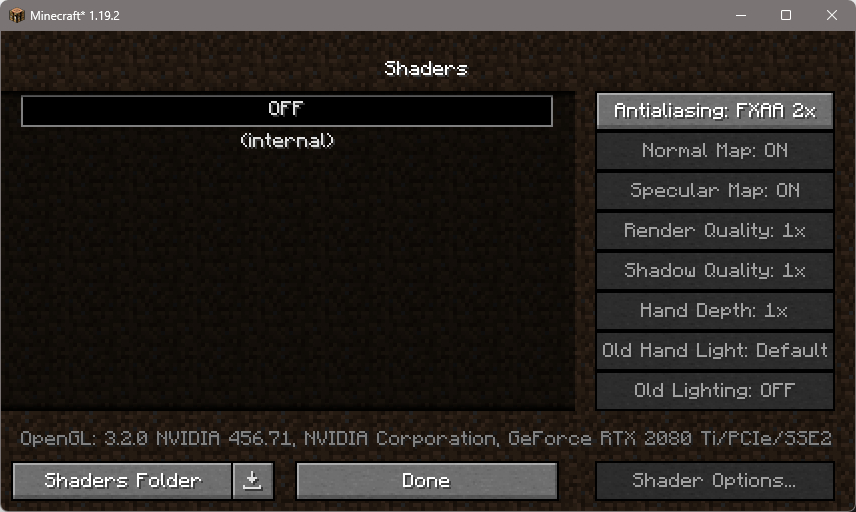
In-game Shaders menu
Go to Options > Video Settings > Shaders to access the shaders menu.
-
Open shaderpacks folder
Click on the "Shaders Folder" button to open the folder where shaders are stored, so you can add or remove shaders as desired.

-
Install Simplicissimus Shaders
Copy or move the downloaded Simplicissimus shaders zip file into the shaderpacks folder.

-
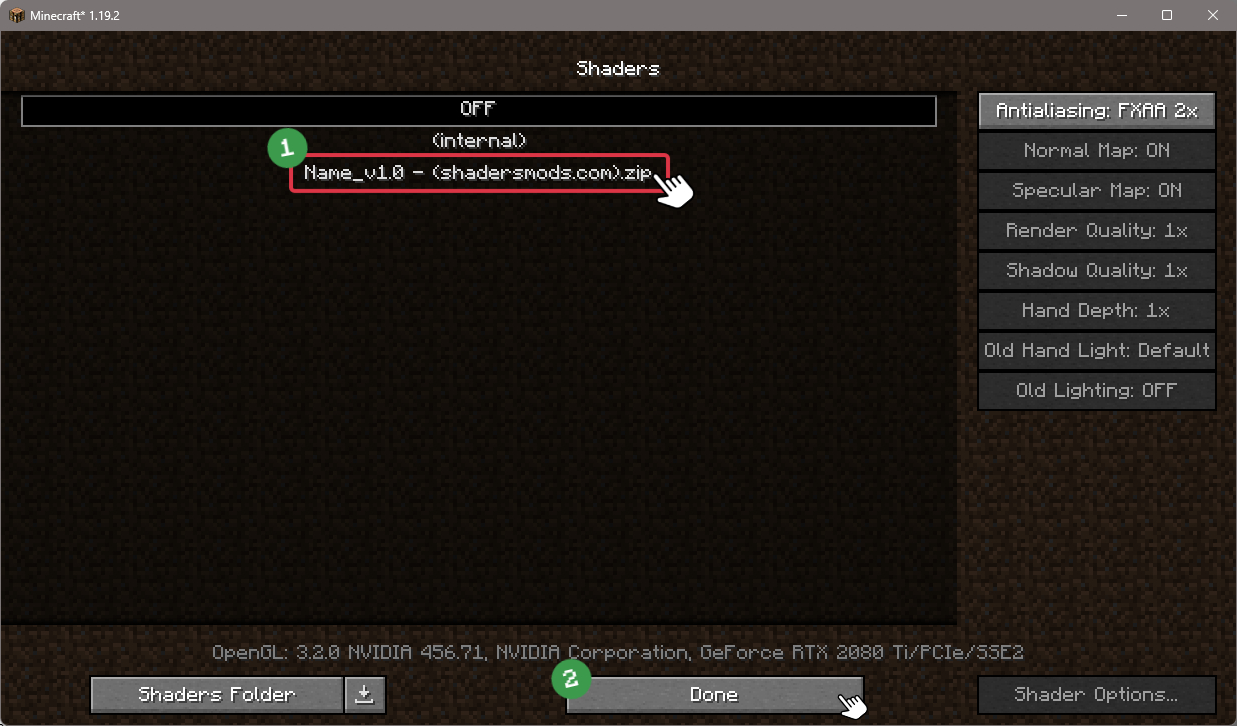
Select Simplicissimus Shaders
Choose Simplicissimus shader pack from the list of available shaders in the options menu.
How to install Simplicissimus Shaders with Forge and Optifine?
Quick Installation Guide
-
Install Forge
Obtain the latest version of Forge that is compatible with your Minecraft version.
Download Minecraft Forge -
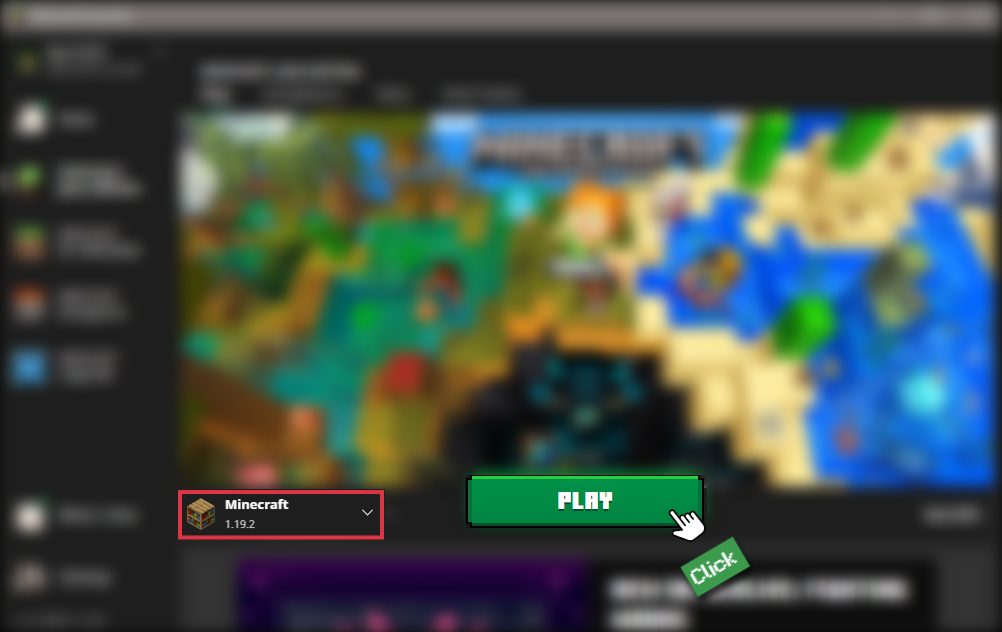
Launch Minecraft
Start the Minecraft launcher and select the version of Minecraft you want to install Forge on. Run the game once by clicking on the "Play" button to create necessary files for Forge.
-
Install Forge Client
Double-click on the Forge installer jar file and choose "Install Client" in the window that appears.
-
Install Optifine
Download the Optifine jar file after Forge is installed. Move the Optifine jar file to the mods folder in the .minecraft directory.
Download Optifine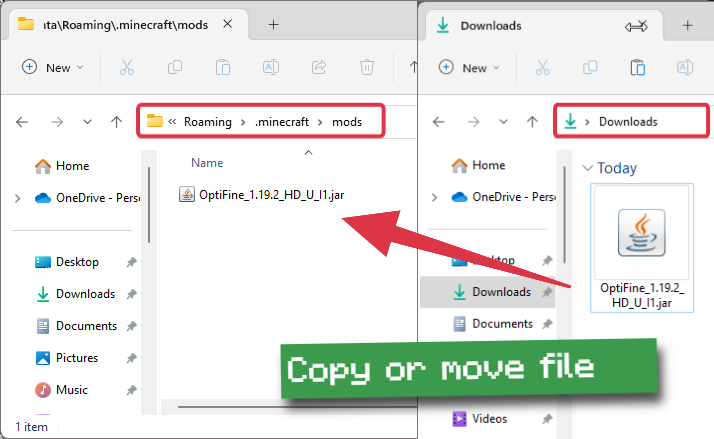
-
Launch Forge Profile
Launch Minecraft using the "Forge" profile, Optifine will be automatically loaded along with Forge.

-
Install Chocapic13's Shaders
Now the installation is the same as from the above Optifine instructions, just follow the steps starting from step 5.
Iris Installation Guide
Note
Your device must have Java installed to run the Iris installer.
Quick Java Installation Guide
-
Download Java
Download the Java installer from the official website here.
-
Open Installer
Once you have downloaded the file, run it and click the Install button.
How to install Simplicissimus Shaders with Iris?
-
Download Iris Shaders
Find the latest version of the Iris Shaders installer and download it.
Download Iris Installer -
Install Iris Shaders
Open the downloaded jar file, and choose the preferred game version and installation type.
⯈ Iris Install:
If you don't plan on using any other mods with Iris, choose this option.⯈ Fabric Install:
Choose this option if you want to use Iris with Fabric and other mods. The Iris jar files will be copied to the mods folder within the .minecraft directory.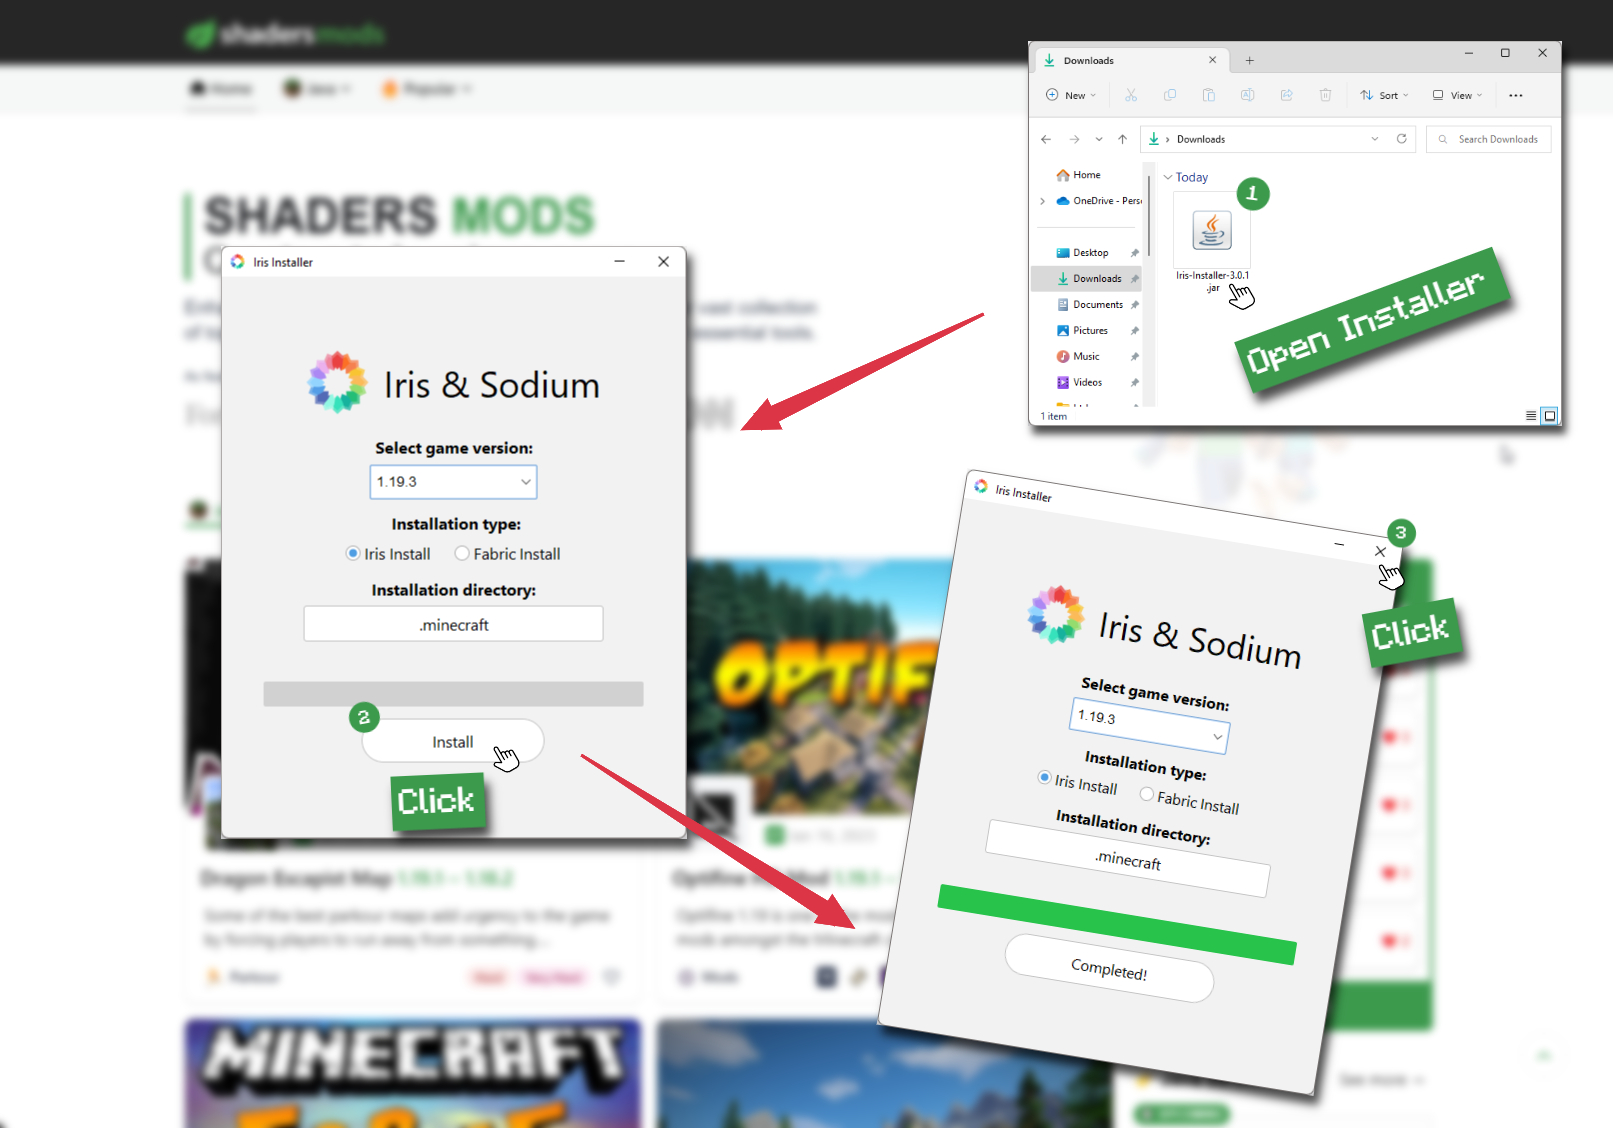
-
Start Installation
After selecting the game version and installation type, click the "Install" button to start the installation process.
-
Launch Minecraft
Start the Minecraft launcher and make sure you have the Iris profile selected.
Note
Select the Fabric profile if you opt for the Fabric installation type.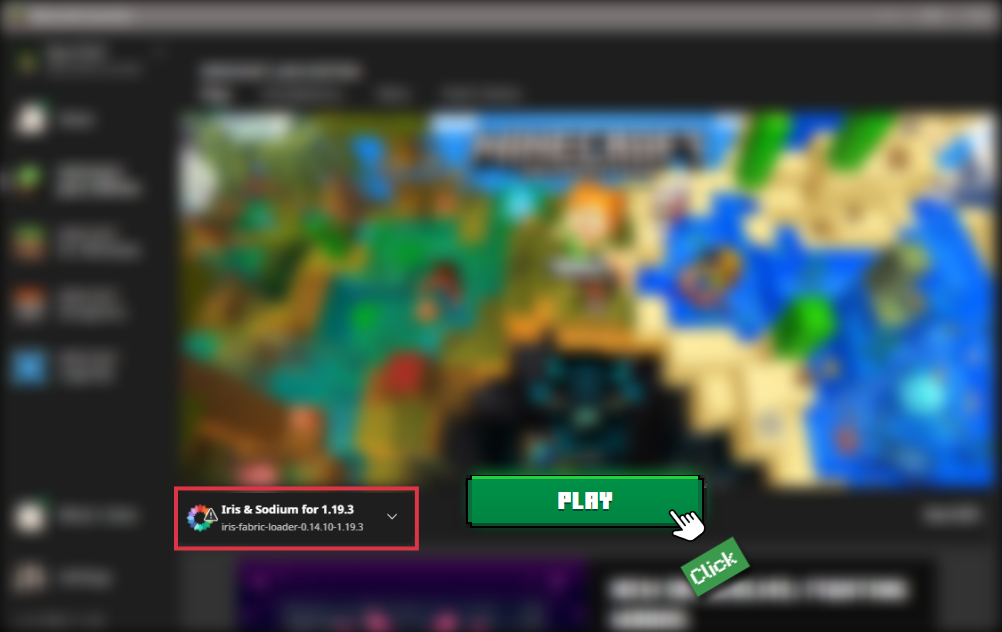
-
In-game Shader Menu
Open the Minecraft game and go to Options > Video Settings > Shader Packs to access the shaders menu.
Tip
To simplify the process, simply drag and drop the shader ZIP file directly into the Minecraft window, bypassing the next two steps.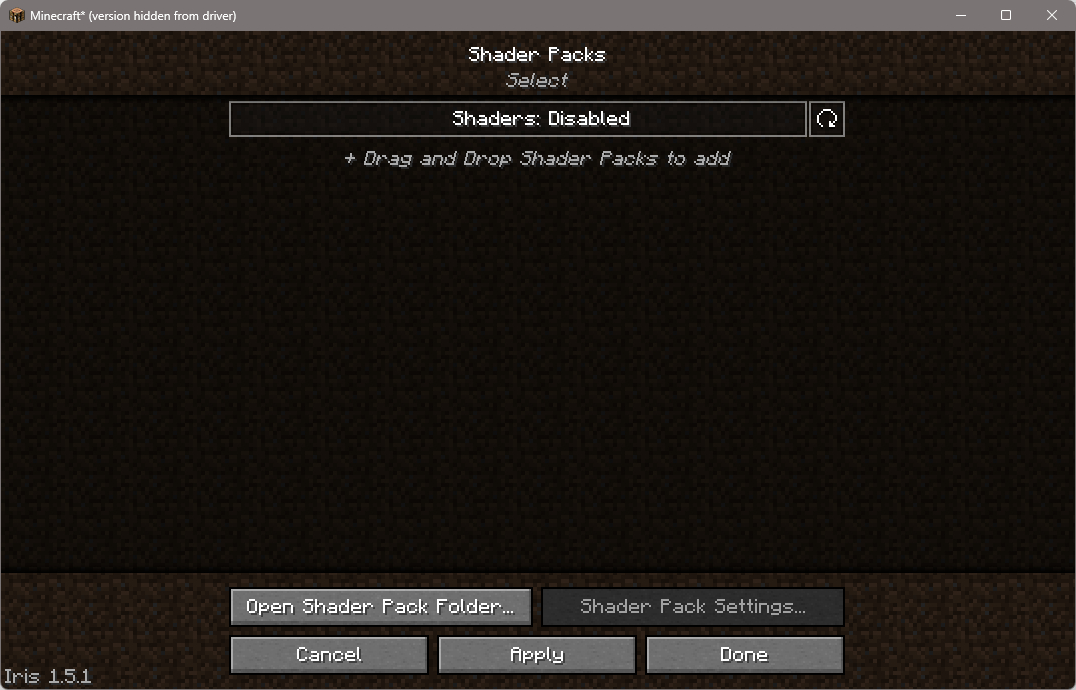
-
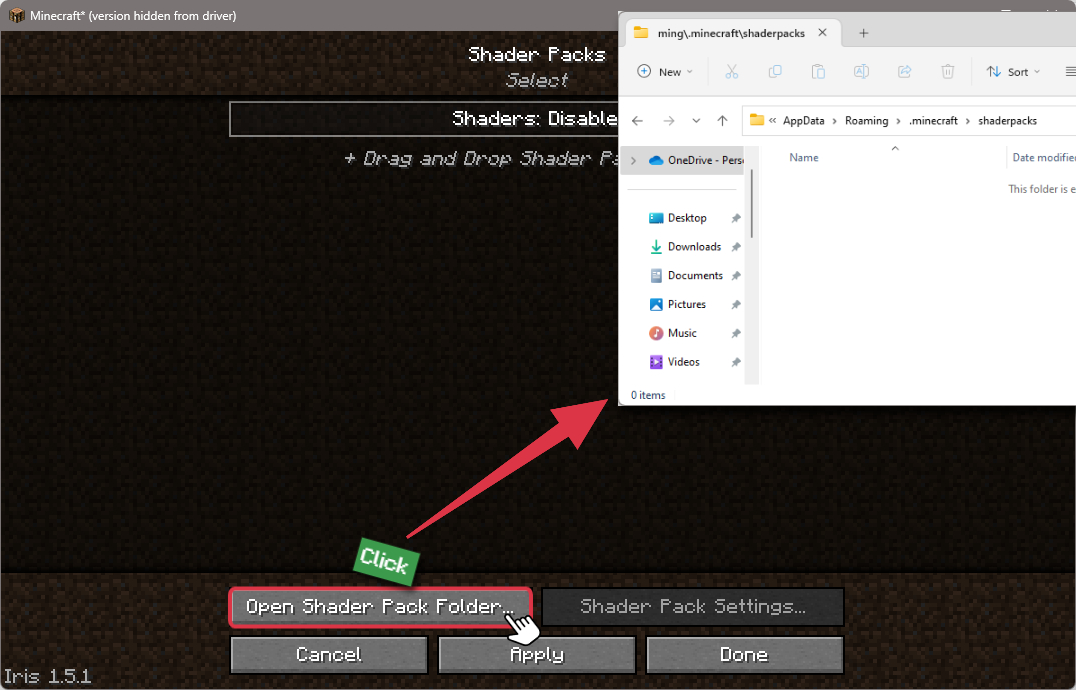
Open shaderpacks folder
Click on the "Open Shader Pack Folder" button to access the folder where shaders are stored.
-
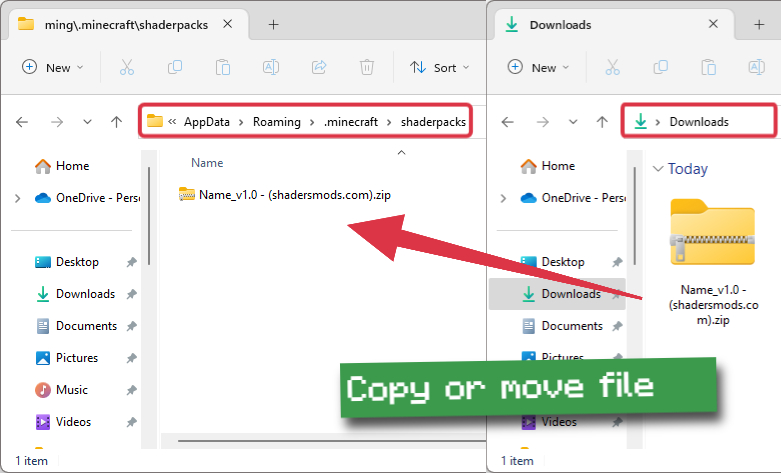
Install Simplicissimus Shaders
Copy or move the shaders zip file into the shaderpacks folder.
-
Select Simplicissimus Shaders
Choose installed shader pack from the list of available shaders in the options menu and click the "Apply" or "Done" button to select it.
Tip
When the shader pack is selected, its name will be changed to yellow.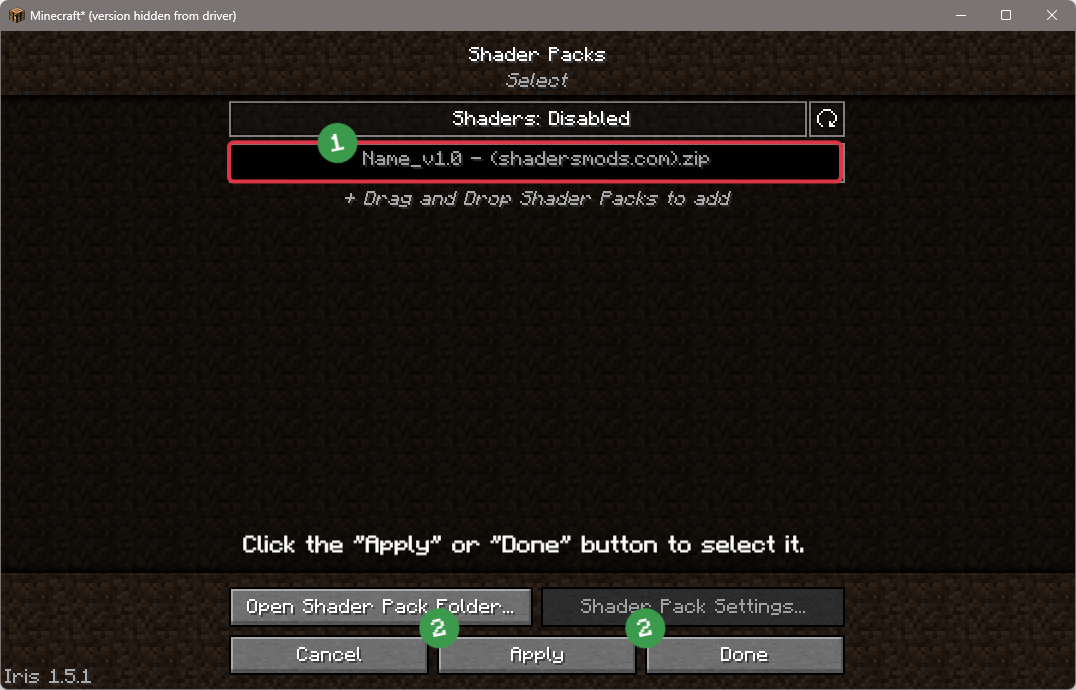
Requirements
- A graphics card supporting OpenGL 2.1
- Operating System Windows, Linux, and Mac
- Optifine or Iris (Iris may have some issues)
- Minecraft Version: 1.12 or higher
📥 Simplicissimus Shaders — Download
Something You Should Know
- Our links are only from the official developer, so you can be sure they are secure.
- No modifications or edits are made to the files.
🔄 Update Logs
v1.2
- Added promo outline effect
- Fixed red areas with handheld items
- Added color grading settings
- Updated labPBR support to 1.3
- Fixed labPBR ao and signs and maps
- Weather support
- Improved fog
- End support
v1.1
- Added wind effects
- Fixed compilation error when using hq shadows
- Adjusted skylight and sky color to match vanilla better
- Added experimental instanced cloud layers (may break in various scenarios when above clouds)
- Improved shadow bias
- Added pixel shadows
- Added simple specular and normal map support
- Made some optimizations
- Reduced bloom a bit