
Wisdom Shaders 1.19.4 → 1.18.2
High-performance Minecraft shaders with quality visuals in one pack.
| Developer | 👤Bobcao3 |
|---|---|
| Style | 🌅Realistic |
| Support GPUs | |
| Loaders | |
| Performance Impact | Medium |
| Settings | 49 |
| Presets | 🛠️ Lite+4 |
| Features | Sun Rays+39 |
| Created | Jul 4, 2016 |
| Updated | Jul 30, 2019 |
| Stats |
|
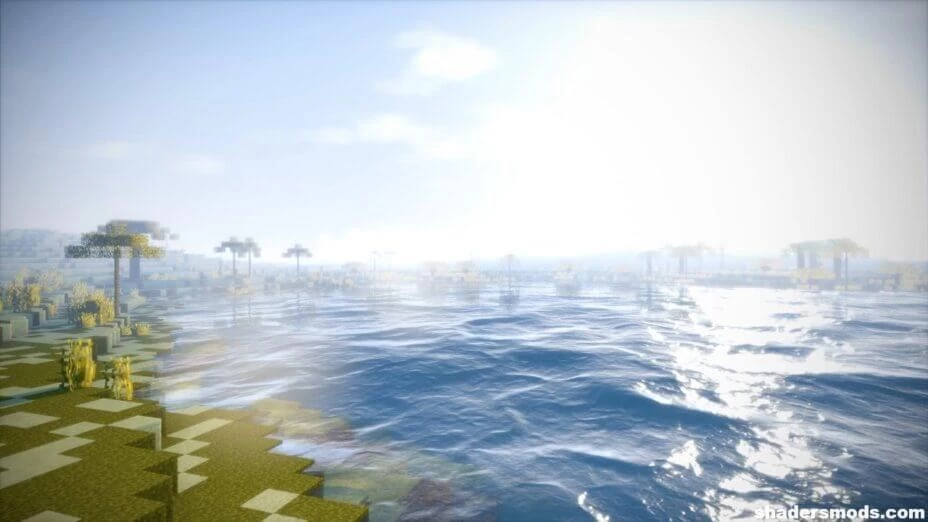
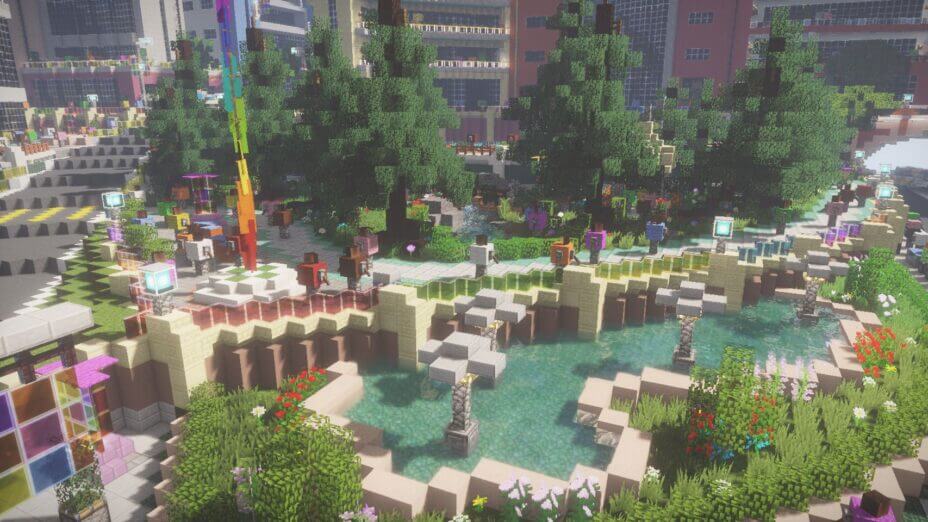
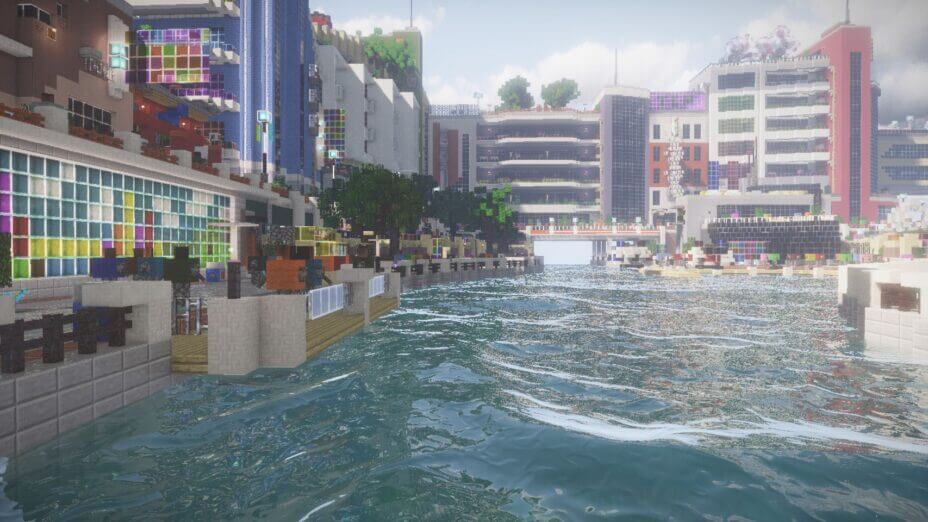
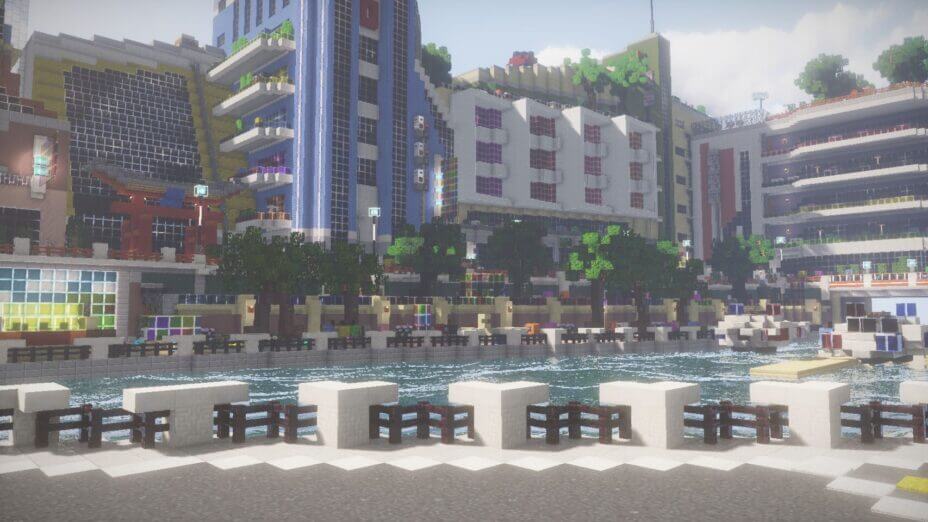
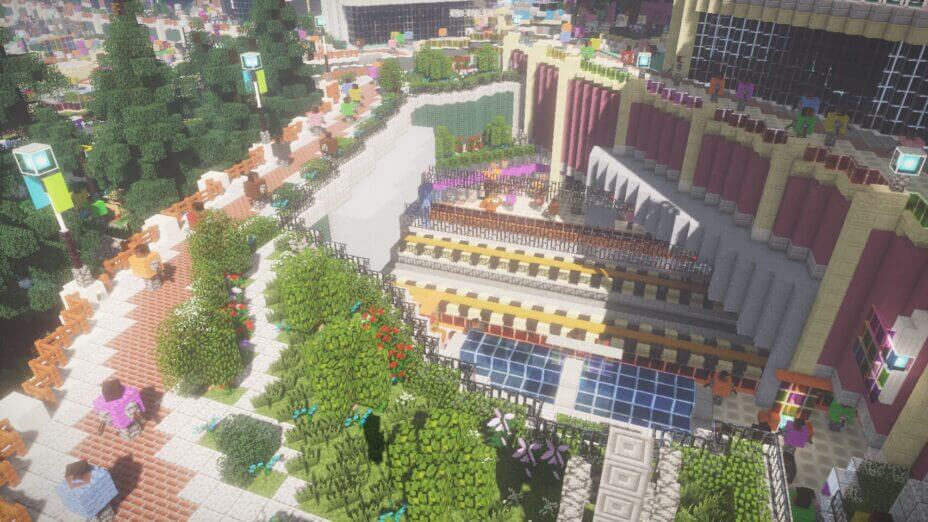
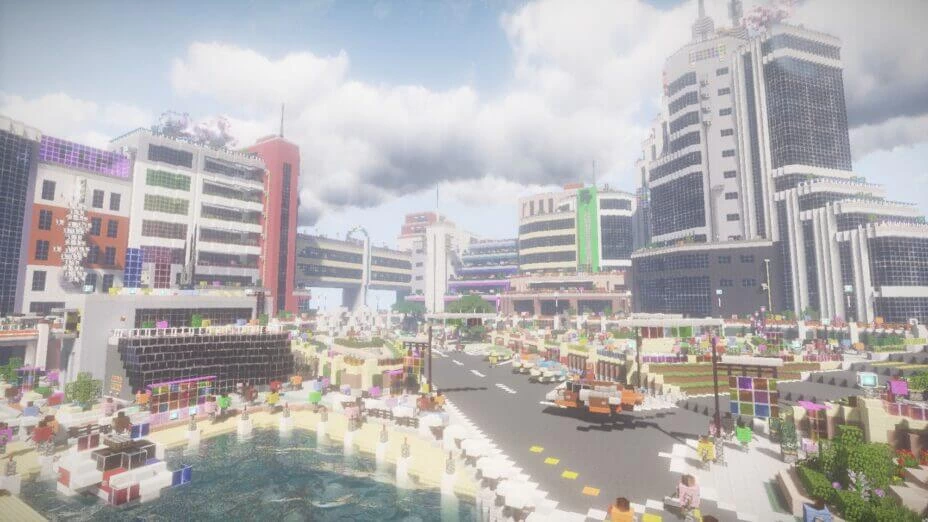
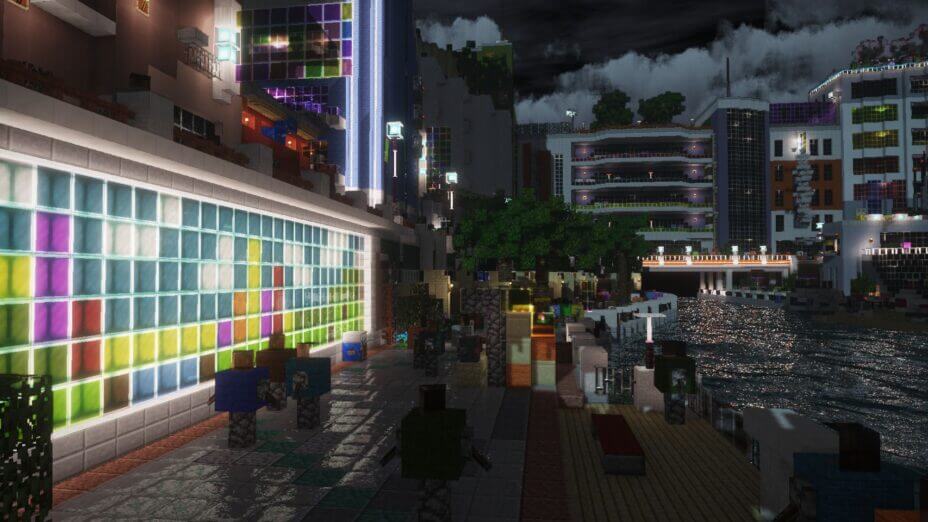
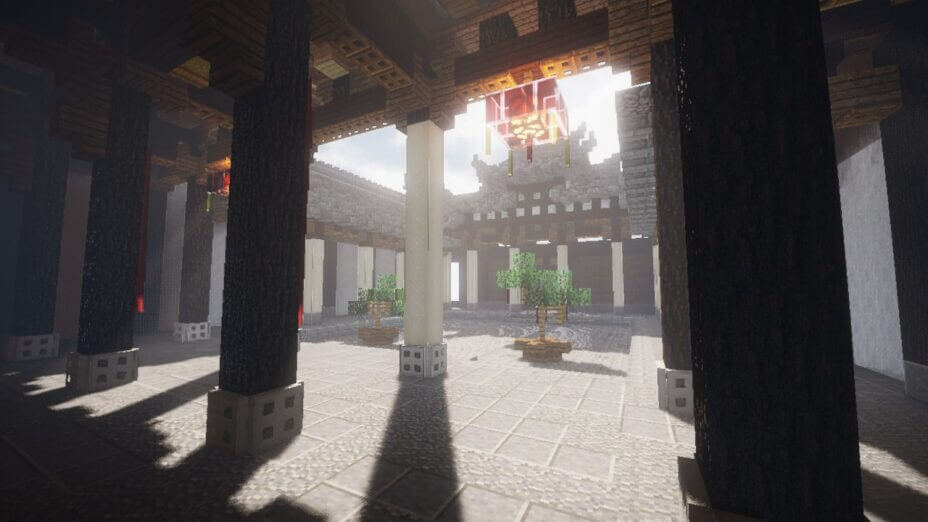
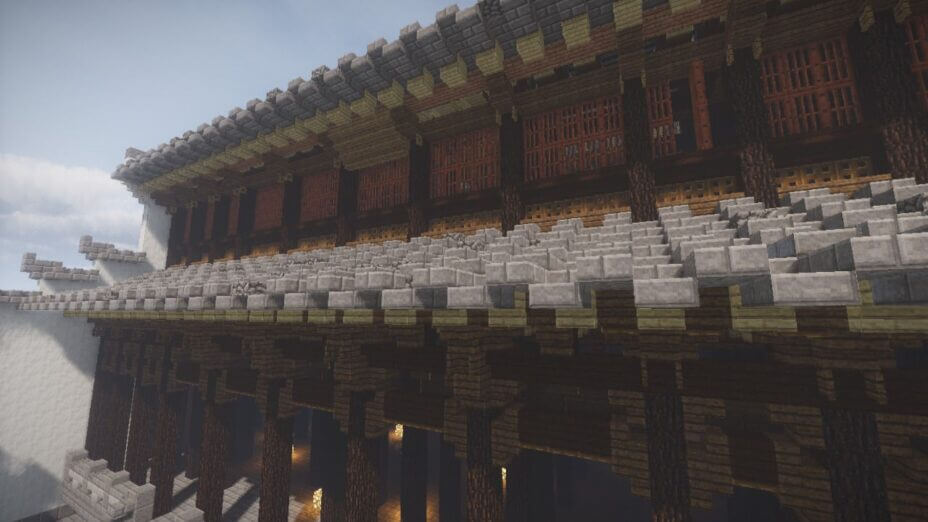
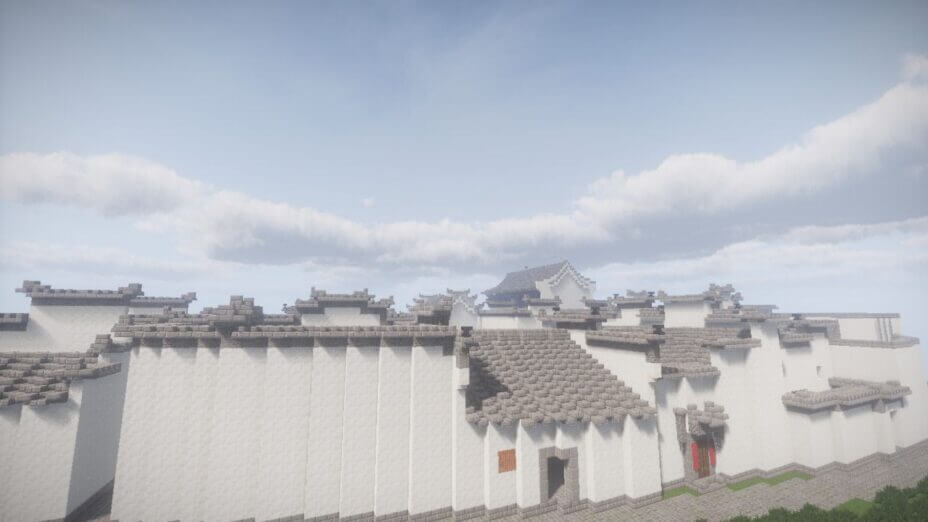
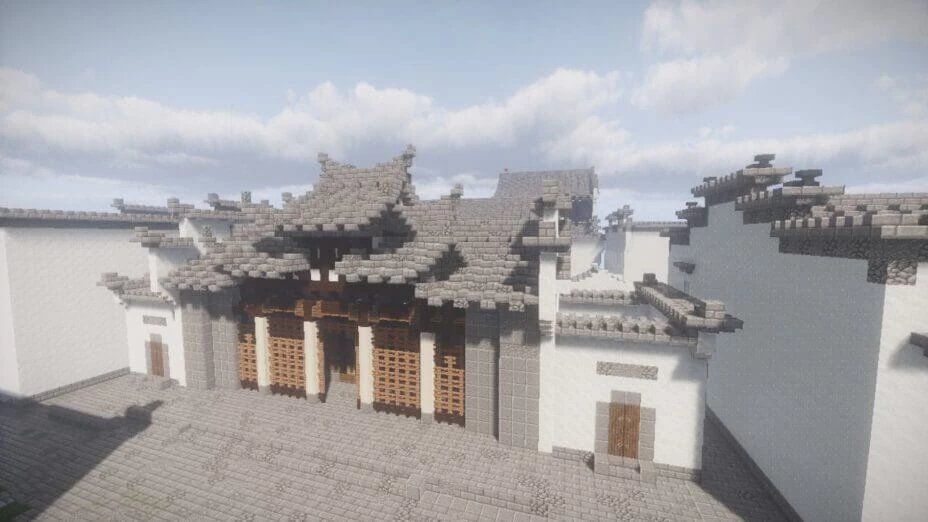
Get impressive graphics for your low-end and high-end devices with Wisdom Shaders! See the world of Minecraft in a more realistic yet vibrant light! Experiment with the filter options and have fun making beautiful videos and playthroughs. Created by username Bobcao3, the pack aims to provide beautiful graphics while maintaining the highest performance possible. The creator of the pack optimized the Shader to run on integrated Intel Graphics cards and made it compatible with Mac, Windows, and Linux.
What the Wisdom Shaders Pack is About
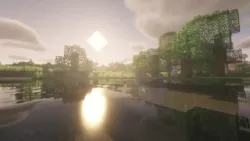
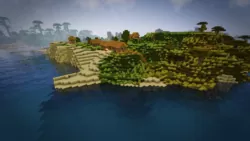
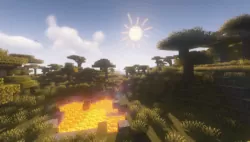
Bobcao3’s Wisdom Shader Pack features stunning graphics that stimulate slightly faded-out realistic lighting and effects, making your Minecraft look like it came out from a movie. Despite the high-end graphics, the creator did not sacrifice the performance. Users can freely tone down or up the setting as they prefer.
Quality PBR Shading
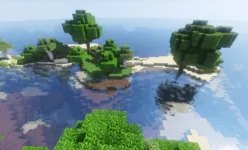
The pack uses PBR (Physics-based rendering) for water, metal, glass, and other shiny objects to simulate real-life light reflection and refraction. It also automatically converts specular packs to PBR packs, so everything looks nice and even.
Super Optimized
The creator of the pack did not compromise between performance and graphics and instead created a very optimized pack for low-end and high-end devices. This makes the pack scale well with Intel HD Graphics and supports high-end Nvidia and AMD cards.
After Effect Options
The Wisdom Shaders also has a selection of After Effects Filters like a Black & White filter, Modern Light Tone, Noise and Grain Filter, Prime Rendering Filter, 8-Bit Filter, and so much more. This makes the pack very customizable. You can also experiment with the pack’s exposure adjustment option for video recording and taking beautiful screenshots.
Advanced Shader Effects
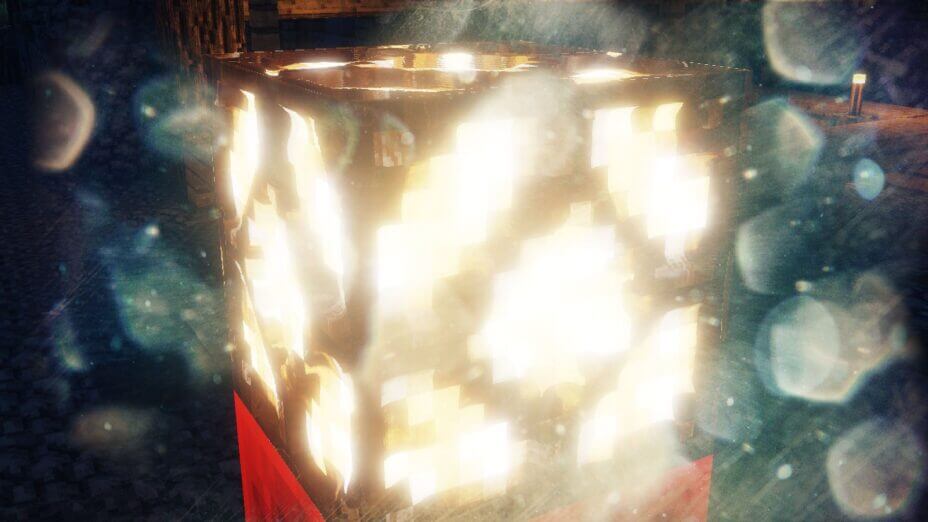
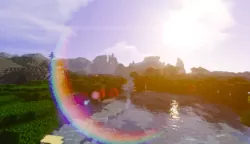
On top of all of its features are the series of advanced Shader effects added to the pack, including volumetric lighting, atmospheric scattering fog, realistic natural boom, emissive mapping support, and more.
Should You Use It?
The default setting of the Wisdom Shader is set on a High profile and is very heavy on the system. However, it does boast one of the nicest graphics and visuals, making it on par with the most popular Shader packs like the SUES. You will definitely enjoy this pack if you have a high-end PC or laptop. If you have a unit with low or medium specs. Then you might want to tone down the visuals to make the game playable.
- 1.19.4
- 1.19.3
- 1.19.2
- 1.19.1
- 1.19
- 1.18.2
- 1.18.1
- 1.18
- 1.17.1
- 1.17
- 1.16.5
- 1.16.4
- 1.16.3
- 1.16.2
- 1.16.1
- 1.16
- 1.15.2
- 1.15.1
- 1.15
- 1.14.4
- 1.14.3
- 1.14.2
- 1.14.1
- 1.14
- 1.13.2
- 1.13.1
- 1.13
- 1.12.2
- 1.12.1
- 1.12
- 1.11.2
- 1.11.1
- 1.11
- 1.10.2
- 1.10.1
- 1.10
- 1.9.4
- 1.9.3
- 1.9.2
- 1.9.1
- 1.9
- 1.8.9
- 1.8.8
- 1.8.7
- 1.8.6
- 1.8.5
- 1.8.4
- 1.8.3
- 1.8.2
- 1.8.1
- 1.8
- 1.7.10
Features
Over 39 new features are available in Wisdom Shaders to enhance your gaming experience.
📊 Performance Impacts
Decrease in performance can vary from device to device, driver version, and many other factors, you should test yourself on your machine for the best result.
- None
- No performance decreases
- Small
- ~5%
- Medium
- ~10%
- High
- ~25%
- Extreme
- +50%
-
- Ambient OcclusionMedium
- Simulating how light interacts with objects and surfaces.
-
- BloomSmall
- Enhance the game's lighting and create a more realistic and immersive visual experience
-
- CausticHigh
- Simulating the way light is refracted and reflected by the water's surface
-
- CinematicExtreme
- Create more cinematic and visually-stunning scenes in the game.
-
- CustomizationNone
- Customize various aspects of the game's visual effects.
-
- Depth of FieldMedium
- Making objects closer to the camera appear sharp and in focus, while objects farther away appear out of focus and blurry.
-
- Dirty LensSmall
- Simulates the effect of a dirty or scratched camera lens.
-
- HDRMedium
- Enhance the lighting and color in the game.
-
- Lens FlareSmall
- Simulating the way light scatters and reflects inside a camera lens.
-
- LightMedium
- Enhance the game's overall visual quality.
-
- Motion BlurHigh
- Simulates the way that fast-moving objects appear to blur in the real world.
-
- Moving CloudsMedium
- Simulates the movement of clouds across the sky and can be used to create the appearance of a dynamic and ever-changing sky
-
- Normal MapSmall
- Add depth and detail to surfaces without increasing the number of polygons.
-
- Ocean WavesHigh
- Simulating the movement of waves on the surface of the ocean.
-
- Parallax WaterMedium
- Enhances the realism of water by simulating the parallax effect.
-
- PBRHigh
- Enhances the realism of textures and materials by simulating the way light interacts with surfaces in a more physically accurate way.
-
- Photorealistic SkyboxesMedium
- Replacing the in-game sky with high-resolution, realistic images of the sky.
-
- POMHigh
- Realism of textures by simulating the way light interacts with surfaces.
-
- Rain ReflectionsMedium
- Reflections during rainy weather by simulating the way light reflects off of wet surfaces.
-
- Realistic NightskyMedium
- More realistic and immersive night sky.
-
- Realistic RainMedium
- More natural and immersive rain experience.
-
- Realistic SkyMedium
- More realistic and immersive sky experience.
-
- Realistic WaterHigh
- More realistic and immersive water experience.
-
- ShadowsSmall
- Simulate how light is blocked and scattered by objects in the environment.
-
- Sun RaysMedium
- Simulate the appearance of sunlight streaming through trees leaves, objects, clouds, or other atmospheric conditions.
-
- SunriseSmall
- More realistic and immersive sunrise experience.
-
- SunsetSmall
- More realistic and immersive sunset experience.
-
- TAAMedium
- Smooth out jagged edges and reduce the "stair-stepping" effect that can occur when rendering graphics.
-
- Tone MappingSmall
- Adjusting the brightness, contrast, and saturation levels.
-
- VignetteNone
- Darkening effect around the edges of the screen
-
- Volumetric CloudsHigh
- Simulate the way that clouds appear to have volume and depth in the real world rather than just flat textures.
-
- Volumetric FogHigh
- Create the appearance of fog that is lit from within, casting shadows and creating a sense of depth.
-
- Volumetric LightHigh
- Simulating the scattering of light in the atmosphere and in the environment.
-
- Water ReflectionsMedium
- Simulating reflections on the surface of the water.
-
- Water WavesMedium
- Movement of waves on the surface of the water.
-
- Waving GrassSmall
- Simulating the way it moves and sways in the wind.
-
- Waving PlantsSmall
- Simulating the way they move and sway in the wind.
-
- Waving TreesSmall
- Adds movement to the leaves and branches of trees, making them look more alive and realistic.
-
- Wet EffectSmall
There are 5 profiles pre-built into Wisdom Shaders to adjust the level of intensity of these effects.
| Profiles | Lite | Low | Medium | High | Ultra |
|---|---|---|---|---|---|
Vanilla Edge Occlusion | |||||
Average Exposure | |||||
Bloom | |||||
Cloud Shadow | |||||
Crepuscular Rays | |||||
Directional Blocklight | |||||
Dirty Lens | |||||
Depth of Field | |||||
High Quality Crepuscular | |||||
High Quality AO | |||||
HQ Volumetric Clouds | |||||
IBL reflections | |||||
IBL Screen Space Reflections | |||||
Motion Blur | |||||
Natural Wave Generator | |||||
Normal Mapping | |||||
Parallax Occlusion Mapping | |||||
Rain Drops on Camera | |||||
Shadow Filter | |||||
Shadow Distance | |||||
Shadow Map Resolution | |||||
SSEDAA (Anti-aliasing) | |||||
Reflection Steps | |||||
Variance Shadow Maps | |||||
Vignette | |||||
Volumetric Clouds | |||||
Water Caustics | |||||
Water Parallax | |||||
Water Refraction | |||||
Waving Foilage | |||||
Waving Shadow | |||||
Wisdom Ambient Occlusion (AO) |
Wisdom Shaders allow you to change more than 49 settings to suit your needs.
| Settings | Description | Options |
|---|---|---|
| Version: V3.2 Release, Build | More information on: qionouu.cn |
|
| Tone (Filters & Colors) | ||
| Exposure |
| |
| Average Exposure |
| |
| Black and White Filter |
| |
| Prime Render |
| |
| Vanilla Edge Occlusion |
| |
| Noise and Grain |
| |
| Filmic Cinematic |
| |
| Filmic Cinematic Anamorphic |
| |
| 8 Bit Filter |
| |
| Modern (White) light |
| |
| Space mode (no sun) |
| |
| Atmosphere | ||
| Crepuscular Rays |
| |
| High Quality Crepuscular |
| |
| Volumetric Clouds |
| |
| HQ Volumetric Clouds |
| |
| Lighting | ||
| Wisdom Ambient Occlusion (AO) |
| |
| High Quality AO |
| |
| IBL reflections |
| |
| IBL Screen Space Reflections |
| |
| Reflection Steps |
| |
| Directional Blocklight |
| |
| Shadow Settings | ||
| Shadow Filter |
| |
| Variance Shadow Maps |
| |
| Shadow Distance |
| |
| Cloud Shadow |
| |
| Shadow Map Resolution |
| |
| Waving Shadow |
| |
| Materials | ||
| Normal Mapping |
| |
| Specular2PBR Conversion | Convert traditional specular textures to PBR textures for compatibility. |
|
| Continuum2 Texture Format |
| |
| Parallax Occlusion Mapping |
| |
| Texutre Parallax Settings | ||
| Max POM Steps | The higher steps it has, higher quality it got, with lower performance. |
|
| POM Scale |
| |
| Texture Resolution |
| |
| Water Settings | ||
| Water Parallax |
| |
| Water Refraction |
| |
| Natural Wave Generator |
| |
| Wave Height |
| |
| Water Caustics |
| |
| Waving Foilage |
| |
| Image effects | ||
| Bloom |
| |
| Depth of Field |
| |
| Motion Blur |
| |
| SSEDAA (Anti-aliasing) |
| |
| Vignette |
| |
| Dirty Lens |
| |
| Dirty Lens Texture | Need newer Optifine's texture loading function |
|
| Rain Drops on Camera |
|
How To Install Wisdom Shaders
- Support Forge / Vanilla
- Extra features
- Good performance
- Support Fabric / Quilt
- Better performance, depend on your hardware
Optifine Installation Guide
Note
Your device must have Java installed to run the Forge and Optifine installers.
Quick Java Installation Guide
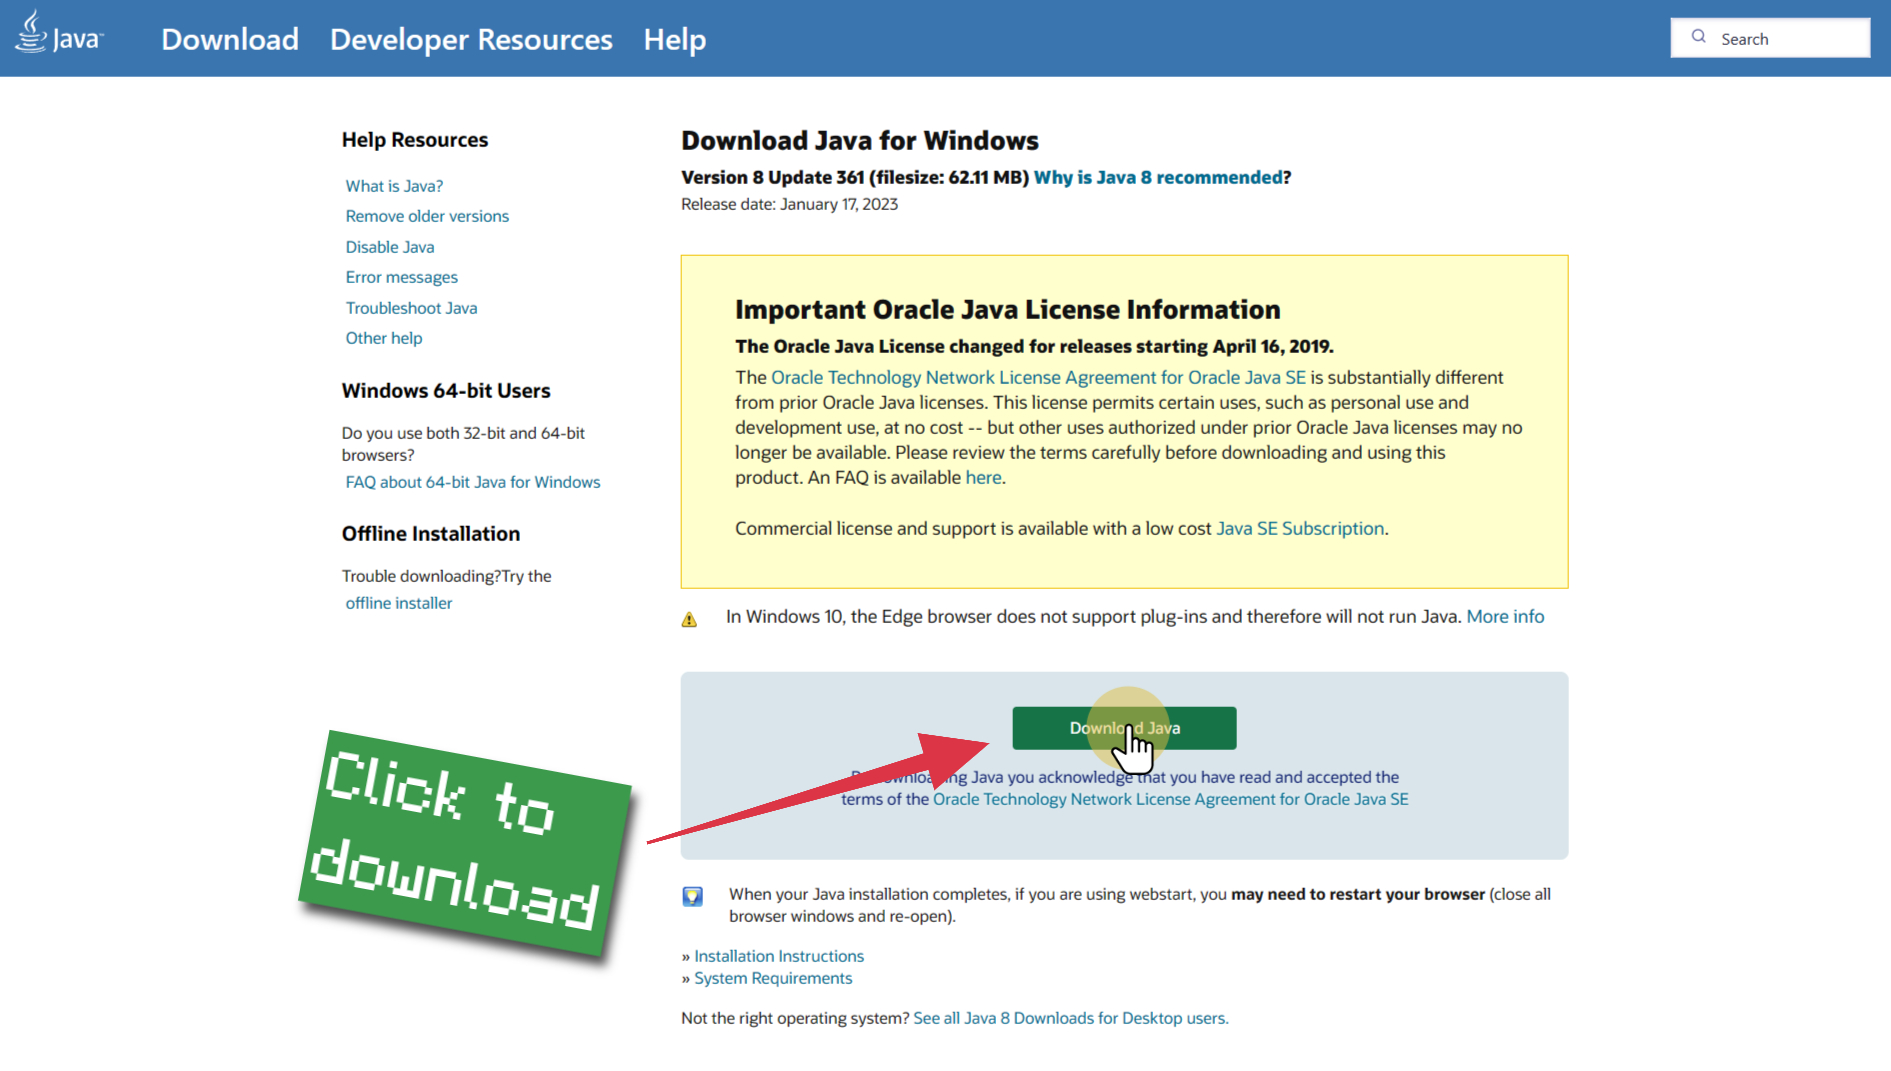
Download Java
Download the Java installer from the official website here.

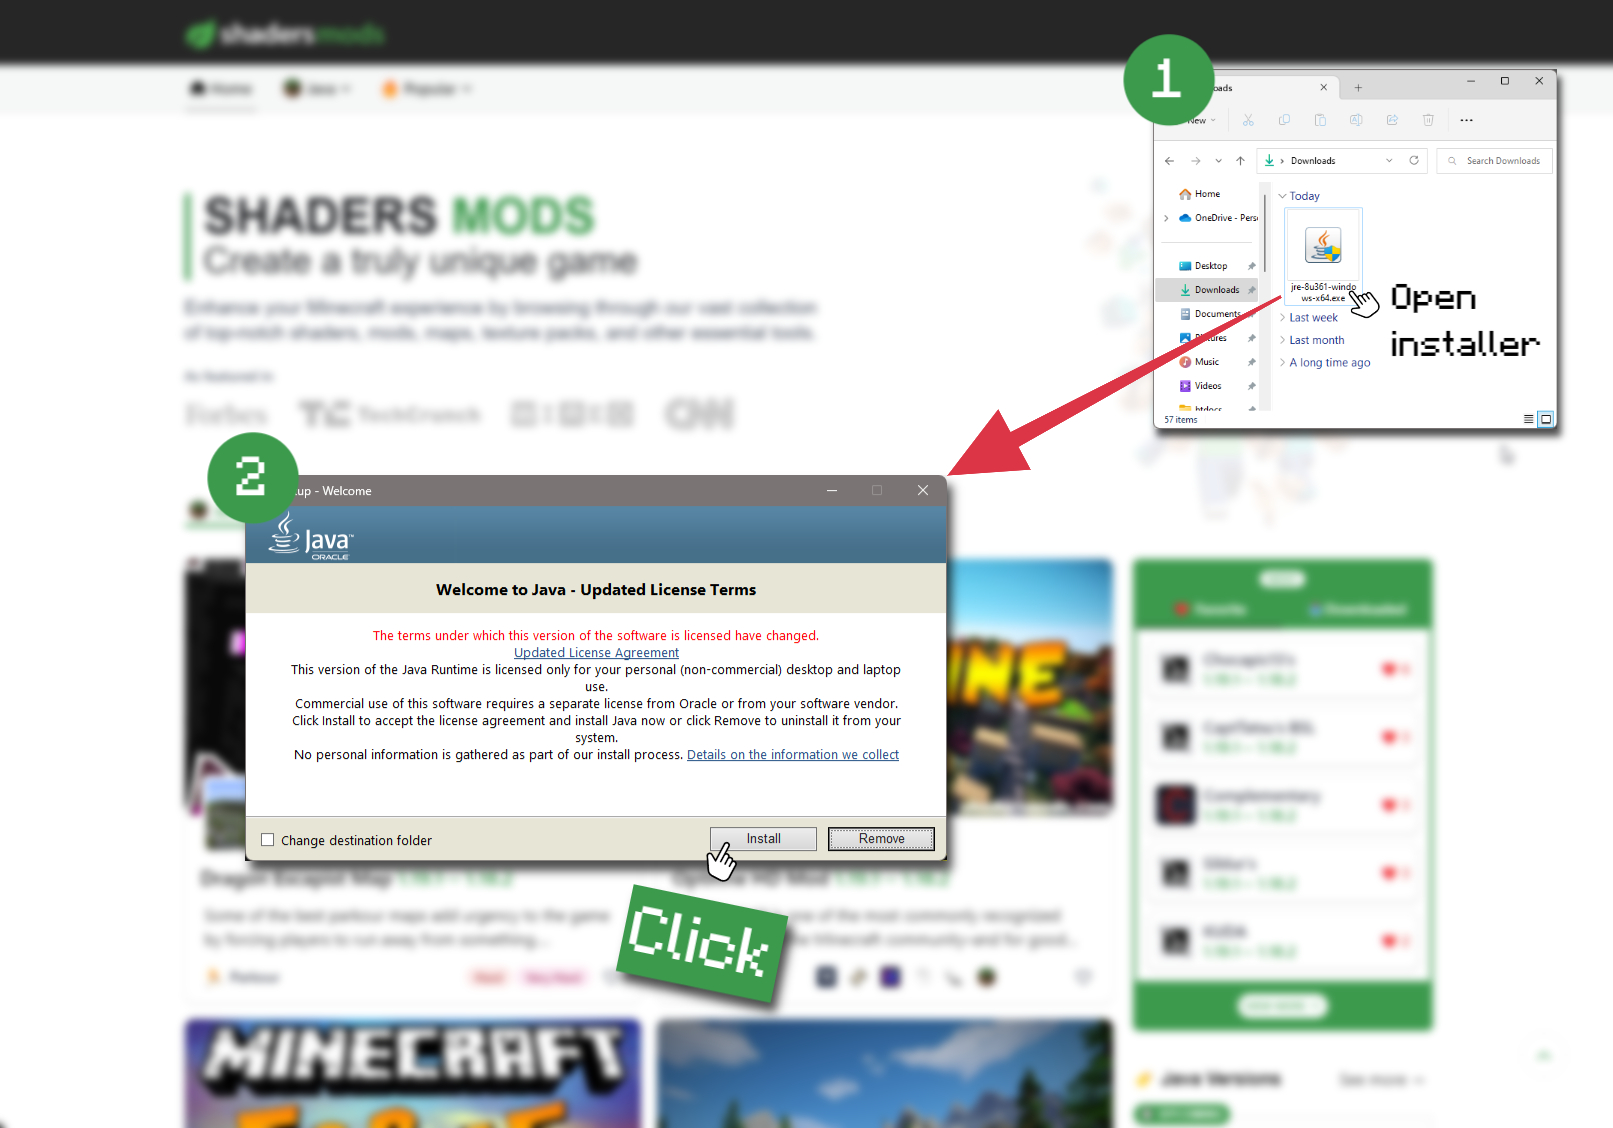
Open Installer
Once you have downloaded the file, run it and click the Install button.
How to install Wisdom Shaders with Optifine?
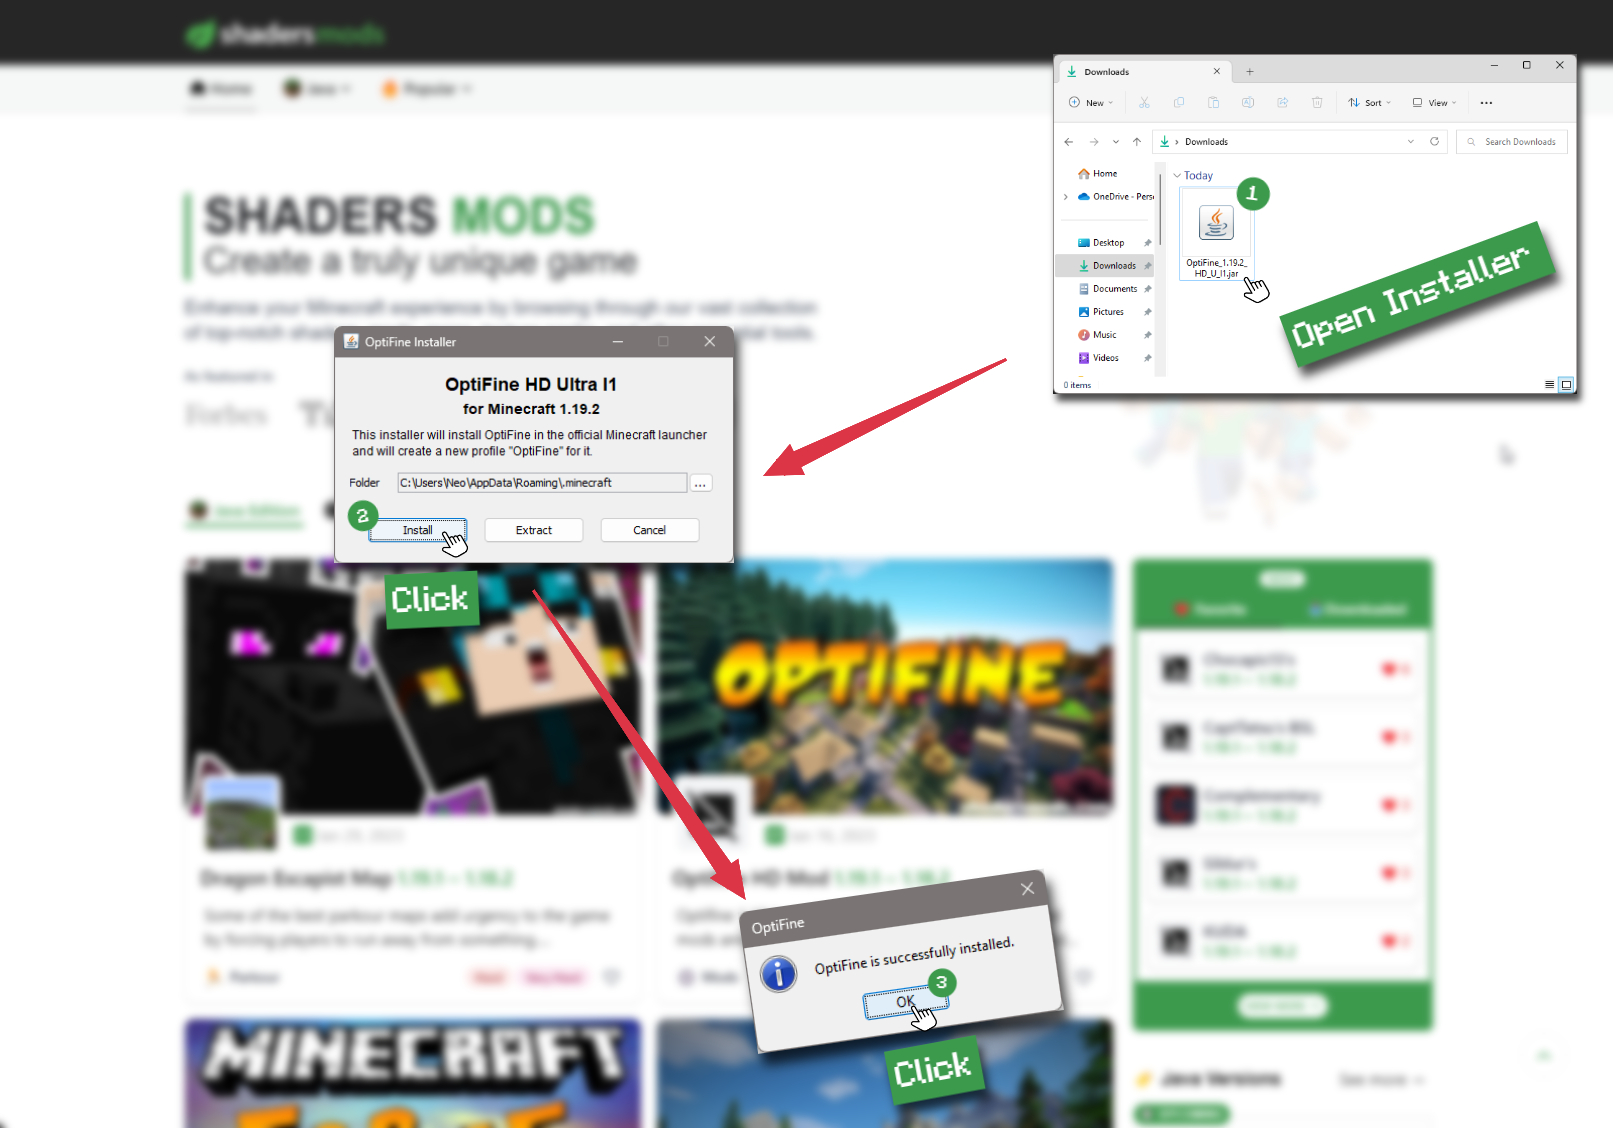
Download Optifine
Get the latest version of Optifine for your Minecraft version.
Download OptifineInstall Optifine
Run the Optifine installer and follow the on-screen instructions to complete the installation.
Download Wisdom Shaders
Go to the download section and get shaders zip file. Unzip the file if necessary, as some shader developers may bundle multiple shader versions in one zip file.
Launch Minecraft
Start the Minecraft launcher and make sure you have the Optifine profile selected.
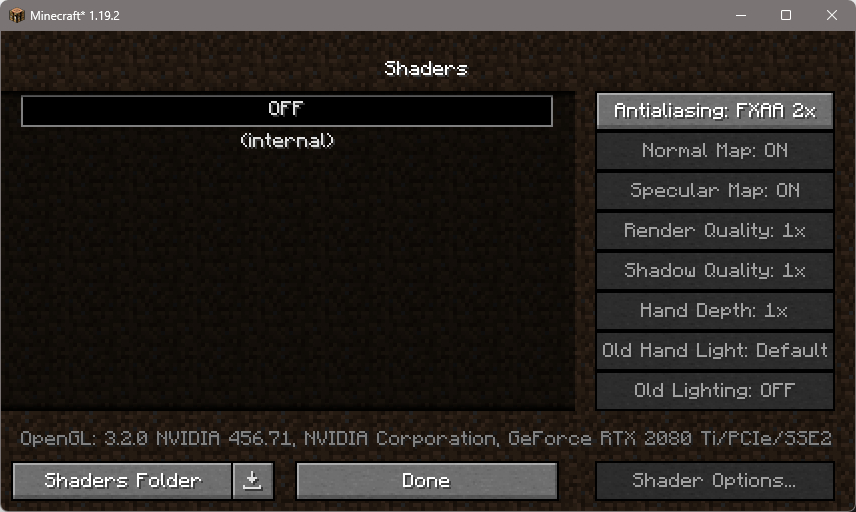
In-game Shaders menu
Go to Options > Video Settings > Shaders to access the shaders menu.
Open shaderpacks folder
Click on the "Shaders Folder" button to open the folder where shaders are stored, so you can add or remove shaders as desired.
Install Wisdom Shaders
Copy or move the downloaded Wisdom shaders zip file into the shaderpacks folder.
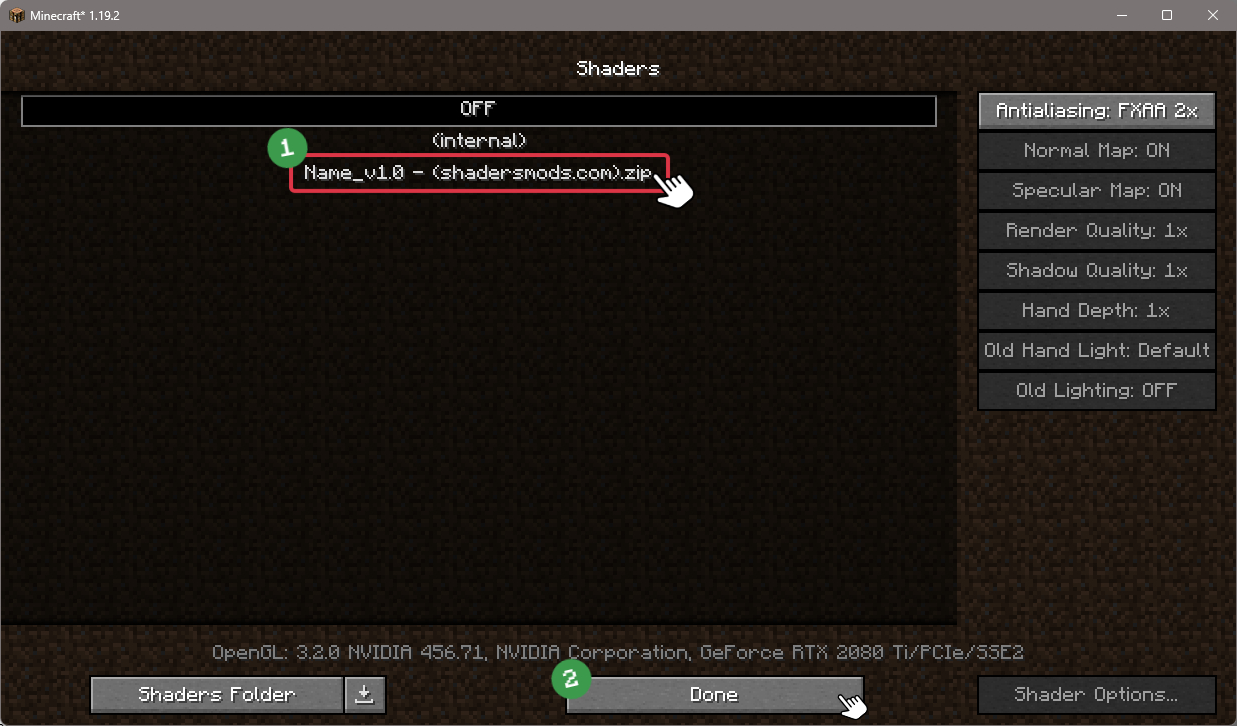
Select Wisdom Shaders
Choose Wisdom shader pack from the list of available shaders in the options menu.


How to install Wisdom Shaders with Forge and Optifine?
Quick Installation Guide
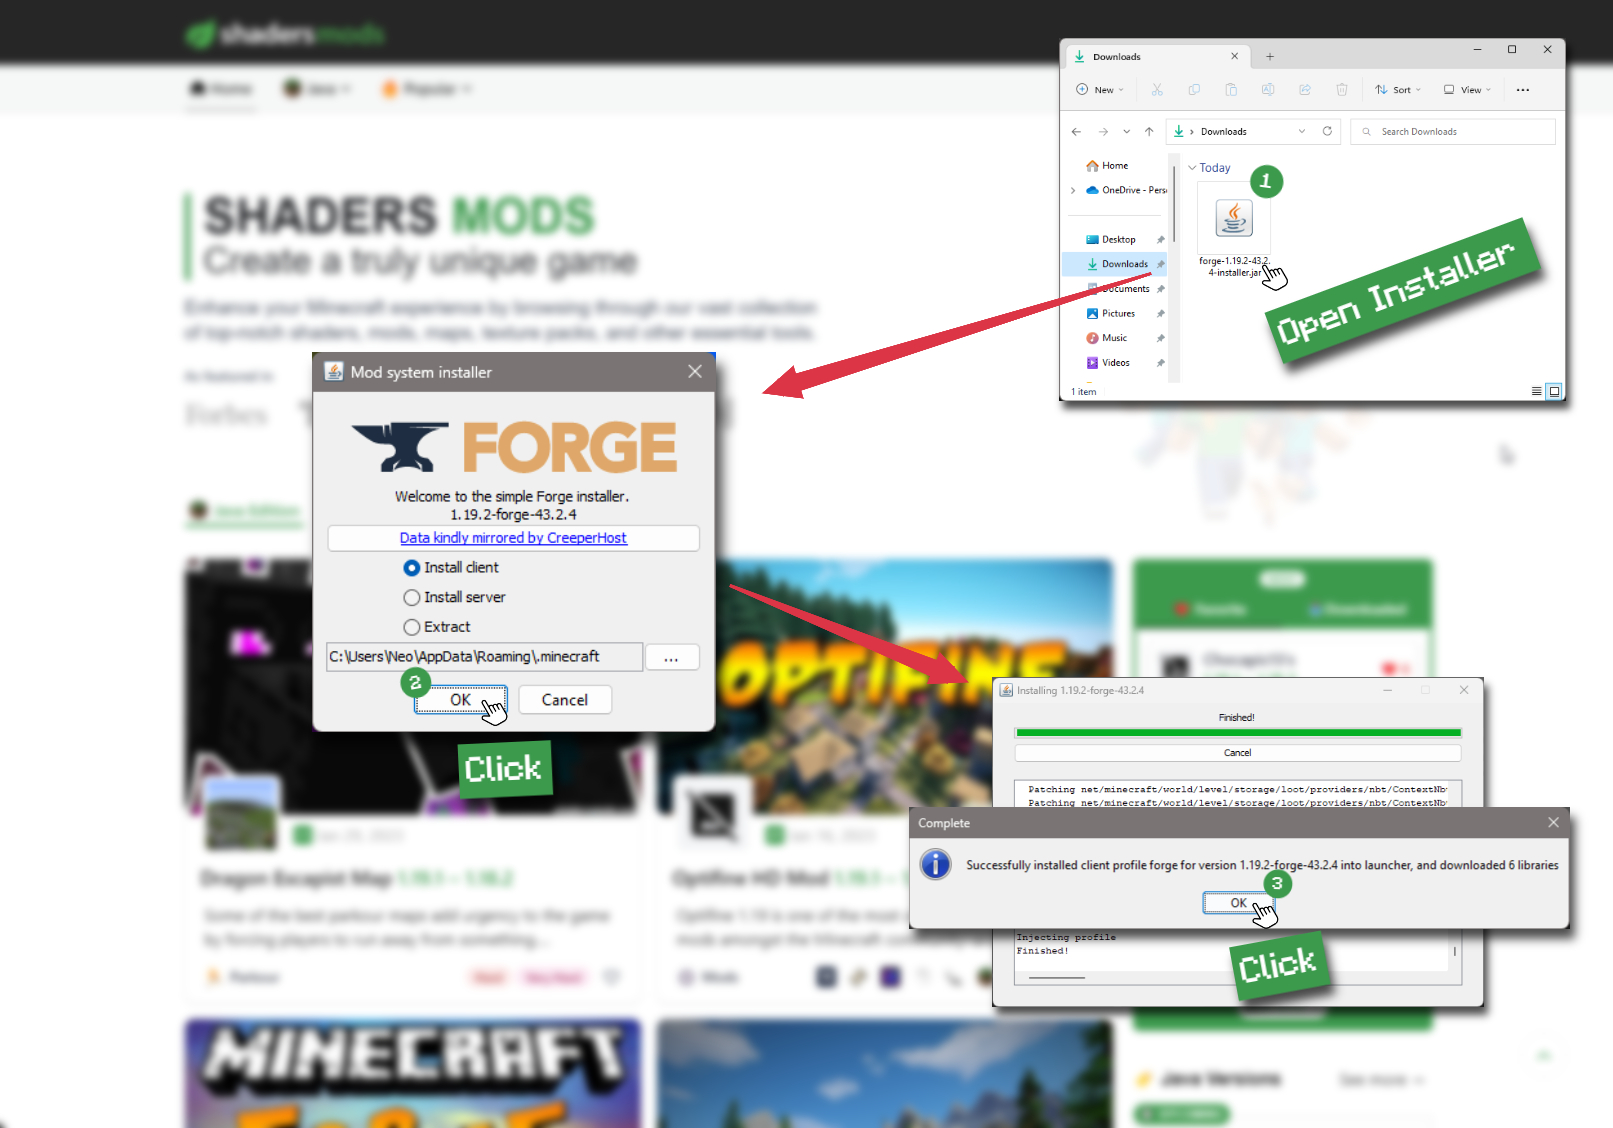
Install Forge
Obtain the latest version of Forge that is compatible with your Minecraft version.
Download Minecraft ForgeLaunch Minecraft
Start the Minecraft launcher and select the version of Minecraft you want to install Forge on. Run the game once by clicking on the "Play" button to create necessary files for Forge.
Install Forge Client
Double-click on the Forge installer jar file and choose "Install Client" in the window that appears.
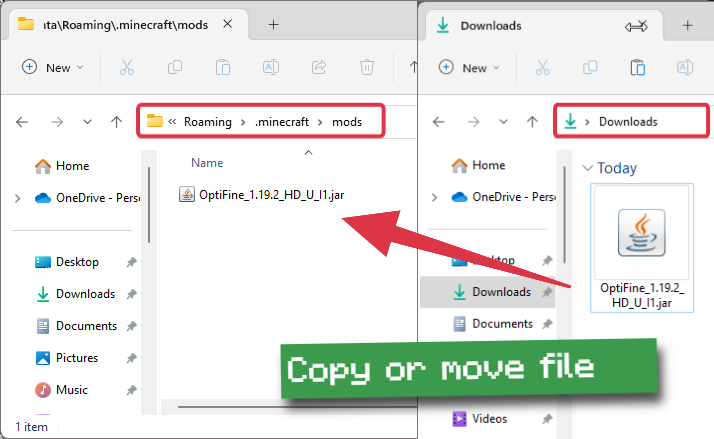
Install Optifine
Download the Optifine jar file after Forge is installed. Move the Optifine jar file to the mods folder in the .minecraft directory.
Download Optifine
Launch Forge Profile
Launch Minecraft using the "Forge" profile, Optifine will be automatically loaded along with Forge.
Install Chocapic13's Shaders
Now the installation is the same as from the above Optifine instructions, just follow the steps starting from step 5.


Iris Installation Guide
Note
Your device must have Java installed to run the Iris installer.
Quick Java Installation Guide
Download Java
Download the Java installer from the official website here.
Open Installer
Once you have downloaded the file, run it and click the Install button.
How to install Wisdom Shaders with Iris?
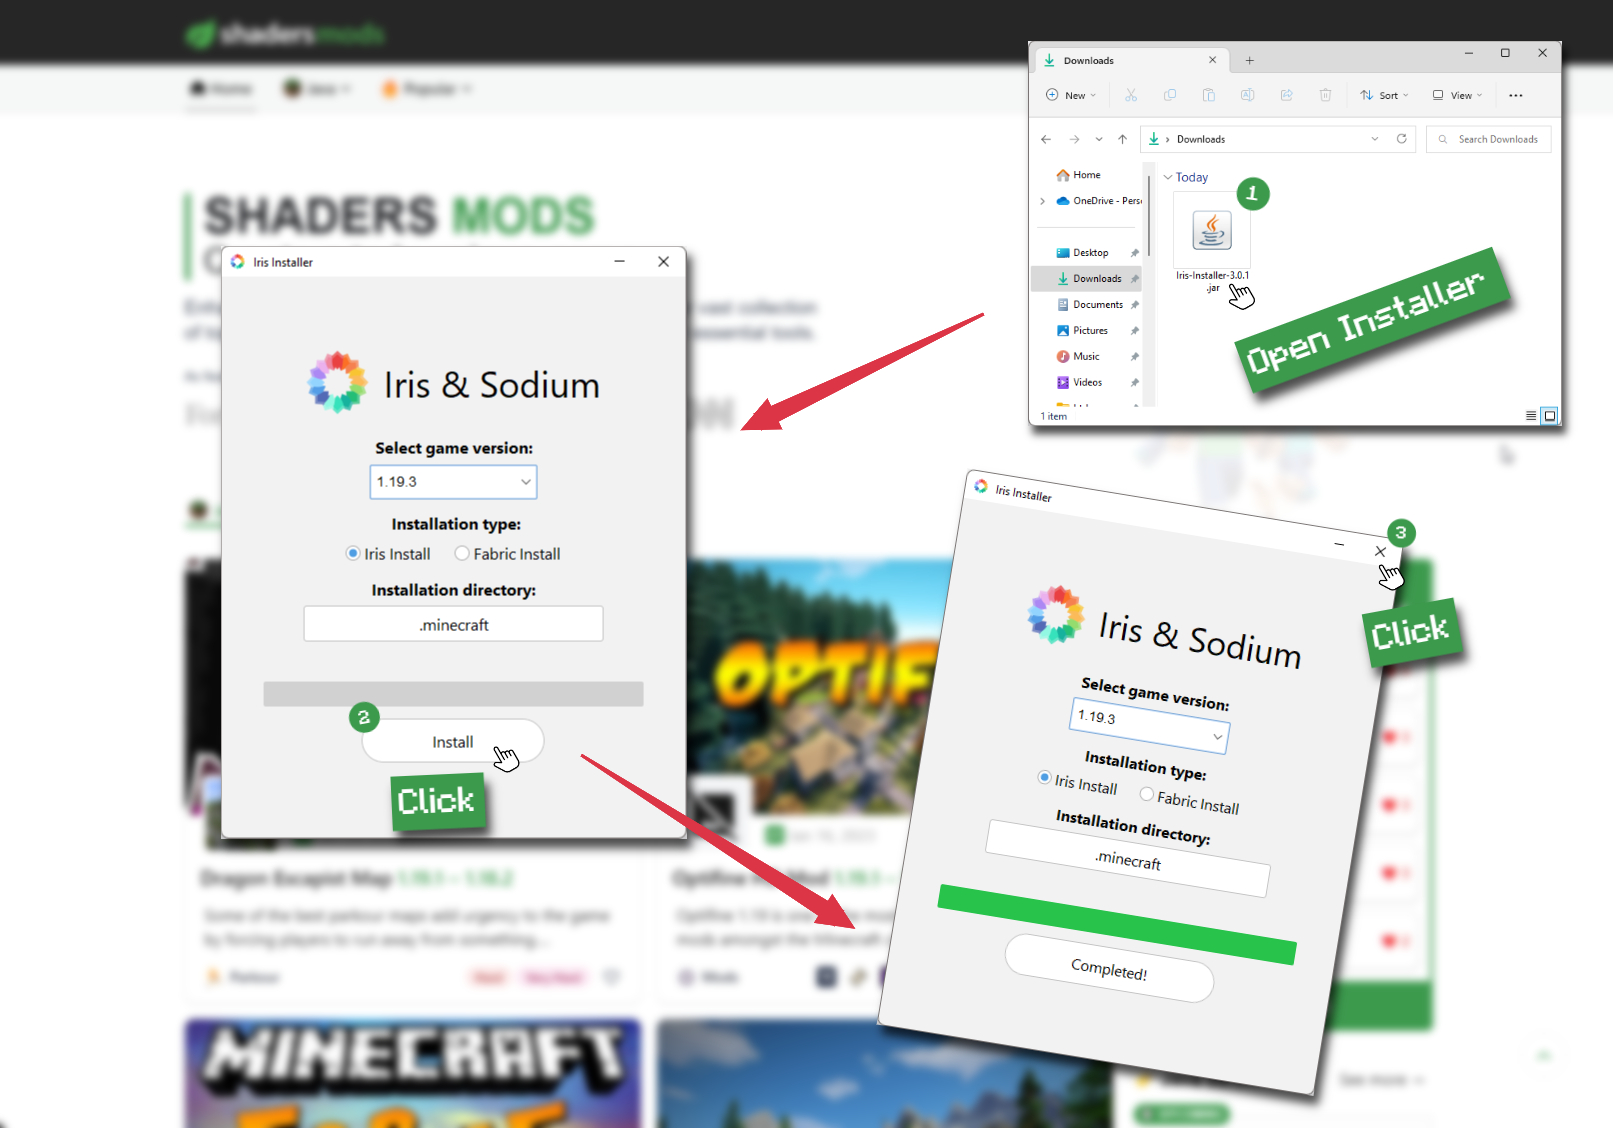
Download Iris Shaders
Find the latest version of the Iris Shaders installer and download it.
Download Iris InstallerInstall Iris Shaders
Open the downloaded jar file, and choose the preferred game version and installation type.
⯈ Iris Install:
If you don't plan on using any other mods with Iris, choose this option.⯈ Fabric Install:
Choose this option if you want to use Iris with Fabric and other mods. The Iris jar files will be copied to the mods folder within the .minecraft directory.
Start Installation
After selecting the game version and installation type, click the "Install" button to start the installation process.
Launch Minecraft
Start the Minecraft launcher and make sure you have the Iris profile selected.
Note
Select the Fabric profile if you opt for the Fabric installation type.
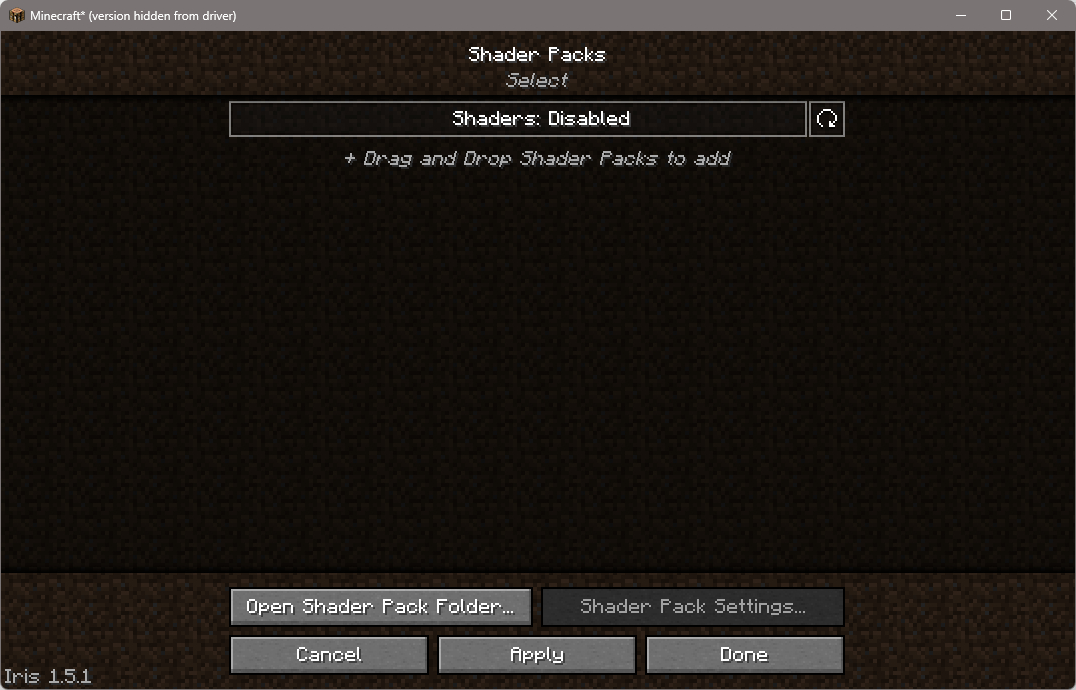
In-game Shader Menu
Open the Minecraft game and go to Options > Video Settings > Shader Packs to access the shaders menu.
Tip
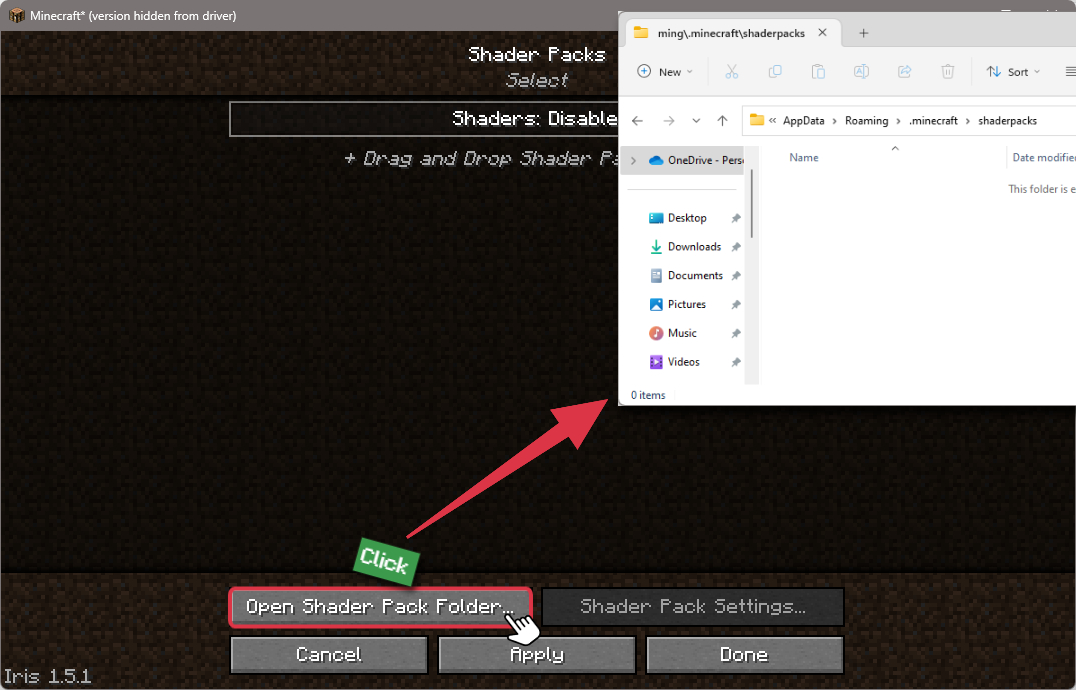
To simplify the process, simply drag and drop the shader ZIP file directly into the Minecraft window, bypassing the next two steps.
Open shaderpacks folder
Click on the "Open Shader Pack Folder" button to access the folder where shaders are stored.
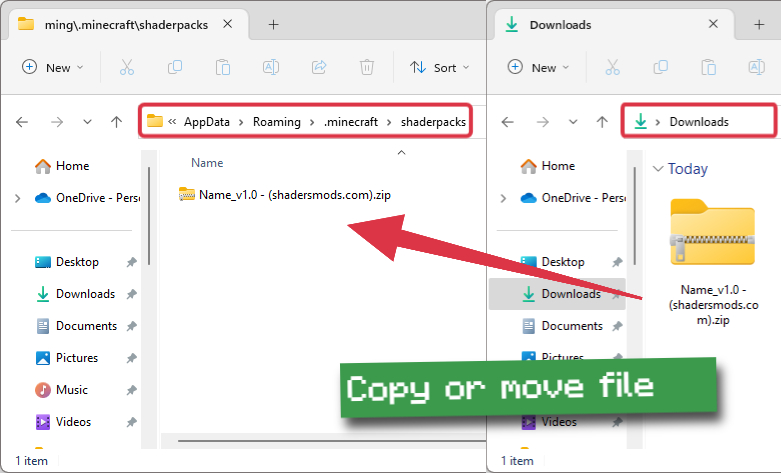
Install Wisdom Shaders
Copy or move the shaders zip file into the shaderpacks folder.
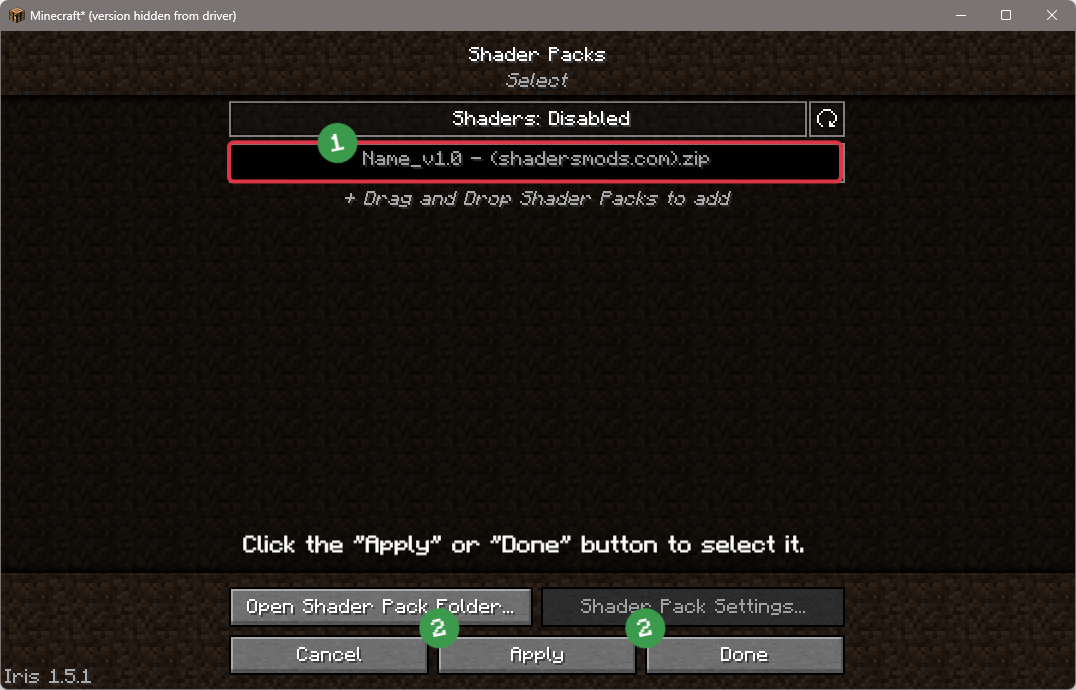
Select Wisdom Shaders
Choose installed shader pack from the list of available shaders in the options menu and click the "Apply" or "Done" button to select it.
Tip
When the shader pack is selected, its name will be changed to yellow.

Requirements
Software
- Minecraft 1.7.10 or higher
- Does not compatible with ShadersModCore, use Optifine instead
- Minecraft 1.7.10: Optifine HD_U_D7 or higher
- Minecraft 1.8.X : Optifine HD_U_H6 or higher
- Minecraft 1.9.X: Optifine HD_U_D7 or higher
- Minecraft 1.10.X: Optifine HD_U_D3 or higher
- Minecraft 1.11.X or higher: Any version of Optifine
Hardware
- At least 4GB of memory is recommended
- Intel i5 / Ryzen R3 or better is recommended
- For laptop: Intel i7 or better is recommended
- Intel UHD 620 or better
- Nvidia GTX 1050 or better is recommended
- AMD RX 470 or better
📥 Wisdom Shaders — Download
Something You Should Know
- Our links are only from the official developer, so you can be sure they are secure.
- No modifications or edits are made to the files.
🔄 Update Logs
v4.0 Alpha
- Tons of tweaks
- Wisdom 4.0 is coming into shape.
- The very first alpha testing version is uploaded.
- Remember to turn off the WAO_Debug option simply because this is a test version, and it doesn’t have configured shaders options.
V3.2 Build 3232
- Same as Build 3231, but now supports newer Minecraft versions.
V3.2 Build 3231
- This version backported some V4 features, so there are no more white dots caused by lightmap normals, and there tweaked the color.
V3.2 Build 3230
Major update:
- Volumetric clouds
- Better color&tone
- Average exposure
- Bug fixes
- Exposure/gamma adjustment
Comments (75)
ist a super shader i run it 70-80 fps i have a RTX 2060 Mobile good work
thank you